


We will consider the process of creating a tournament “passport”. This is not a complex process, but it requires knowledge of a number of organizational details.
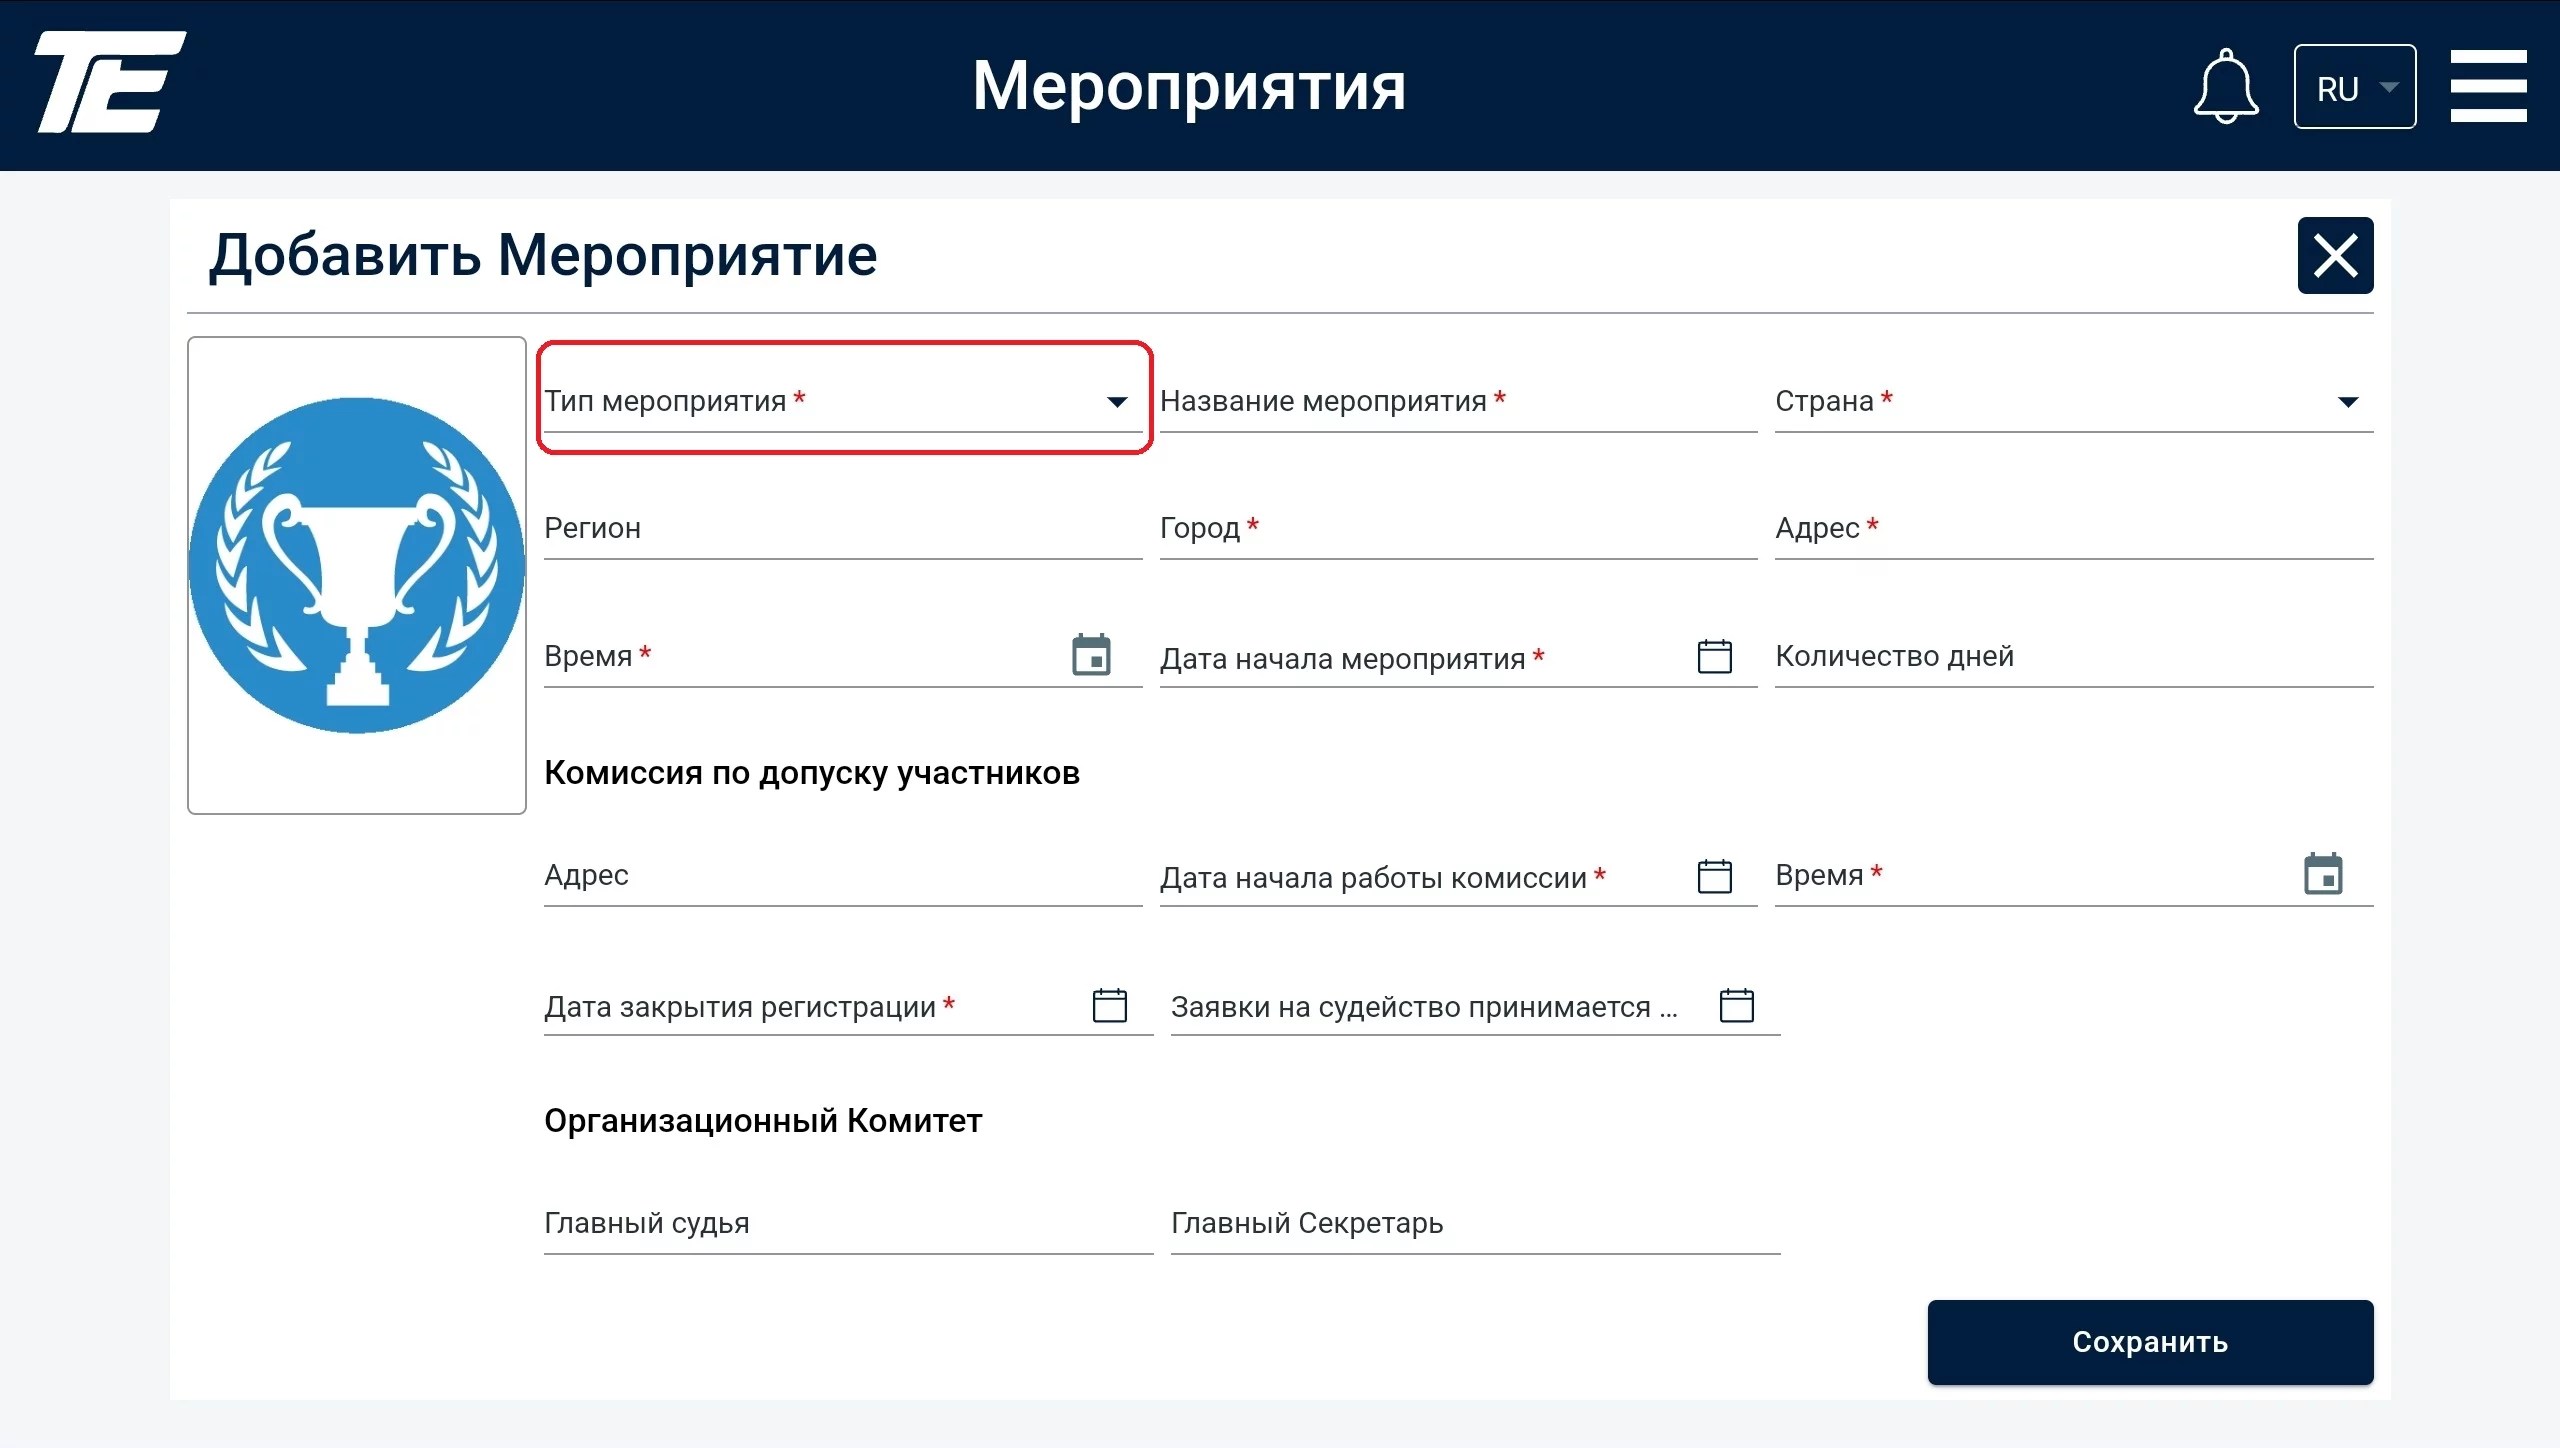

First of all, you should specify the type of event being held. To do this, use the drop-down list of the available options.
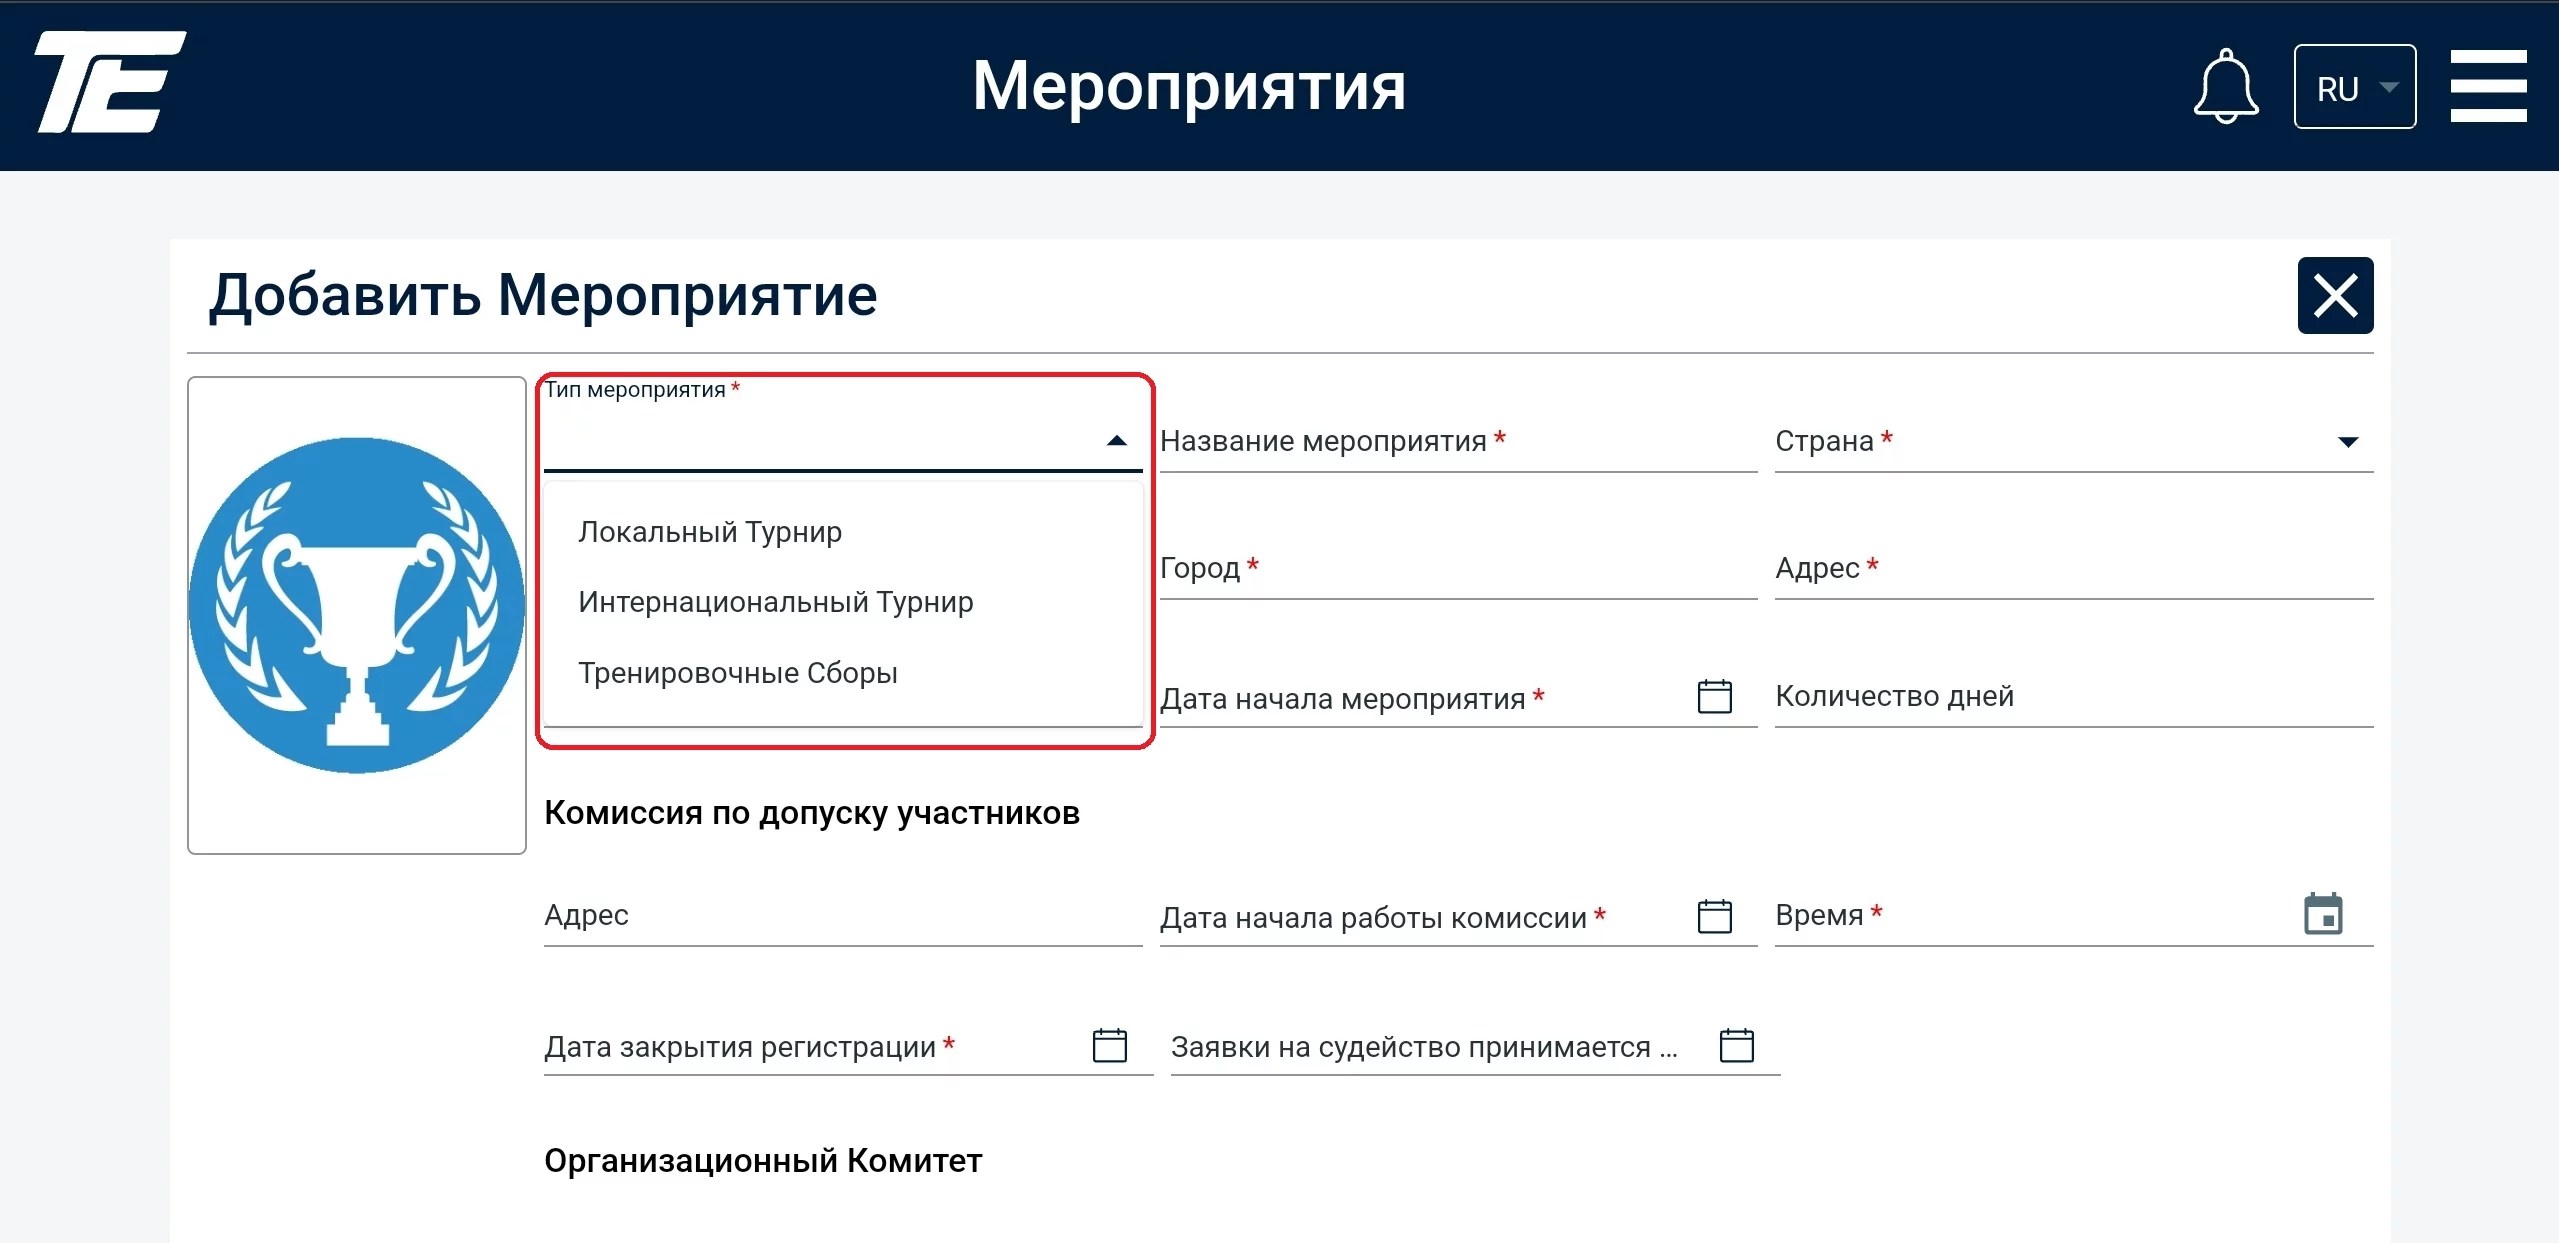
Sporting events come in the following types:
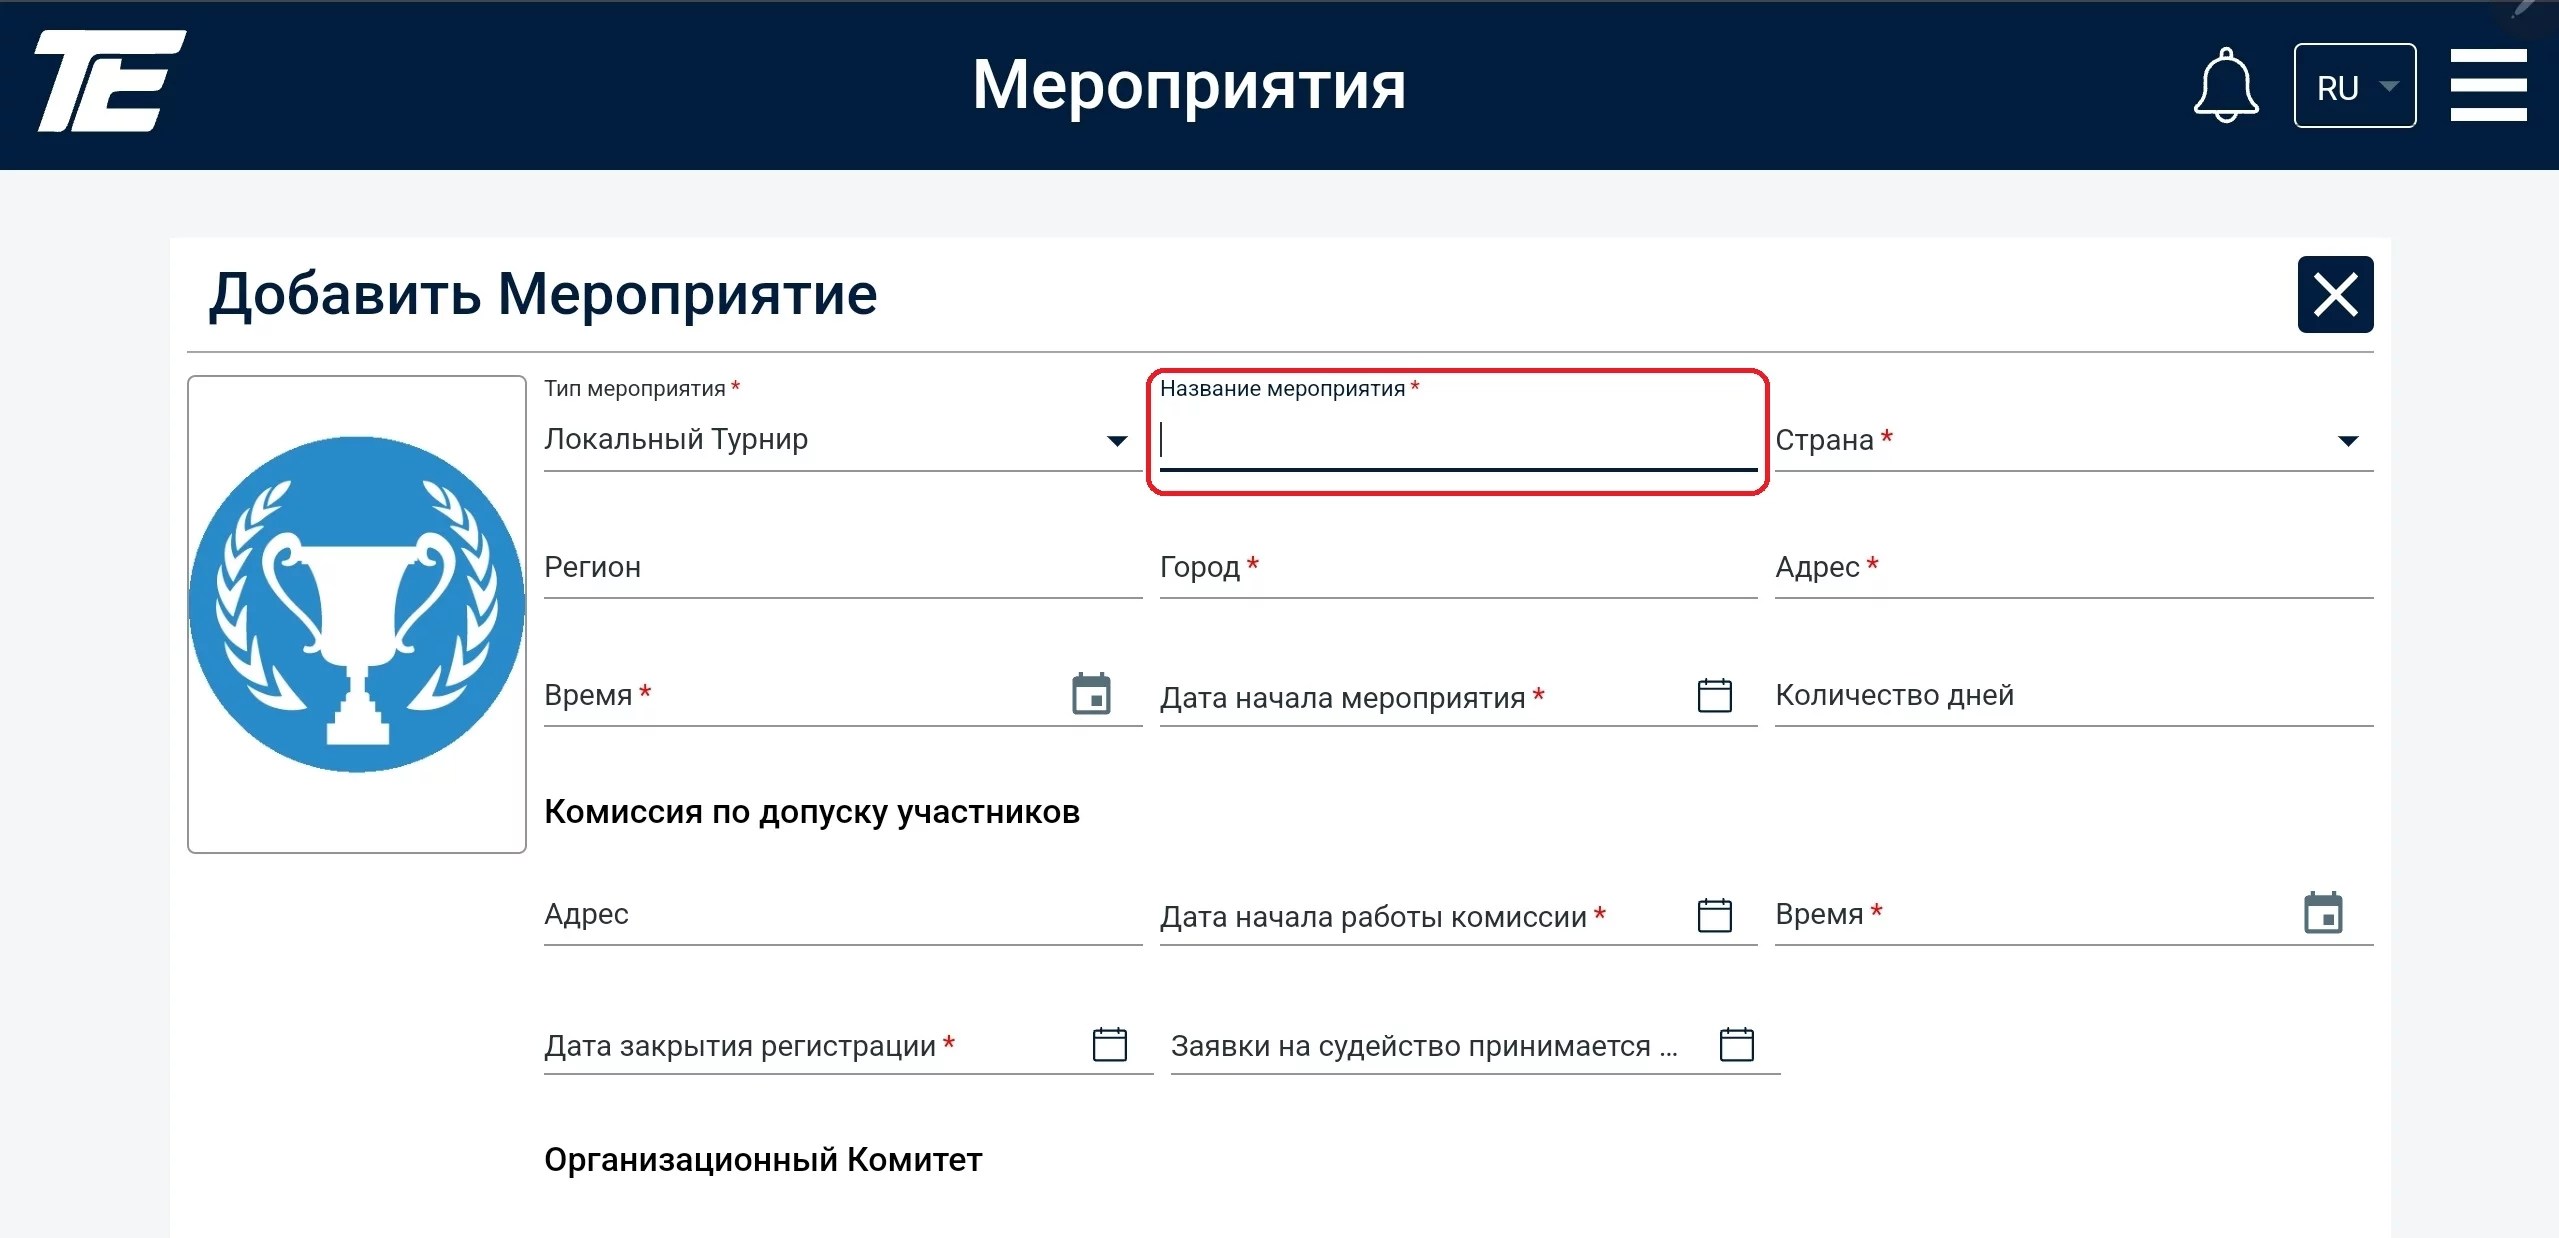
Next, you need to enter the name of the event. Our web portal supports the use of special linguistic characters characteristic of each language.
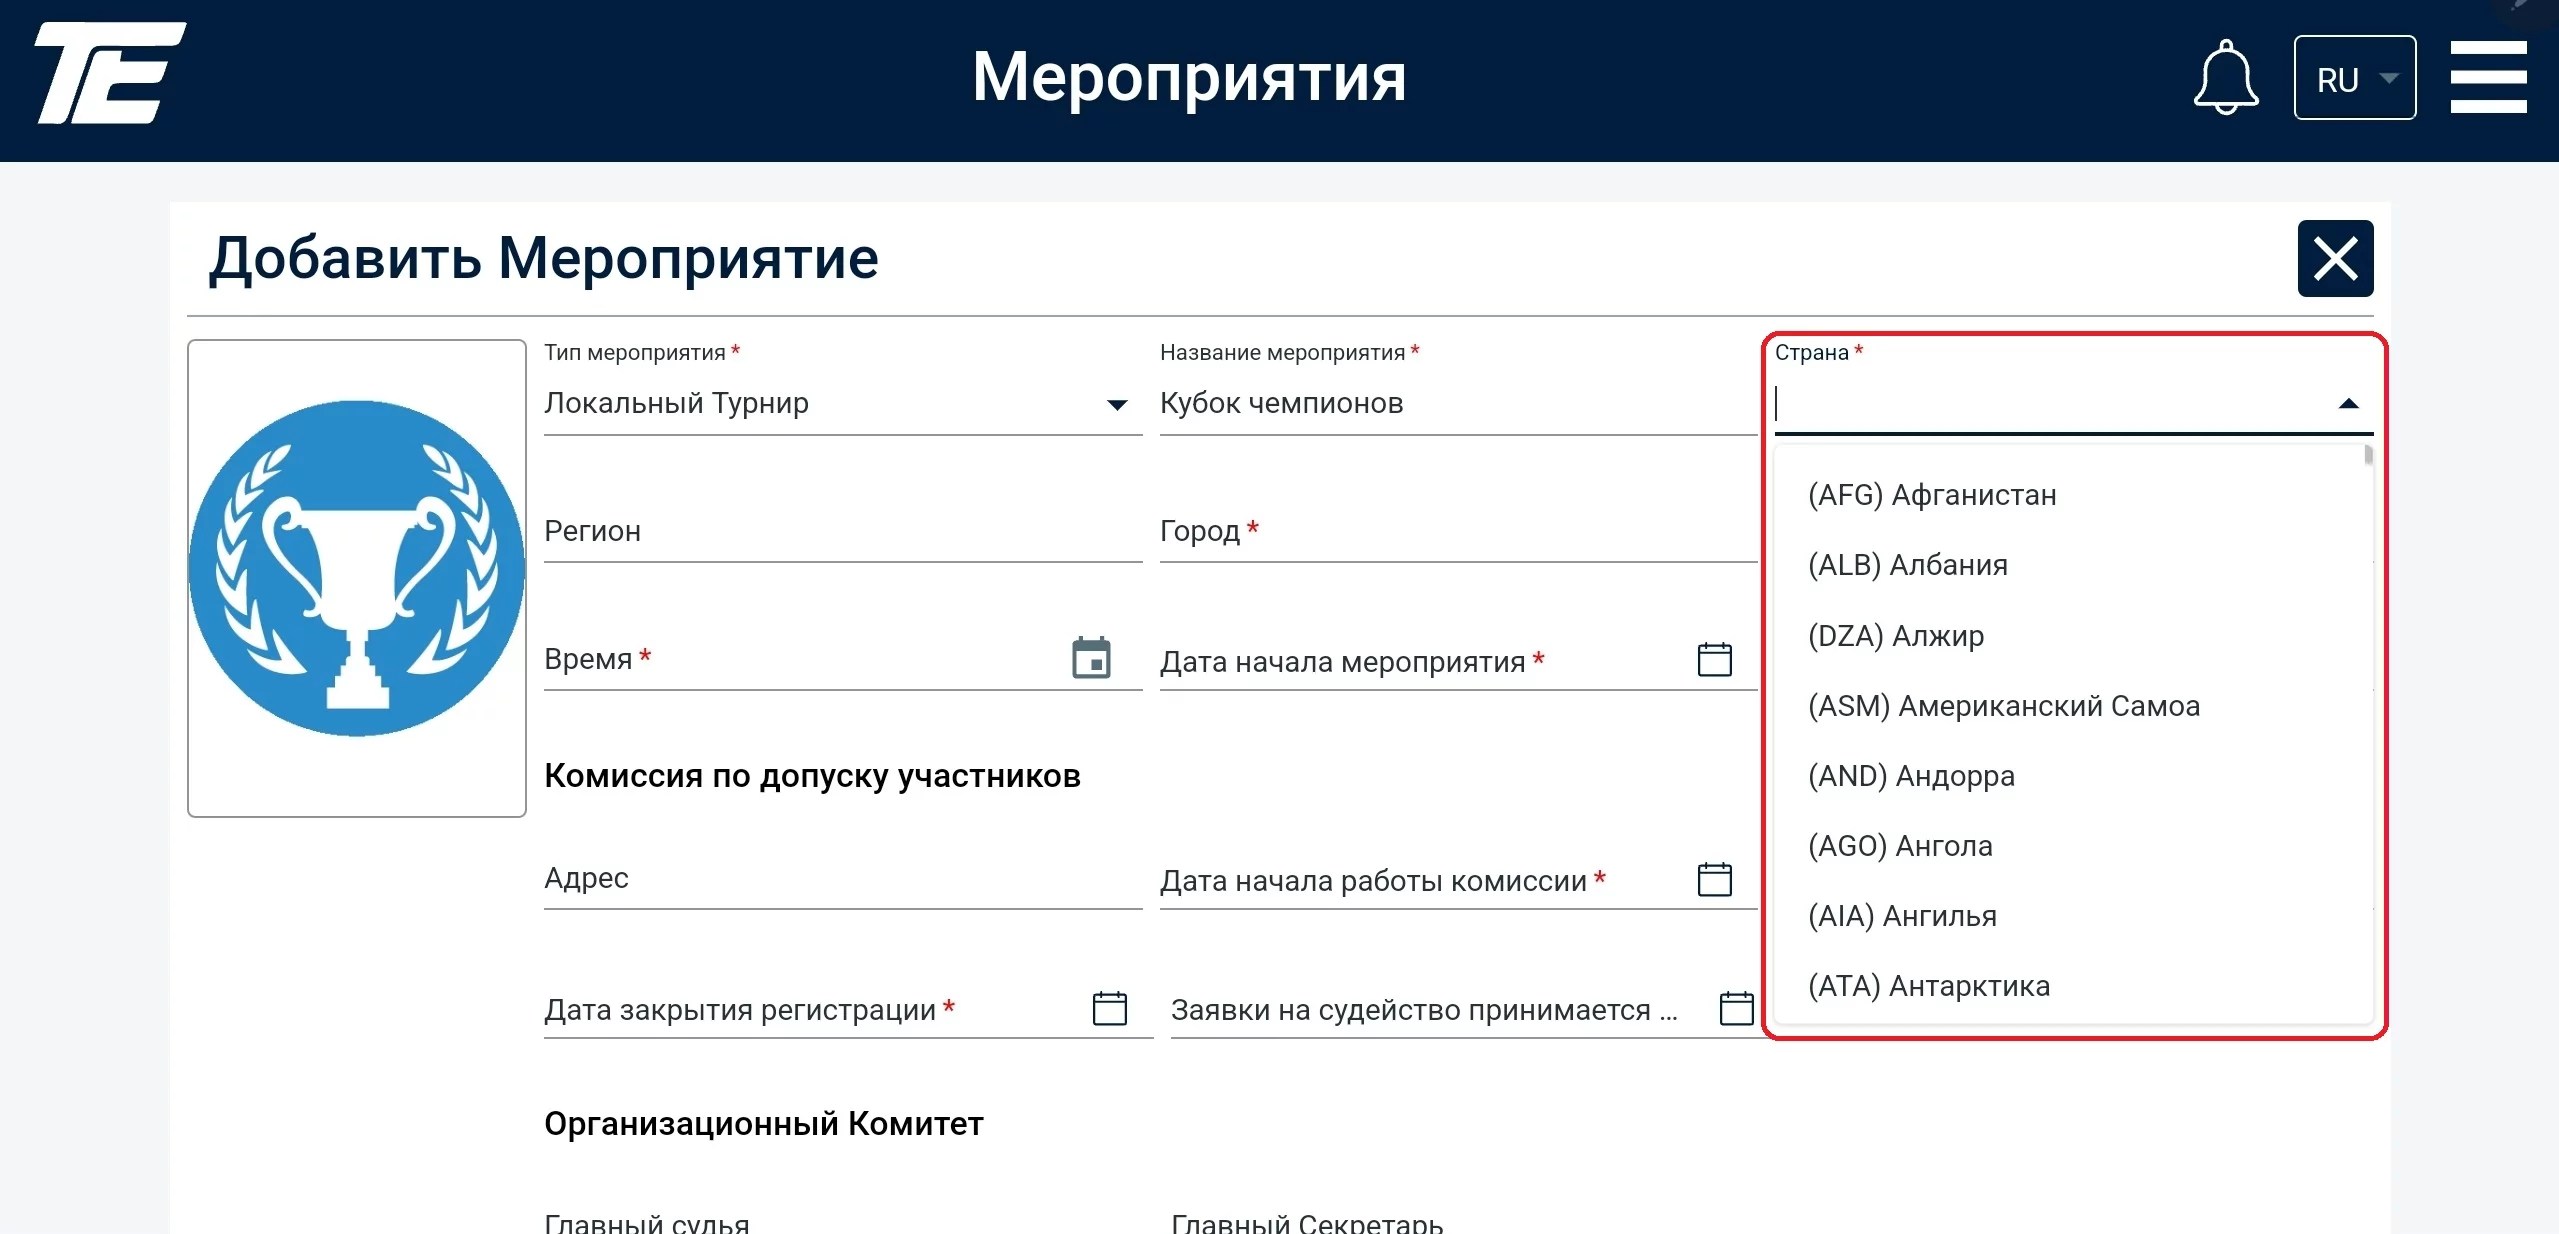
Next, specify the country where the sporting event will be held. This is also a drop-down list of ready-made options. However, for your convenience you can type in the first letters — this activates the search filter.
The nomenclature search is also available (the three Latin letters used worldwide to denote a given country).
The Region field is not mandatory. If your country has no regions, or if this is not a widely used term, you may skip this field.
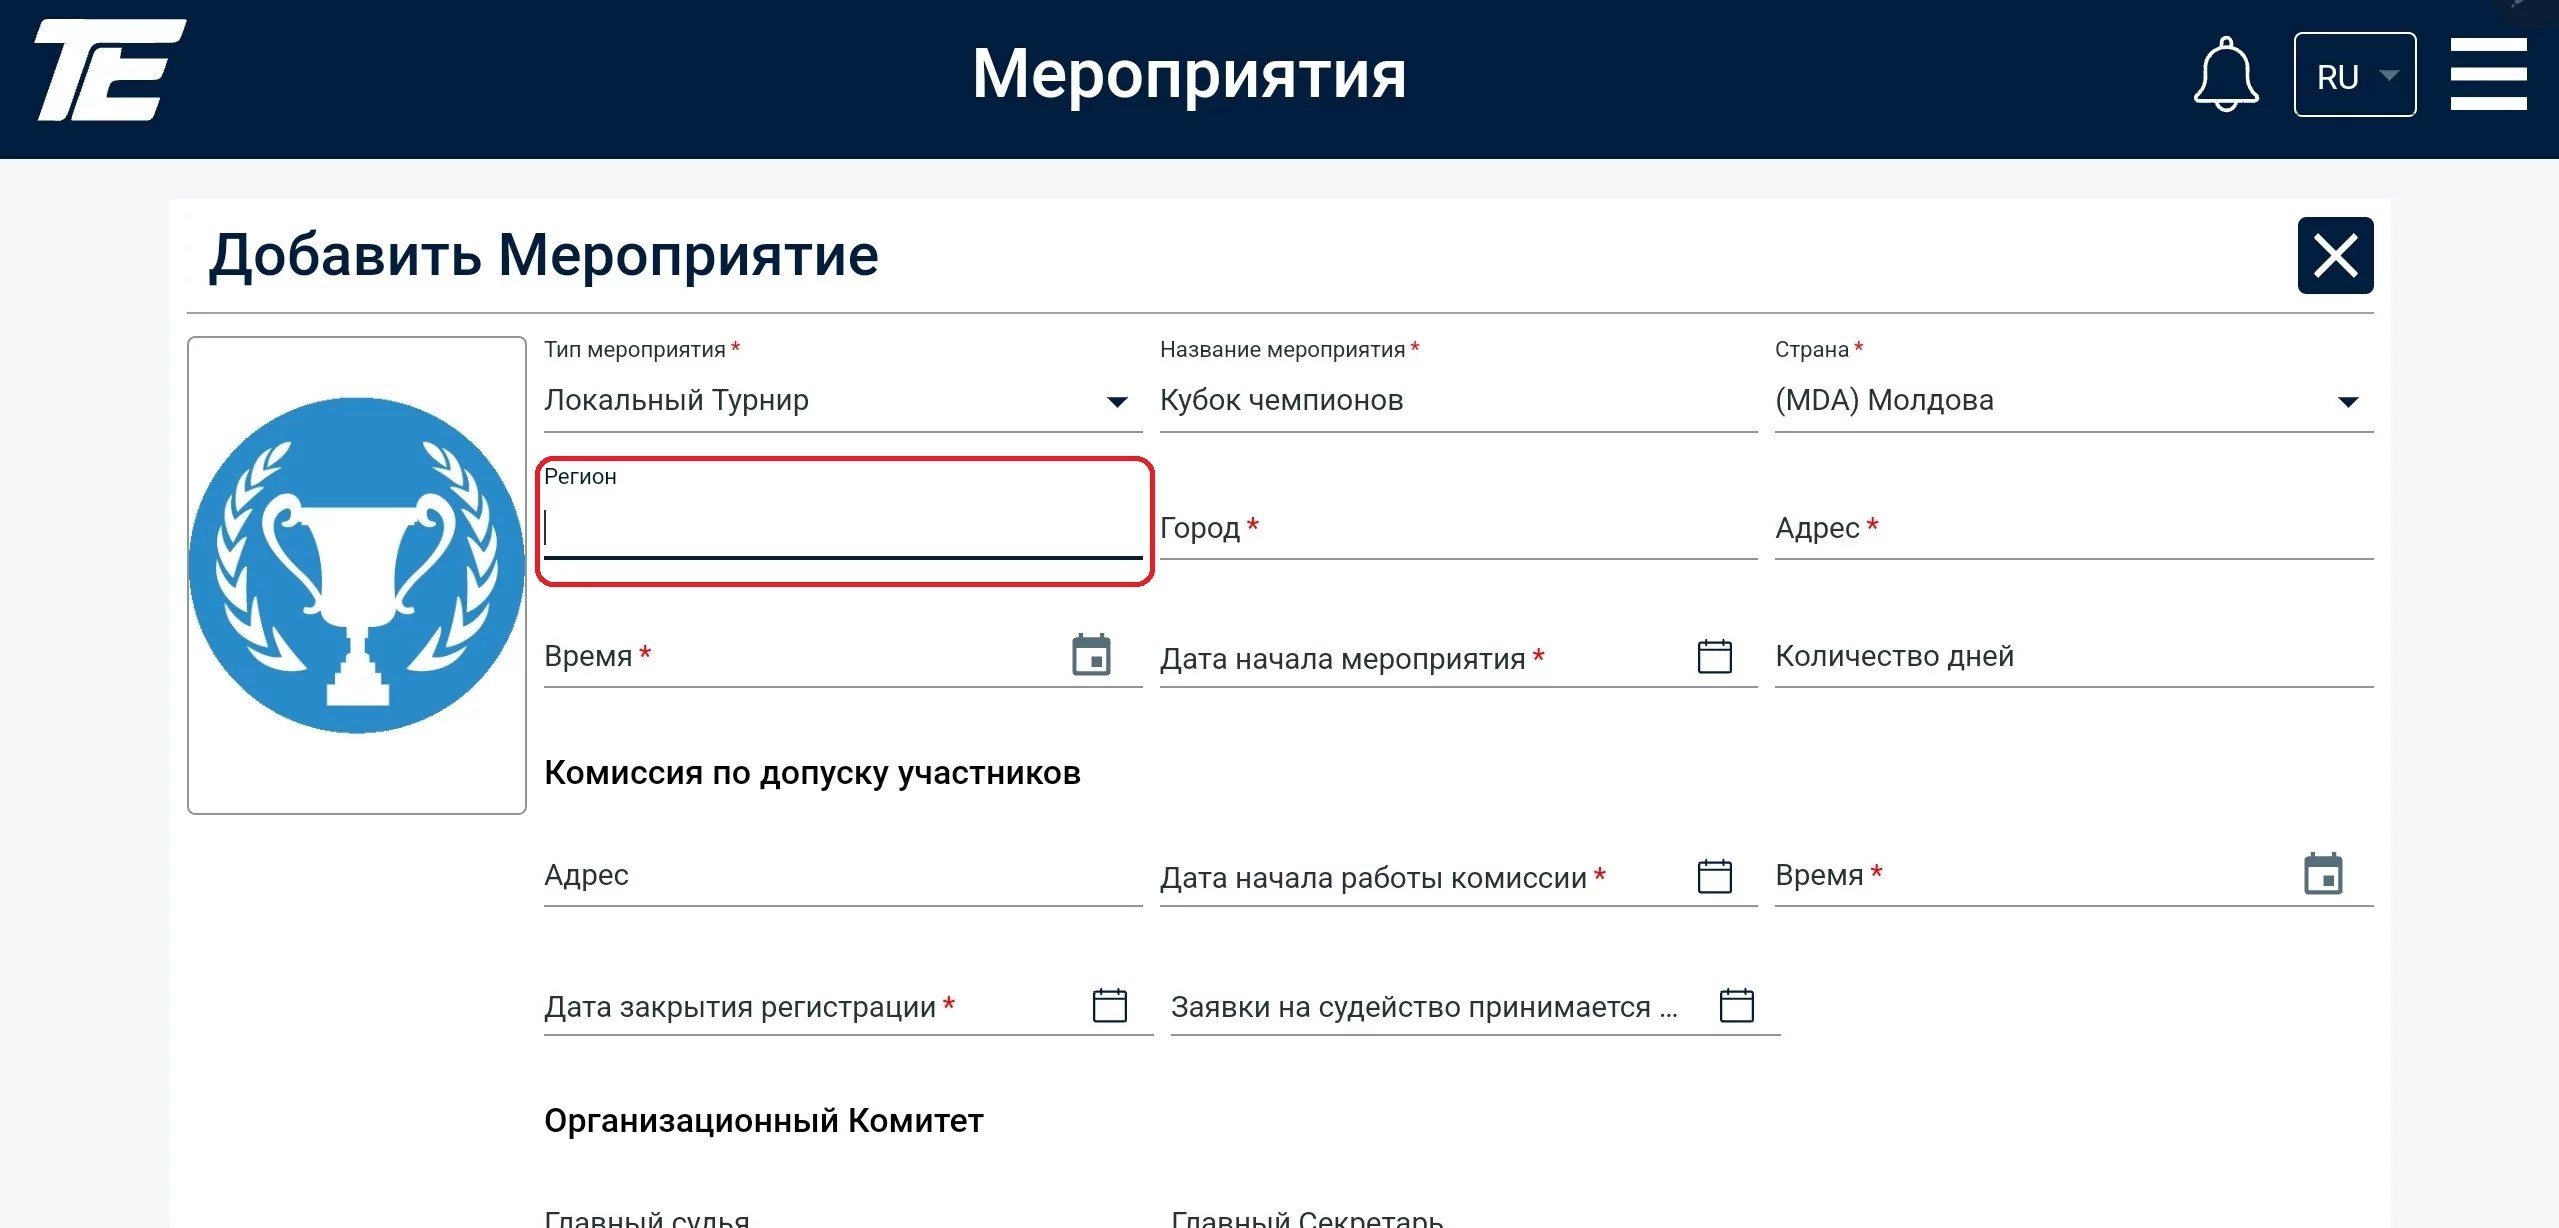
However, if the field is mandatory, it will be highlighted in red.
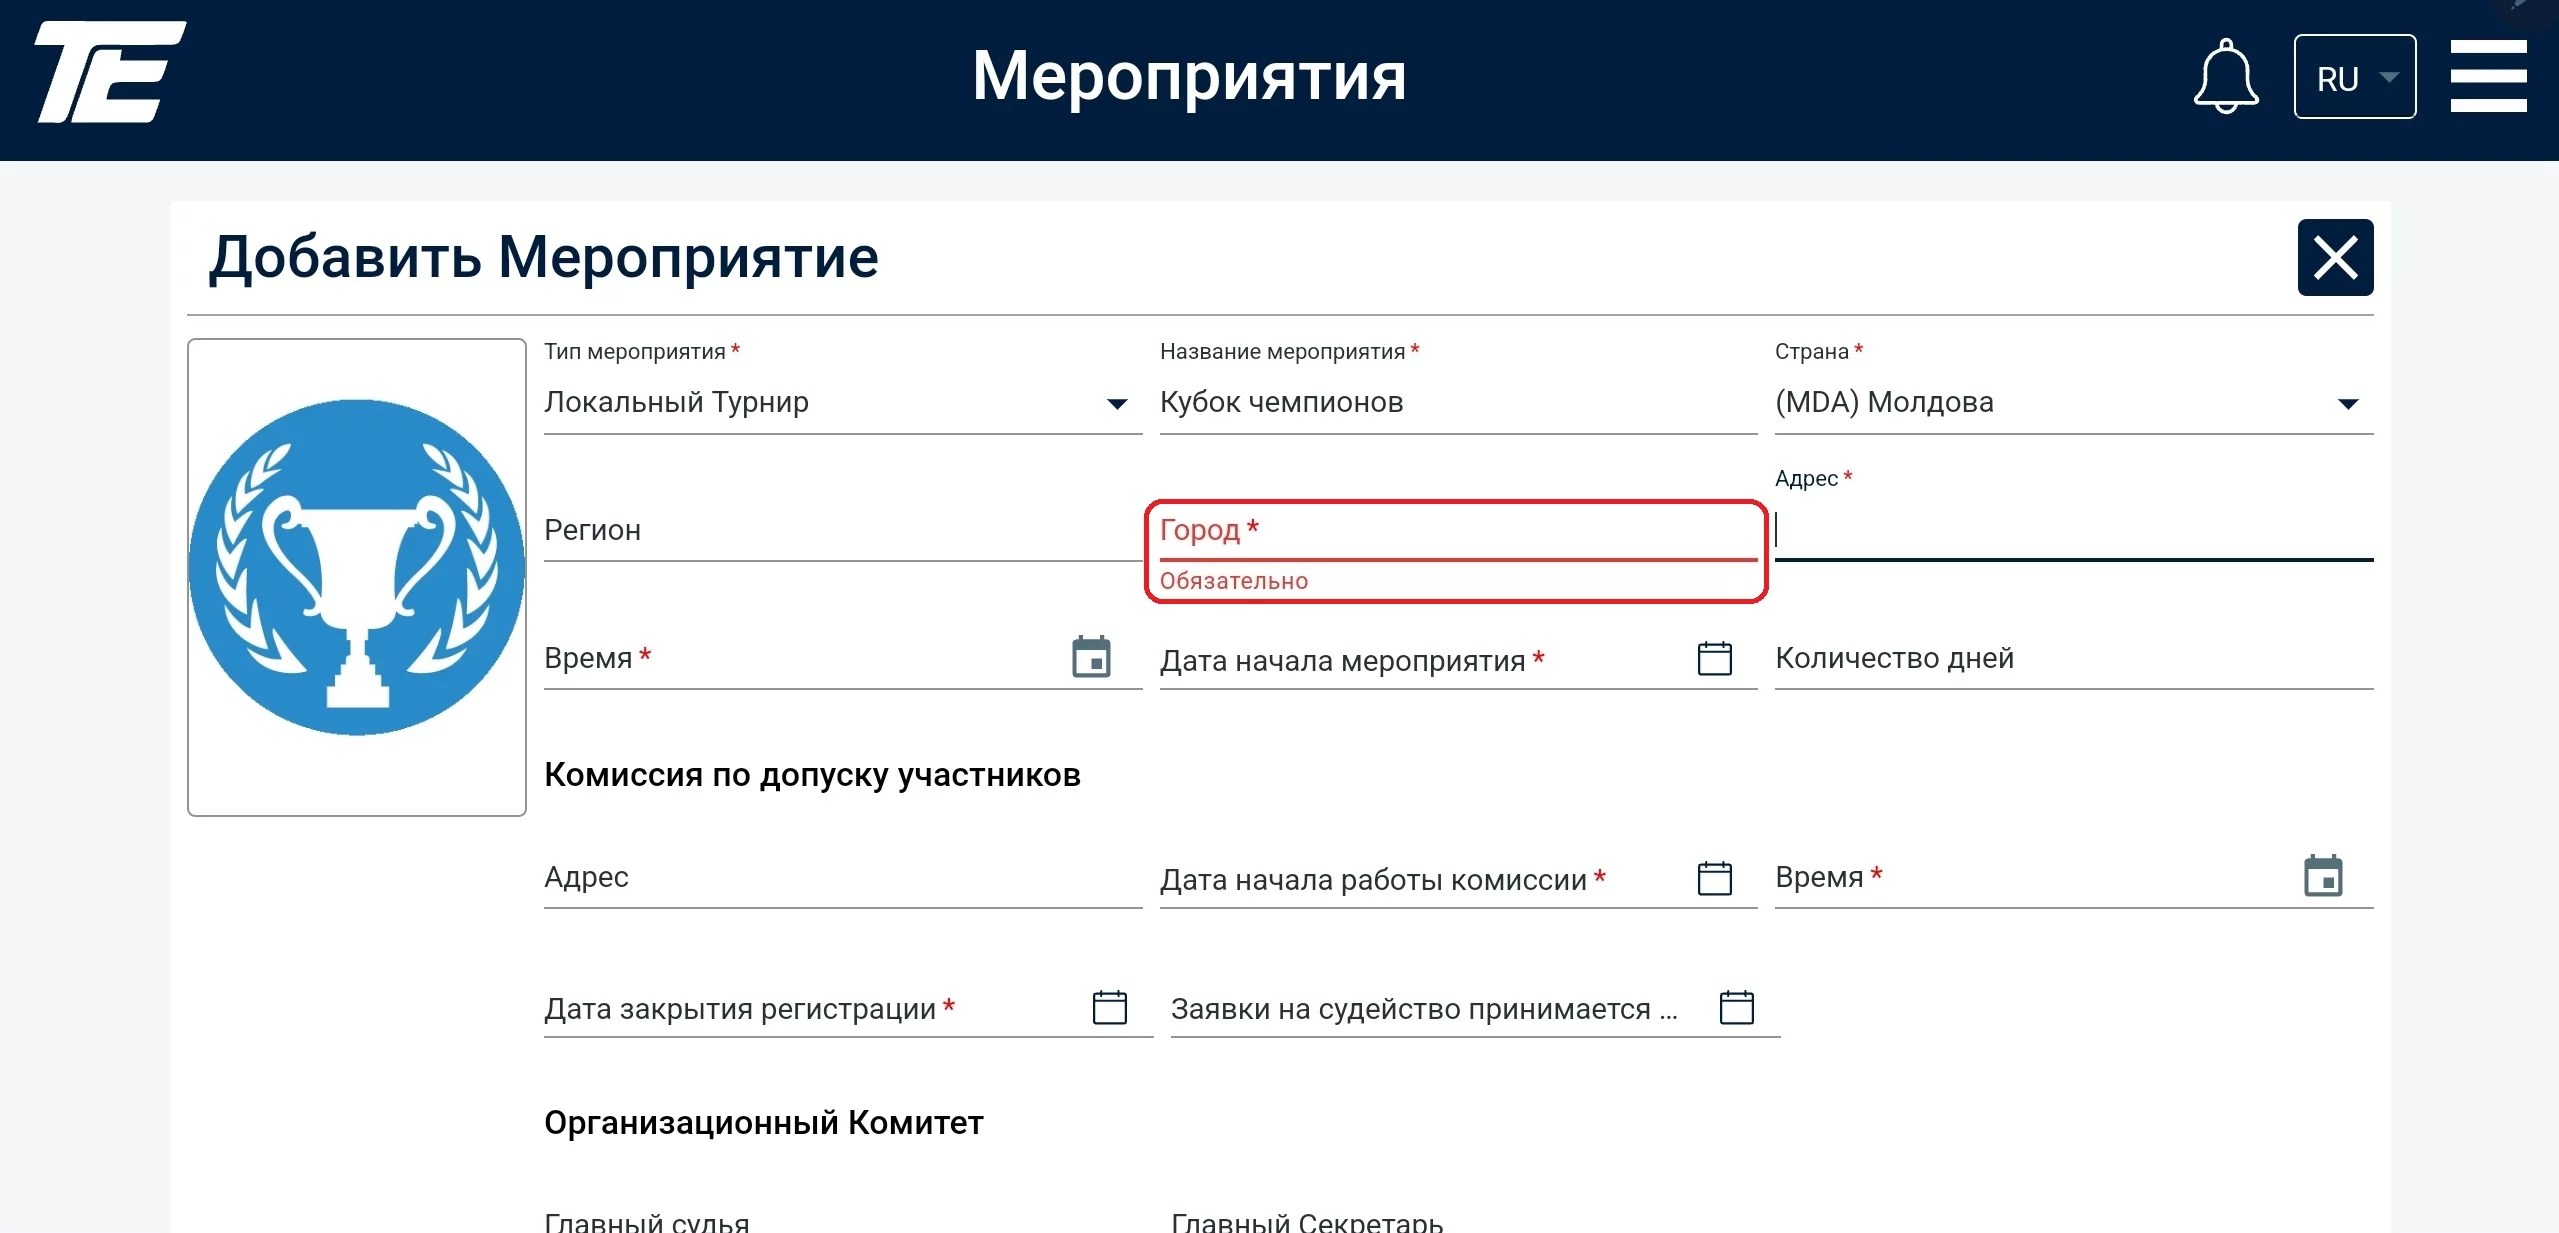
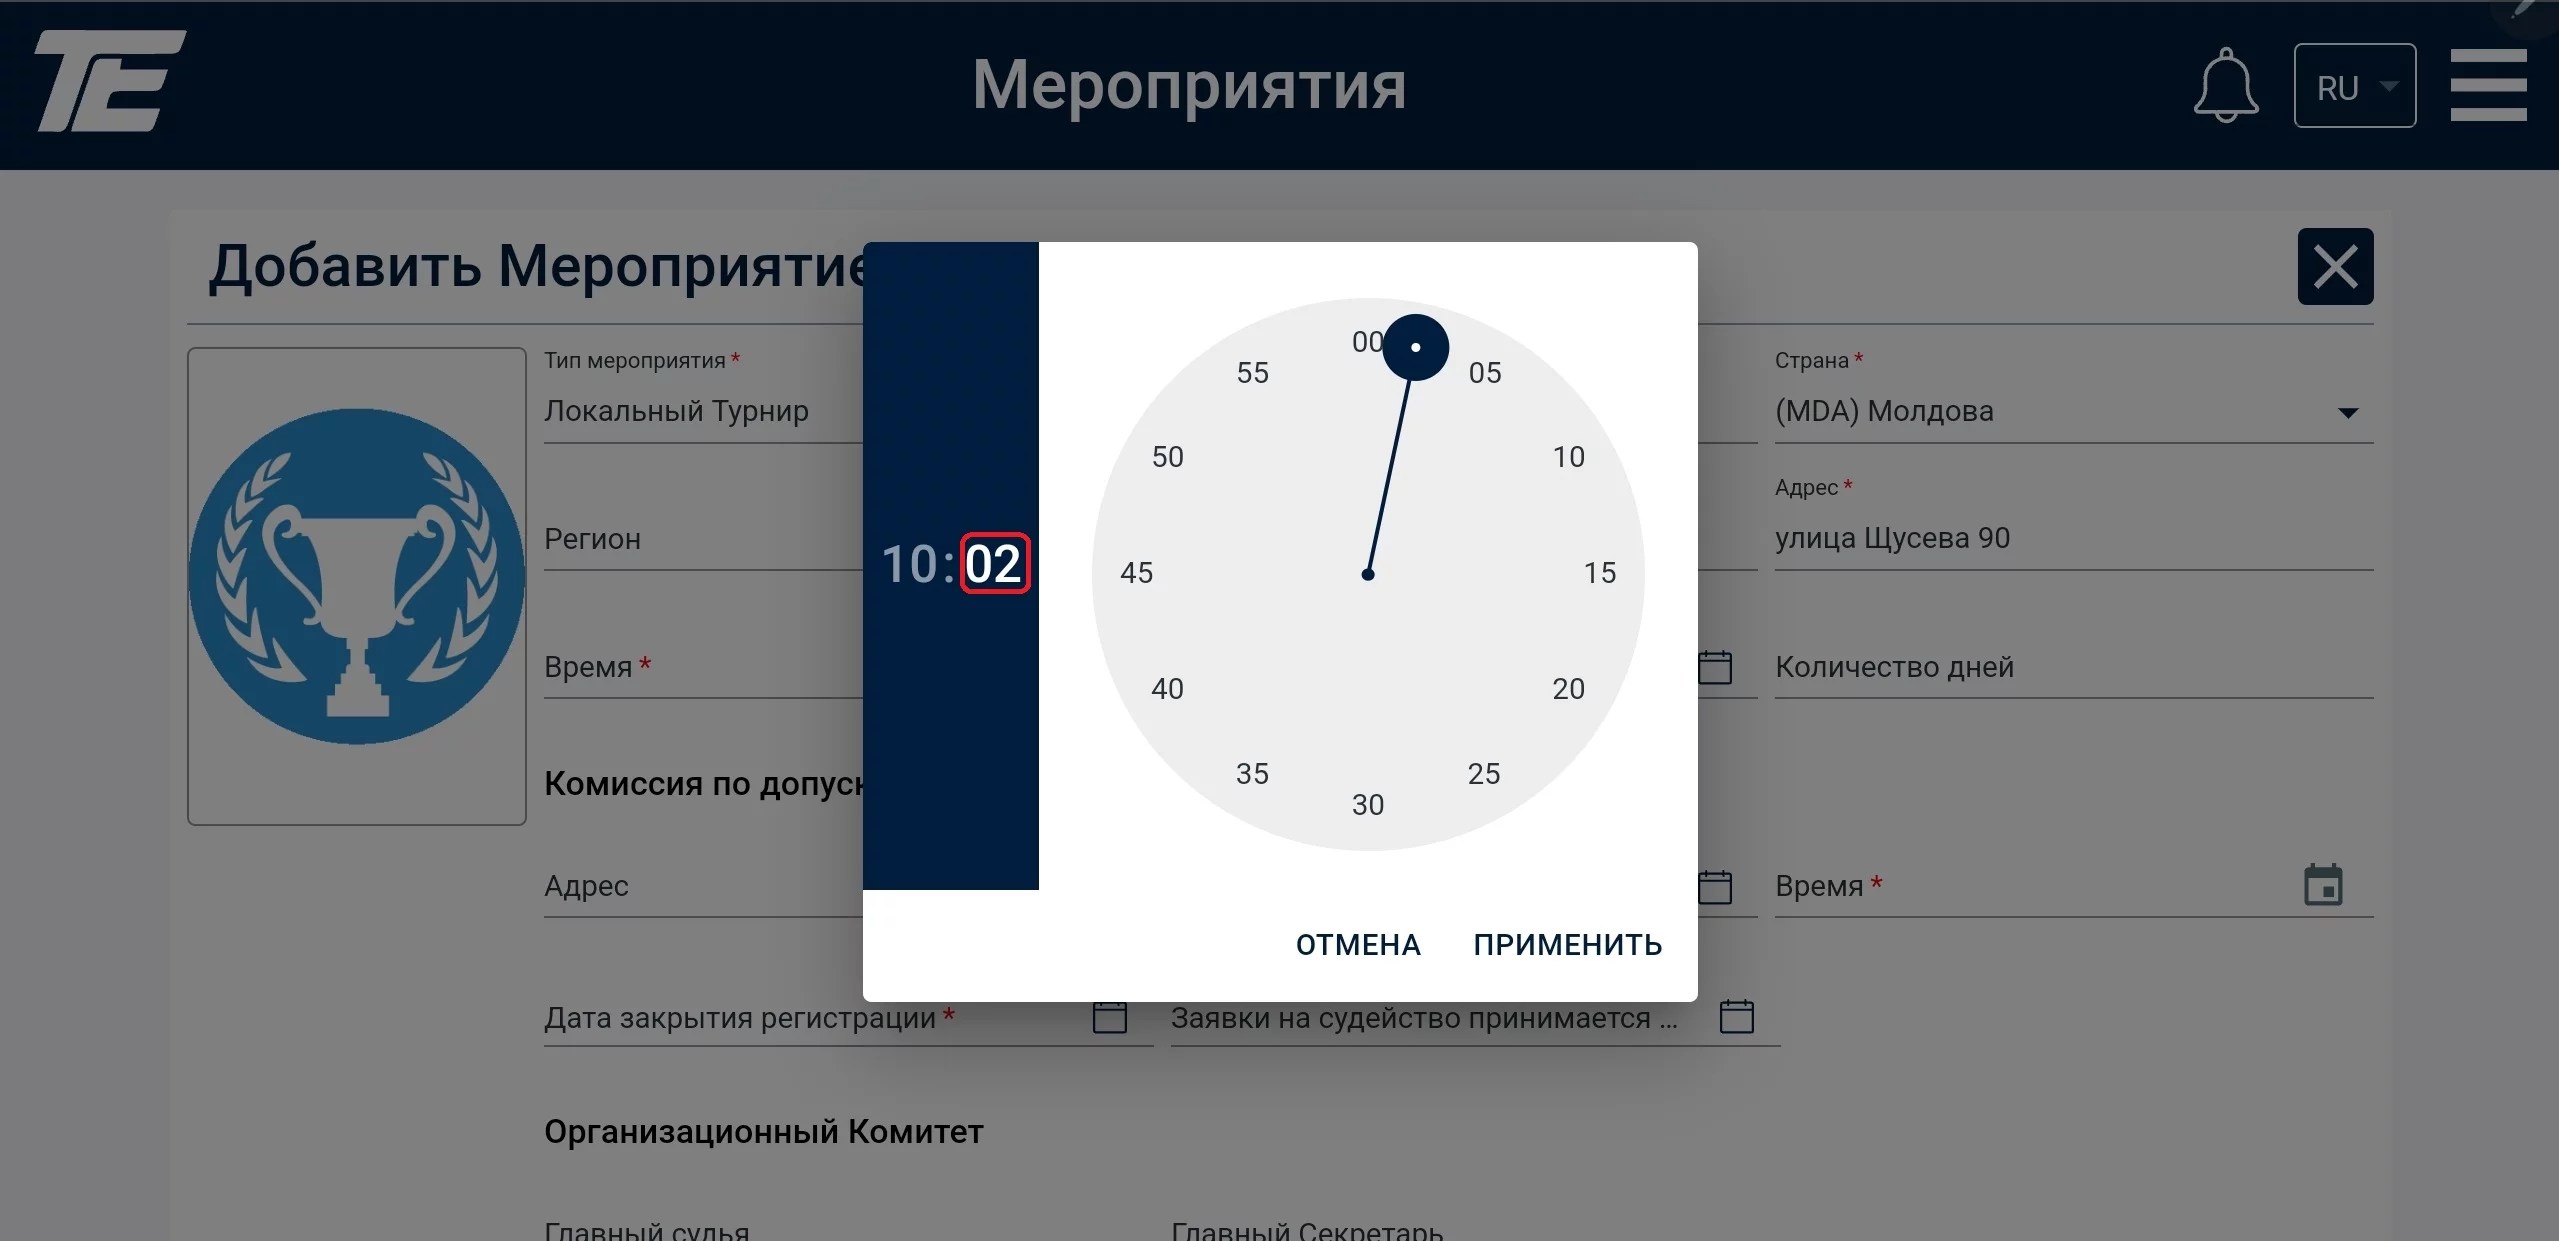
The time can be entered manually or with the help of the program clock
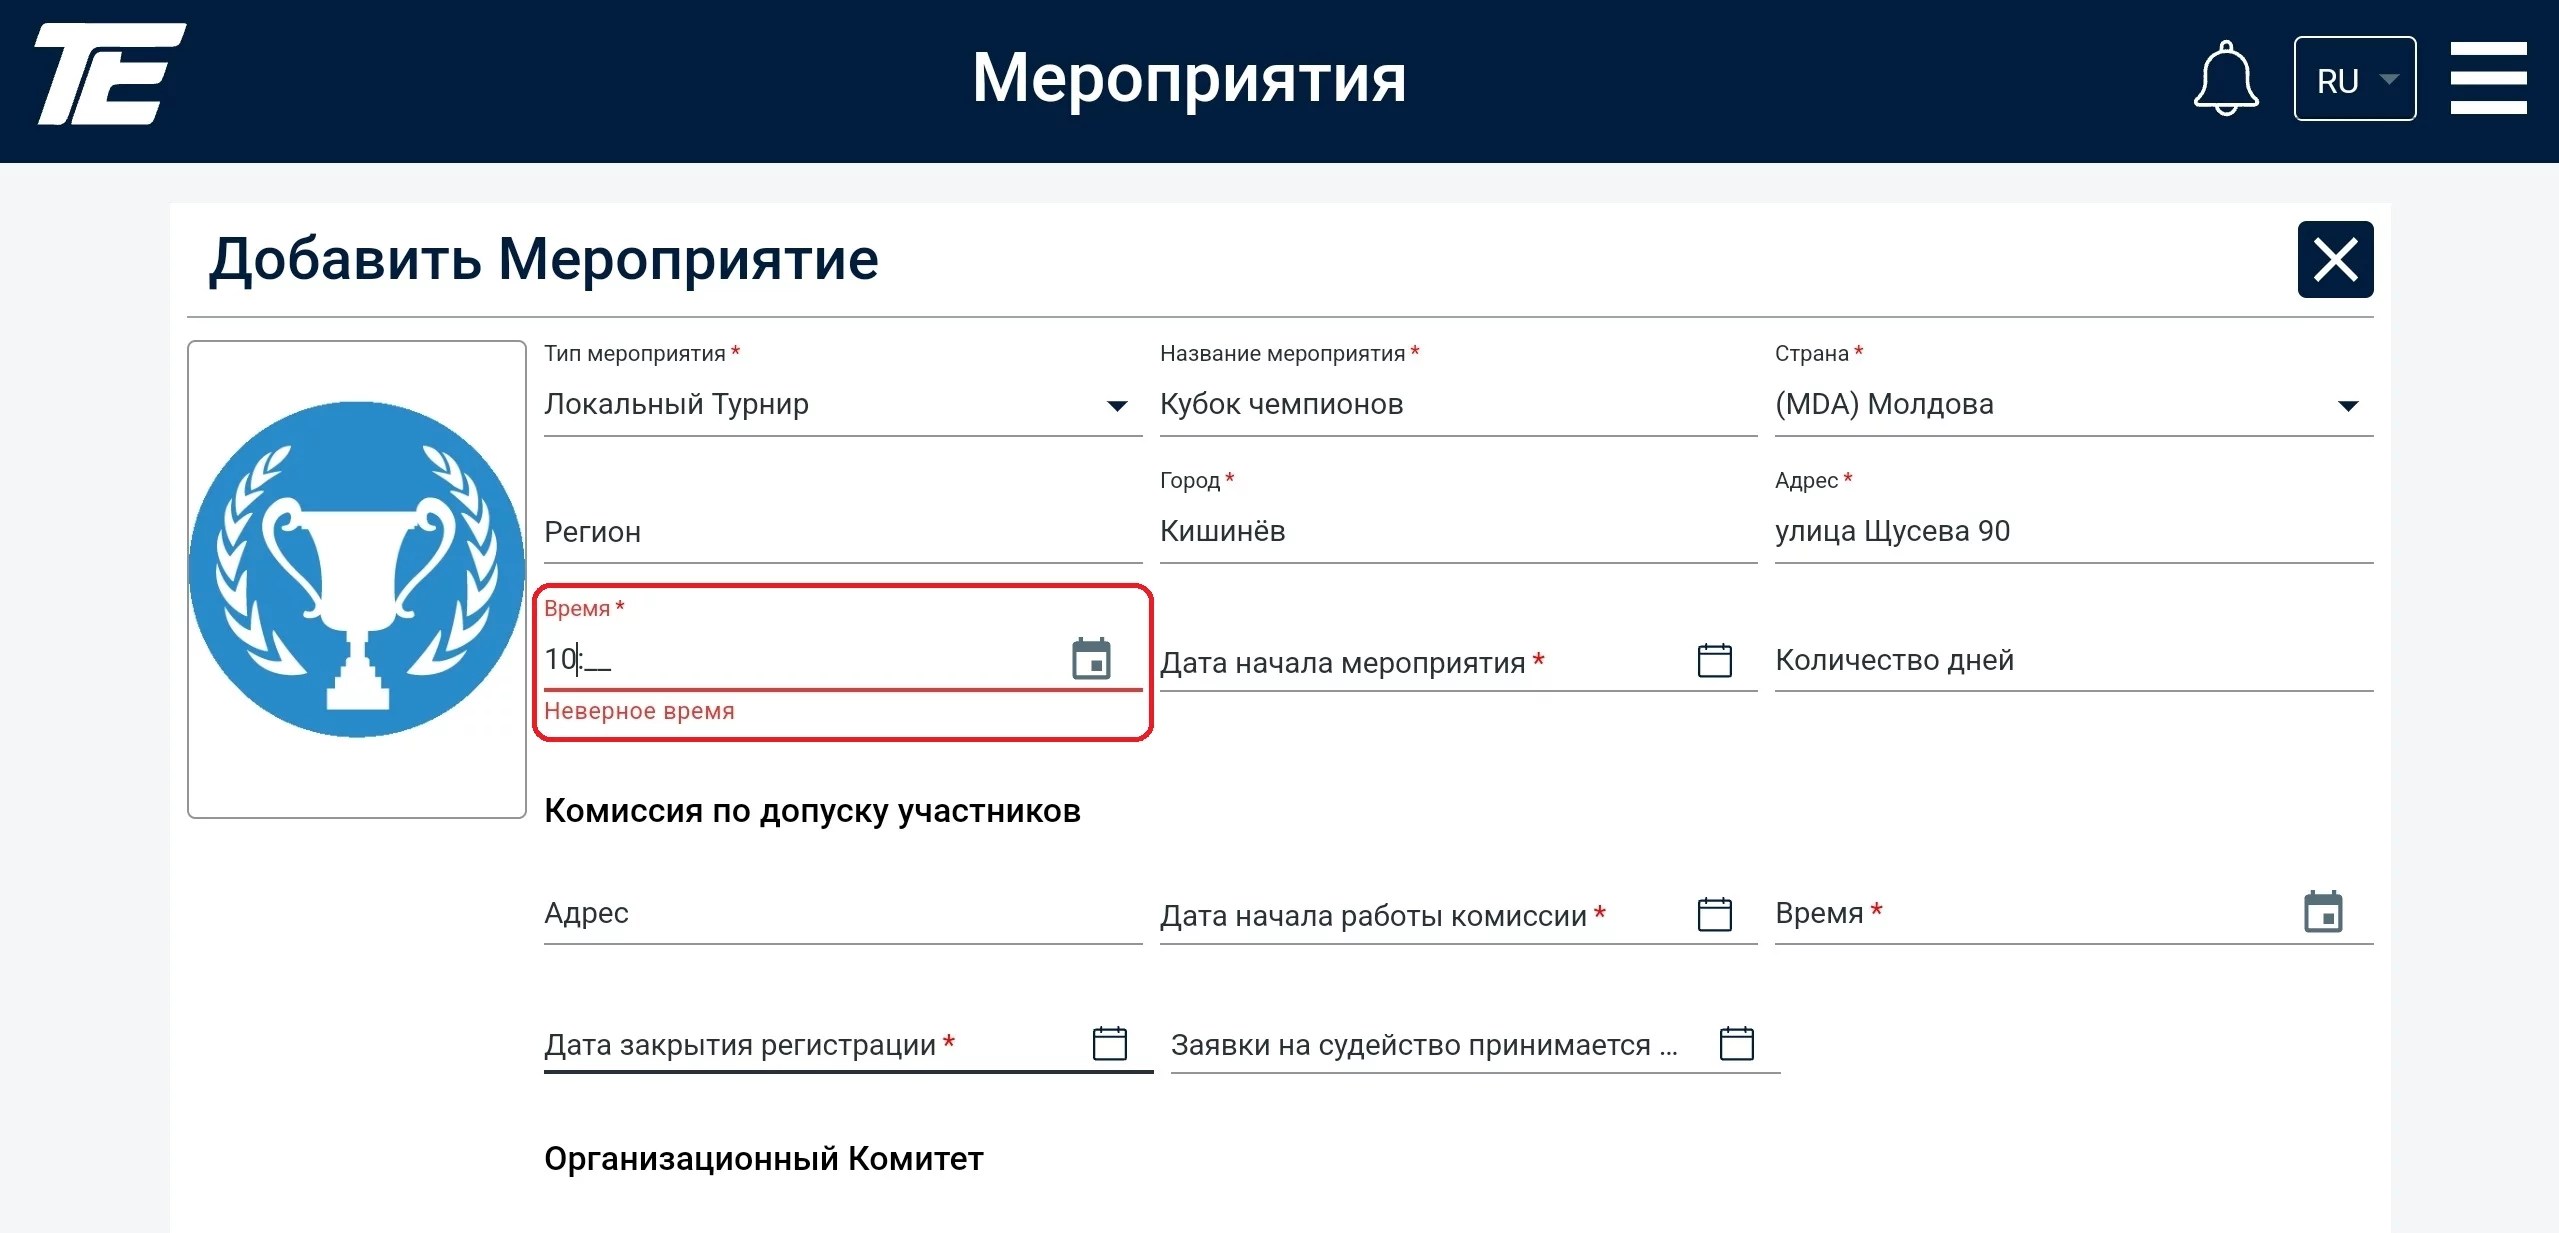
To do this, click the icon in the corner of the field
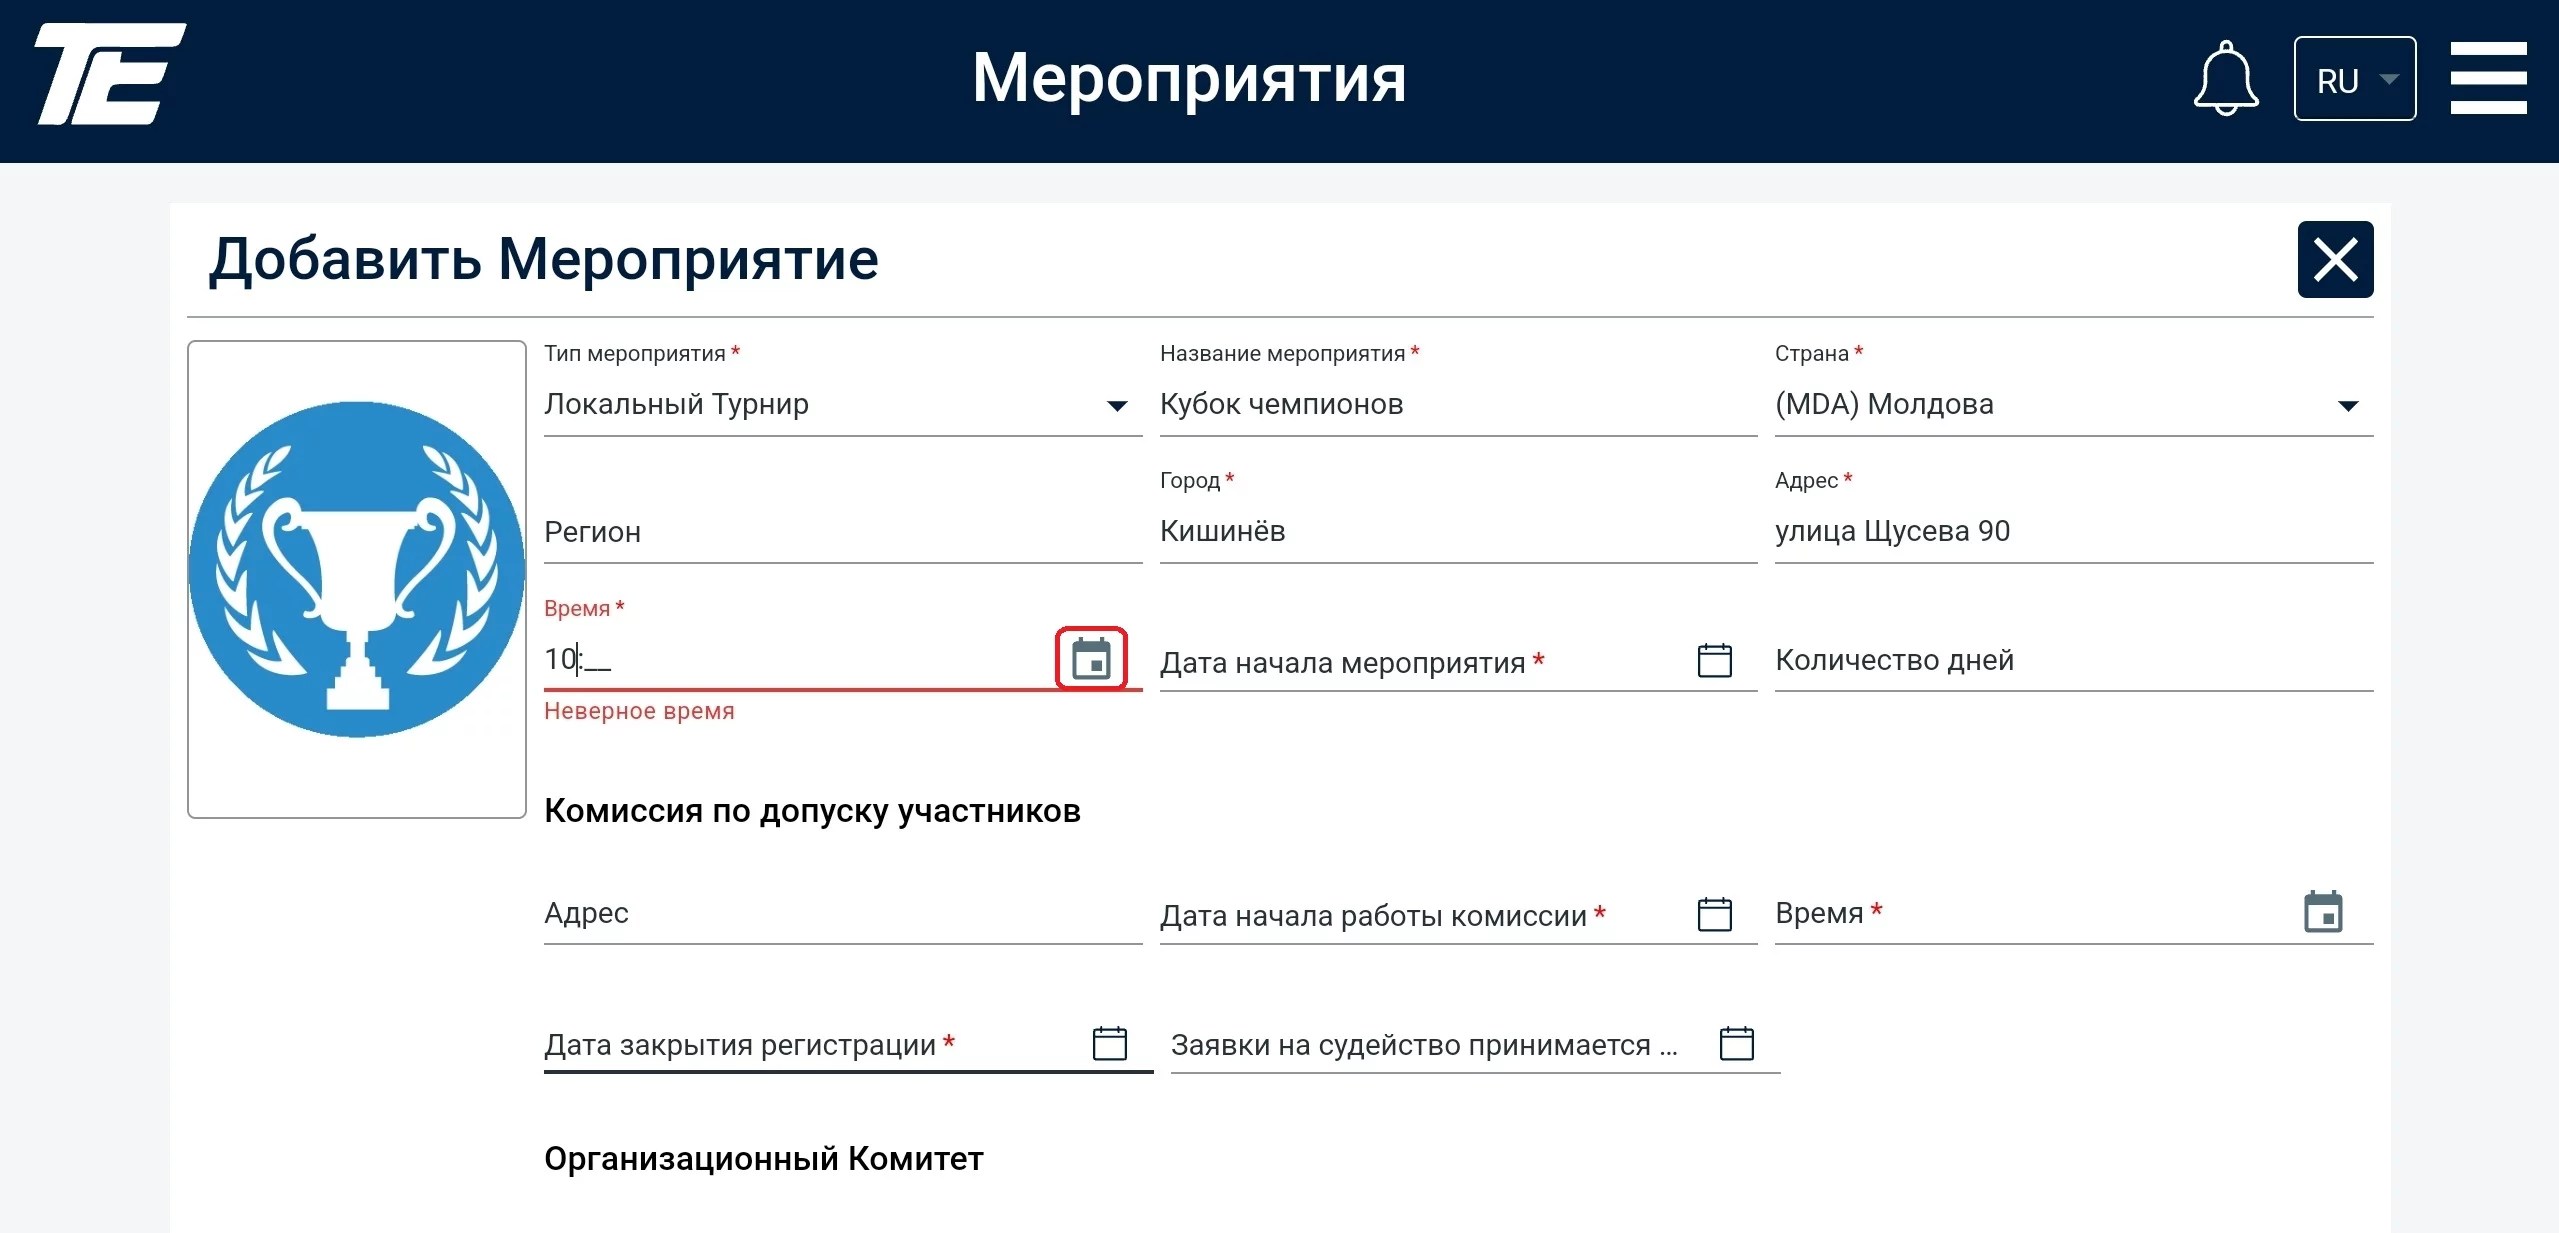
The example above shows how to enter the minutes of the tournament start.
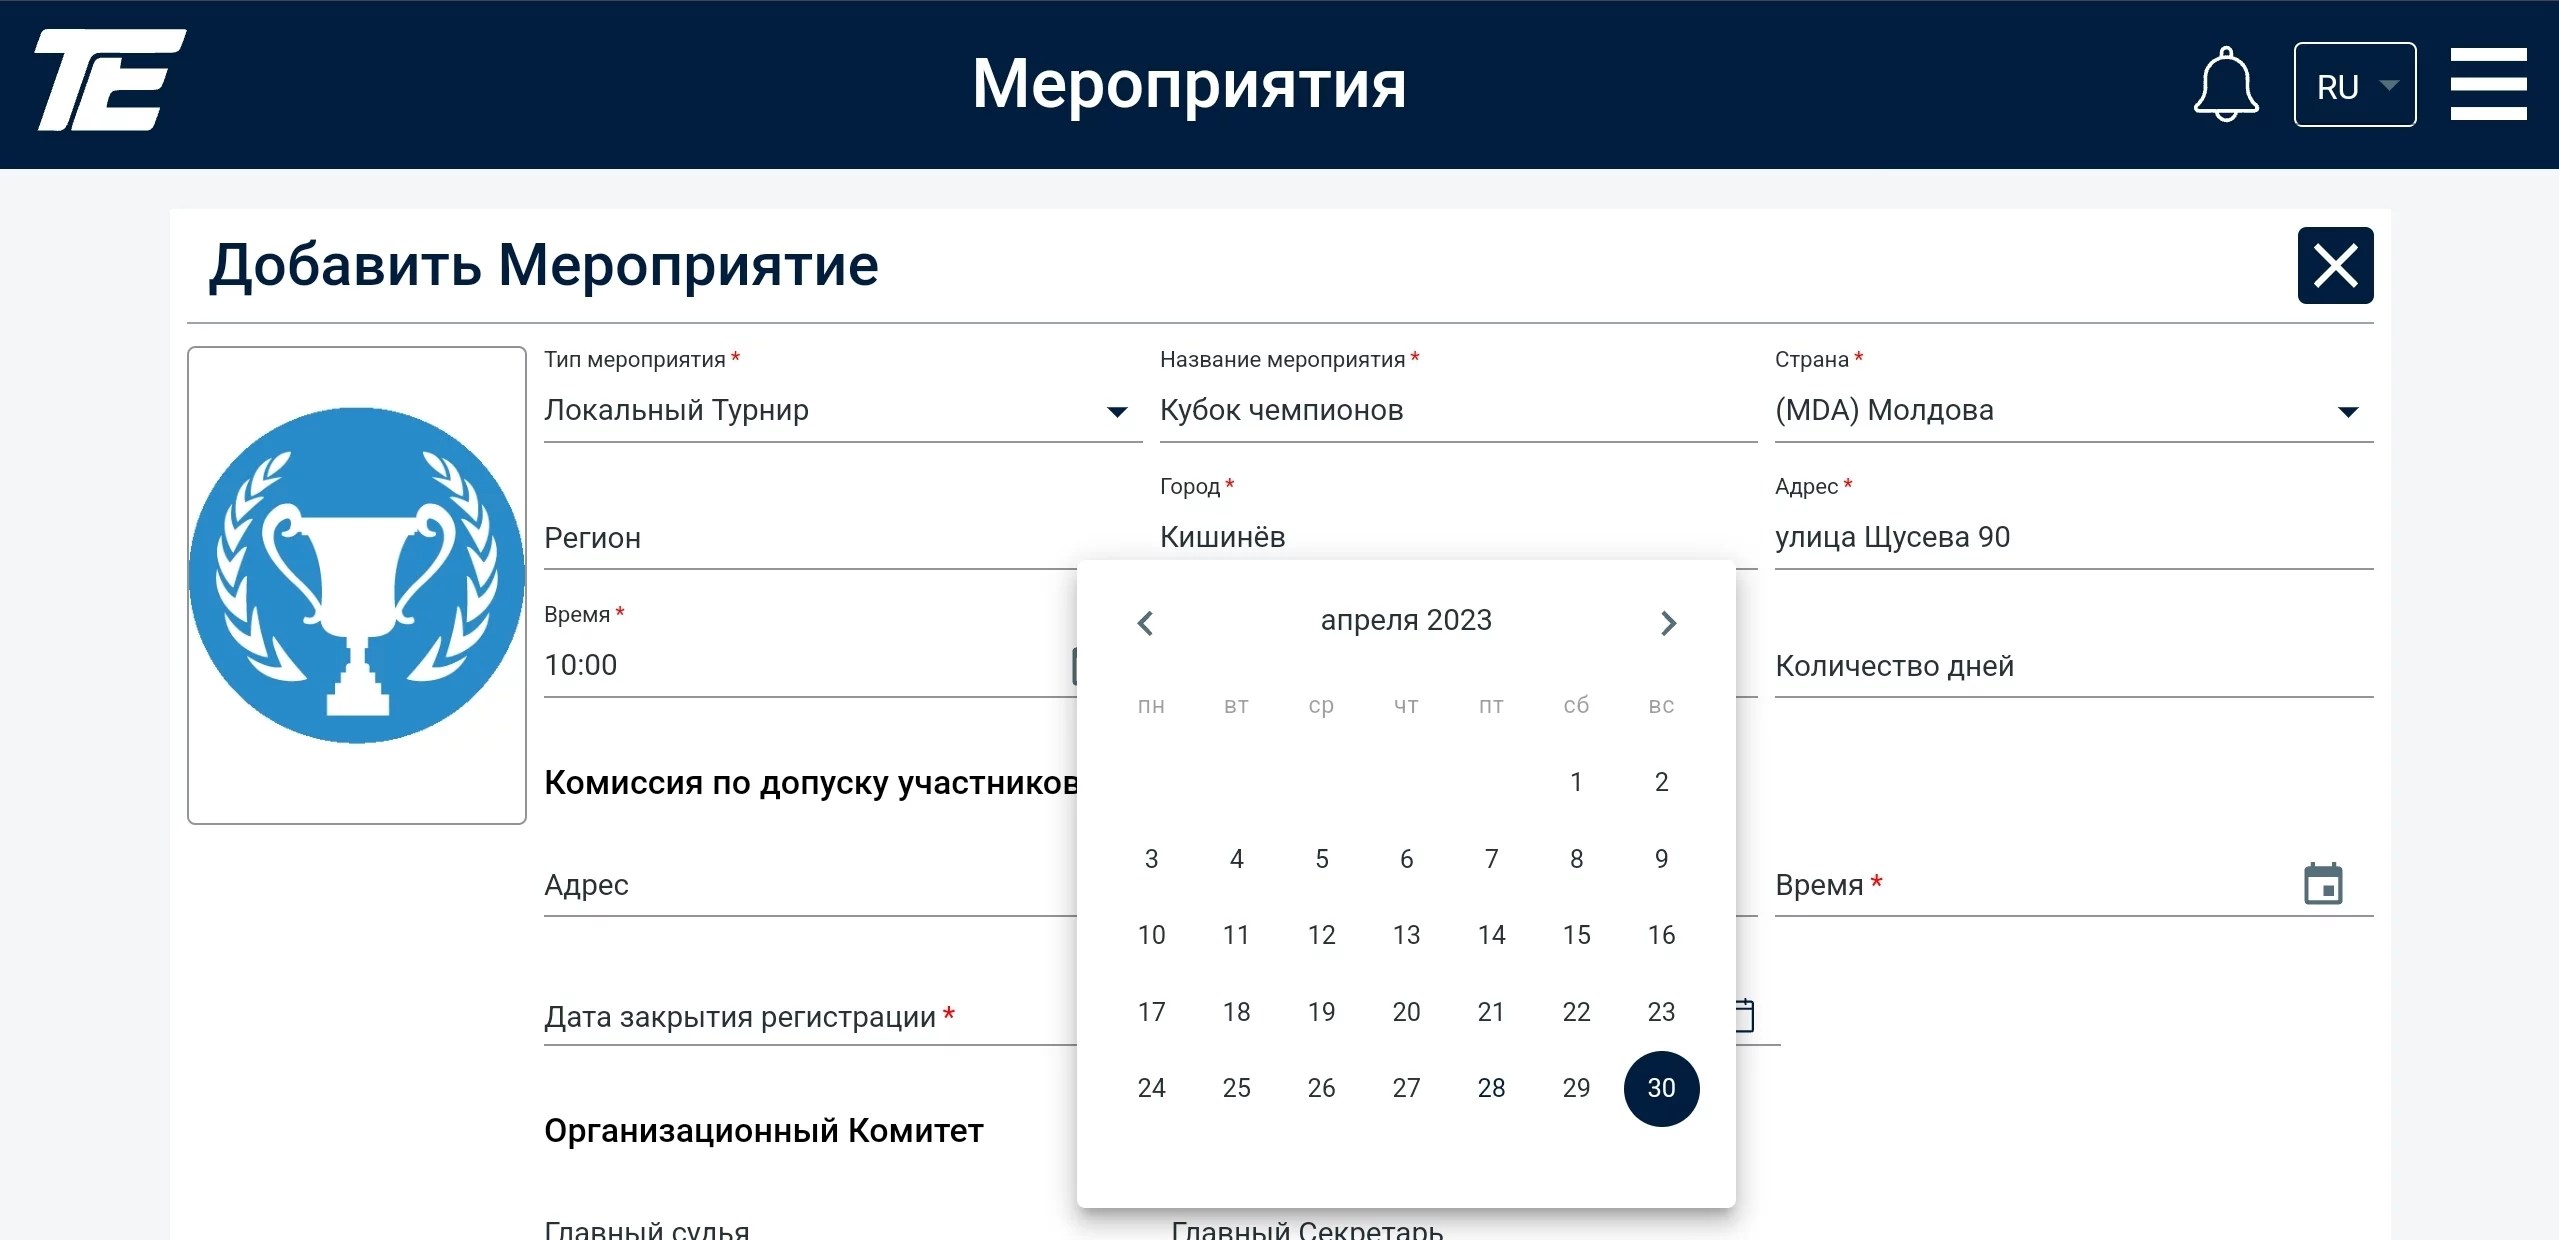
A similar principle exists for entering the date of the tournament.
Important! Be sure to specify the number of full days the tournament runs, including the awards ceremony. If the tournament lasts one day and the awards ceremony takes place the next day, the total number of days is given as 2 days.
If a sporting event runs for half a day during a calendar week, the number of days will be 7.
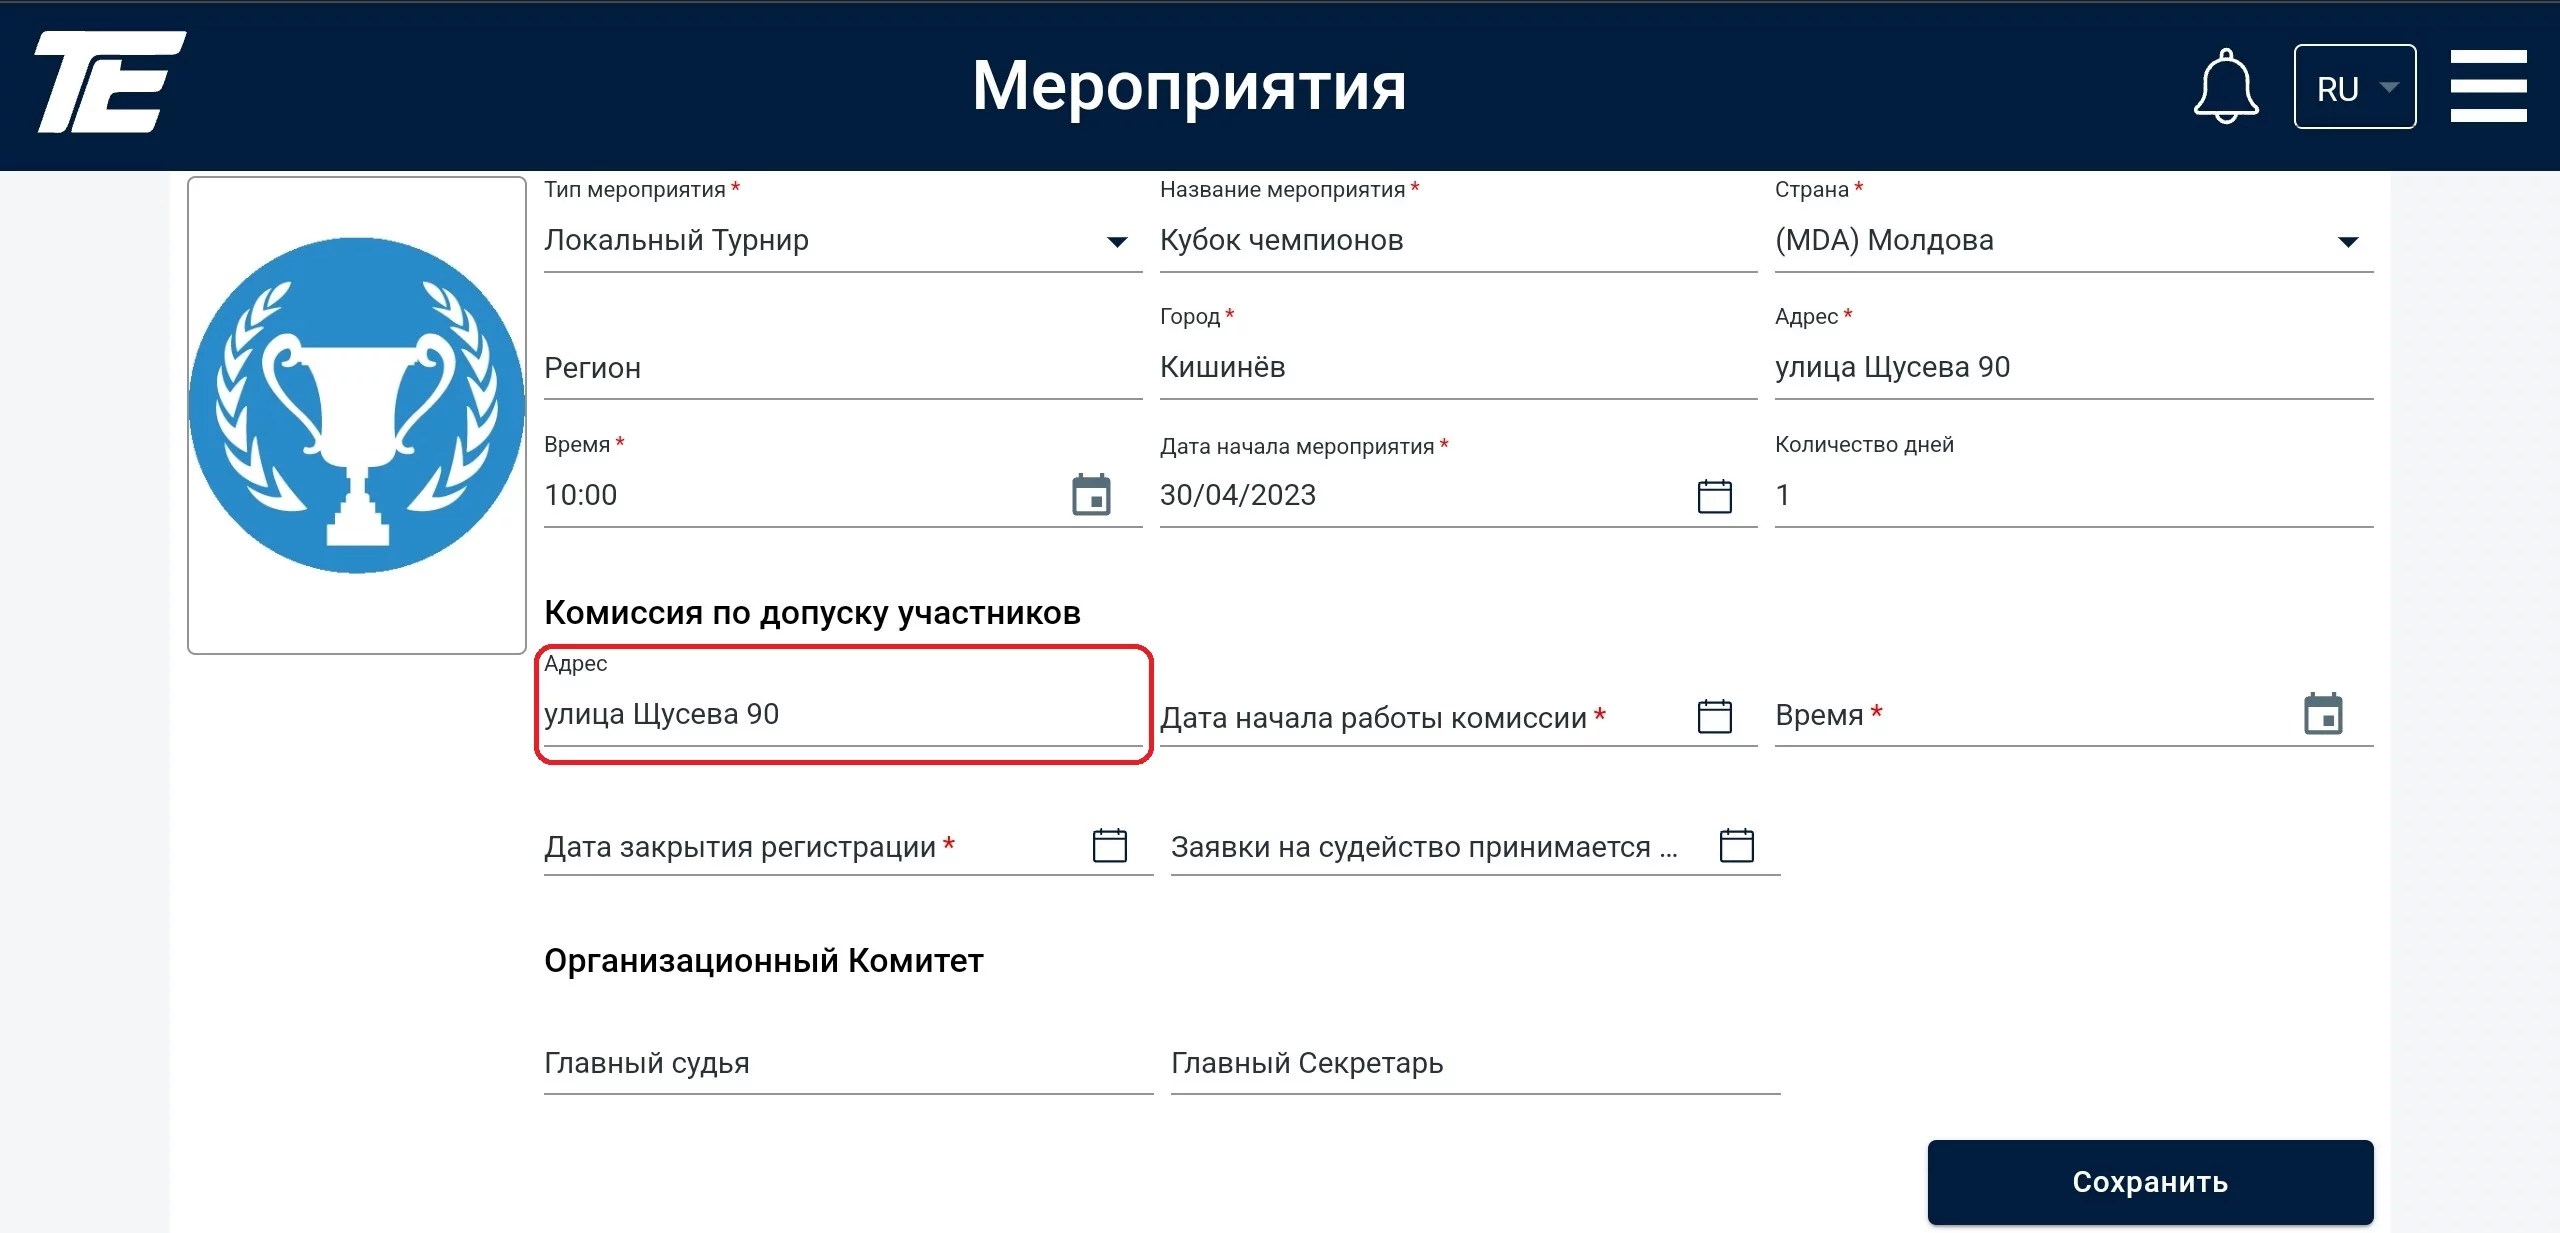
The address of the admission committee may coincide with the tournament venue or be different.
Important! The committee start date and the registration closing date cannot be earlier than the tournament creation date (the web portal does not support date entry in this way).
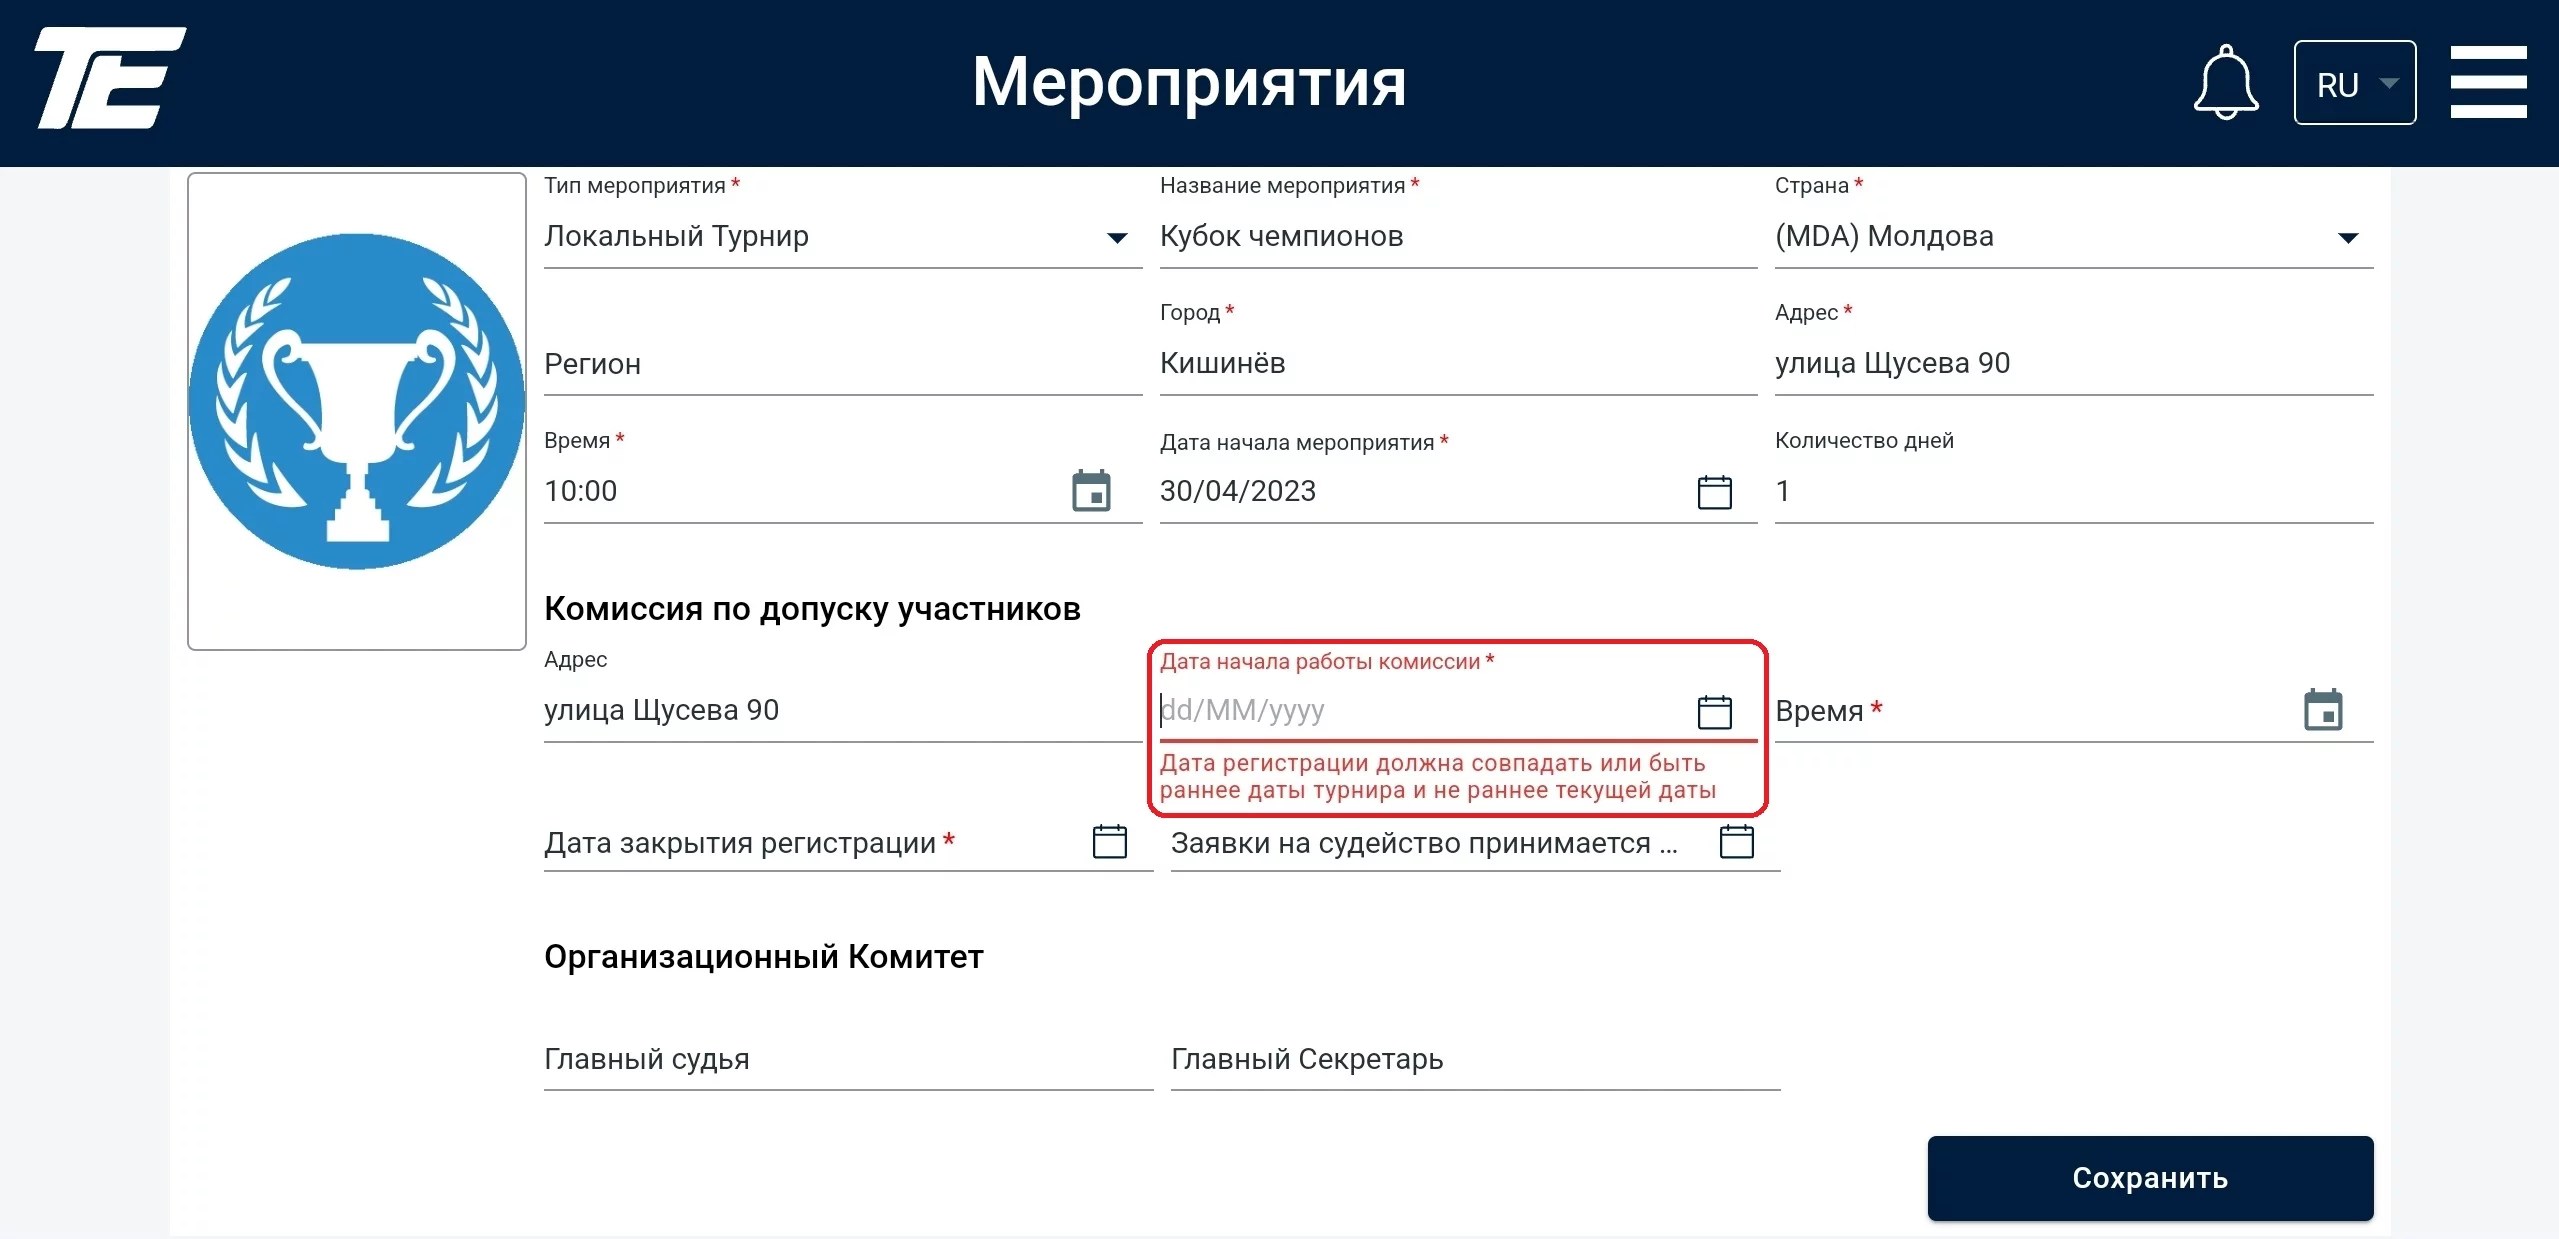
Therefore, we strongly recommend creating the sporting event in advance and allowing at least one month of margin between the start of the tournament and the registration closing date.
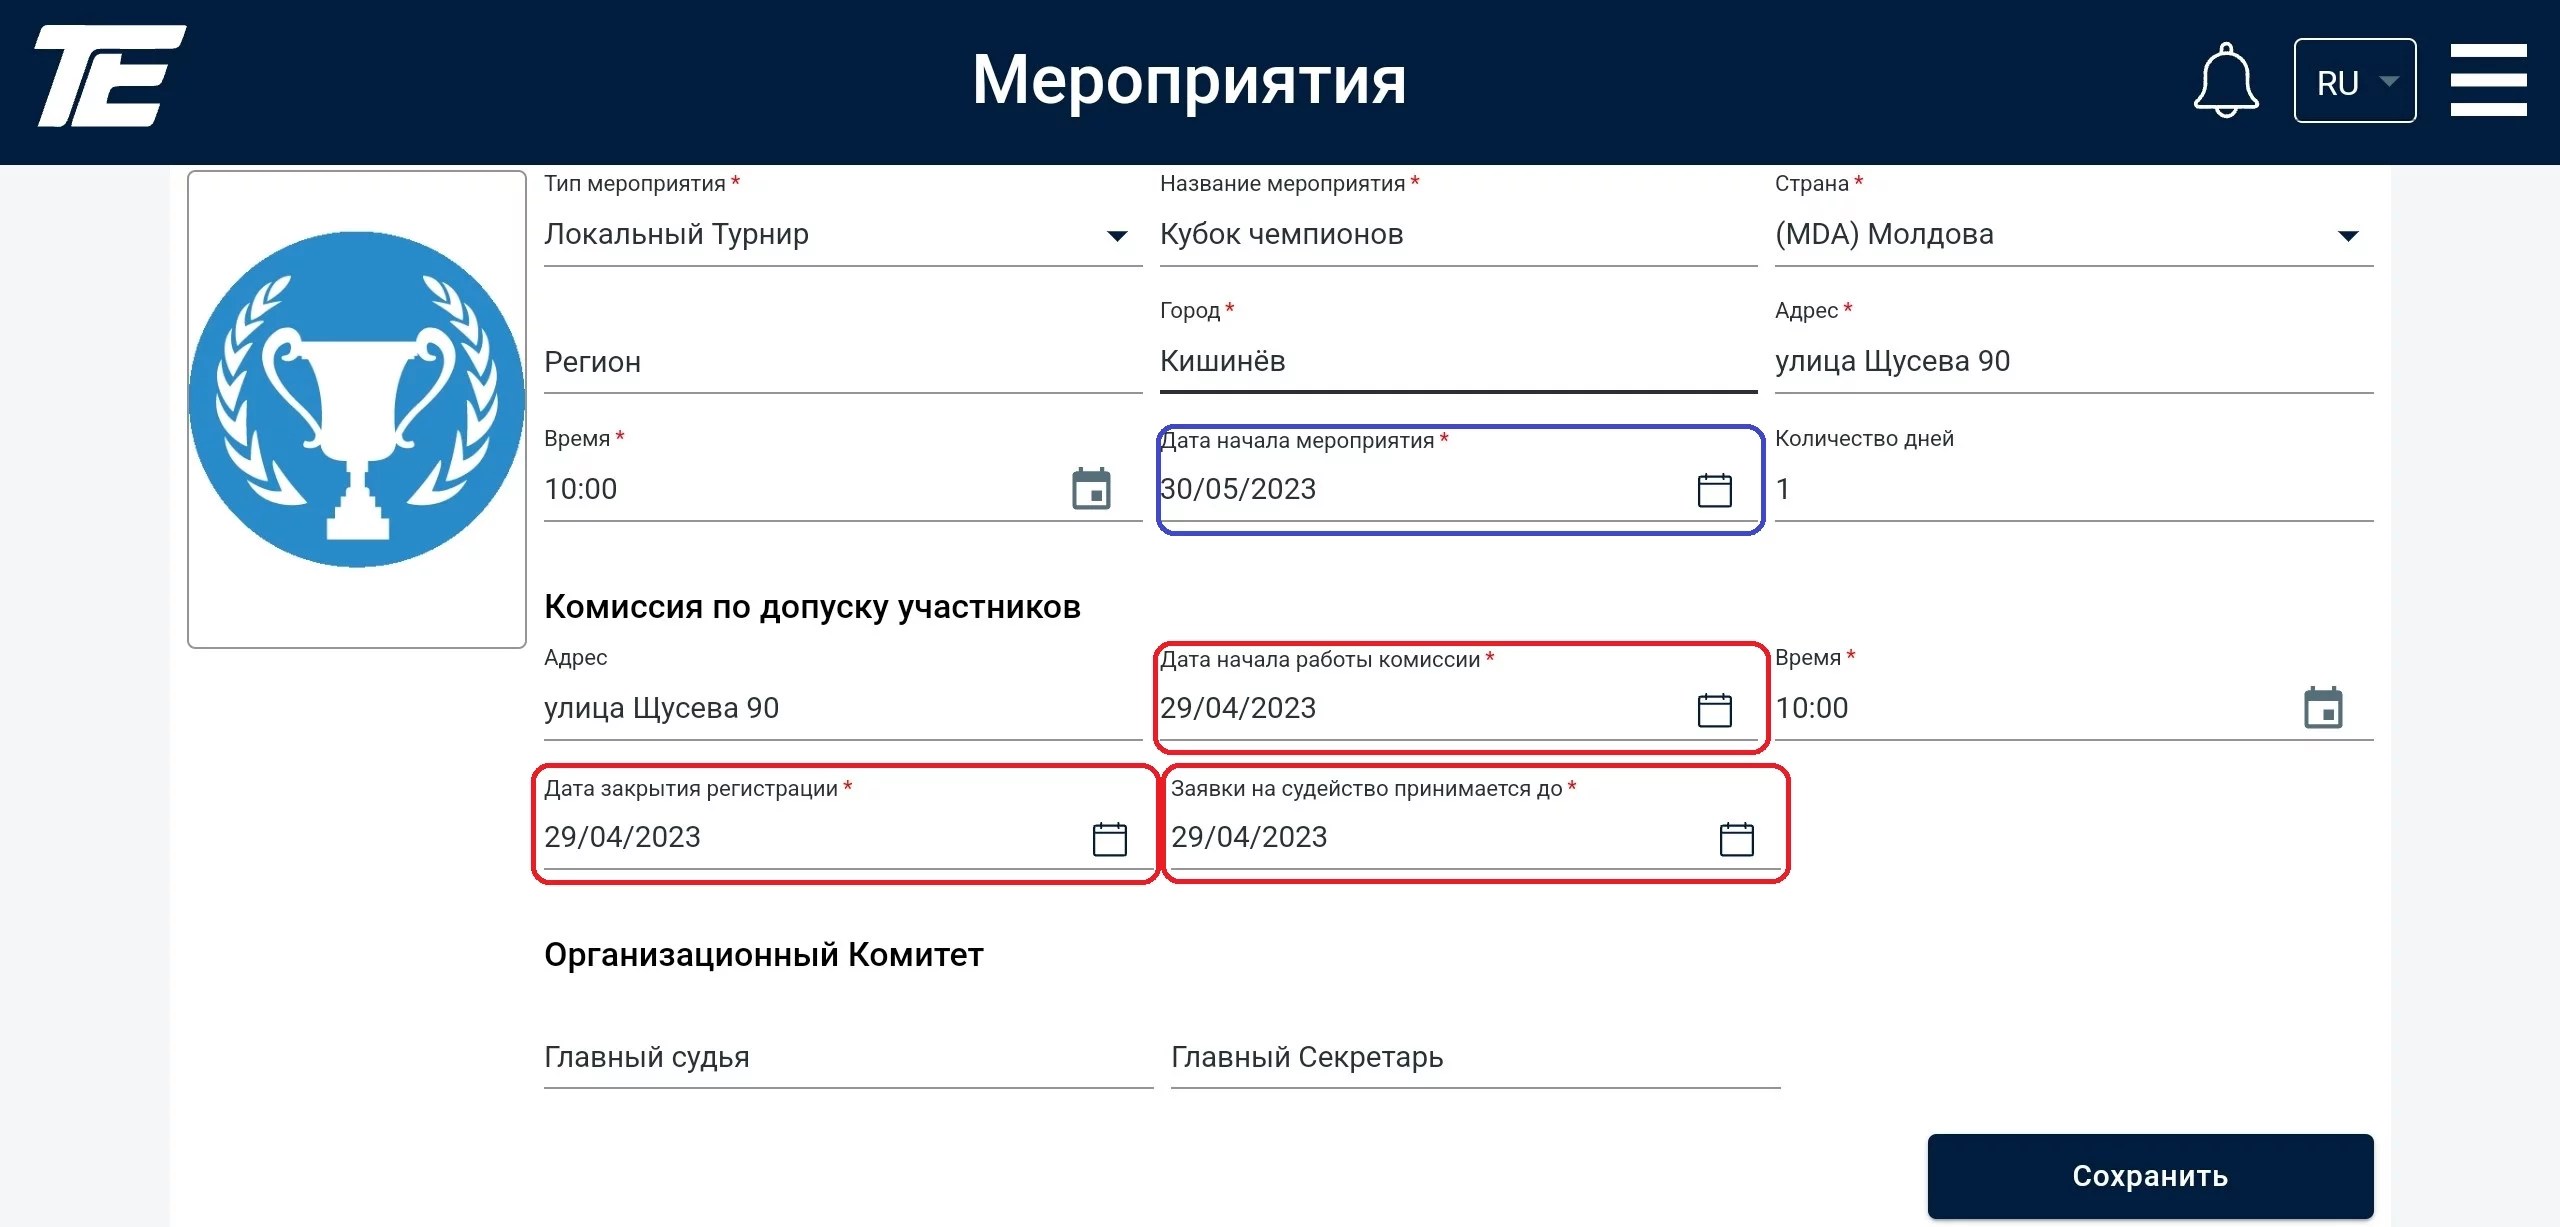
Next, you can enter the name of the Chief Referee and the Chief Secretary.
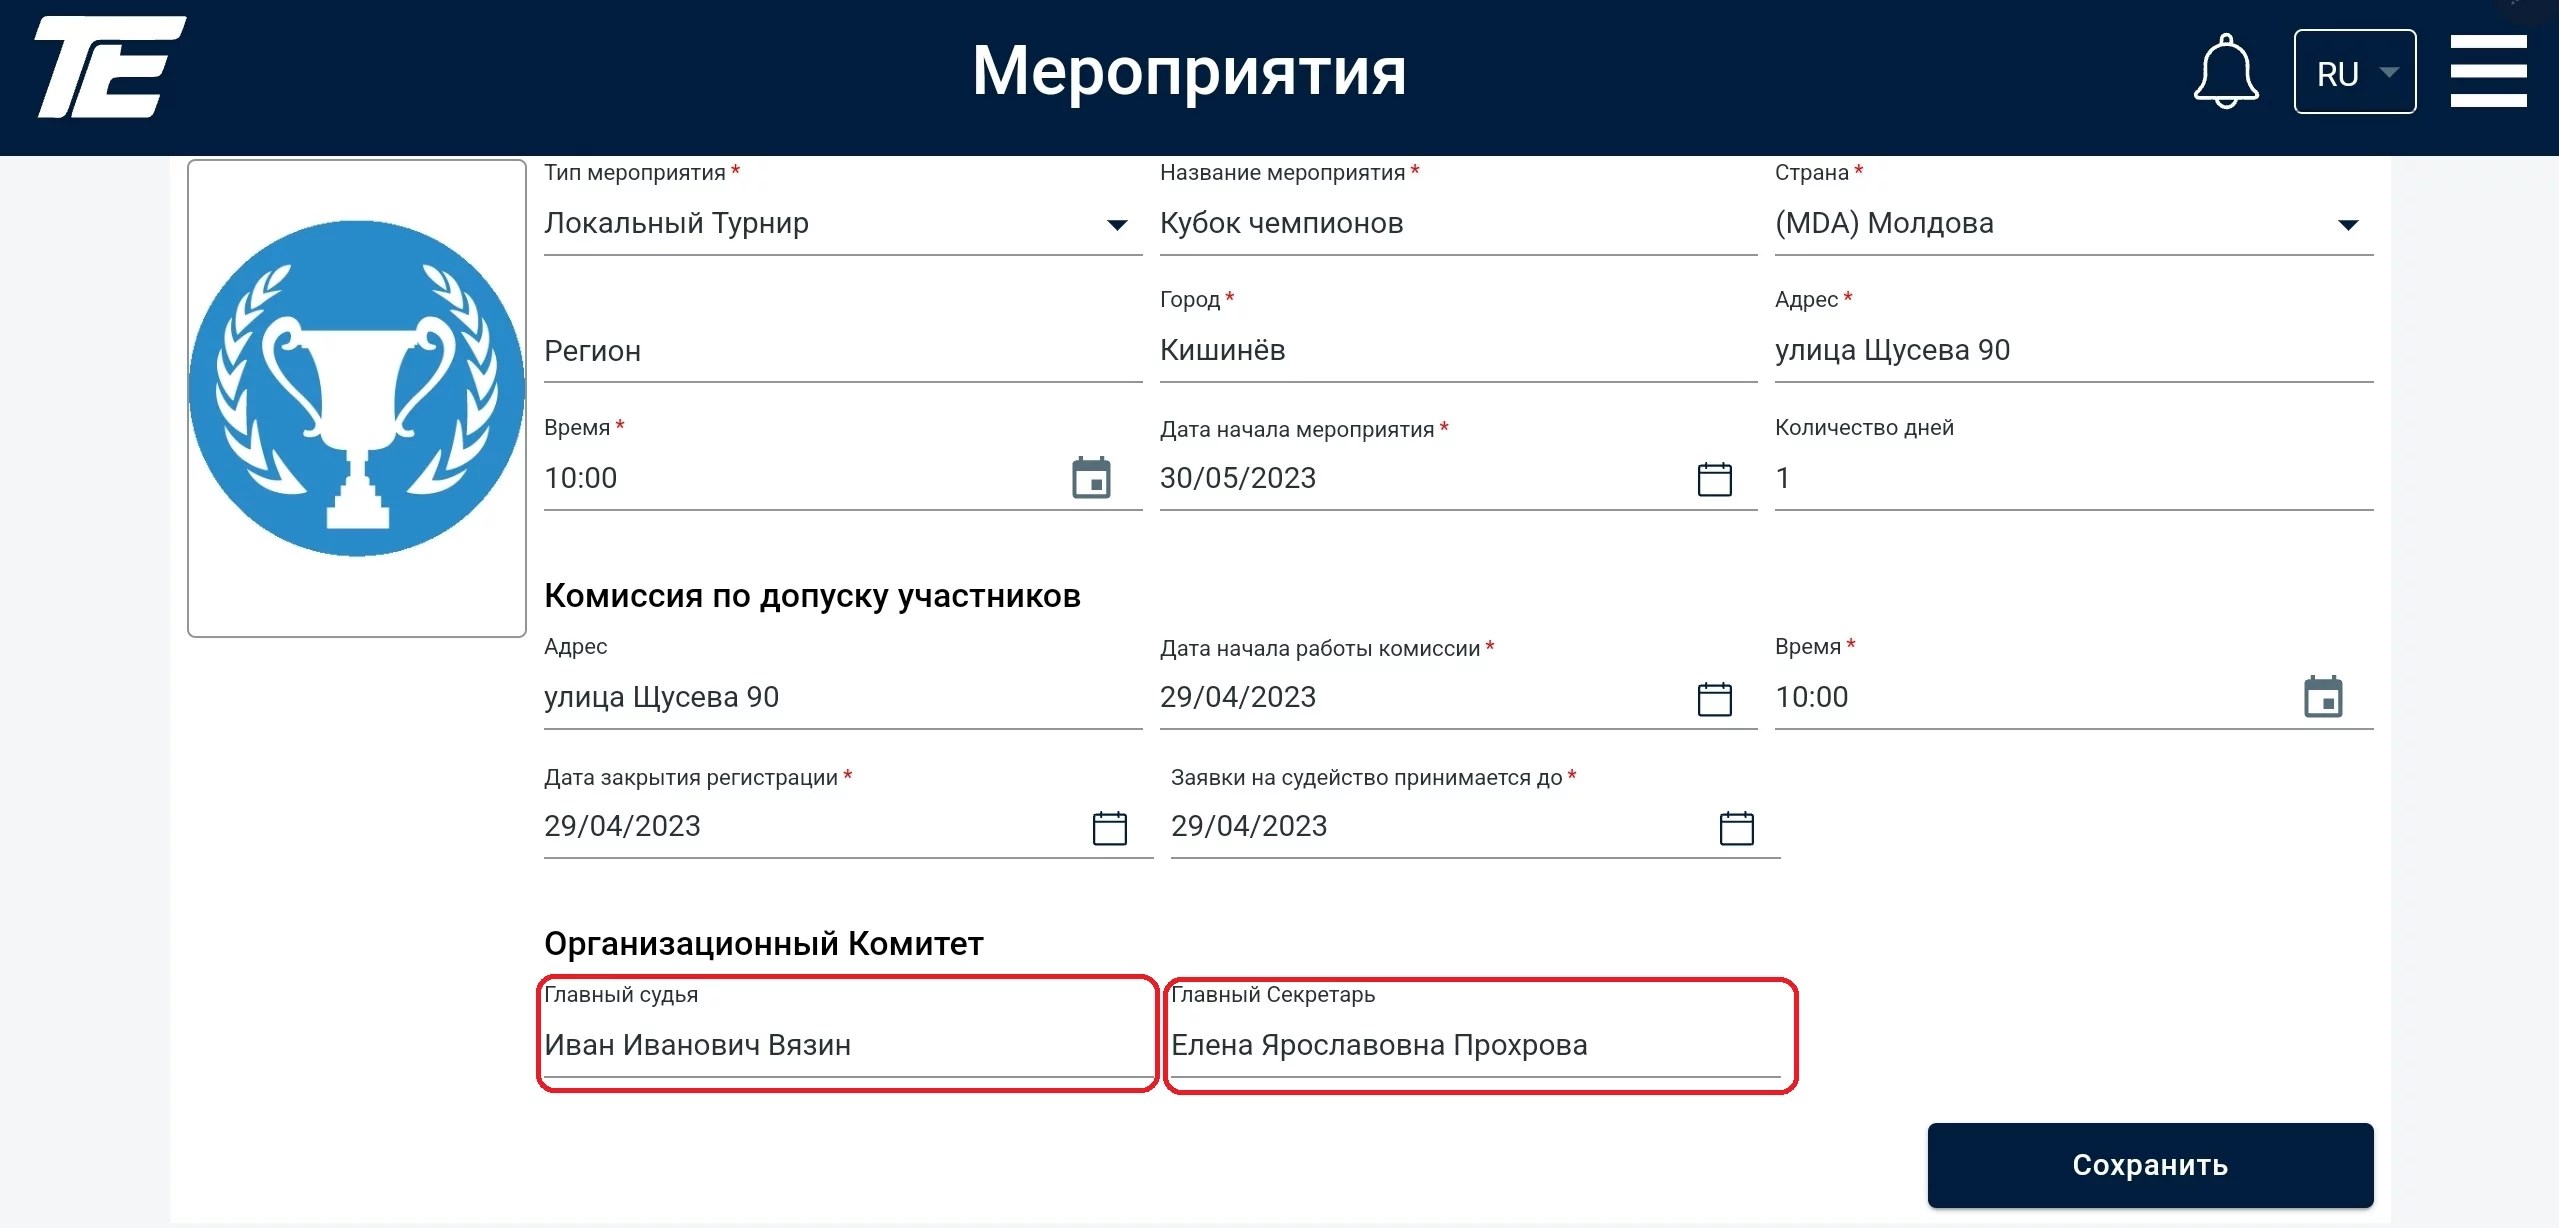
Finally, you can add a poster (flyer) for the upcoming event. If the poster is not ready yet, it can always be added later in edit mode. Until then, the web portal generates a random variant.
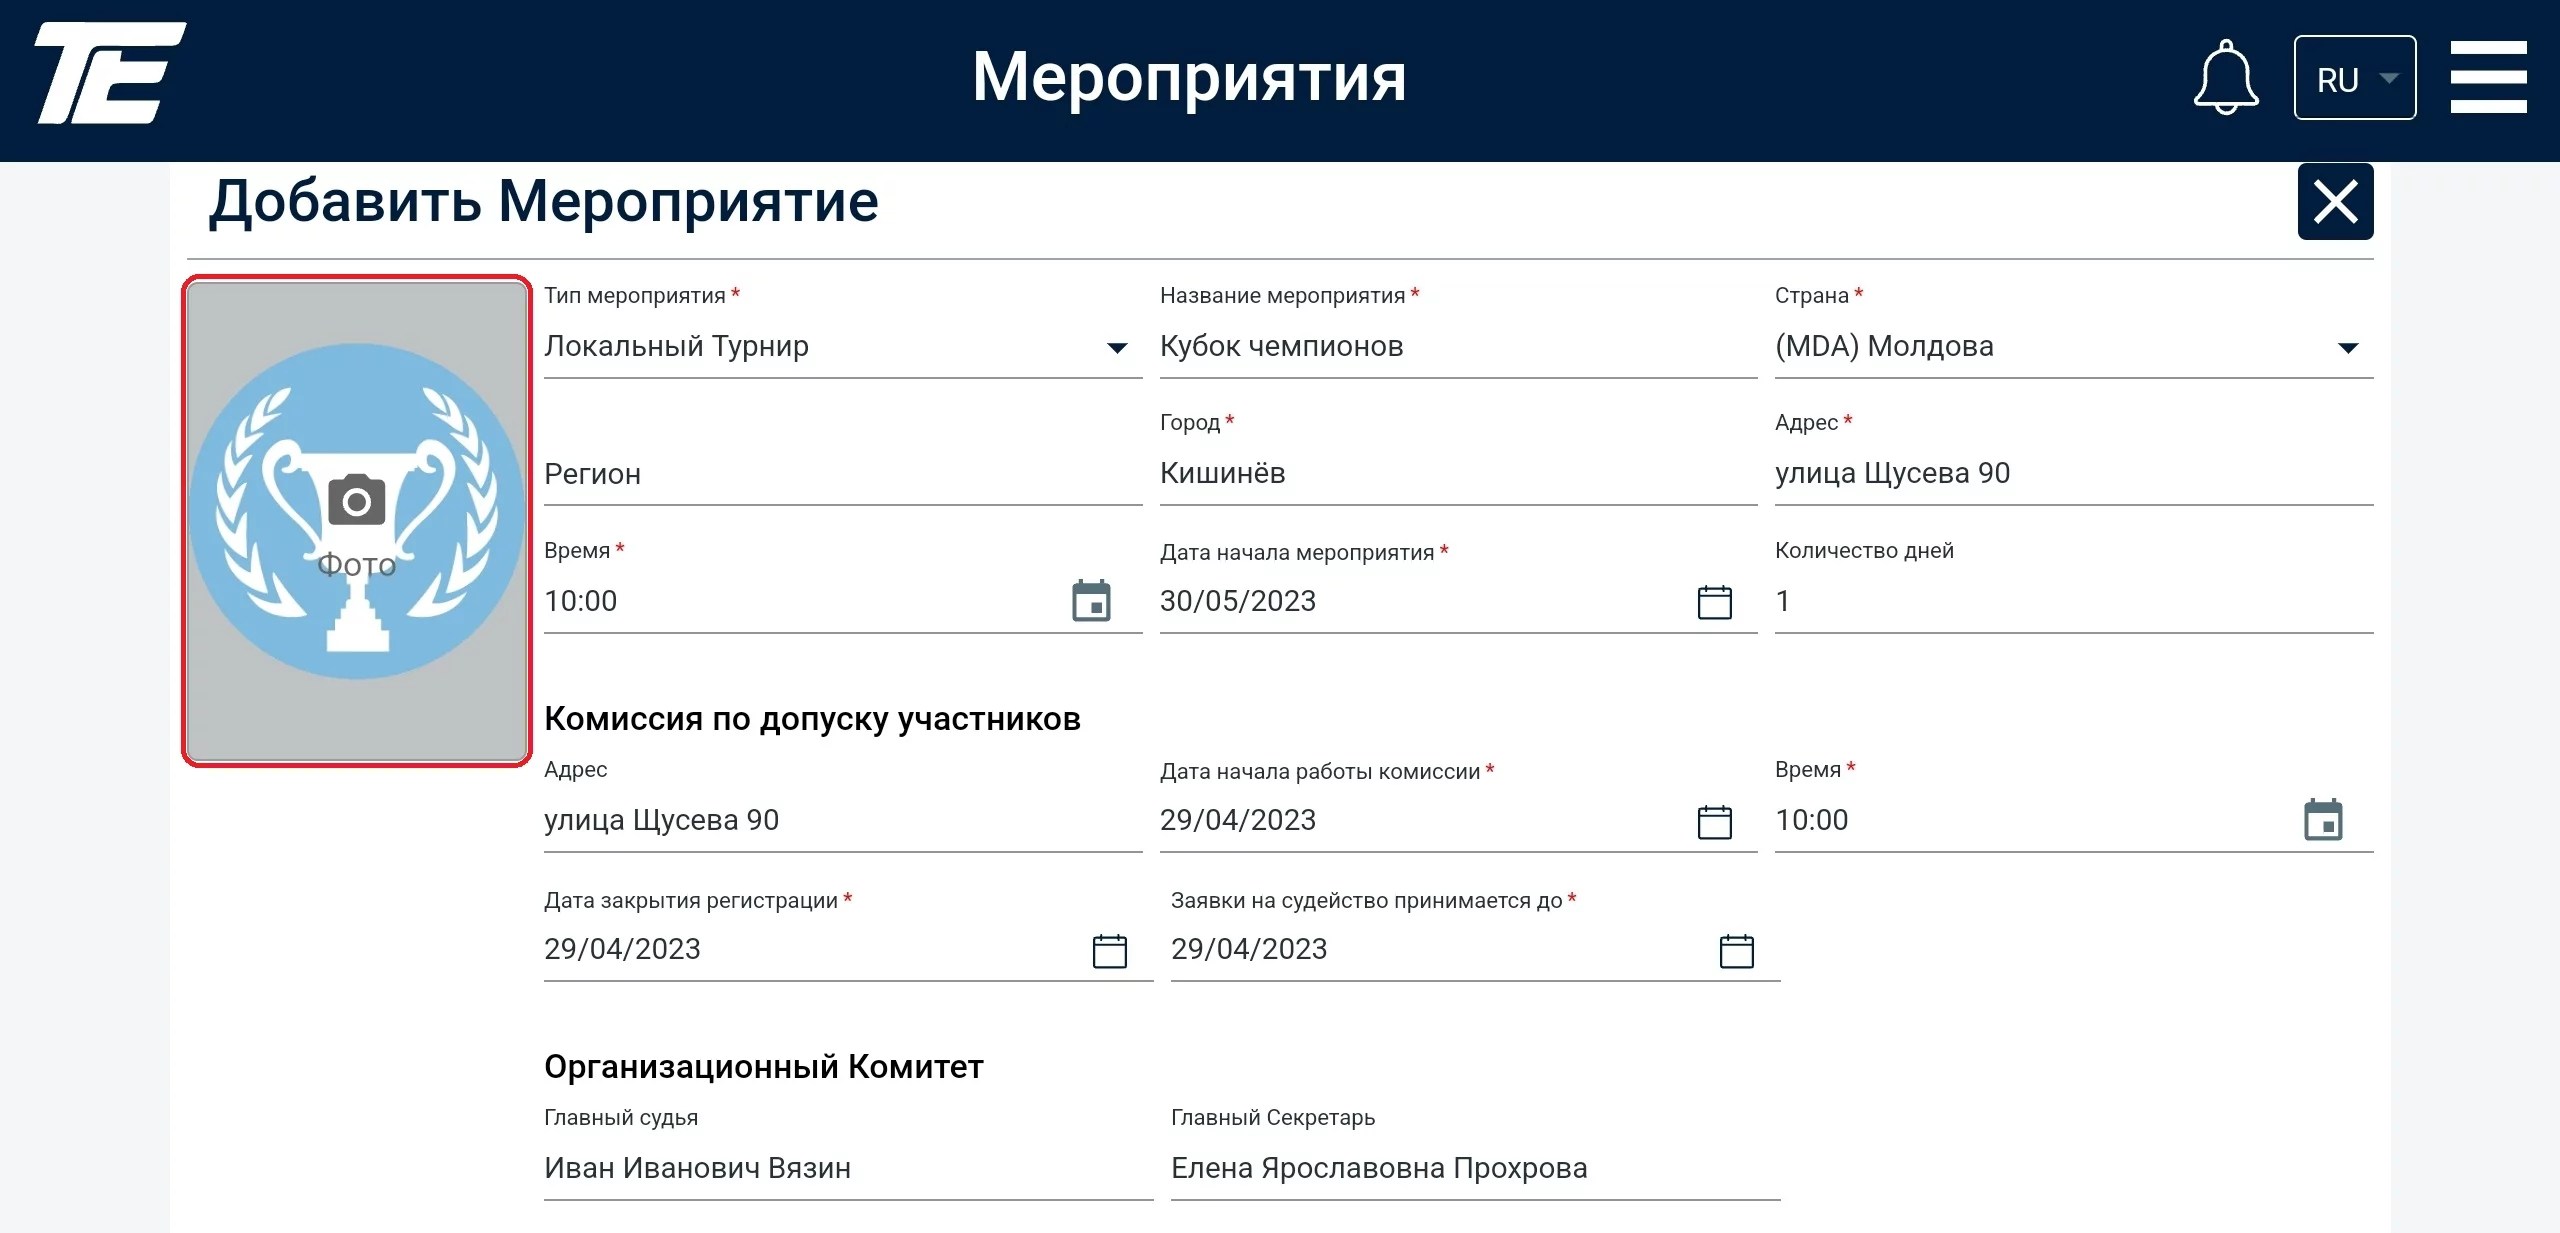
If all the data is filled in, the tournament can be saved.
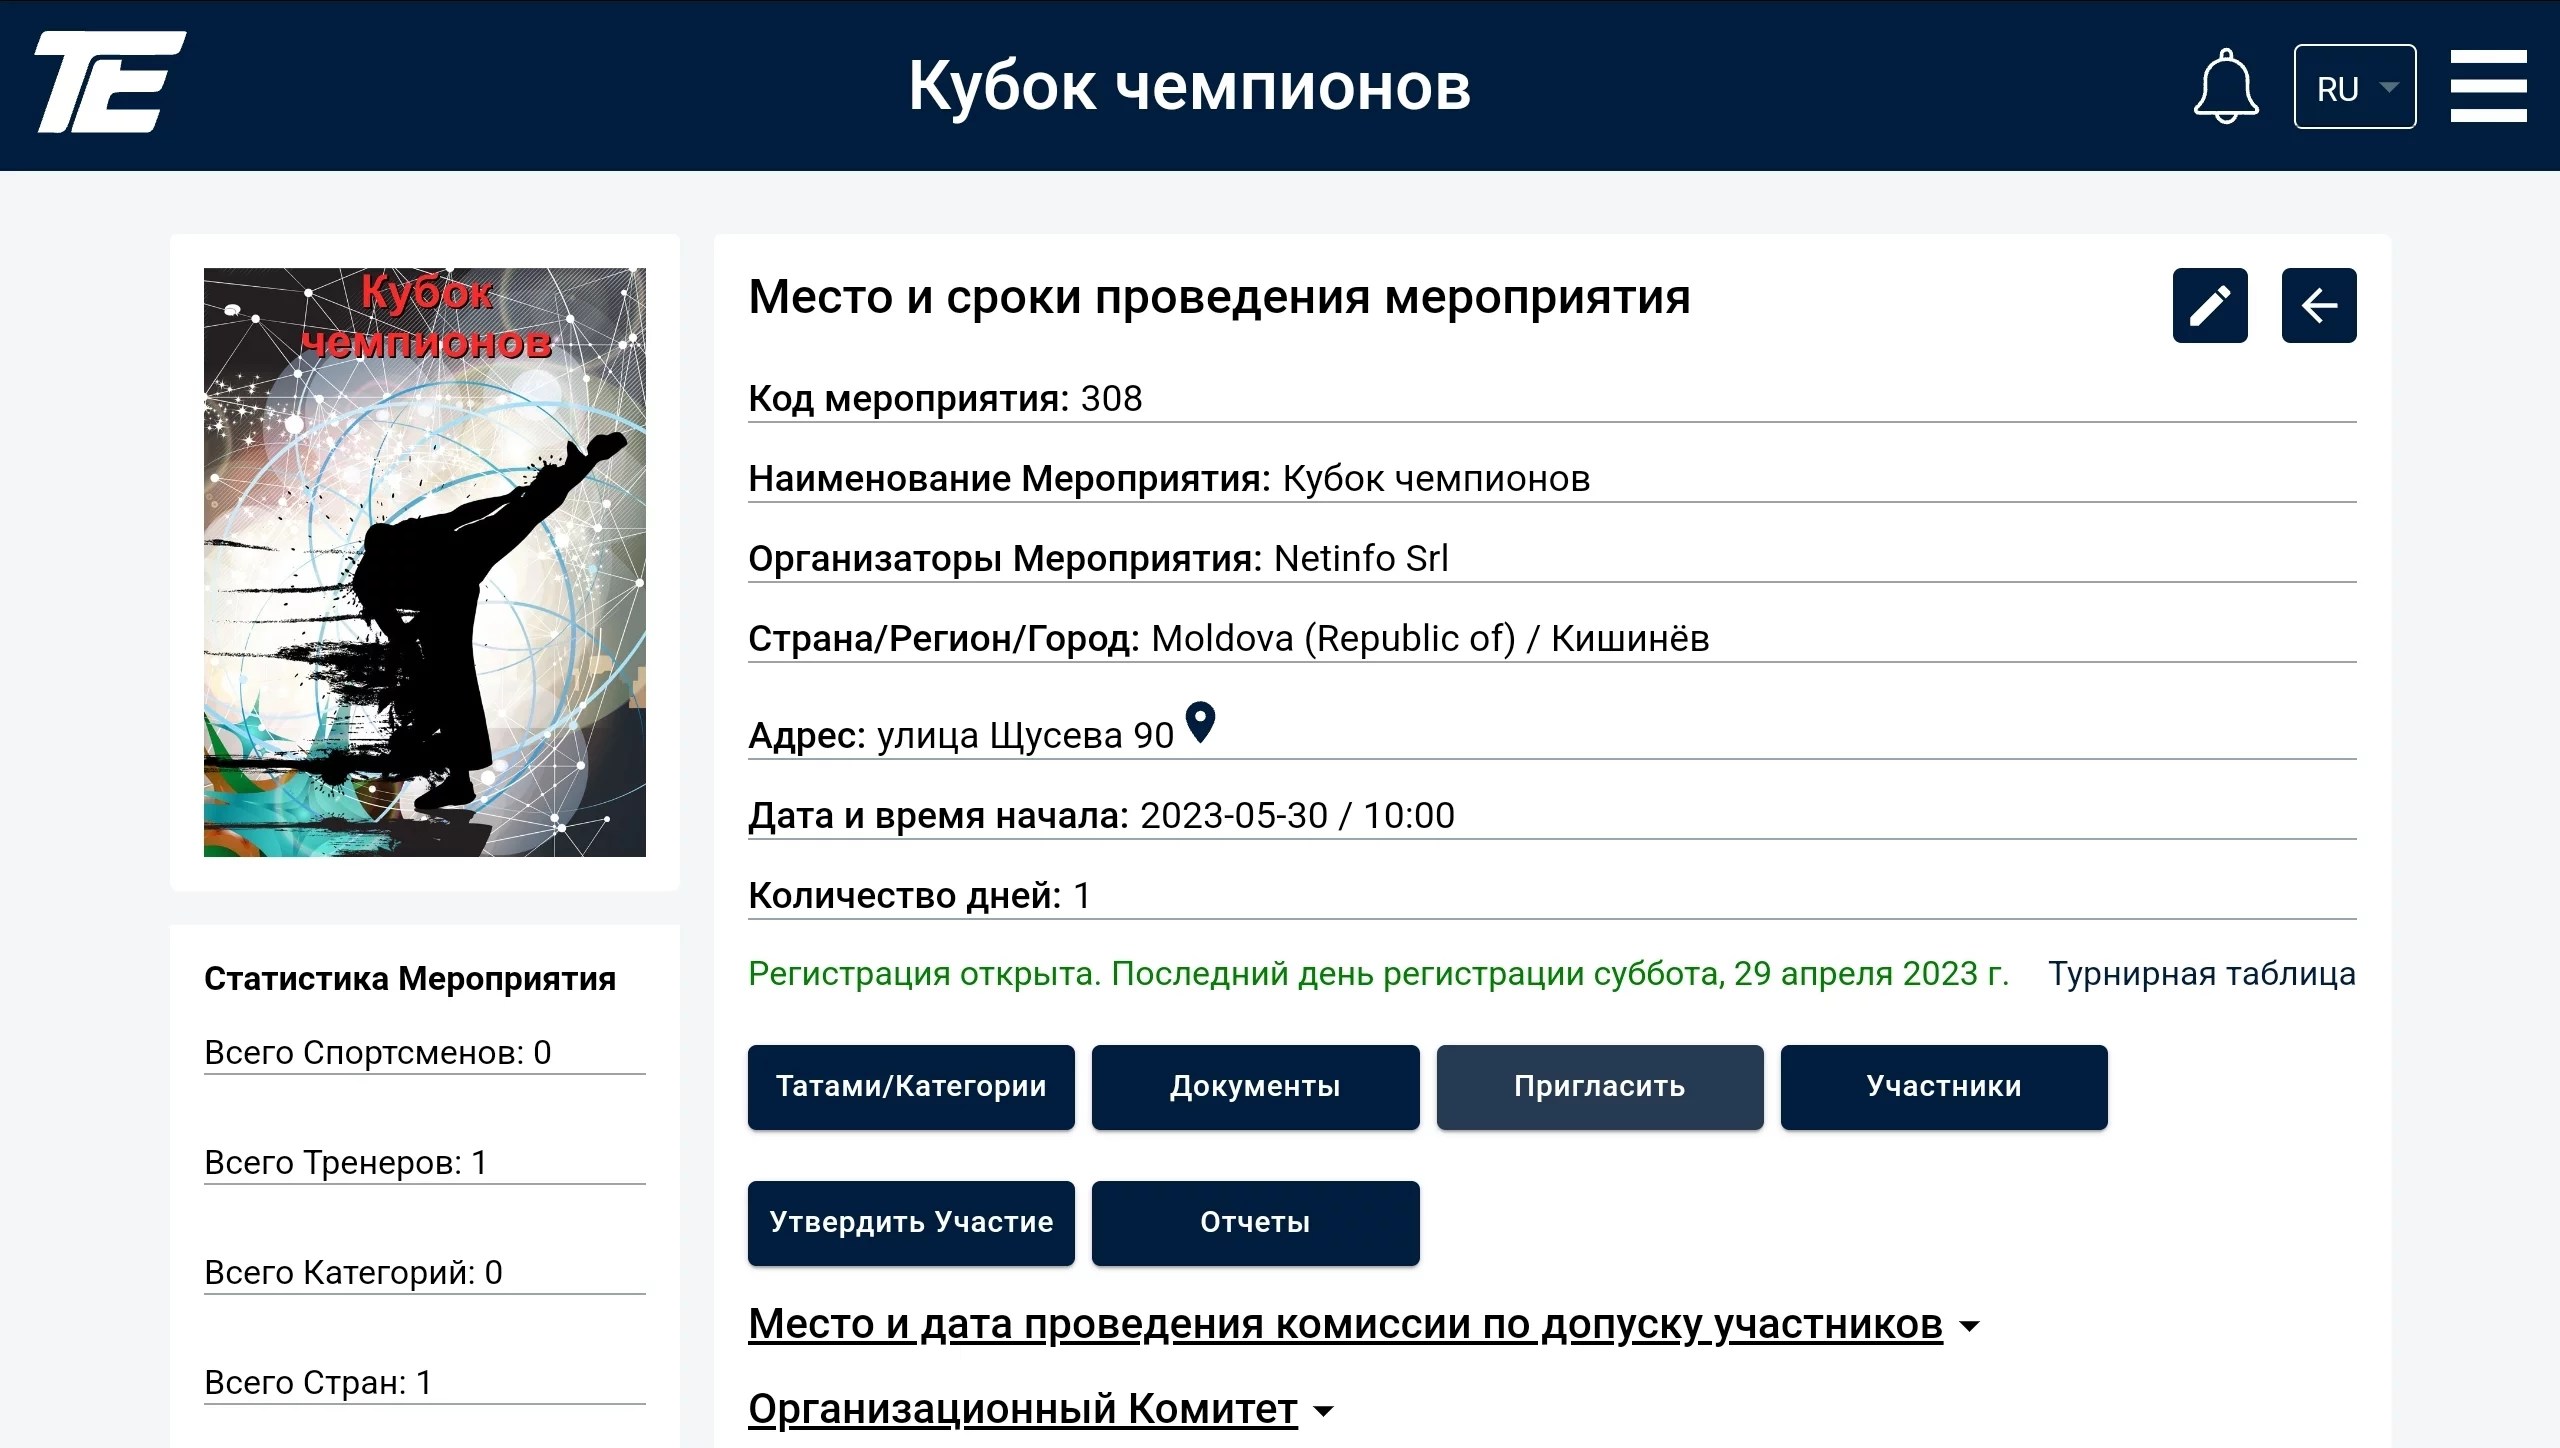
To assign tatami to the tournament, click the “Tatami/Categories” button.
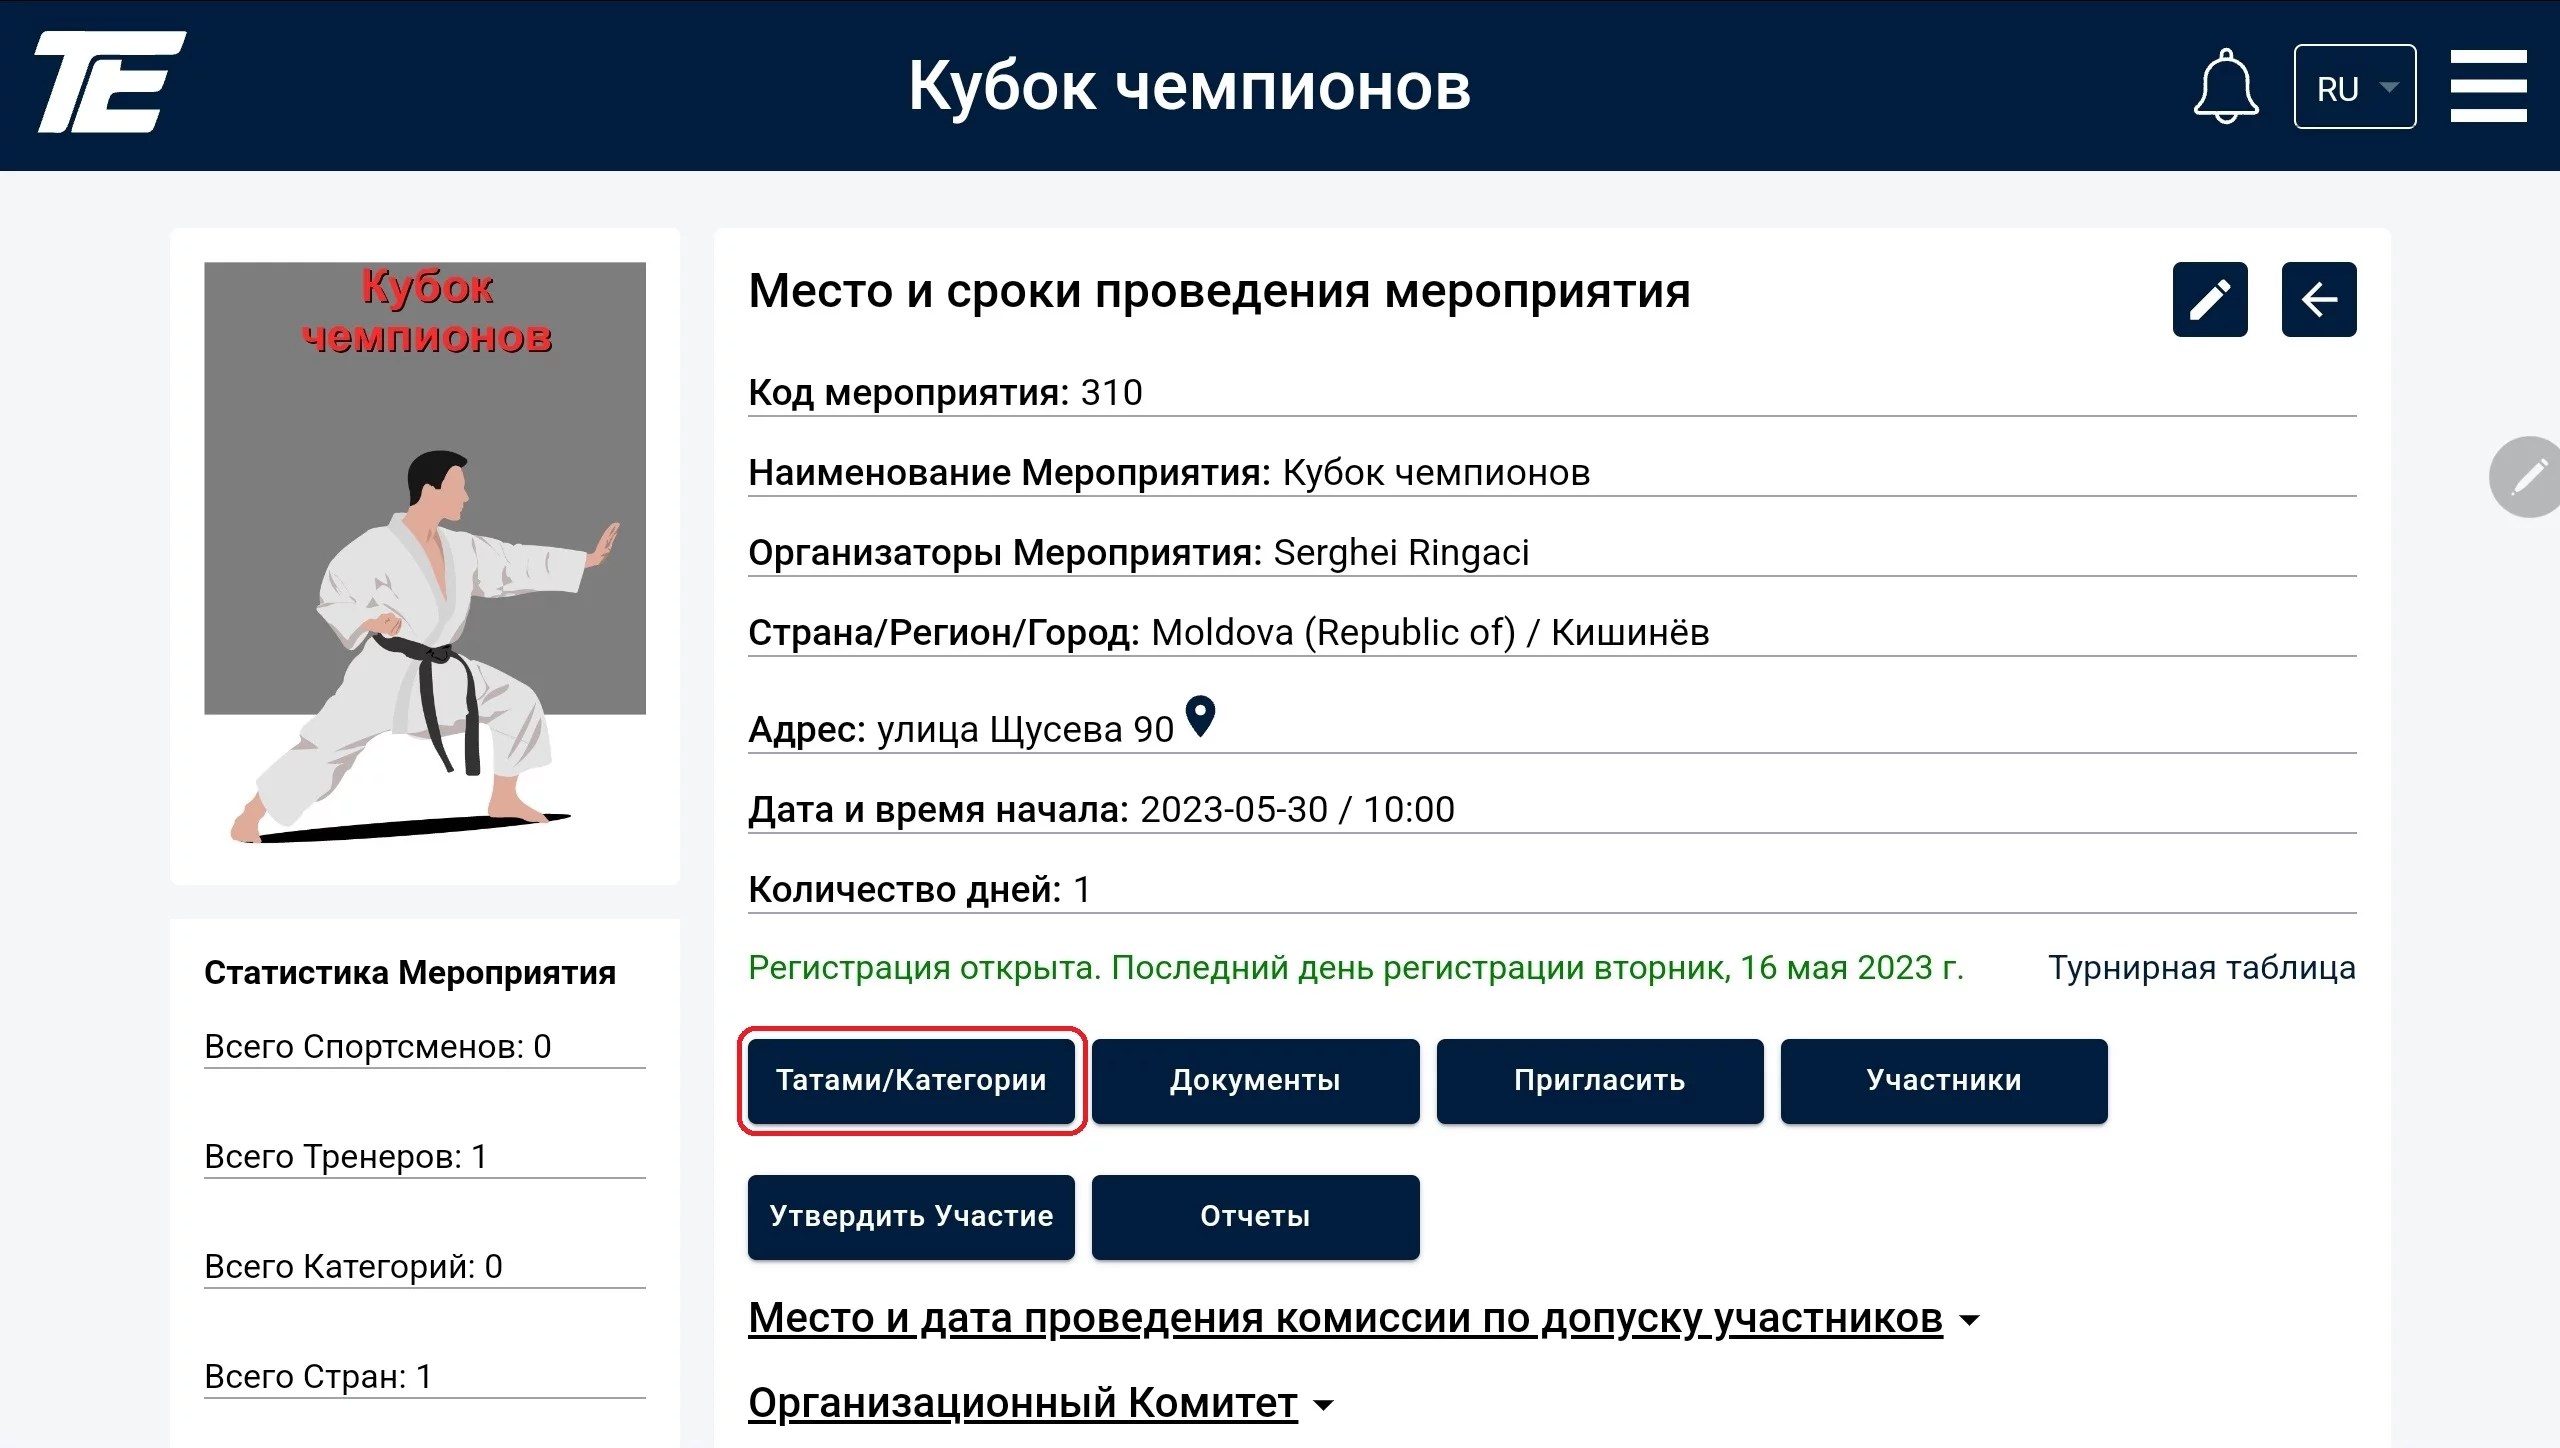
You can assign tatami and categories before the athletes are registered for the tournament. However, distributing categories among the tatami and participants among the categories is only possible once participants appear at the tournament.
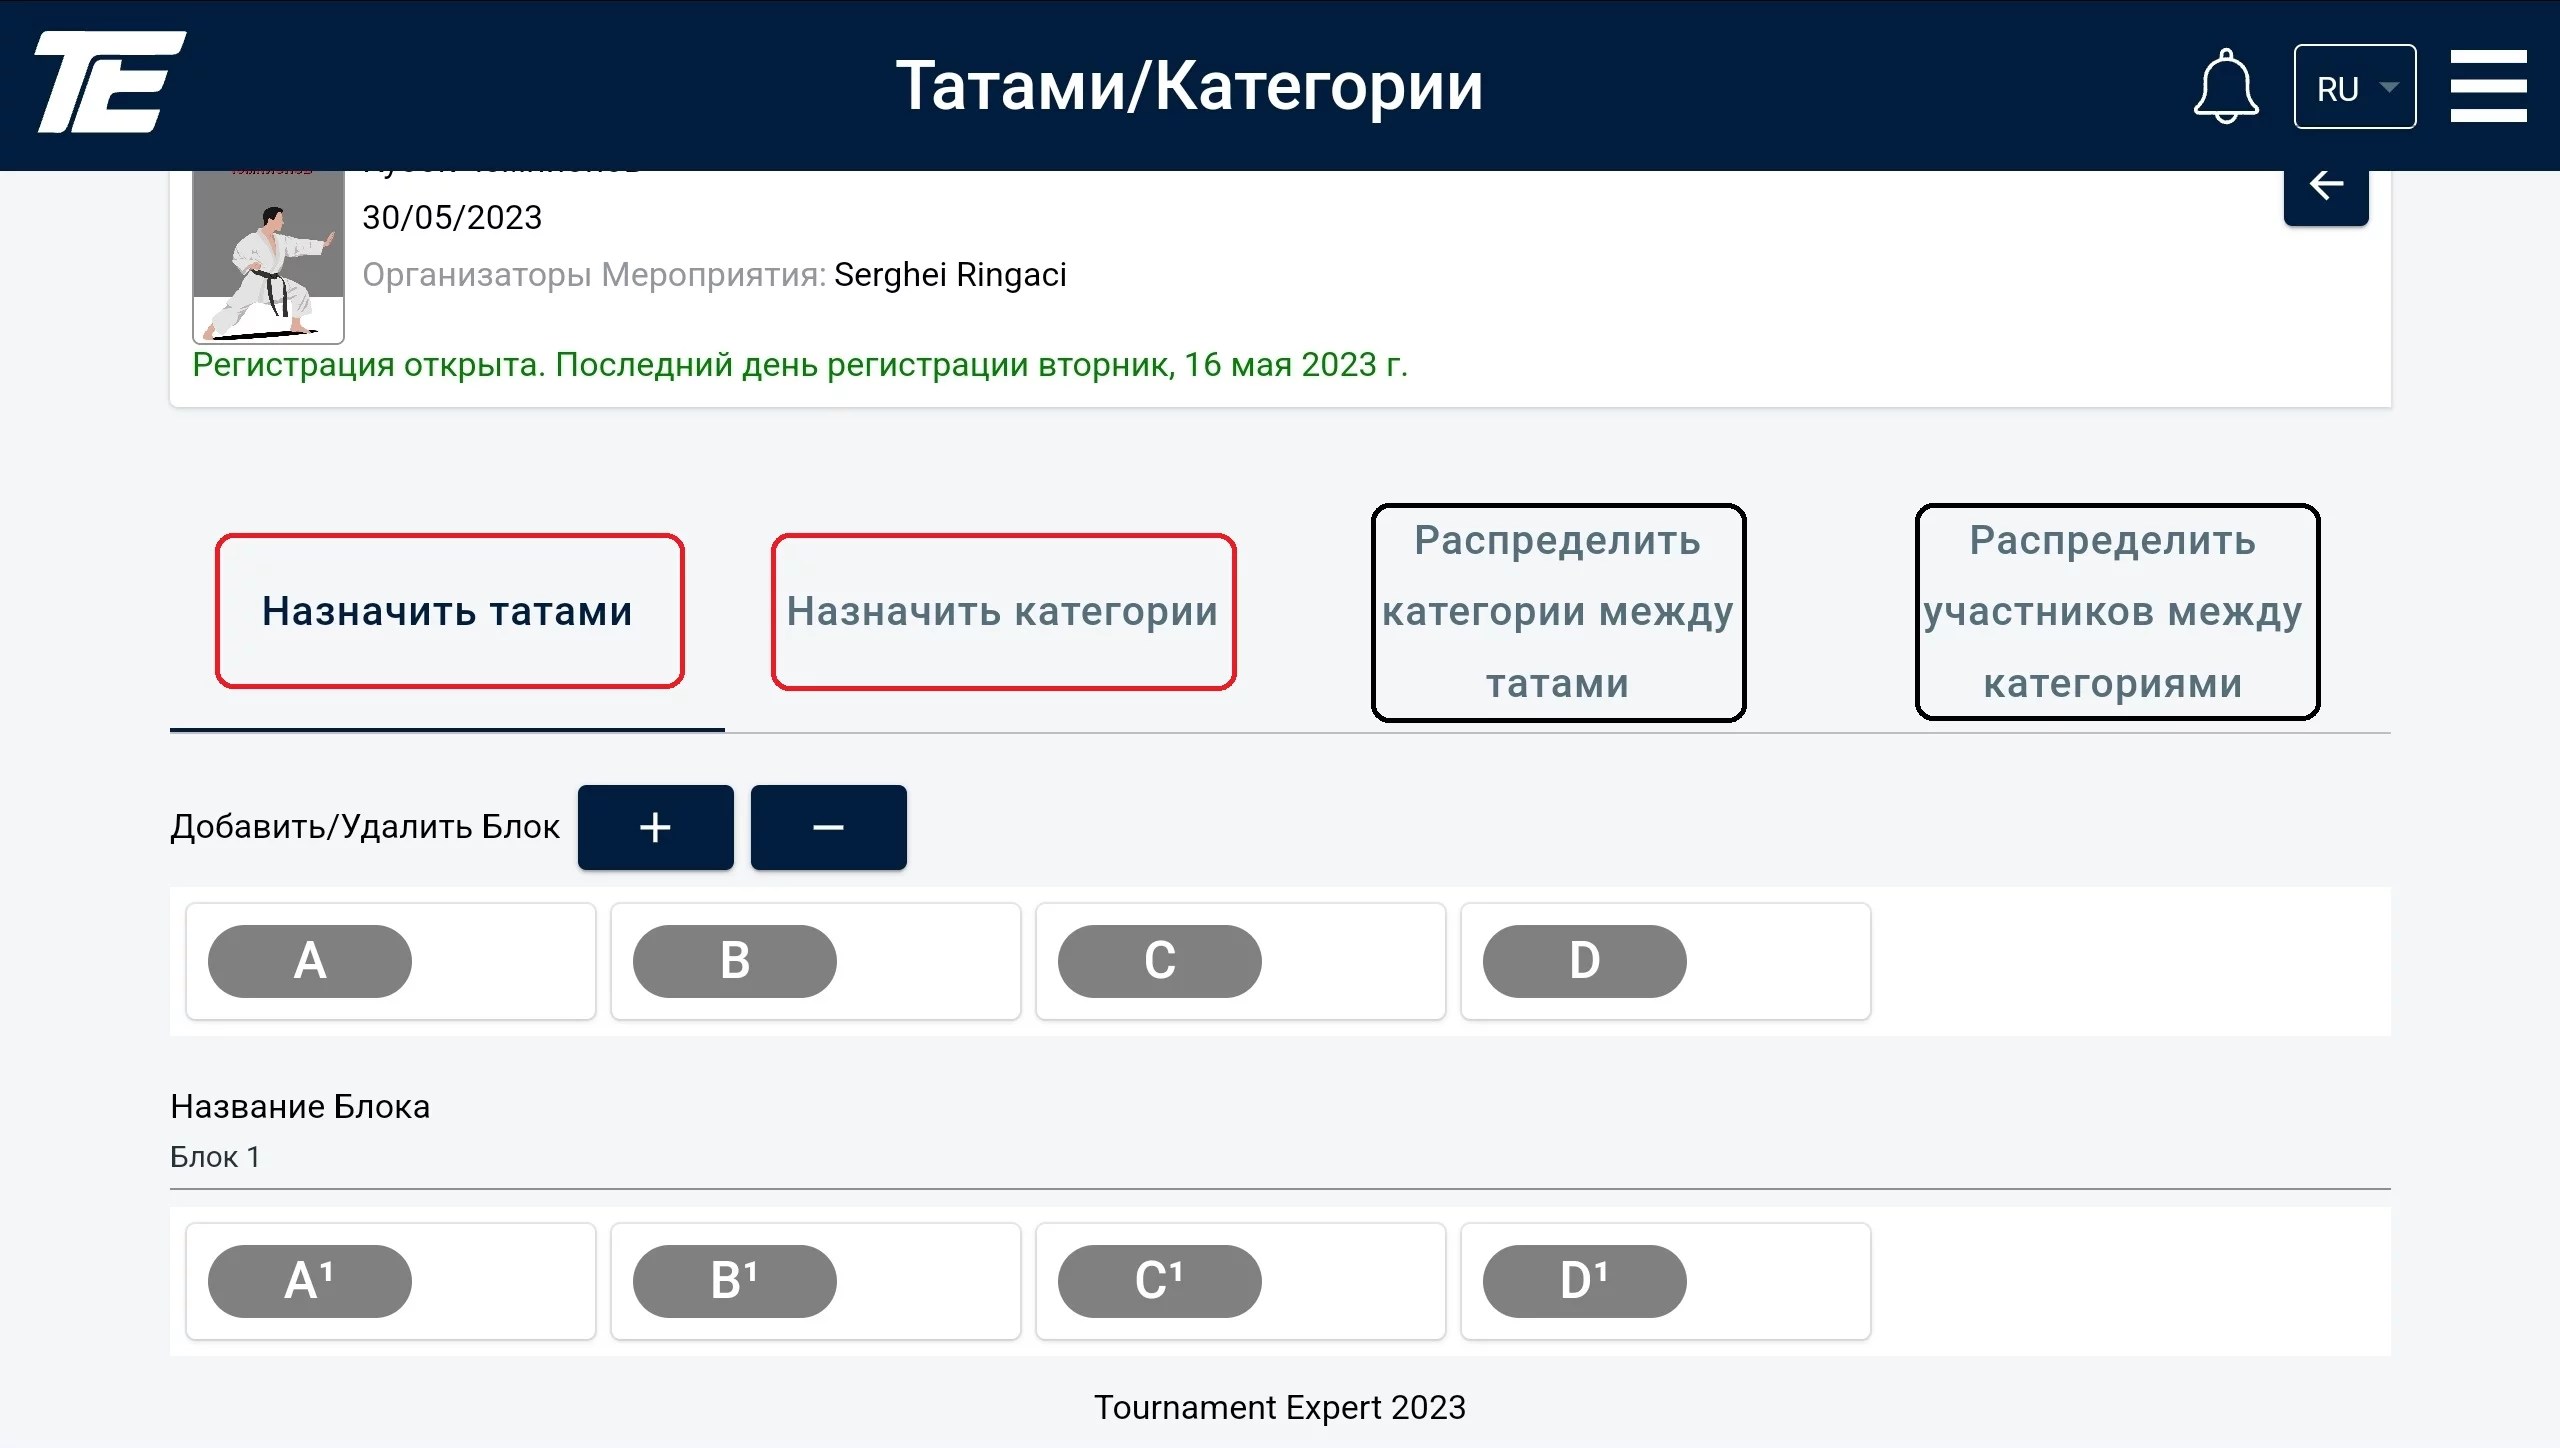
A tournament may have blocks or it may not.
A block is a set of tatami. We recommend using blocks when a single competition needs to be split into several stages for a number of reasons.
The maximum number of blocks for one tournament is 9.
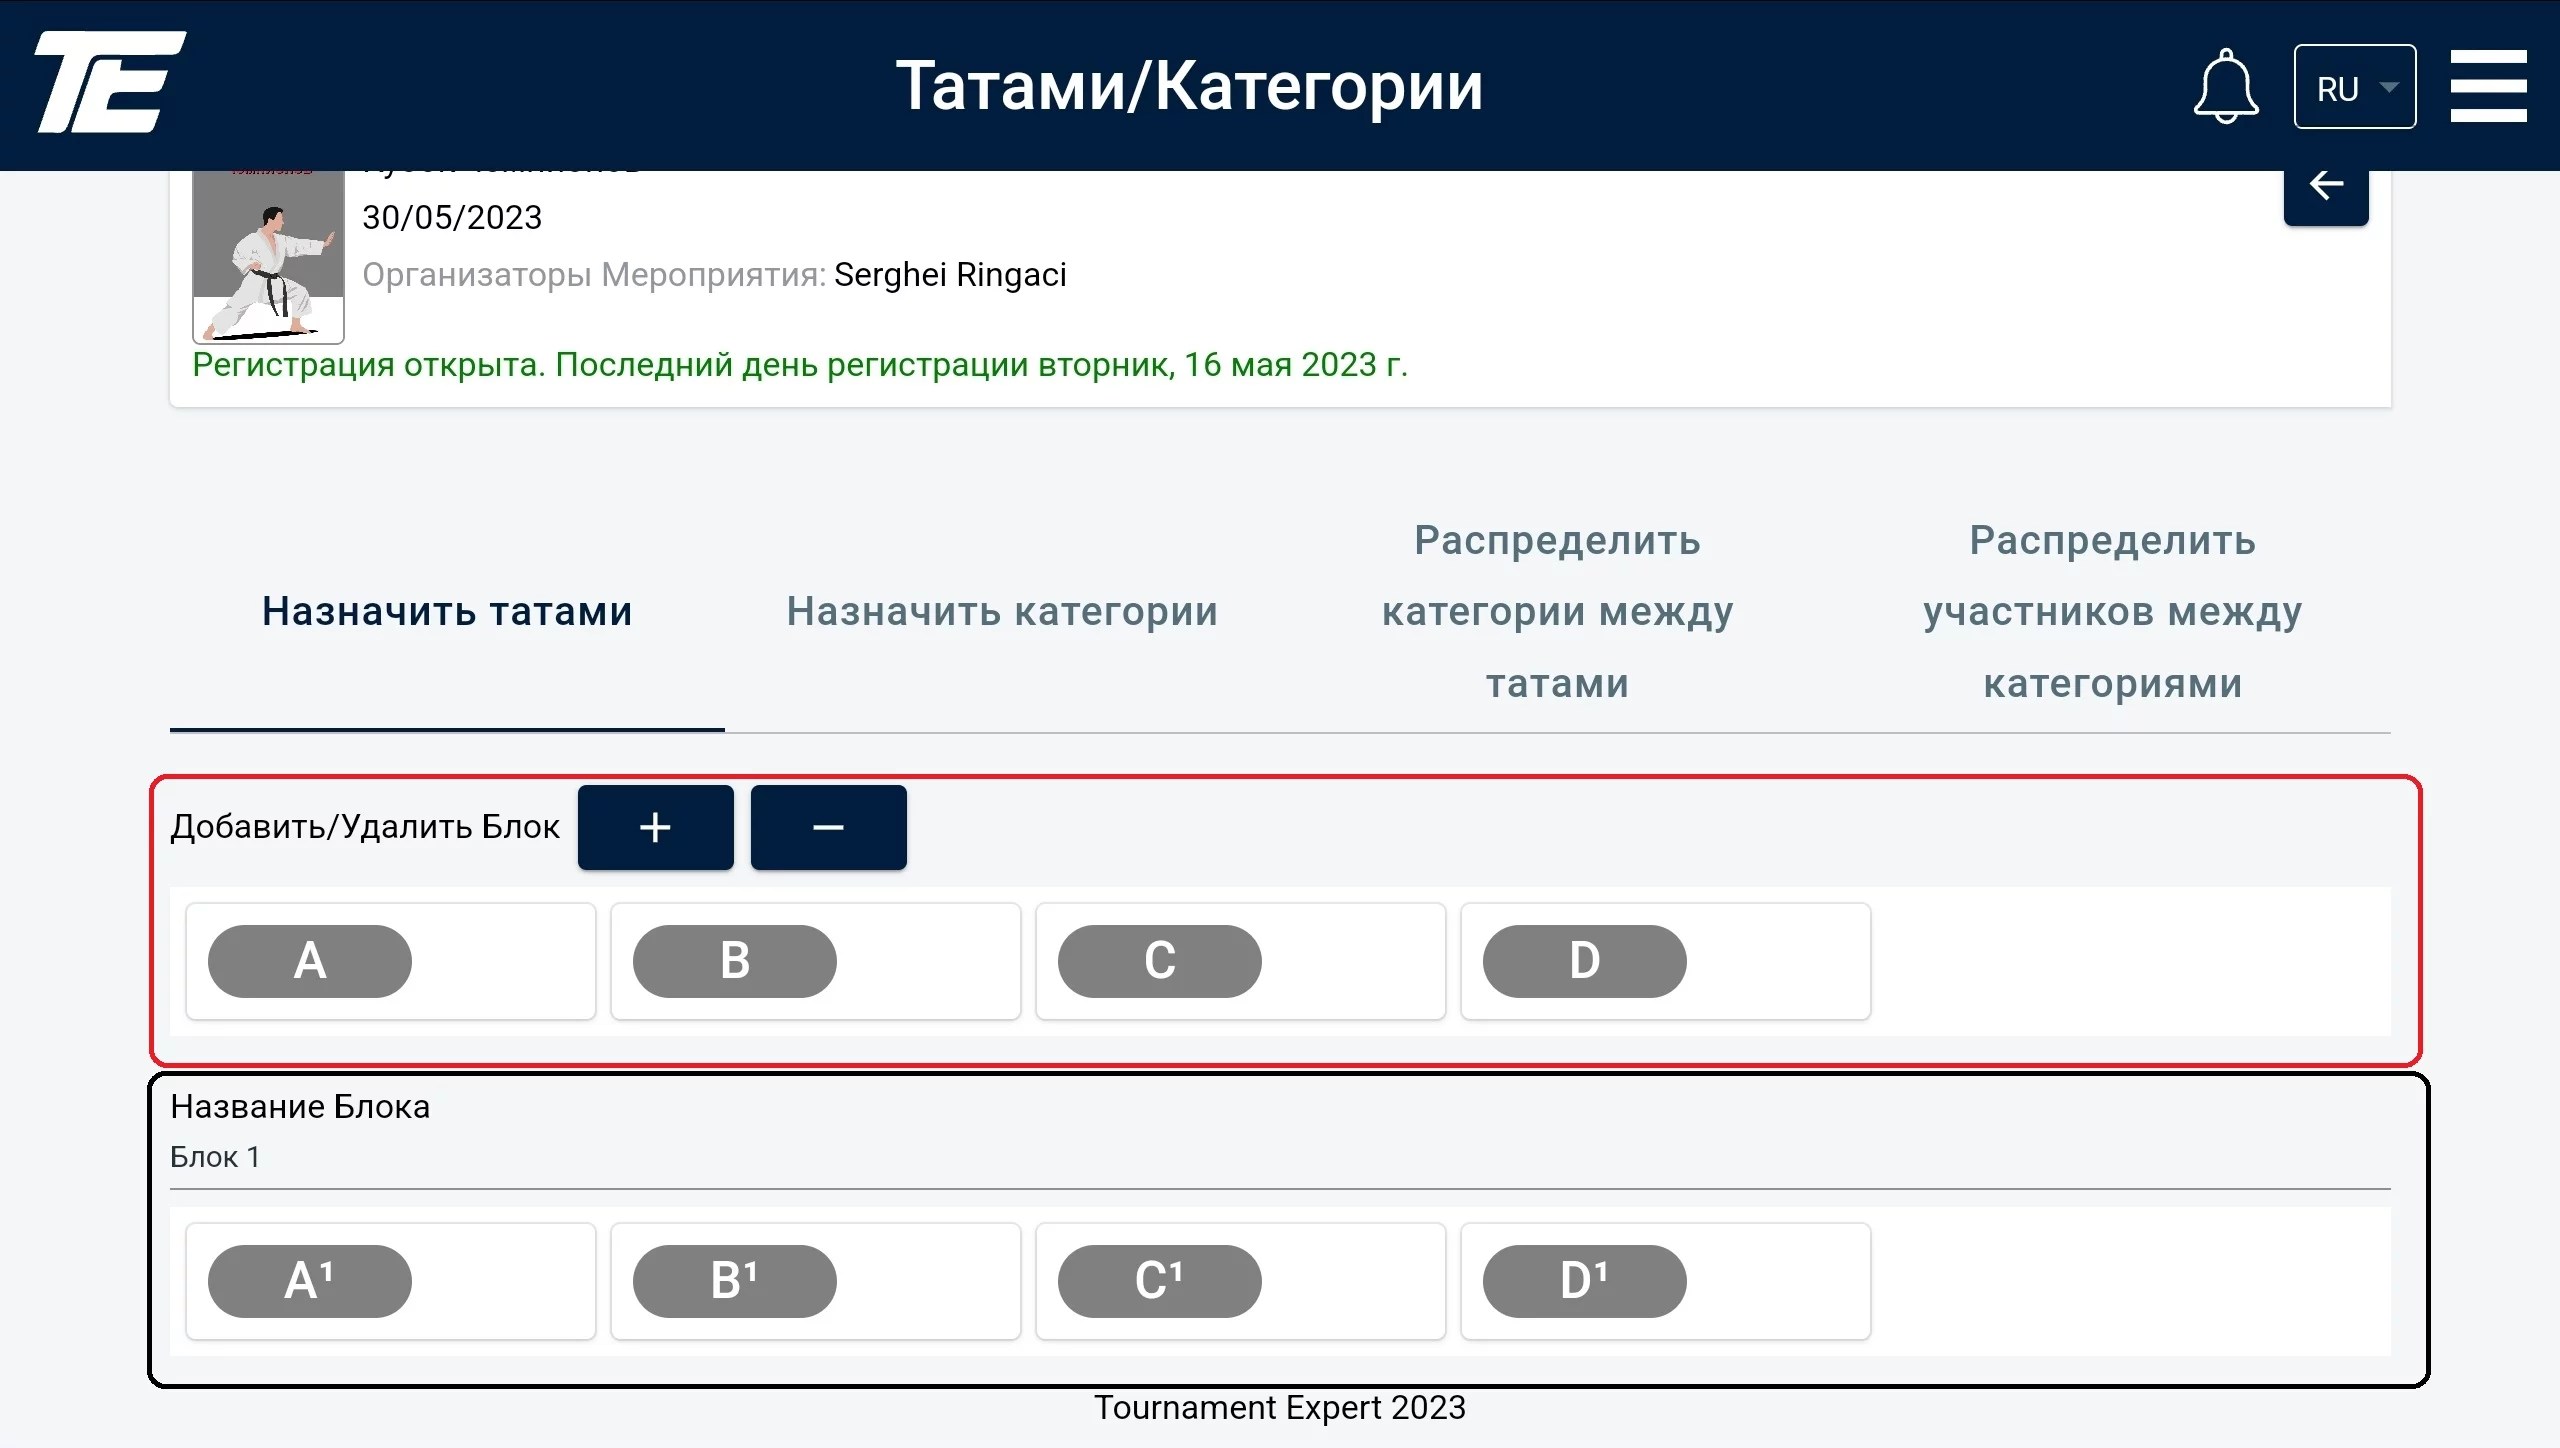
The first block (marked in red) is always available. If your tournament has no blocks and all matches run one after another, you only need to specify the number of tatami at the tournament.
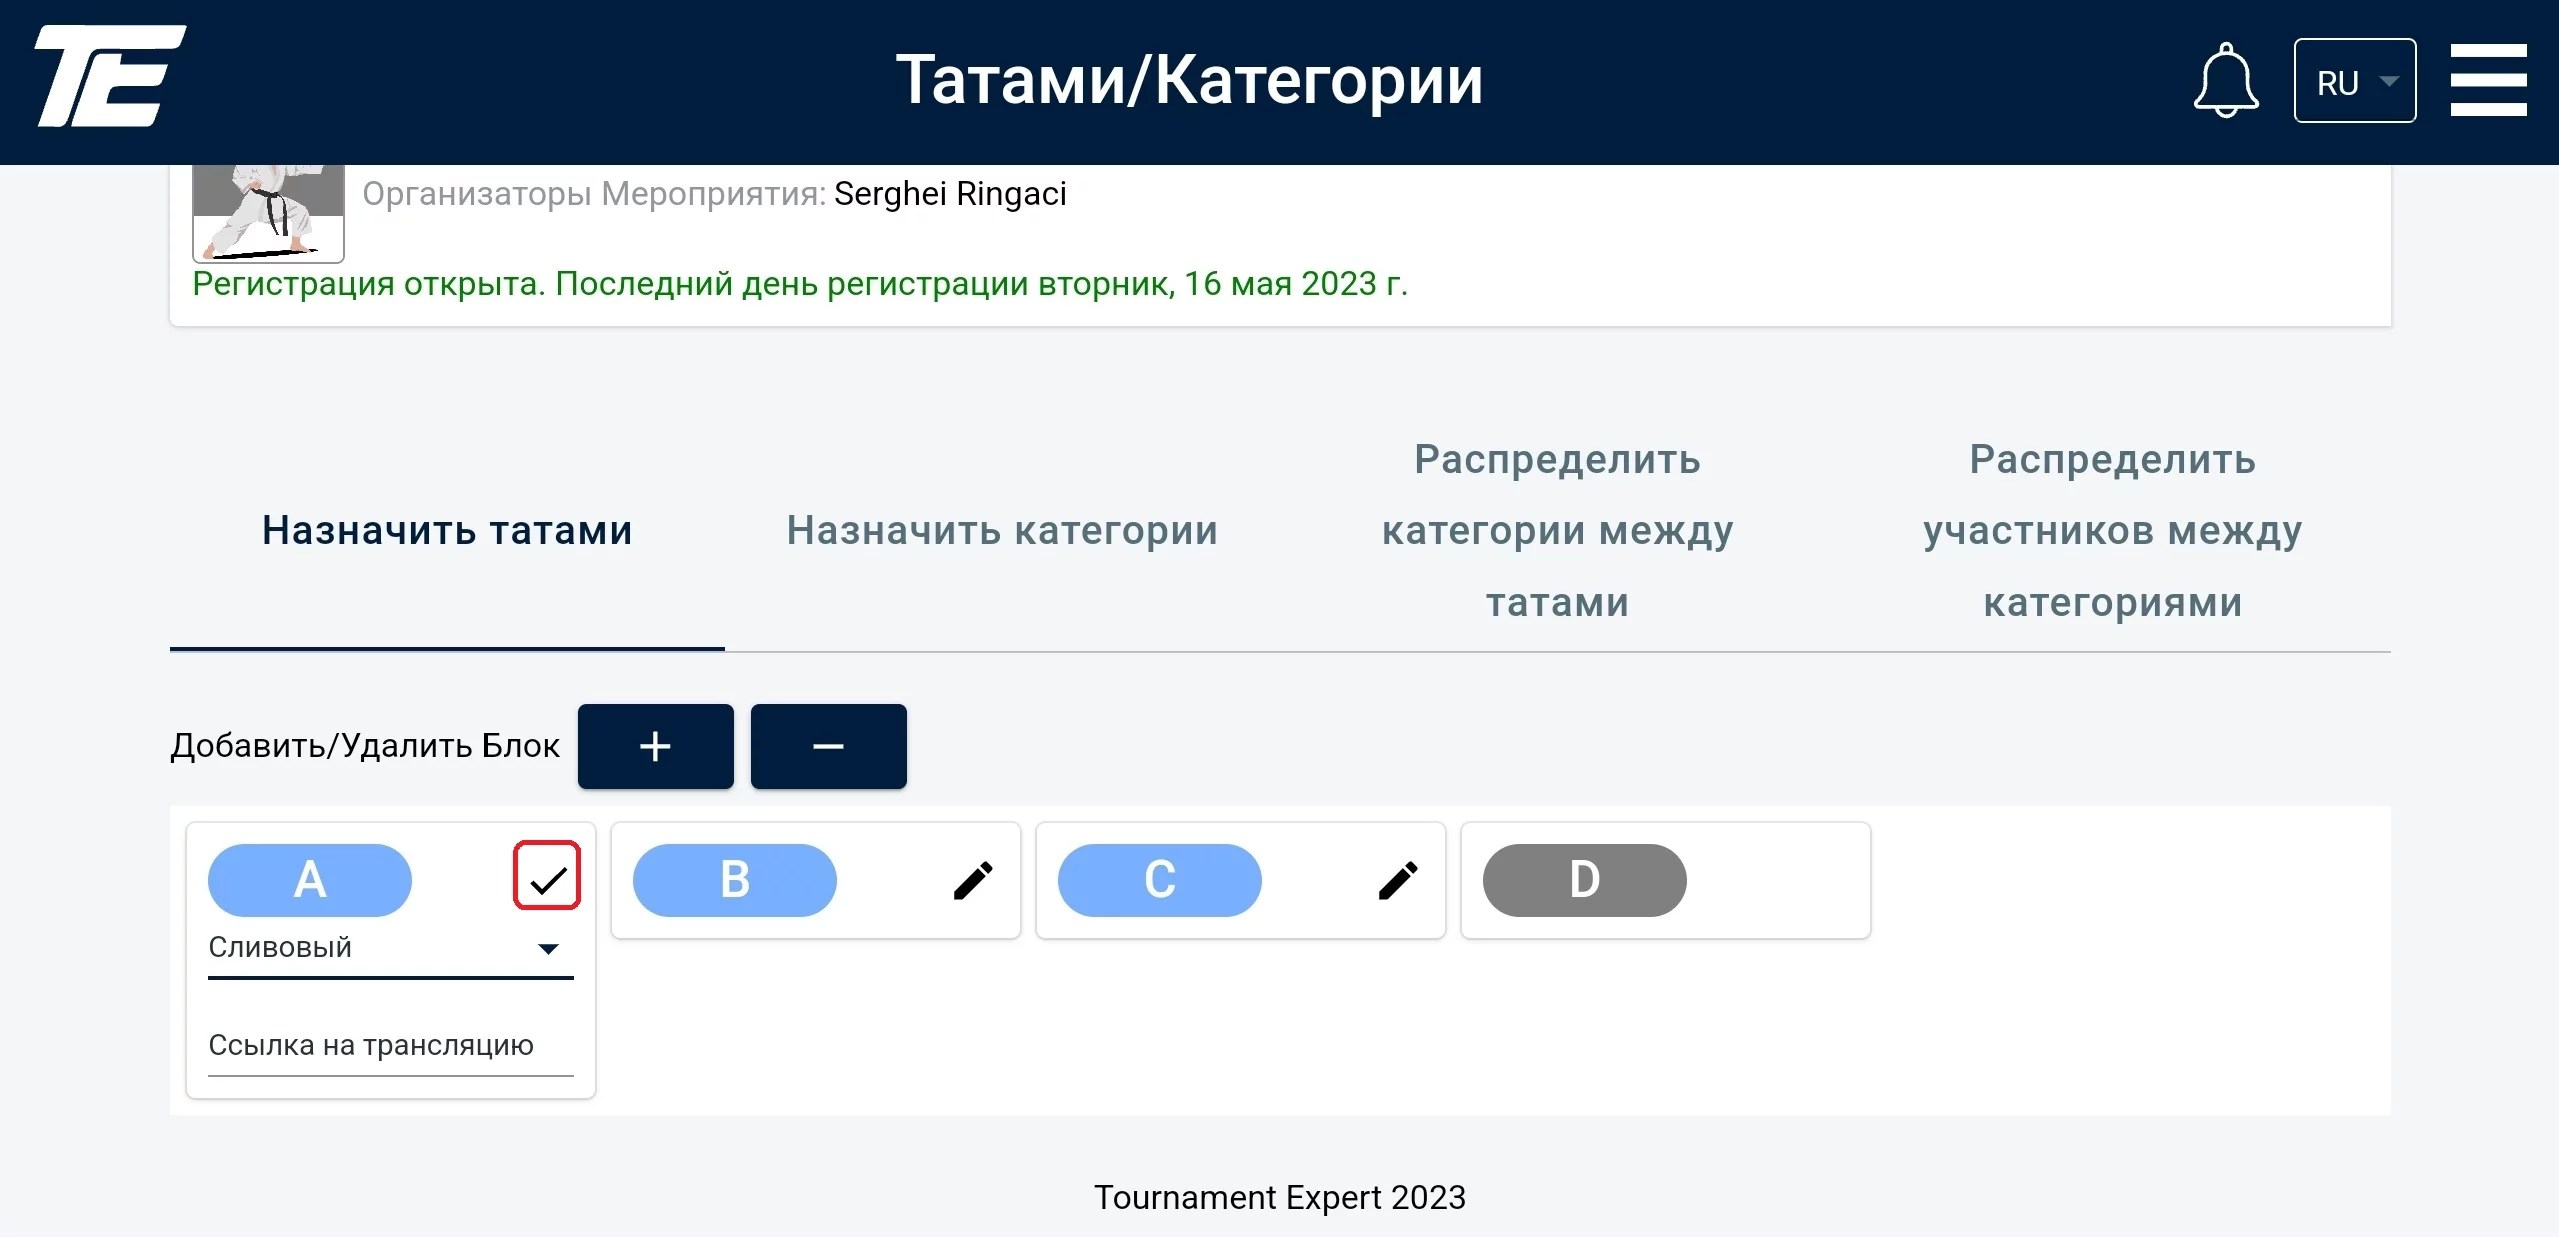
A color can be set for each tatami, which will then be used for the information board and the video broadcast.
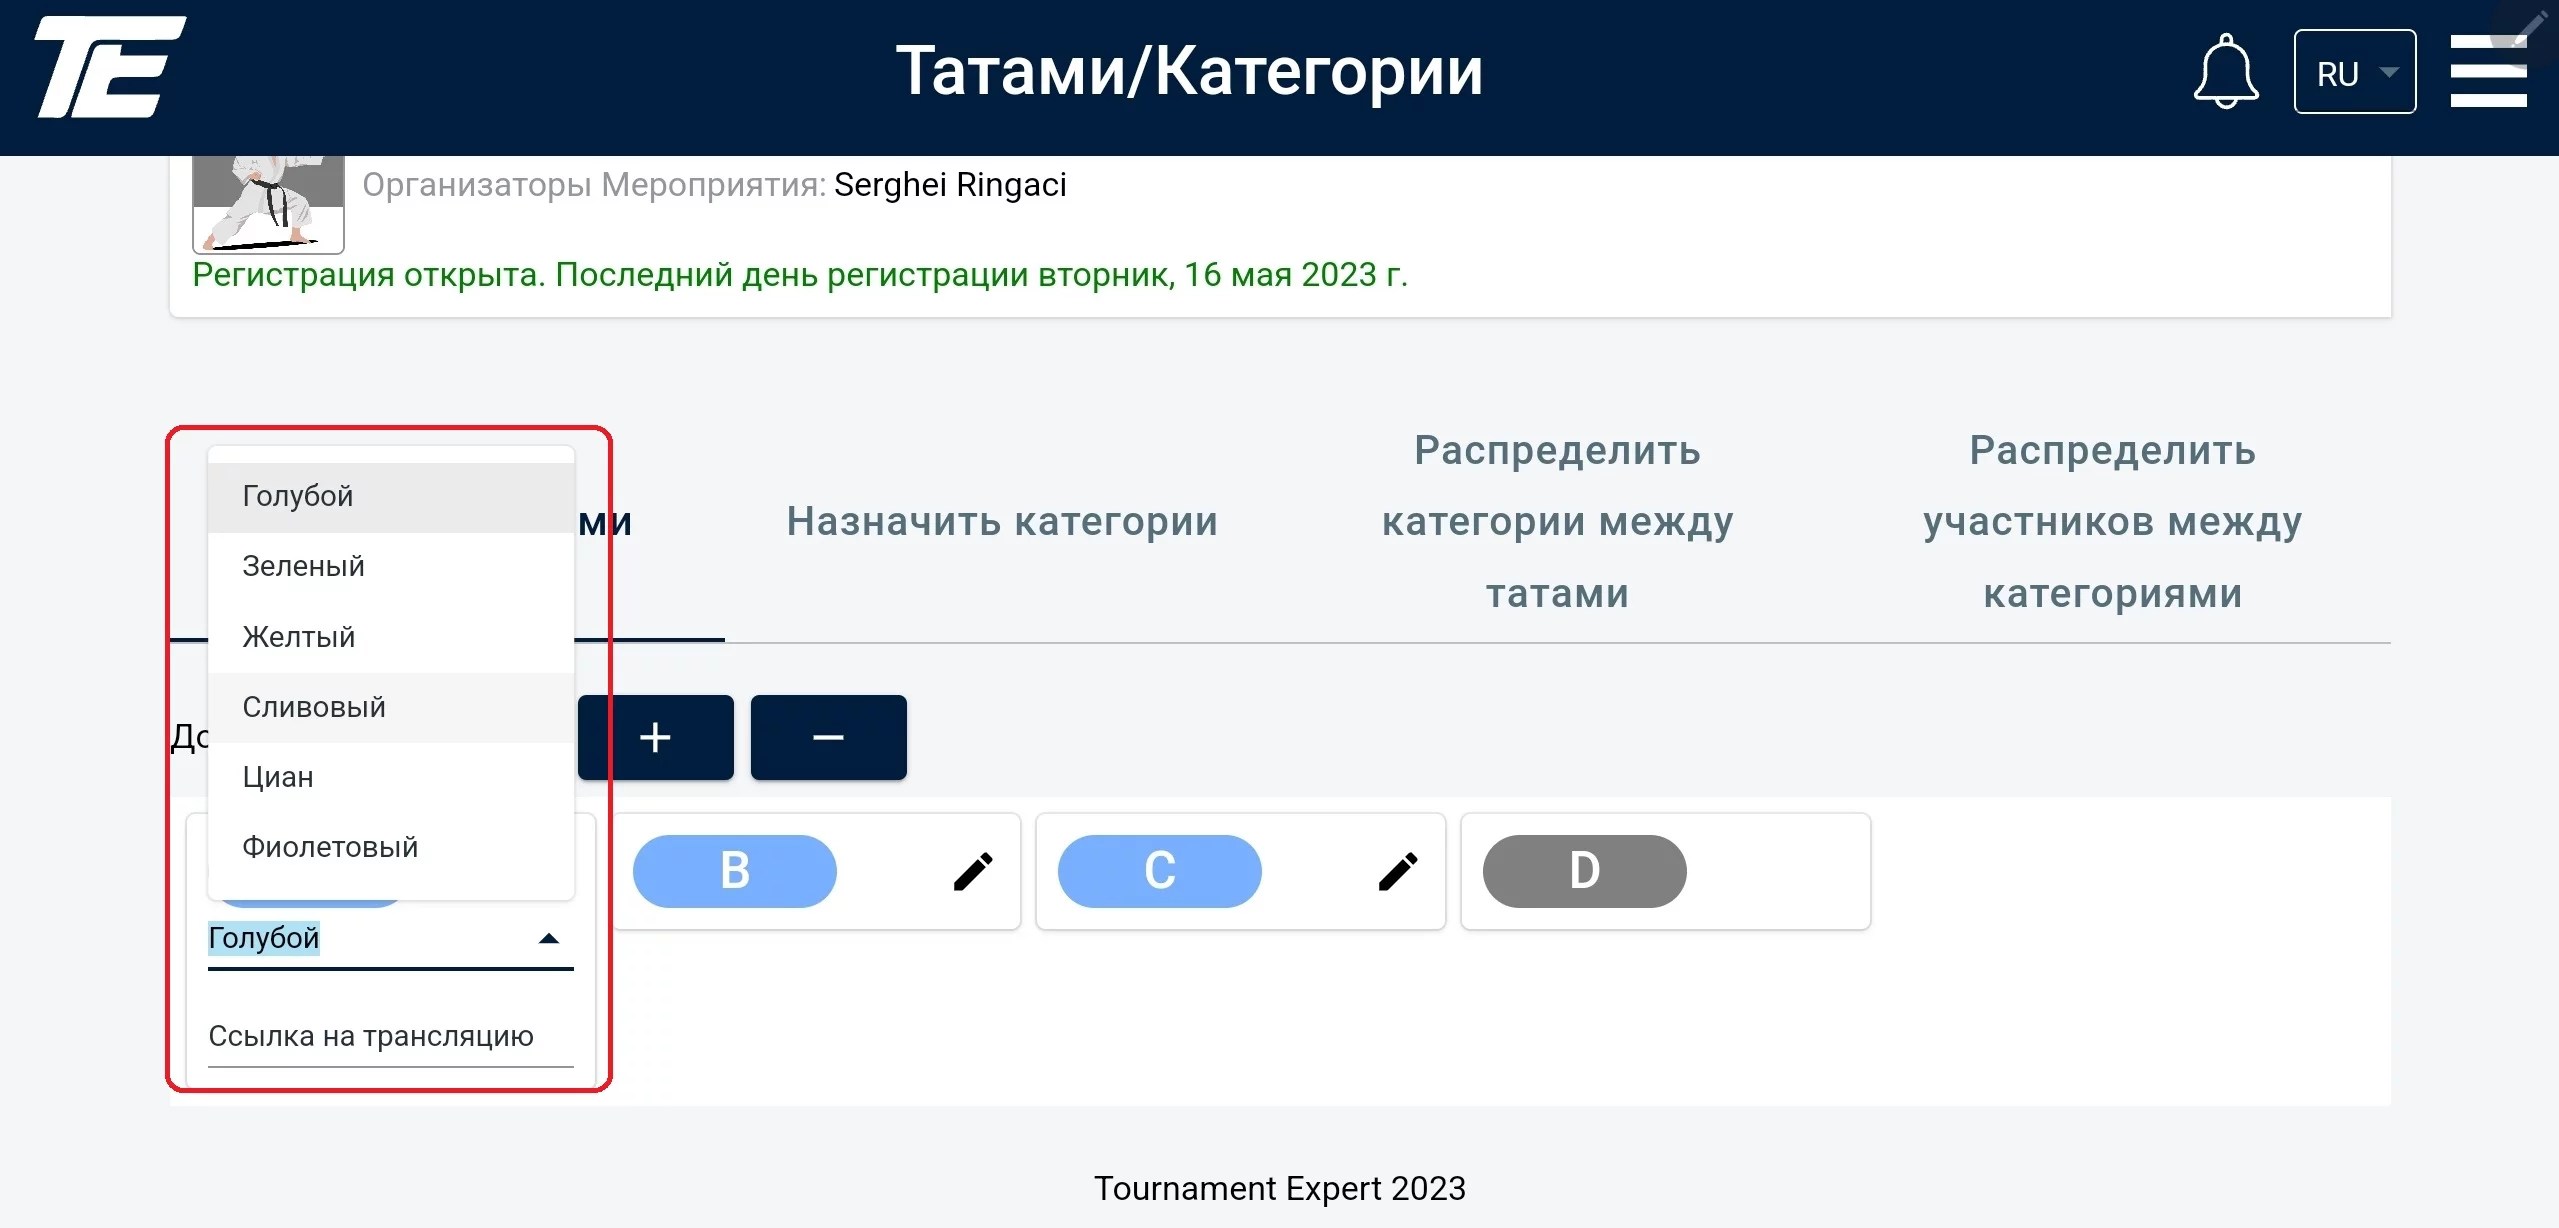
To do this, select the desired color from the list and click the check mark.
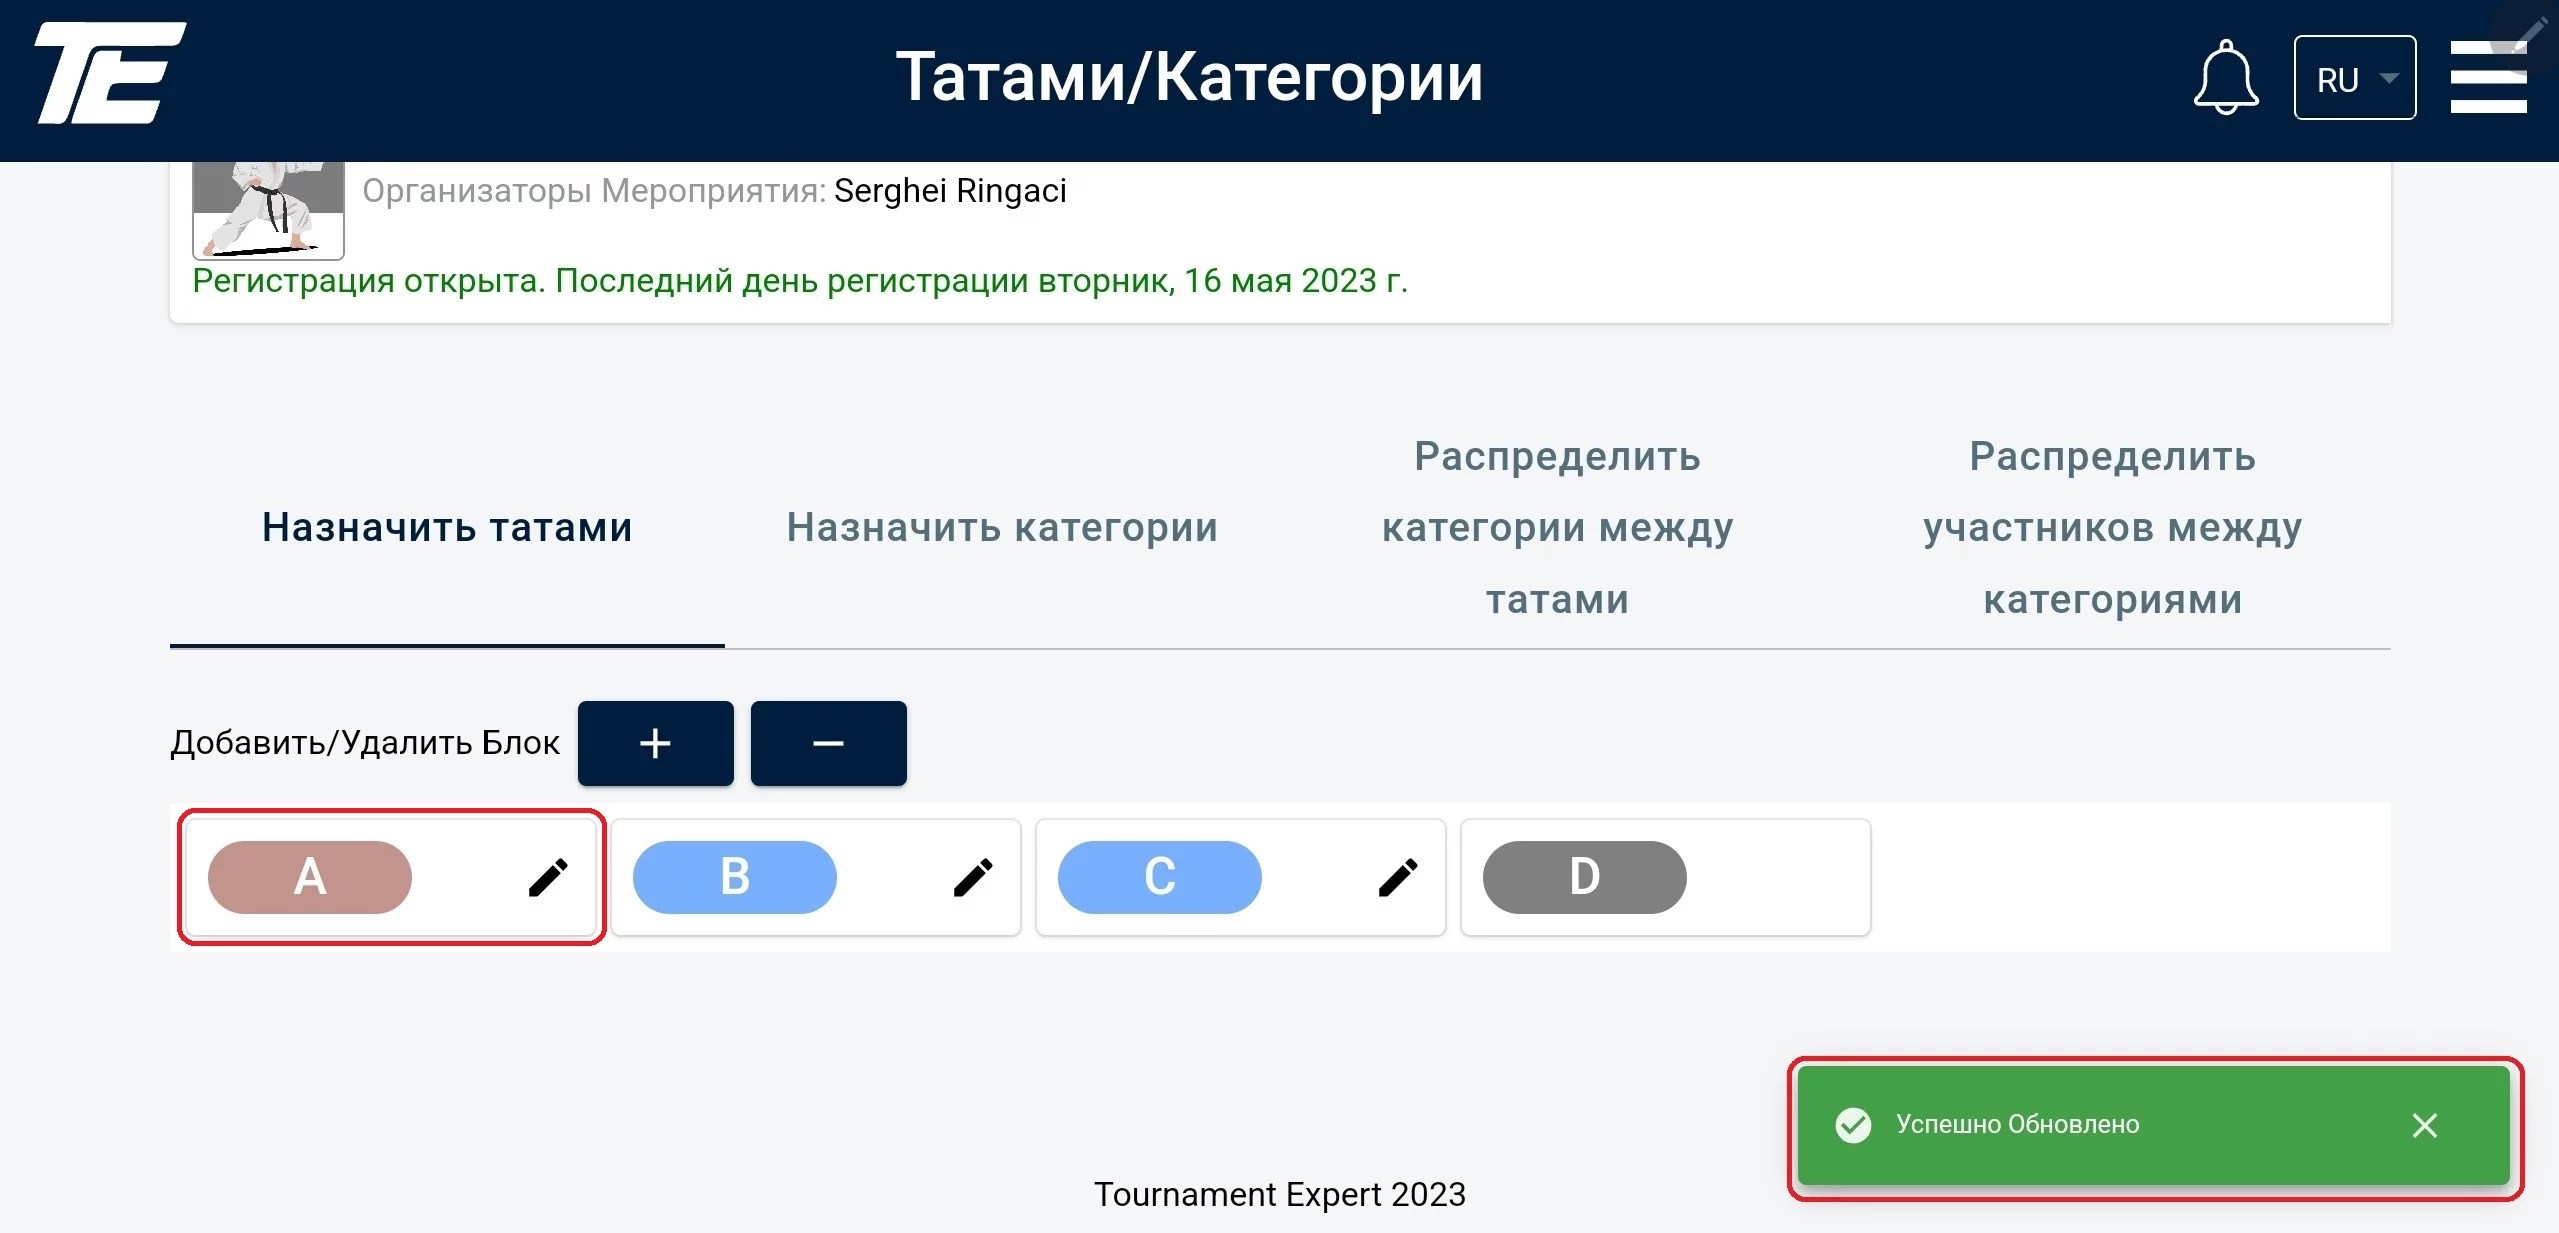
After that the tatami color should change, and a successful update notification will appear in the bottom right corner.
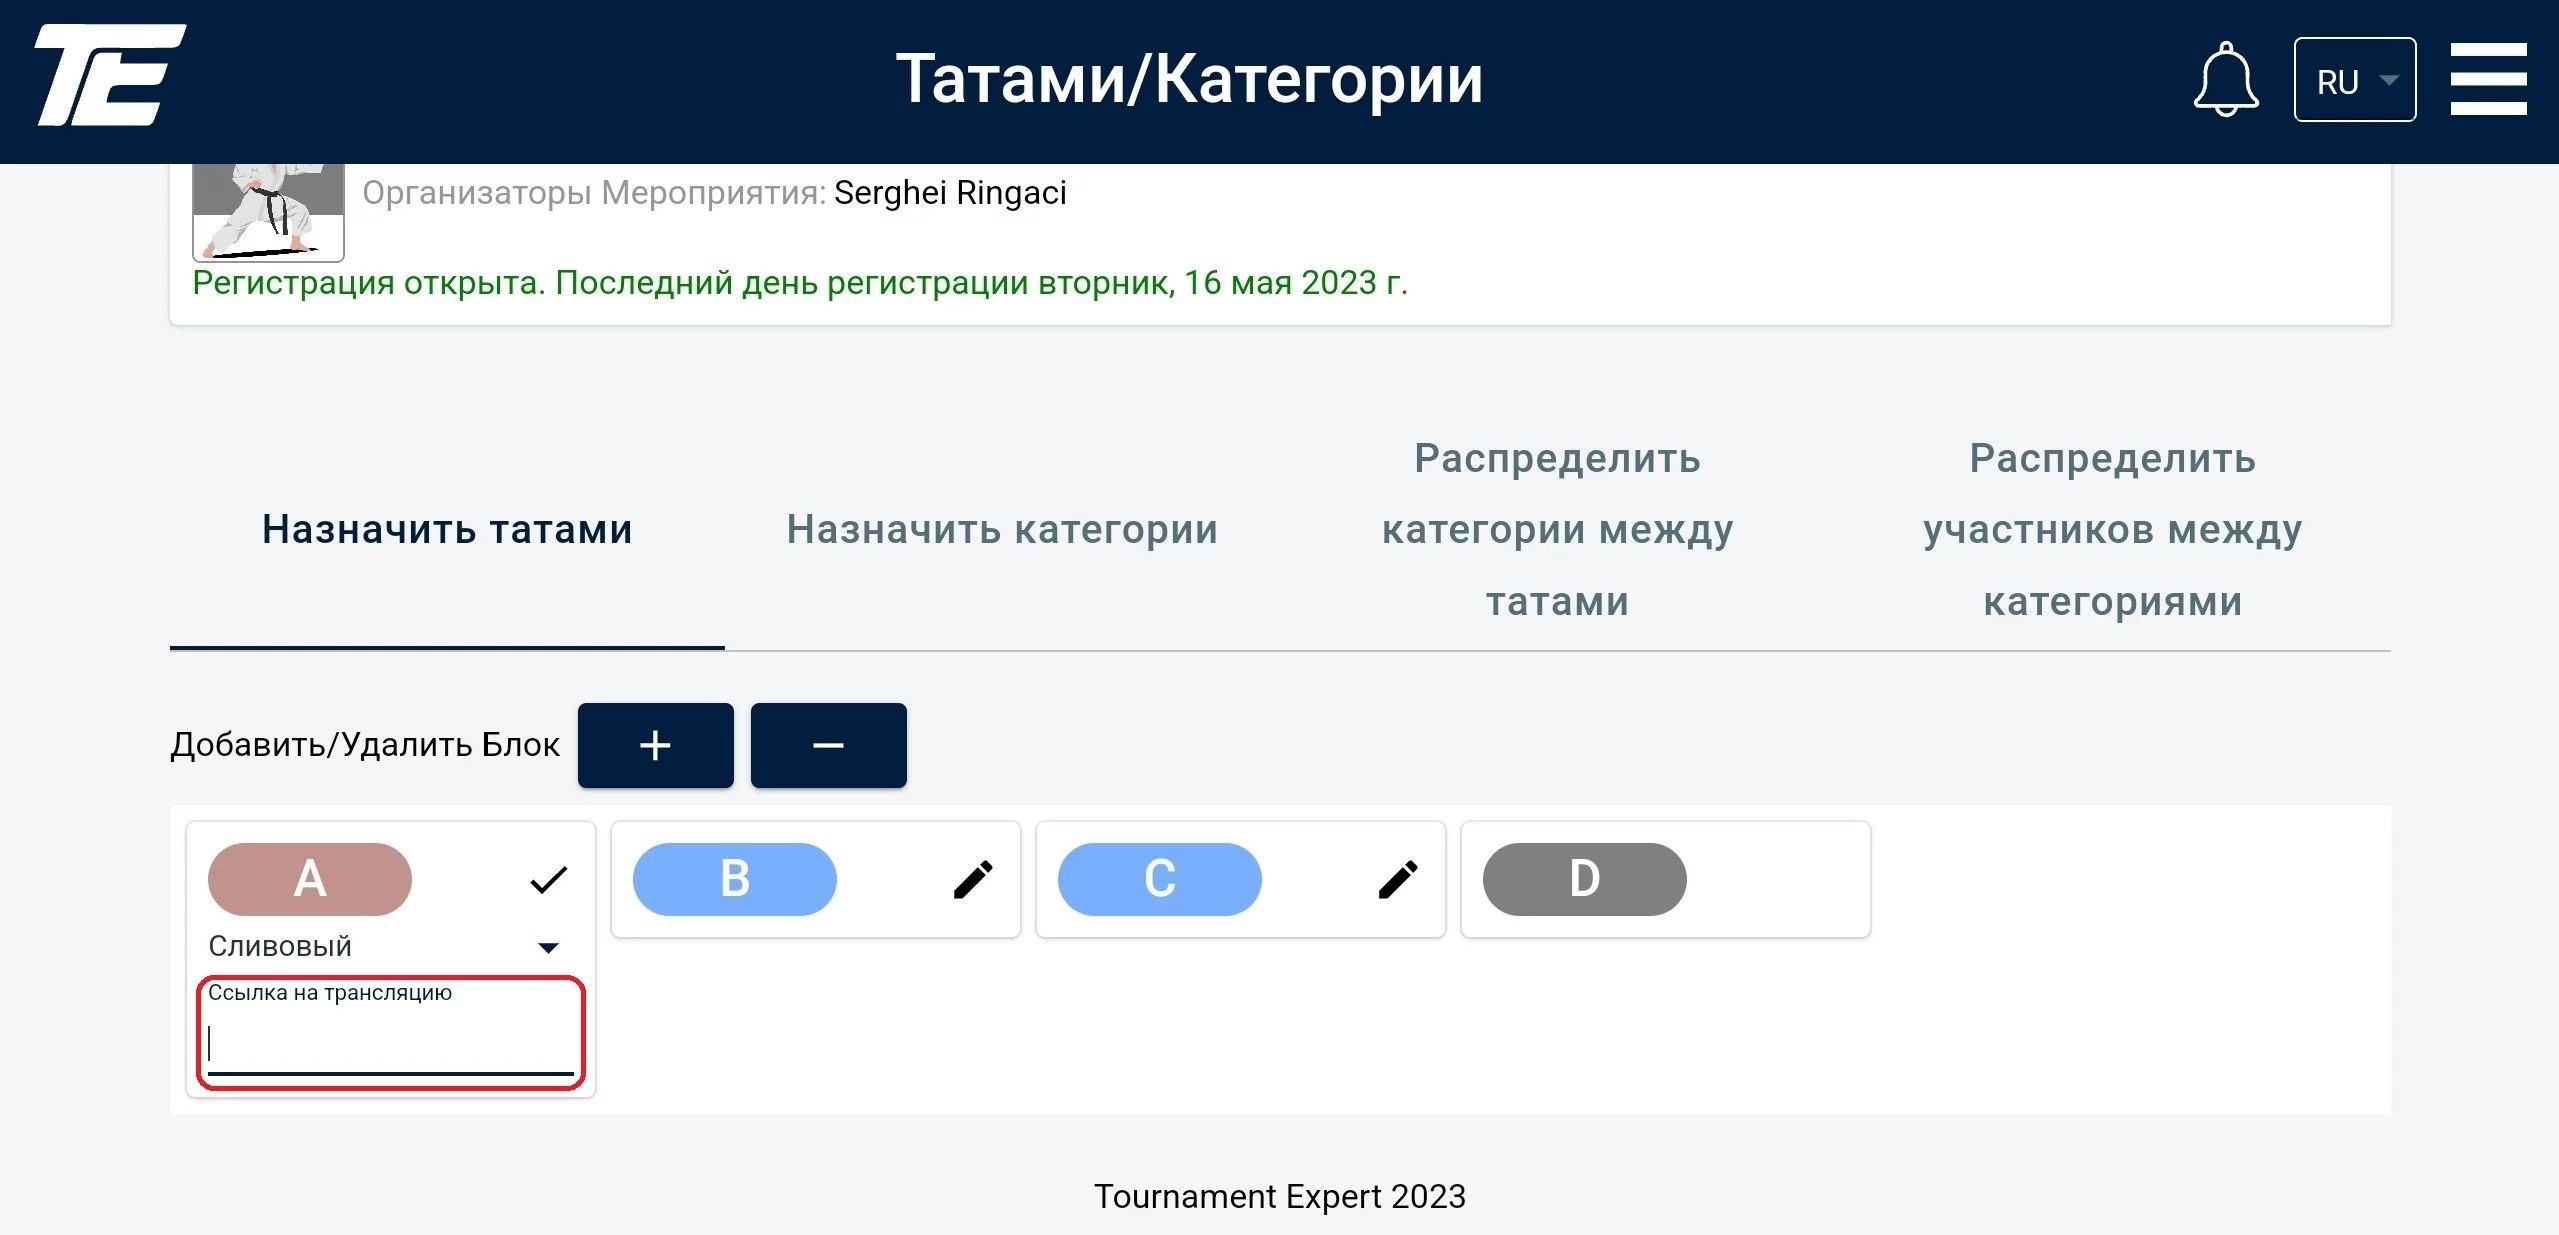
Also, a link to a video broadcast can be added for a tatami, if one is planned.
If this is your first tournament and no categories have been created before, you can create your own or use ready-made templates.
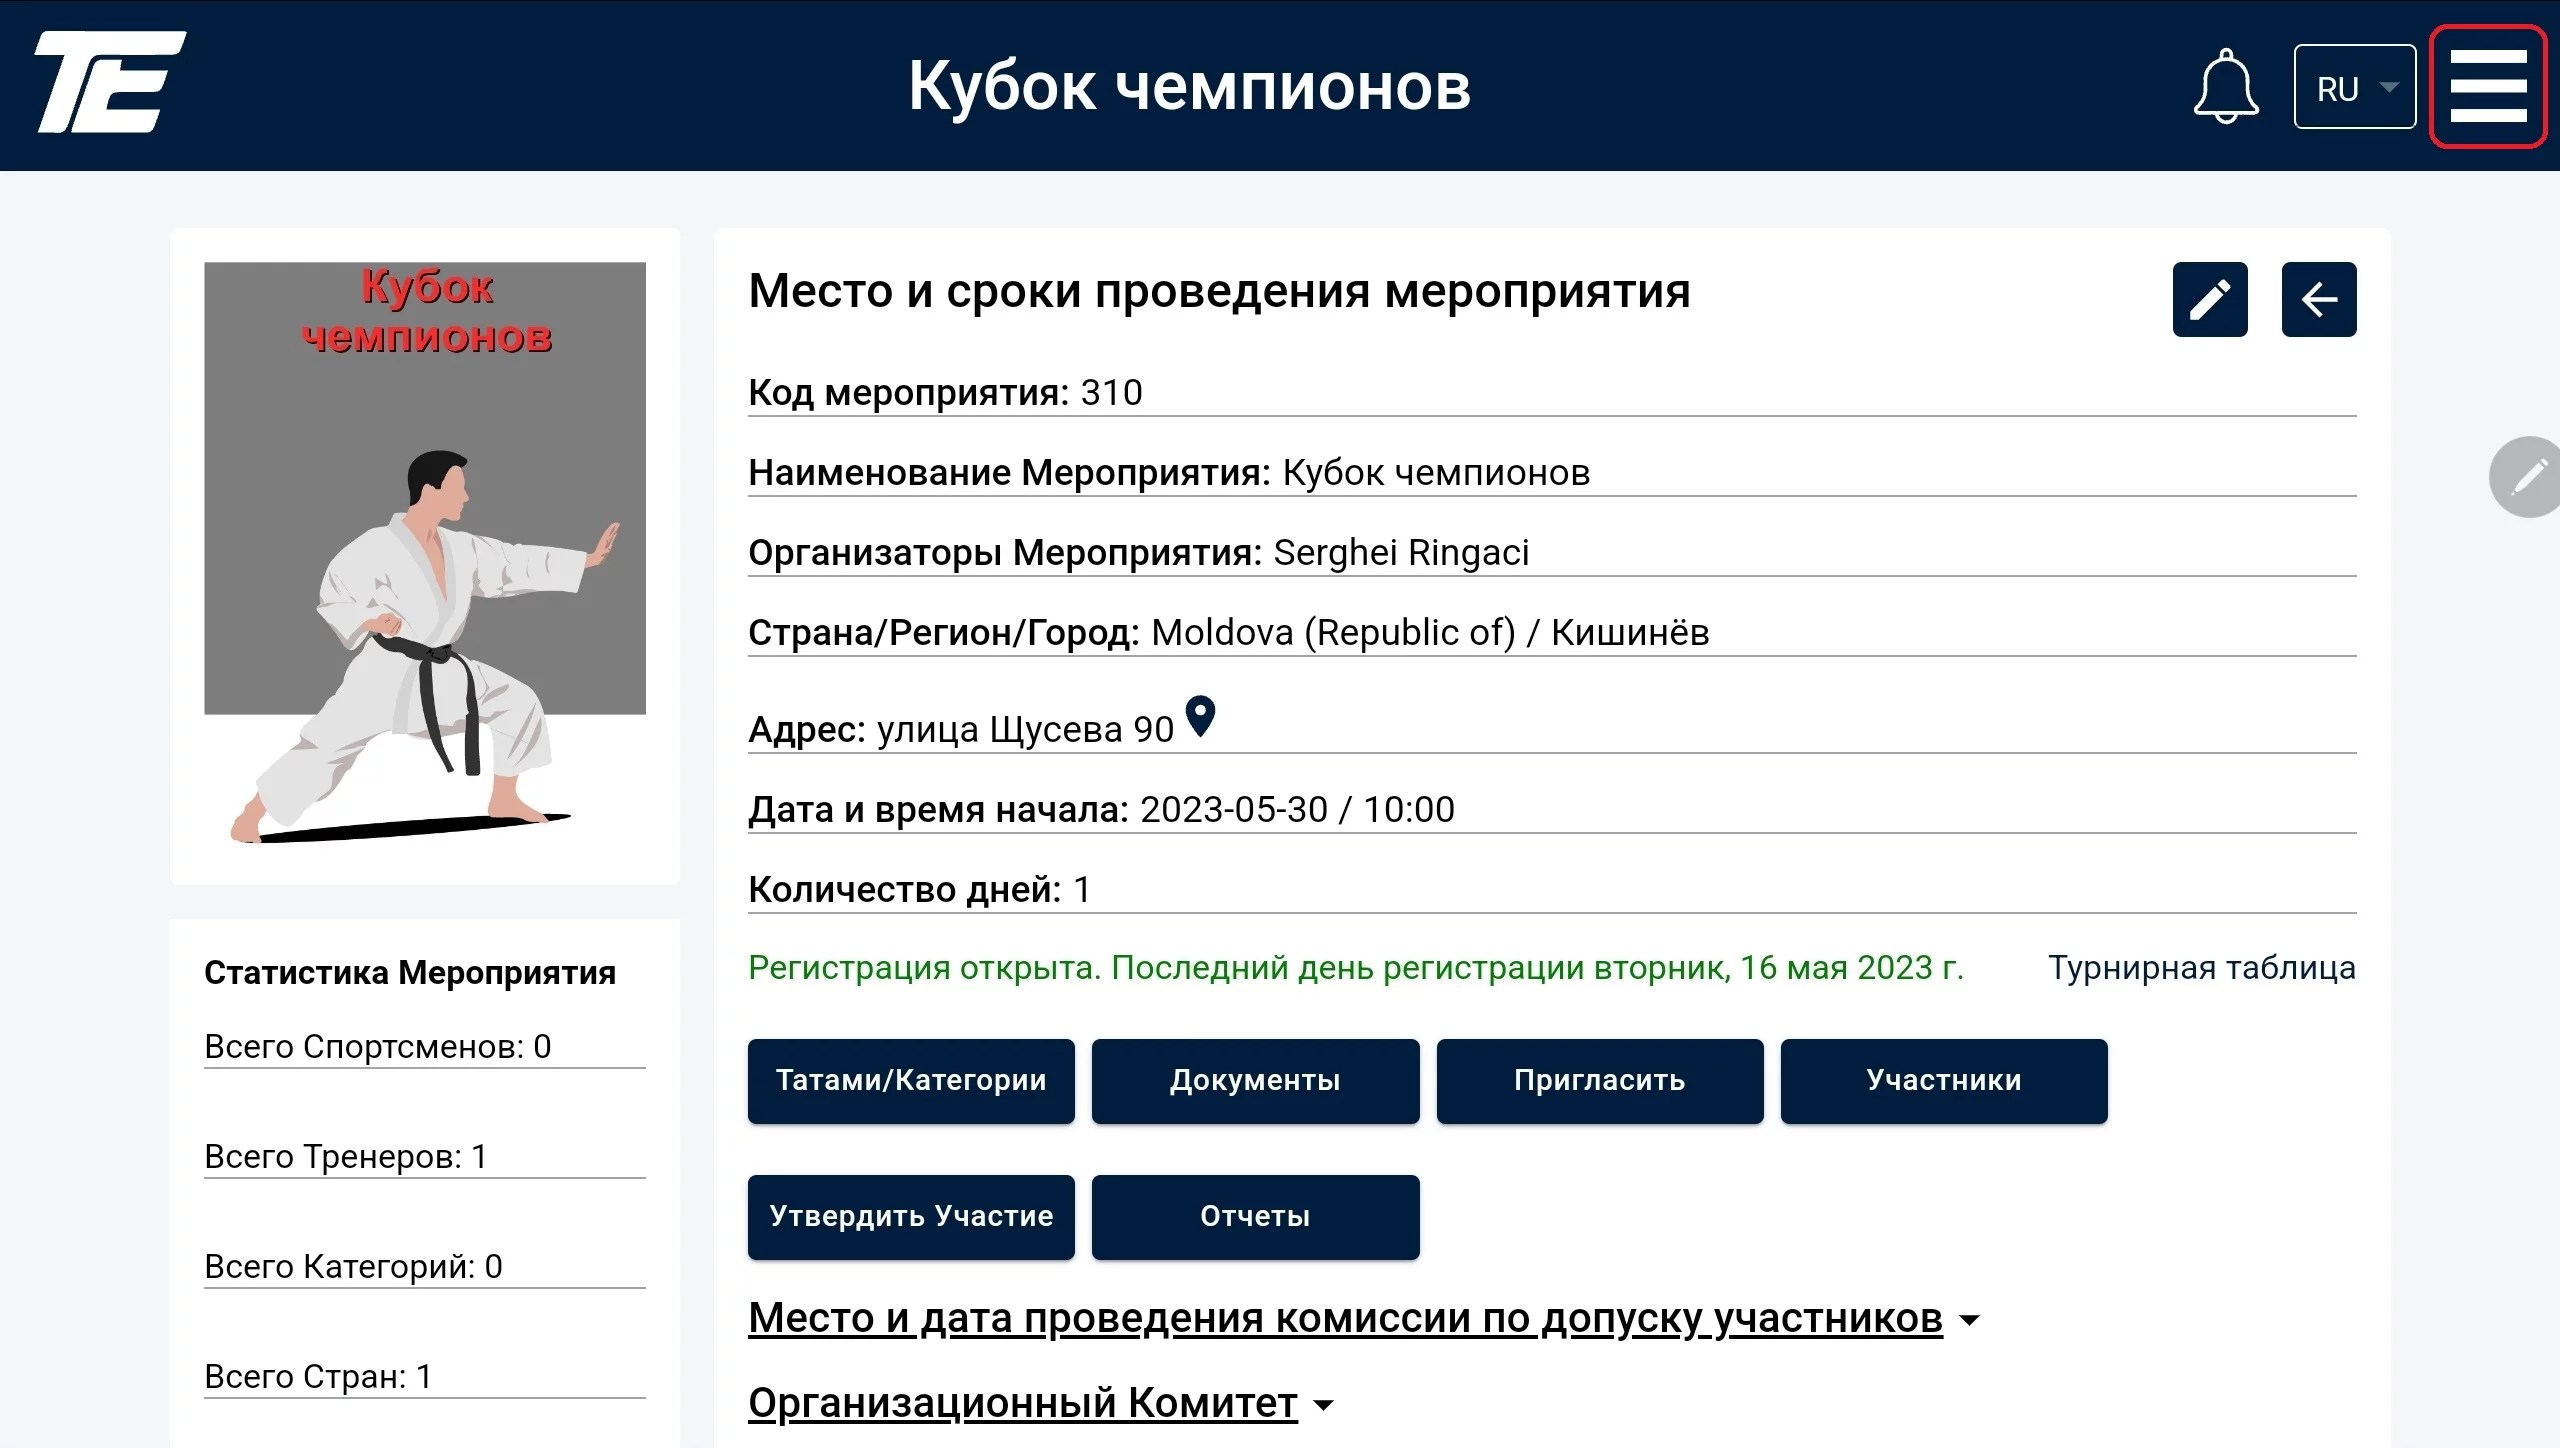
To create your own categories, go through the menu to the «Categories« section.
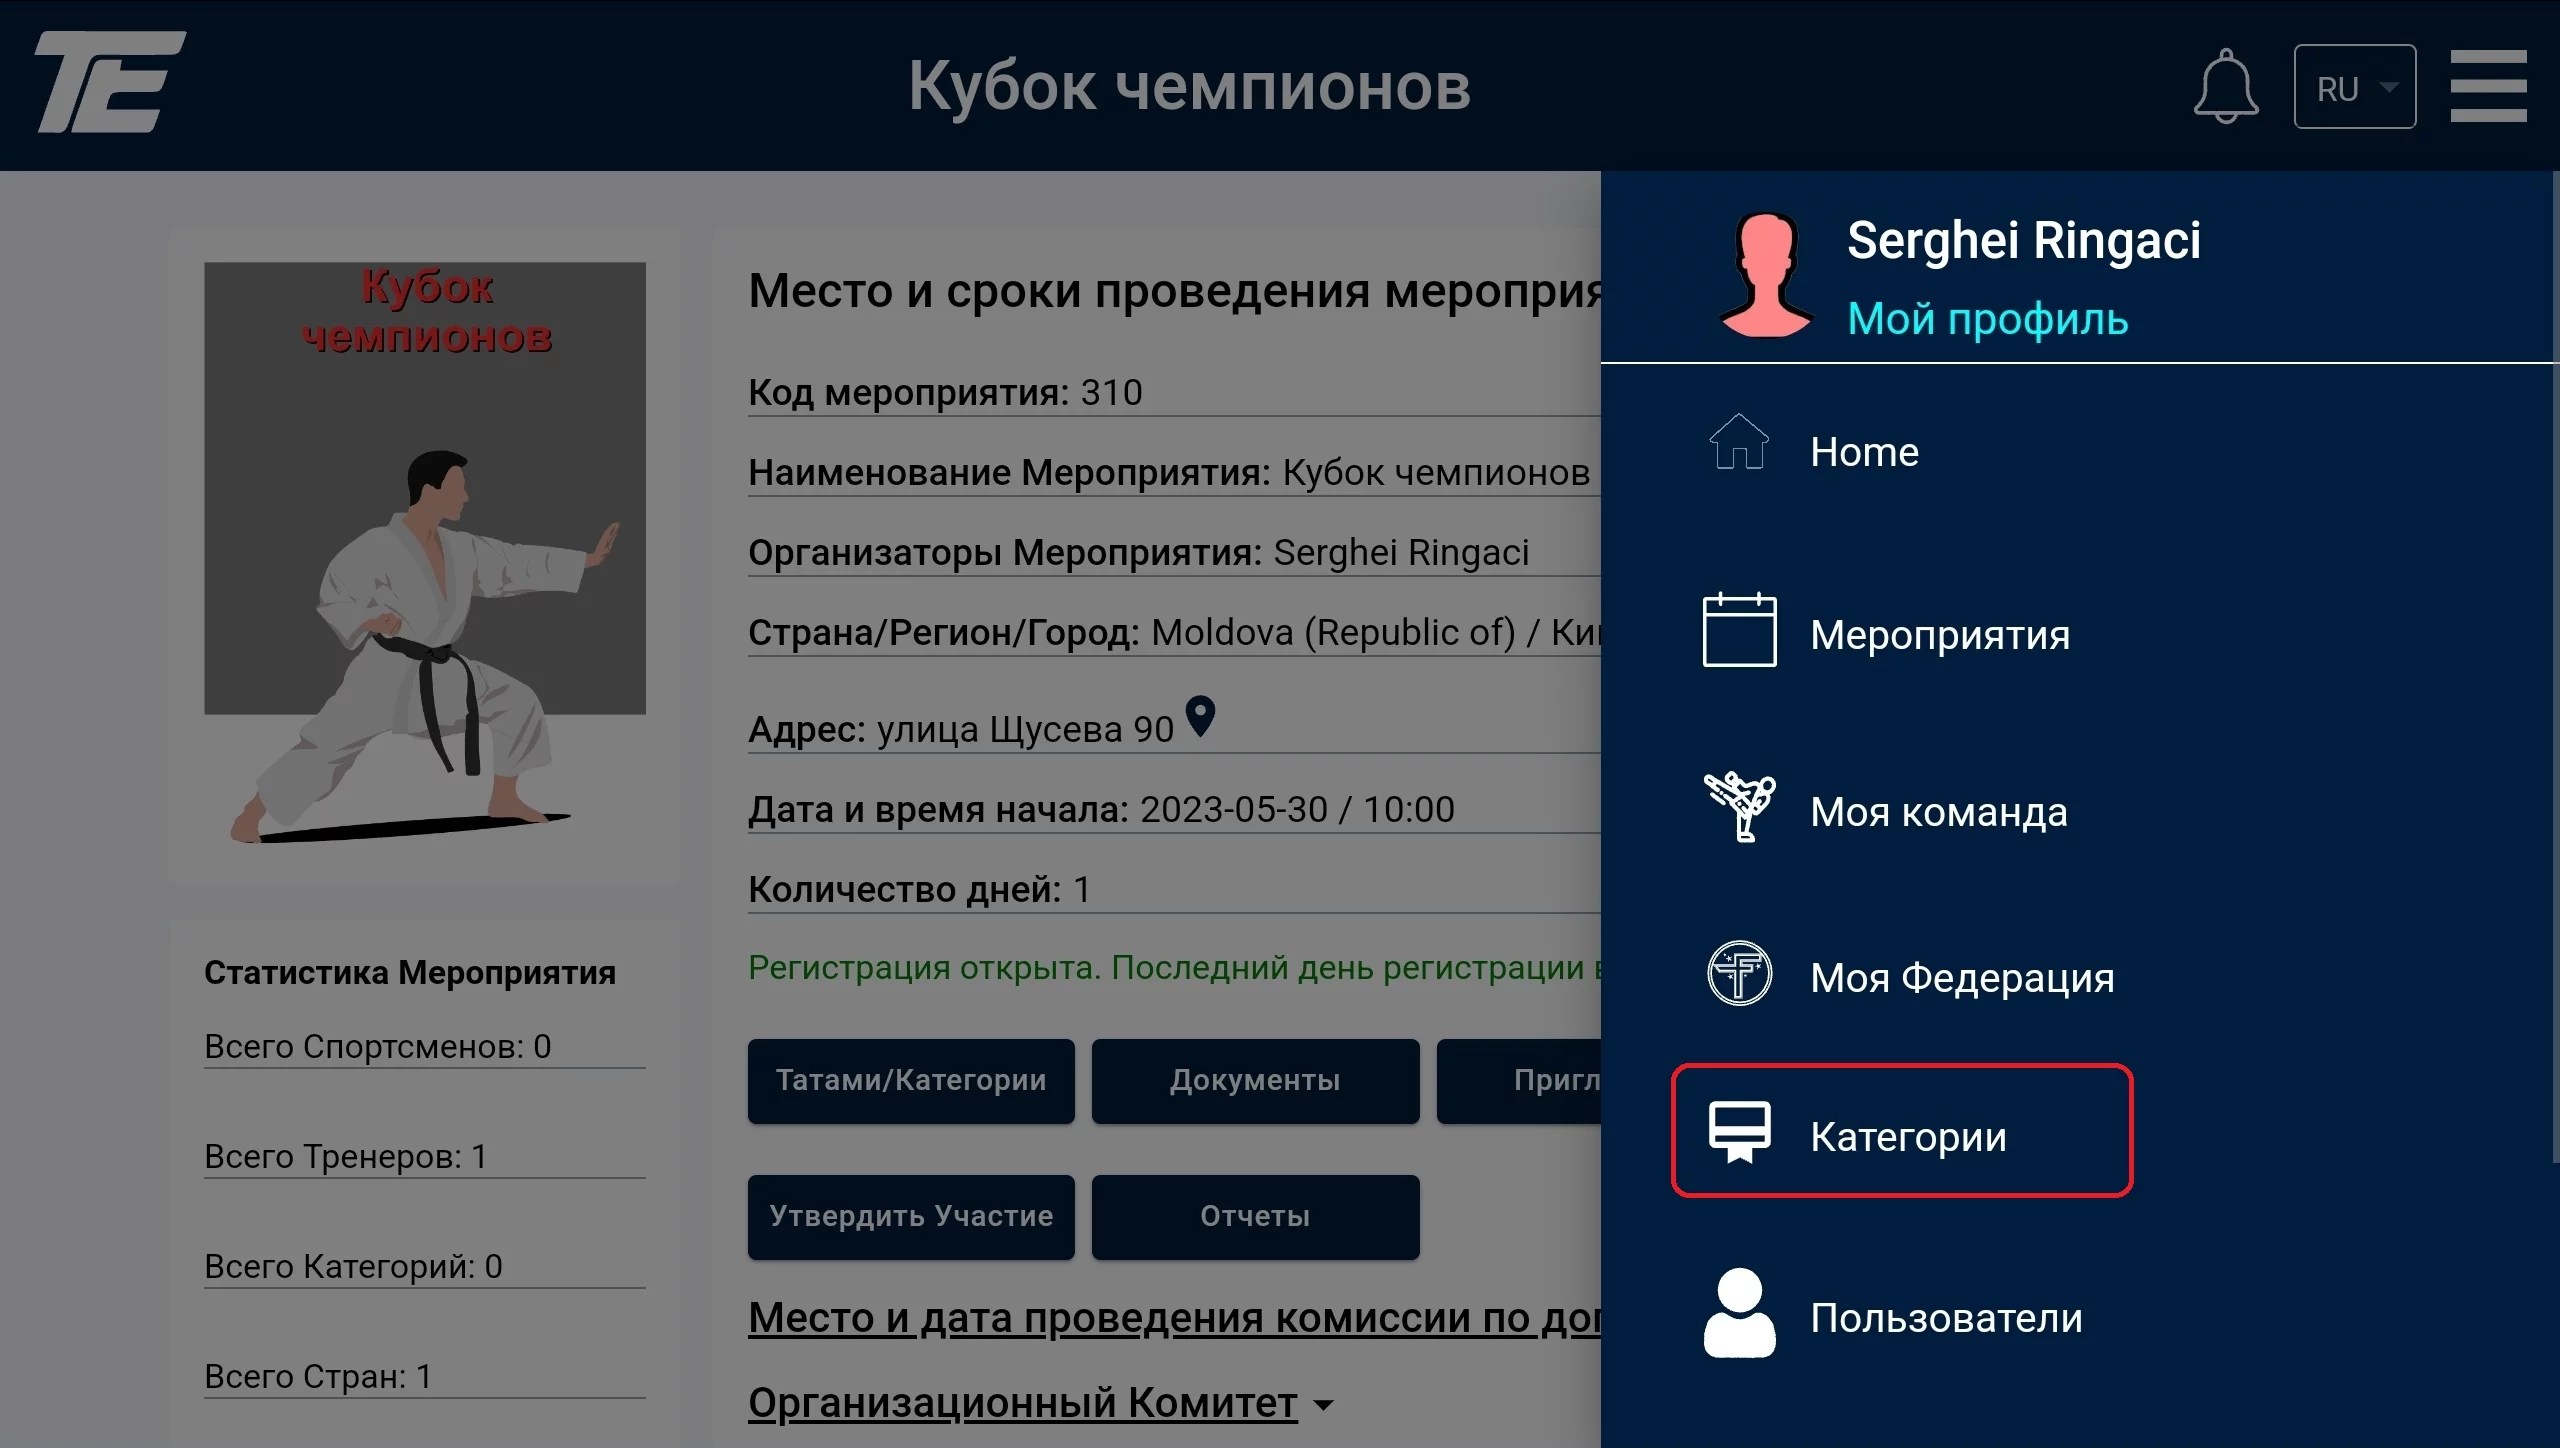
To create a new category, click the «Add« button.
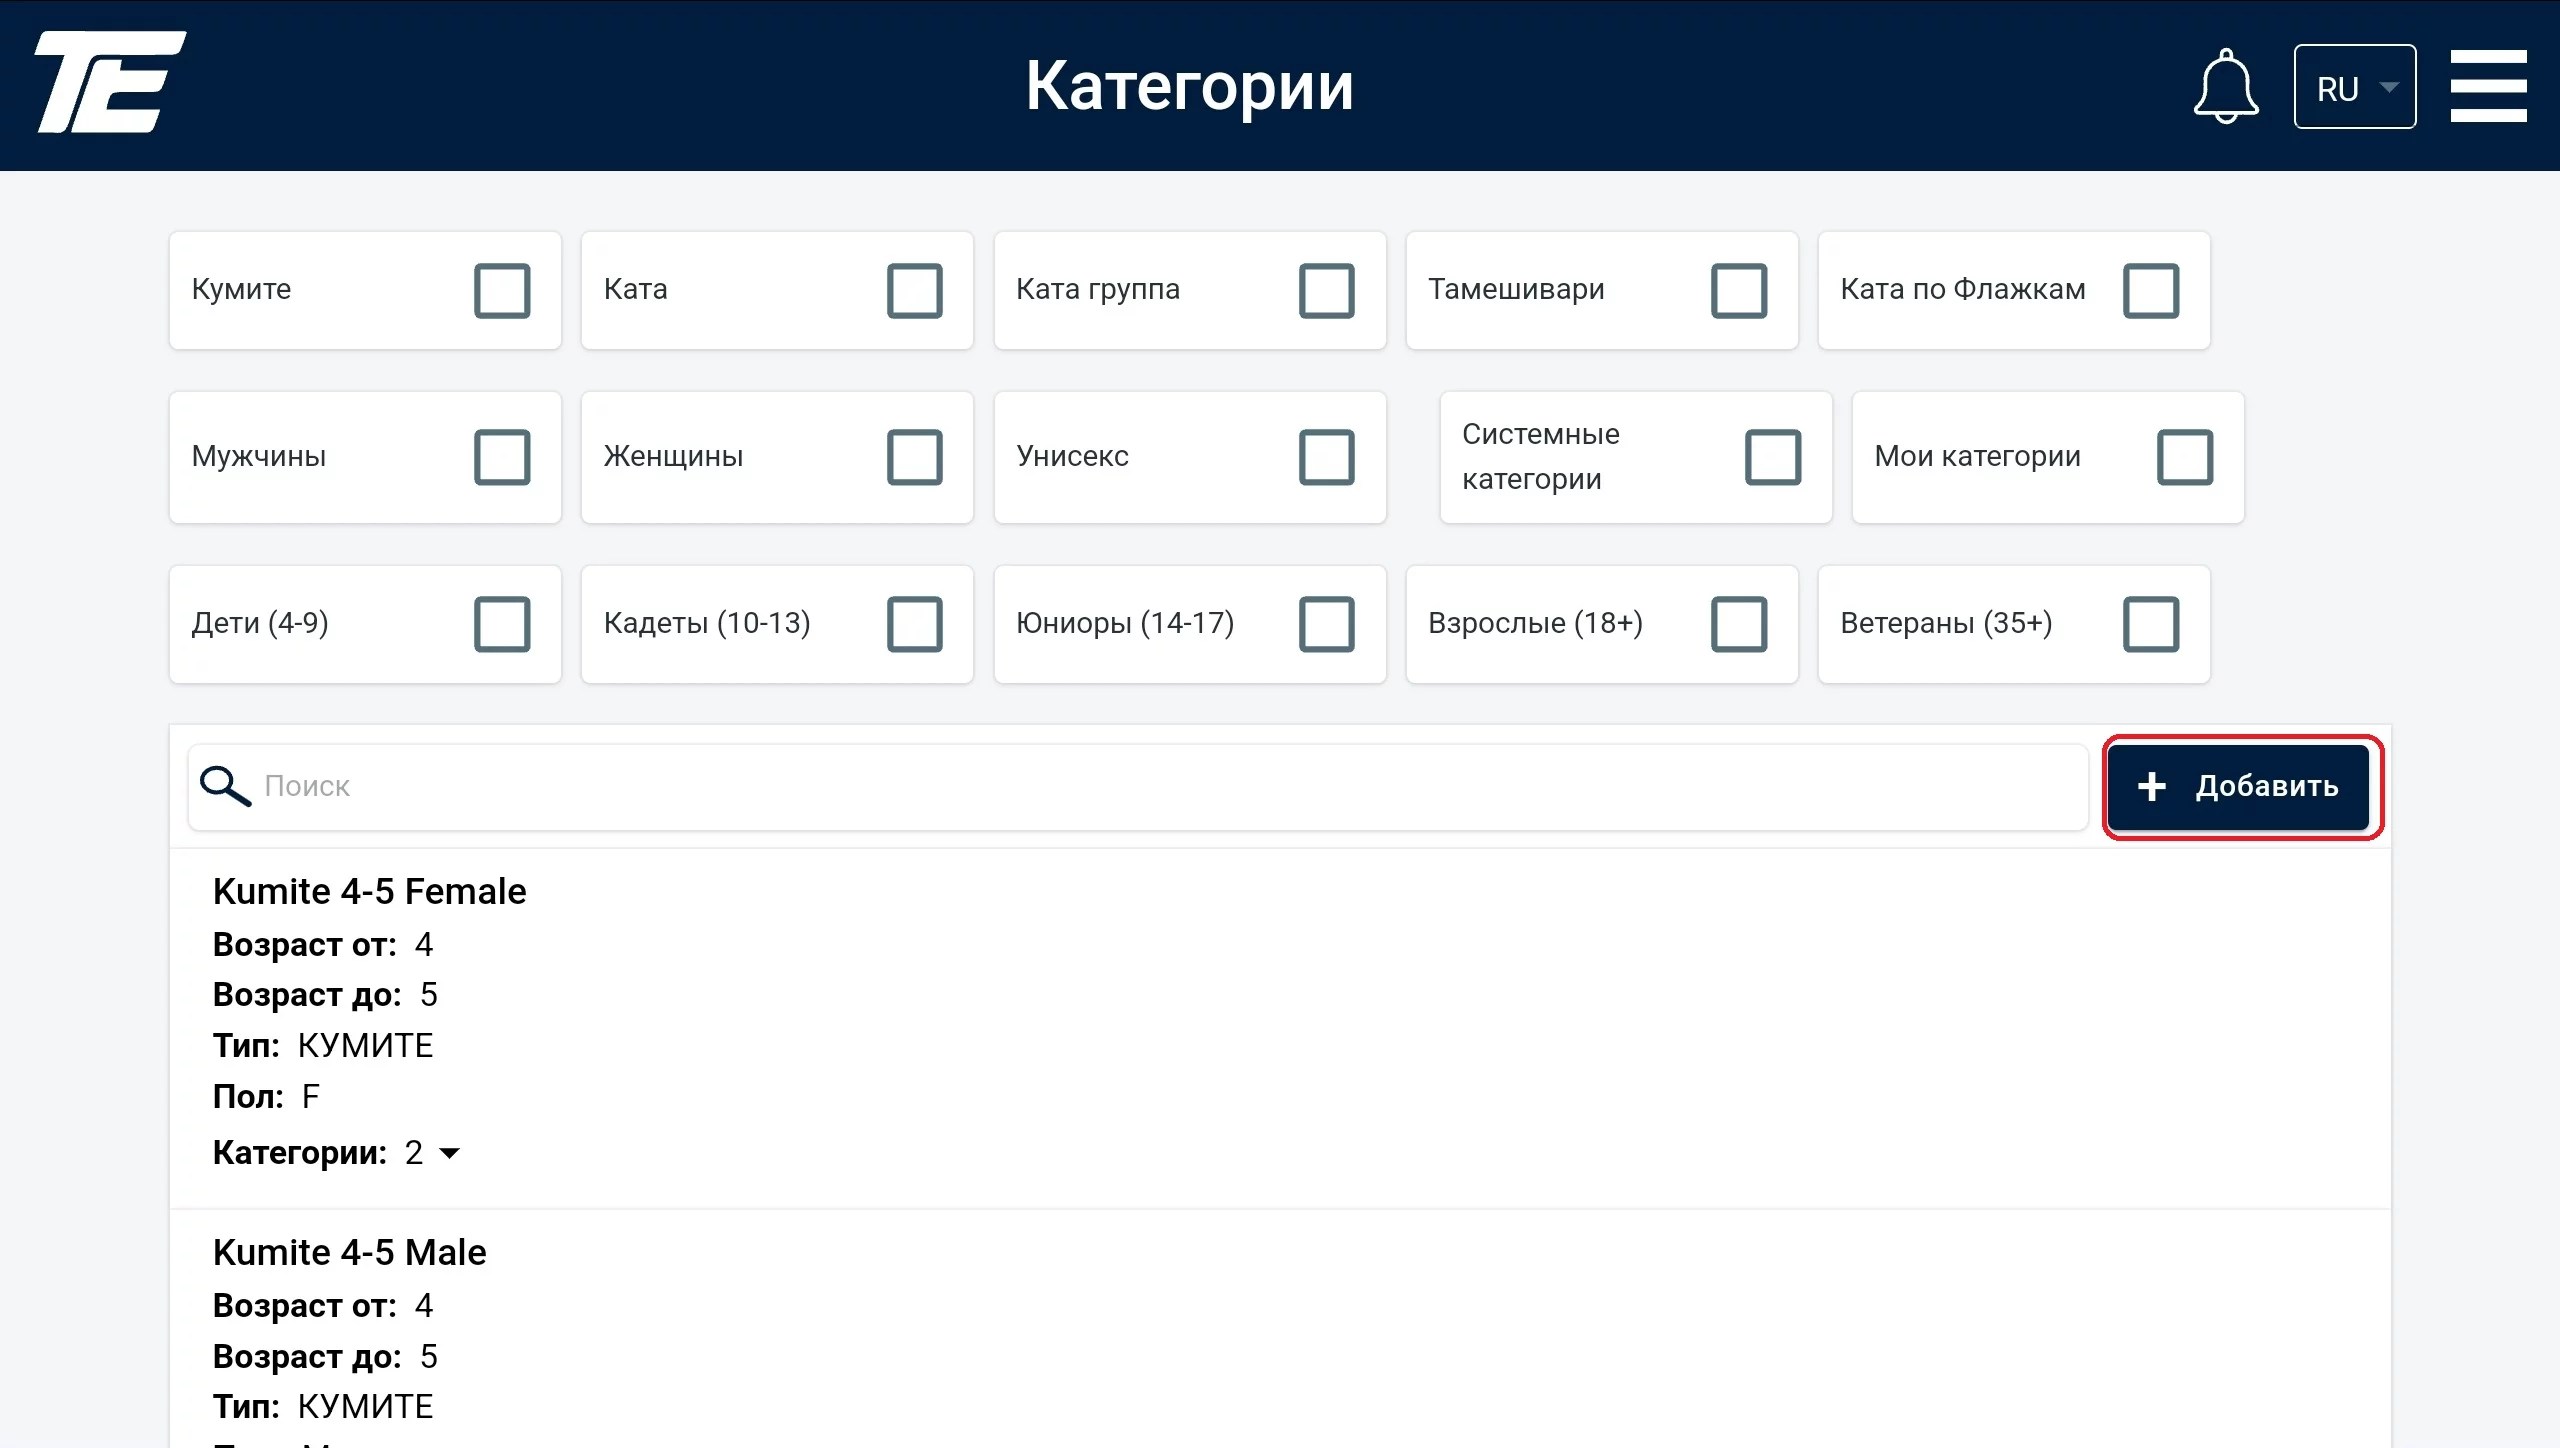
Next, you will be offered a list of category names to create.
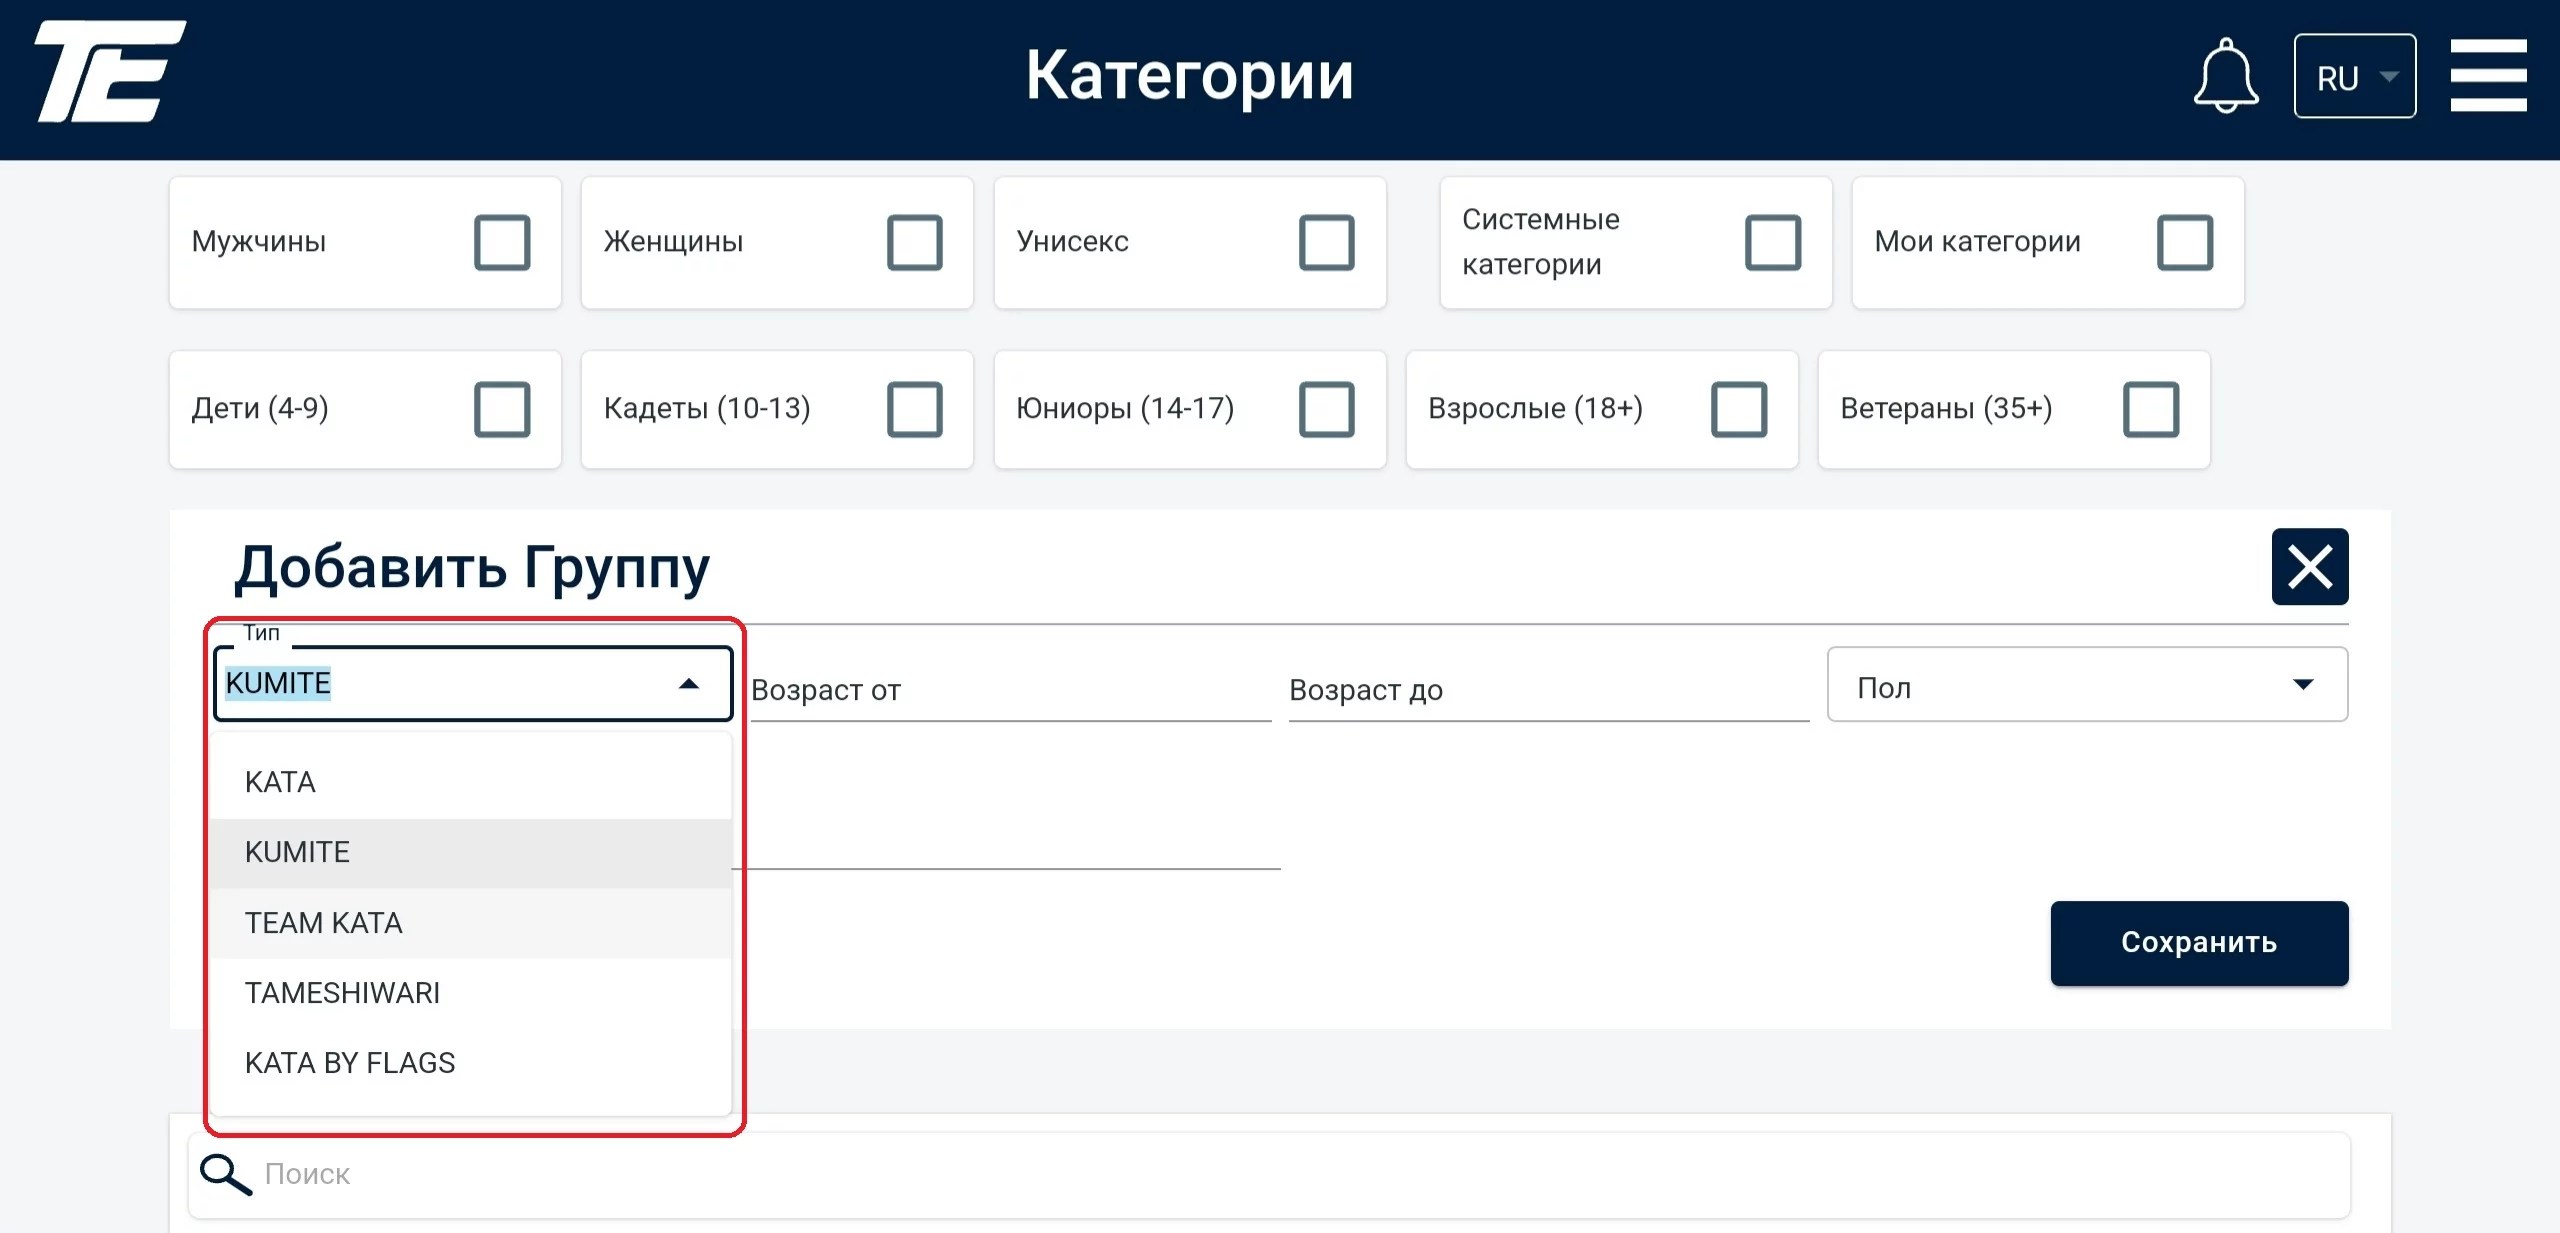
Select KATA from the list
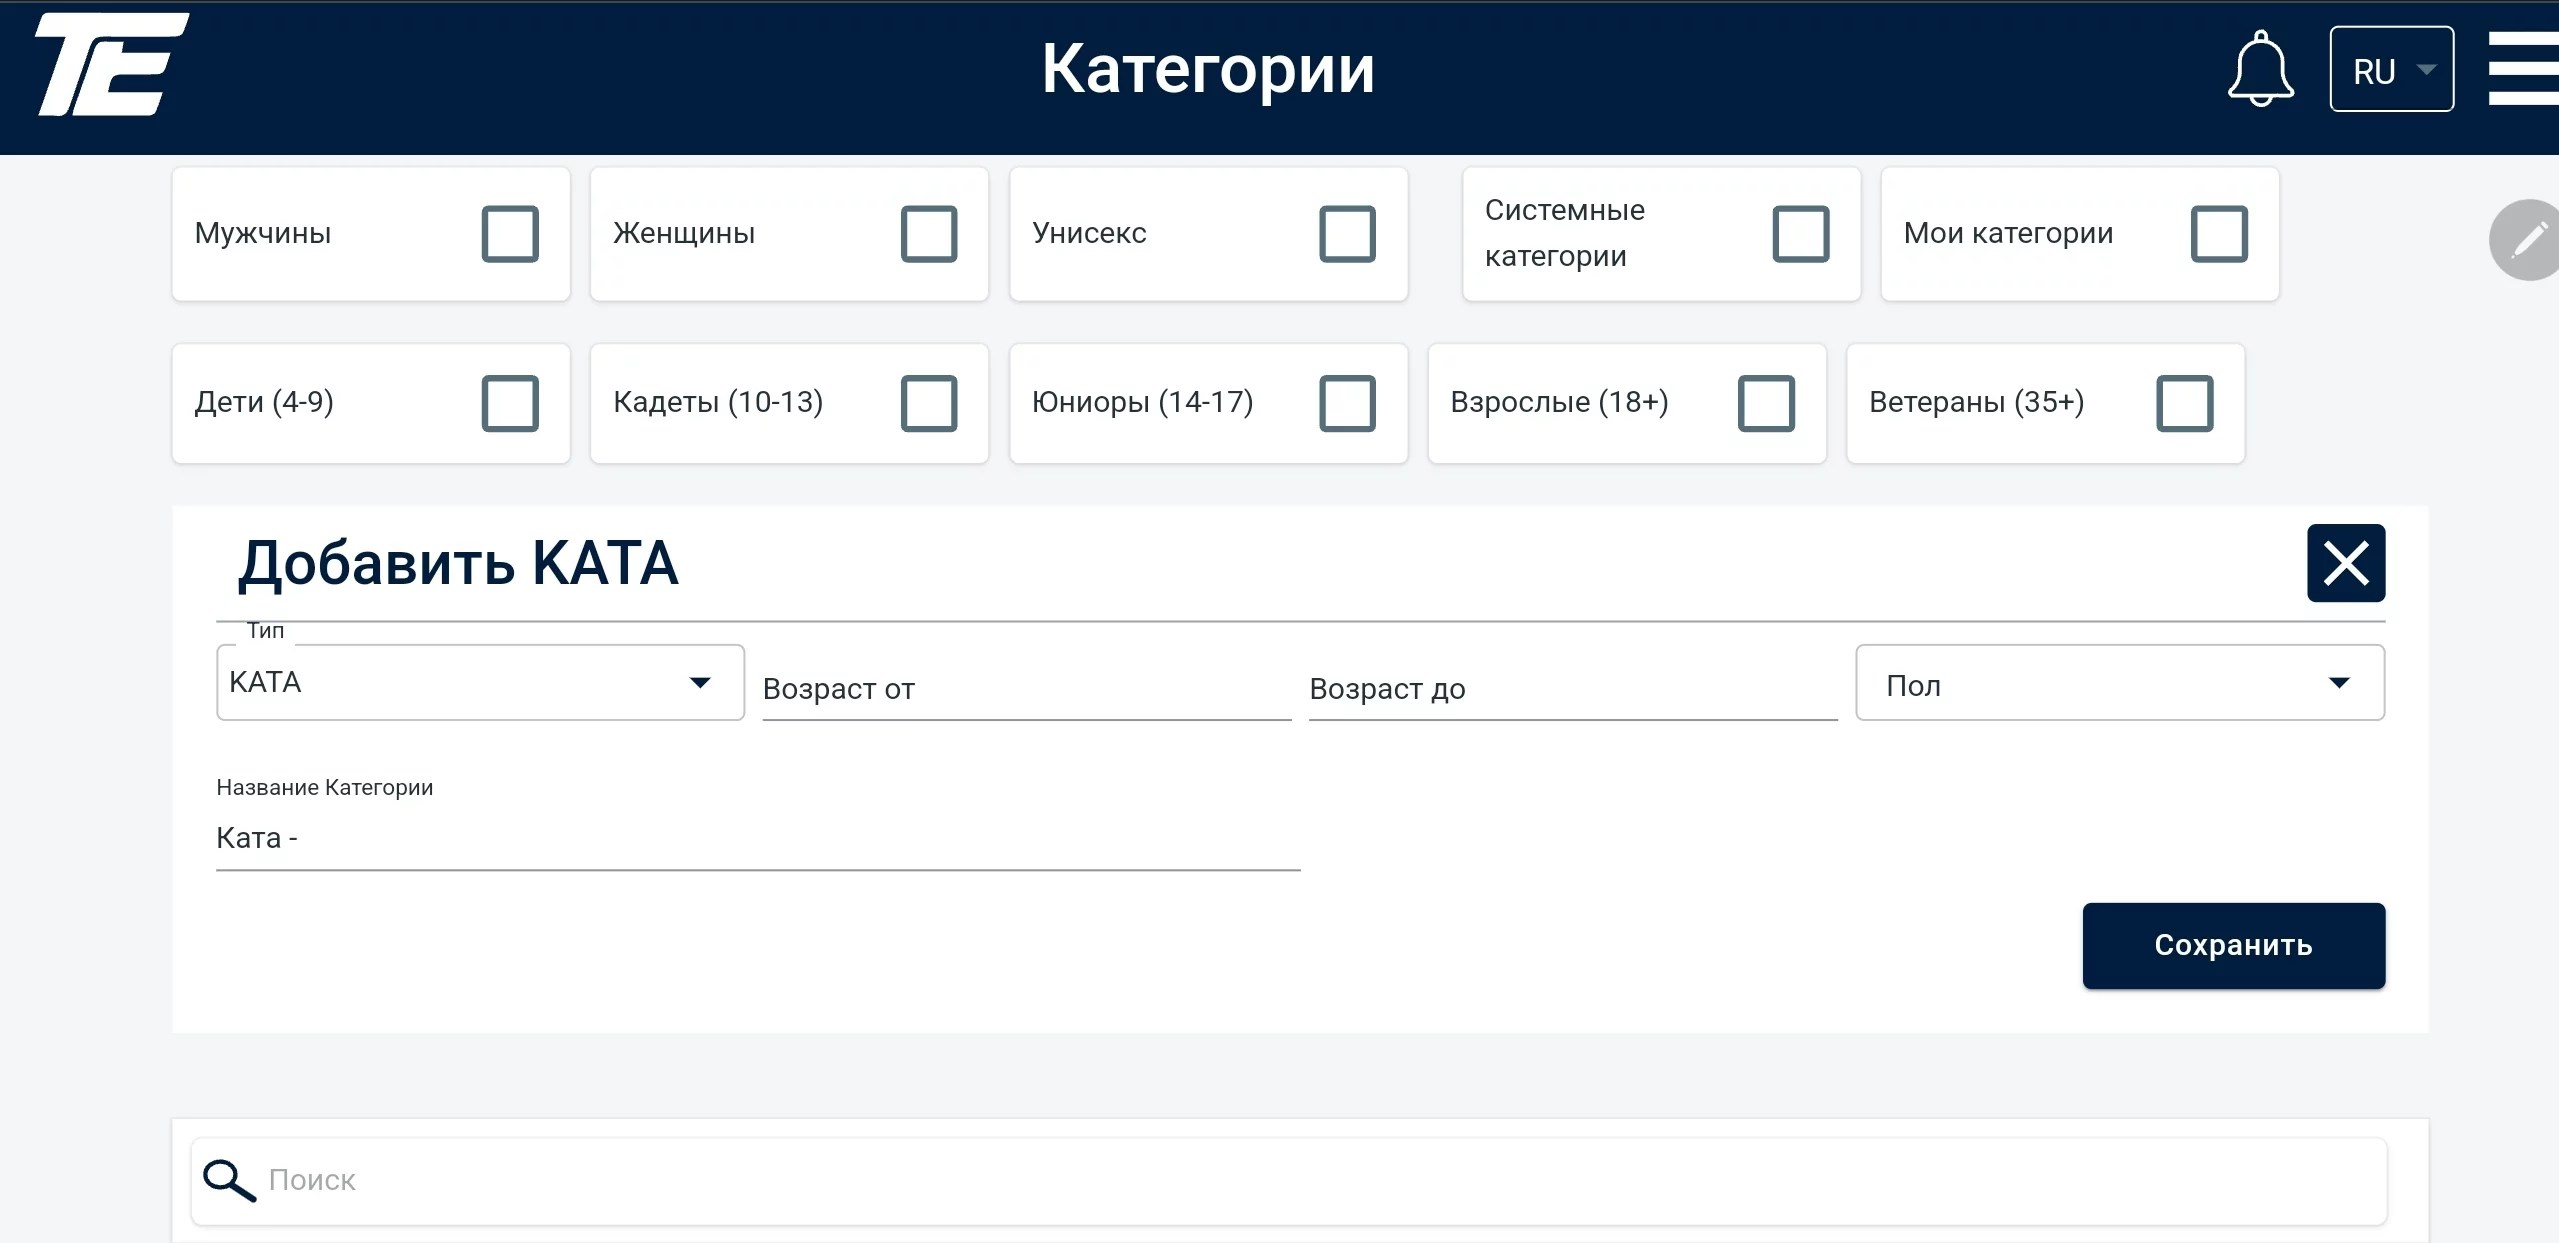
After entering all the data, the category can be saved. If saved successfully, a green notification will appear in the bottom right corner.
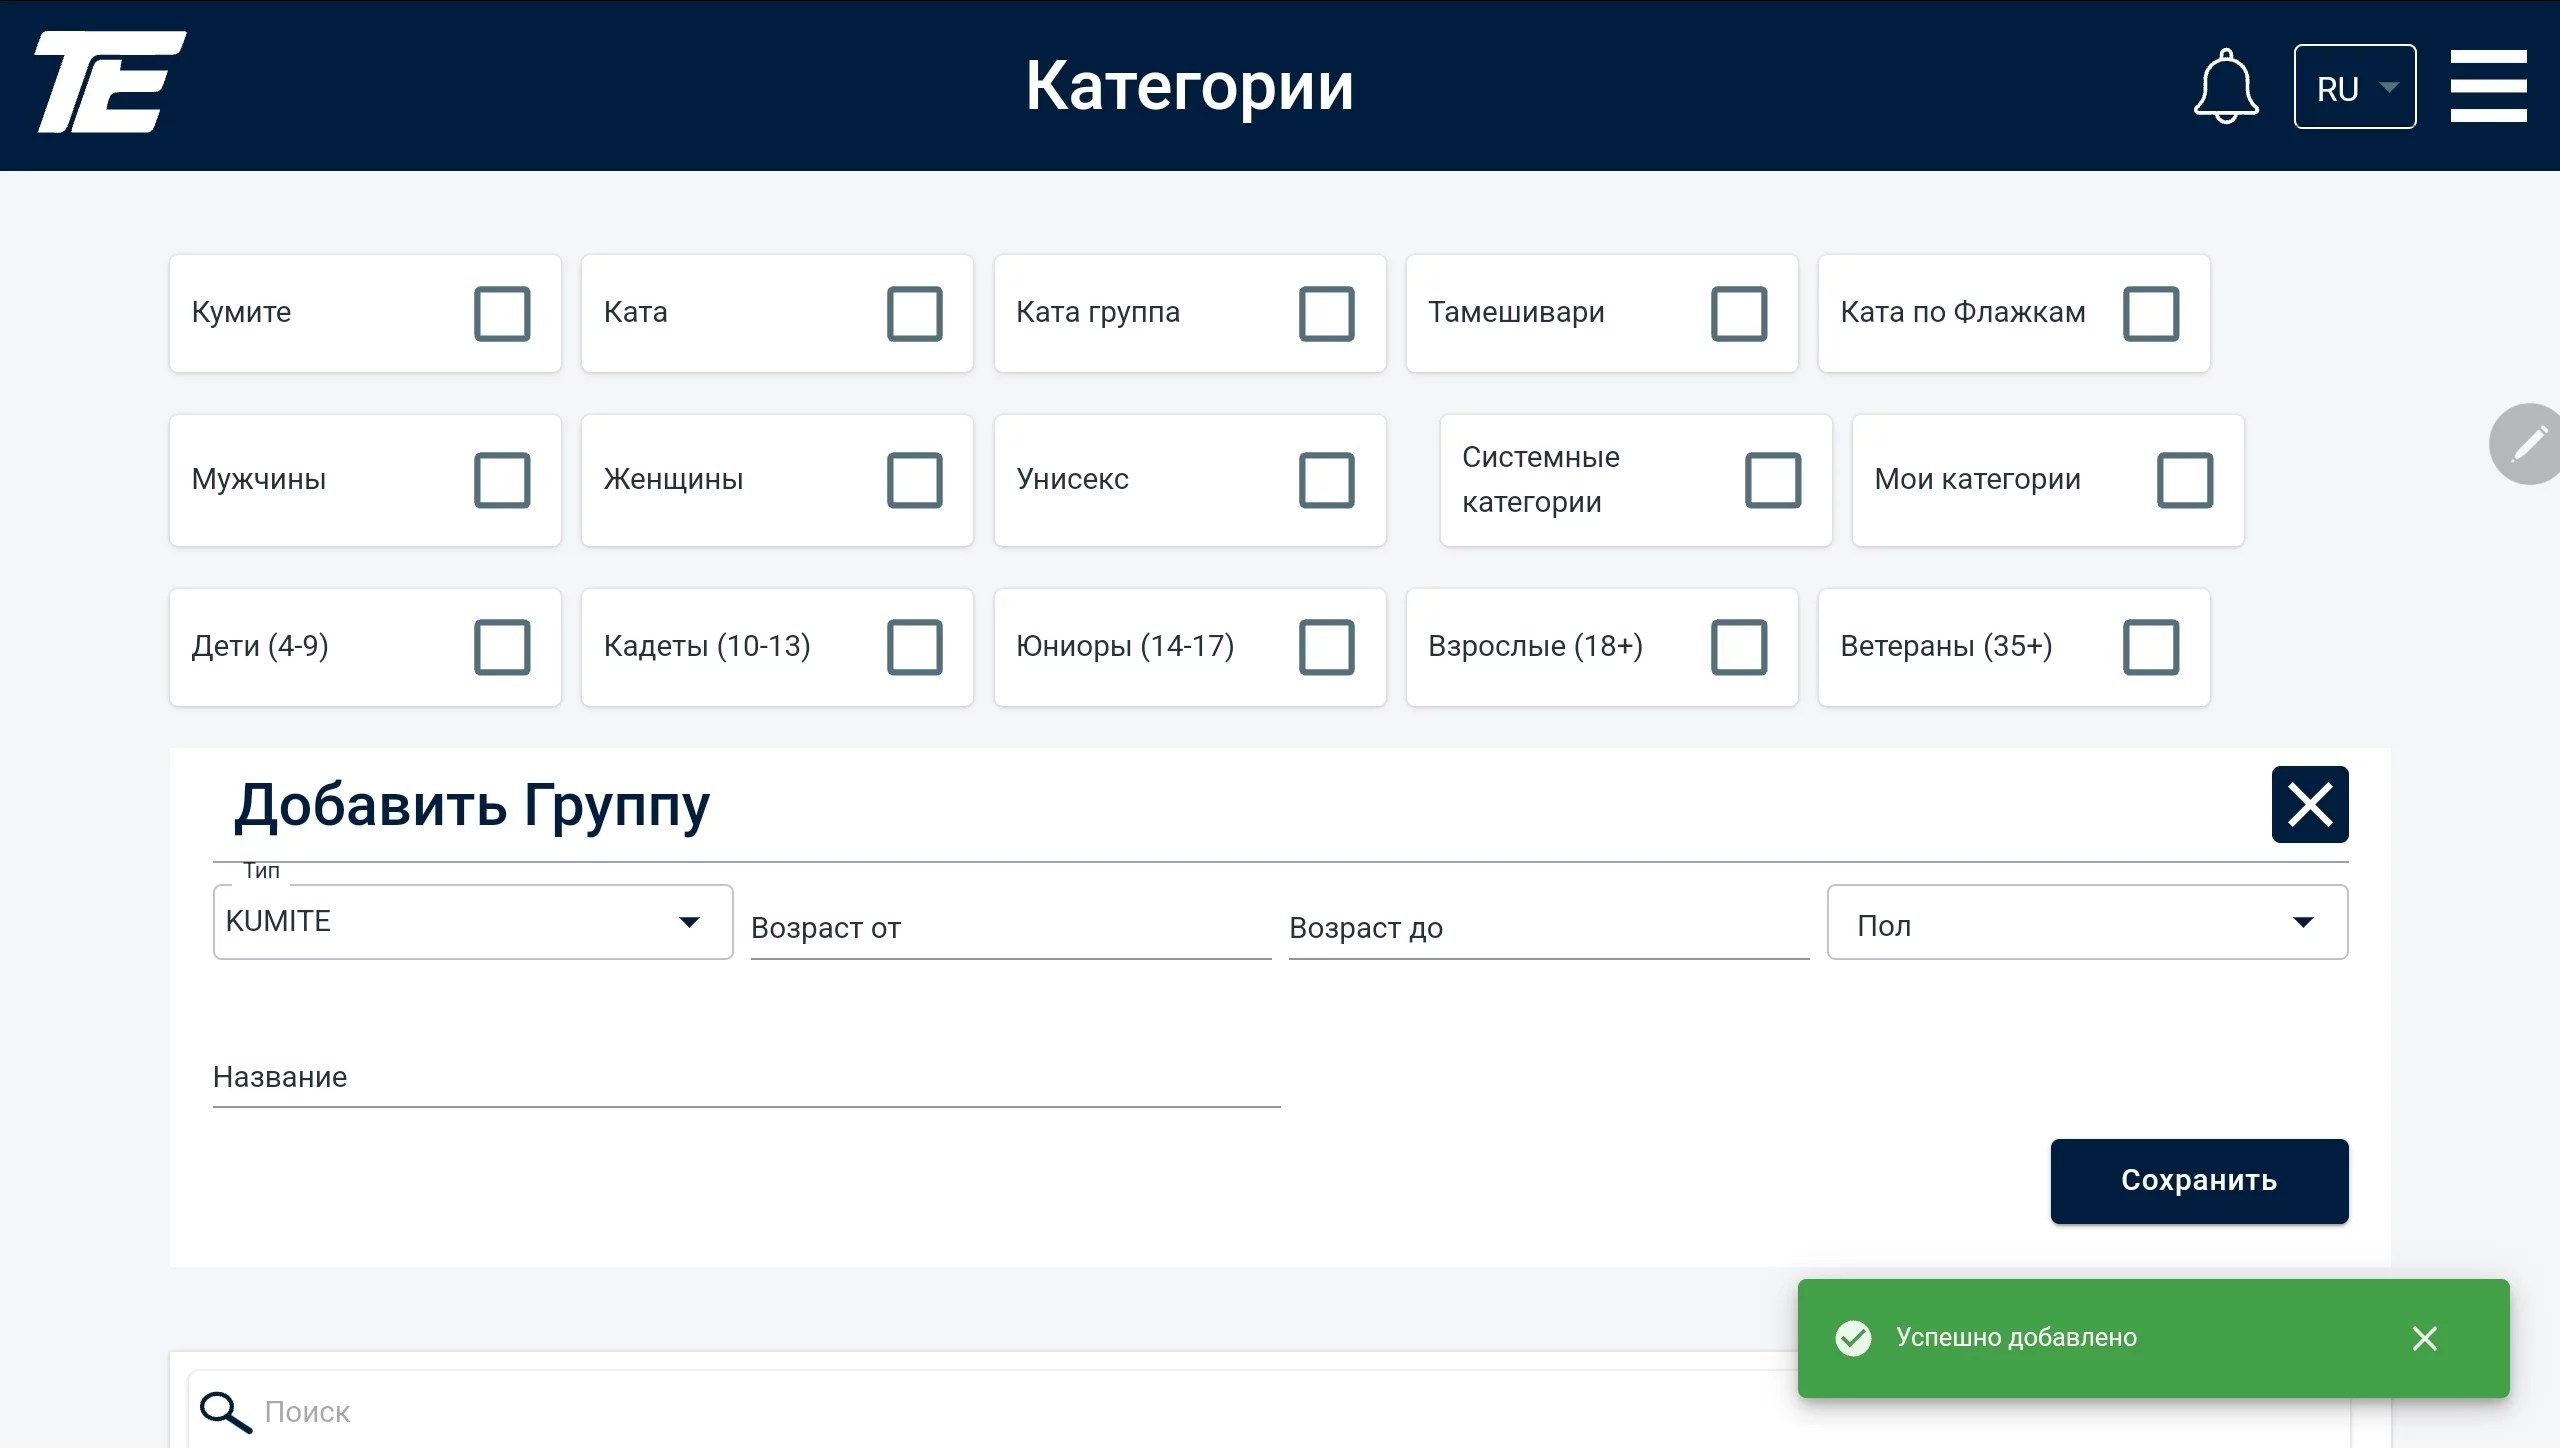
The initial stage of creating a Kumite category is very similar to creating other categories.
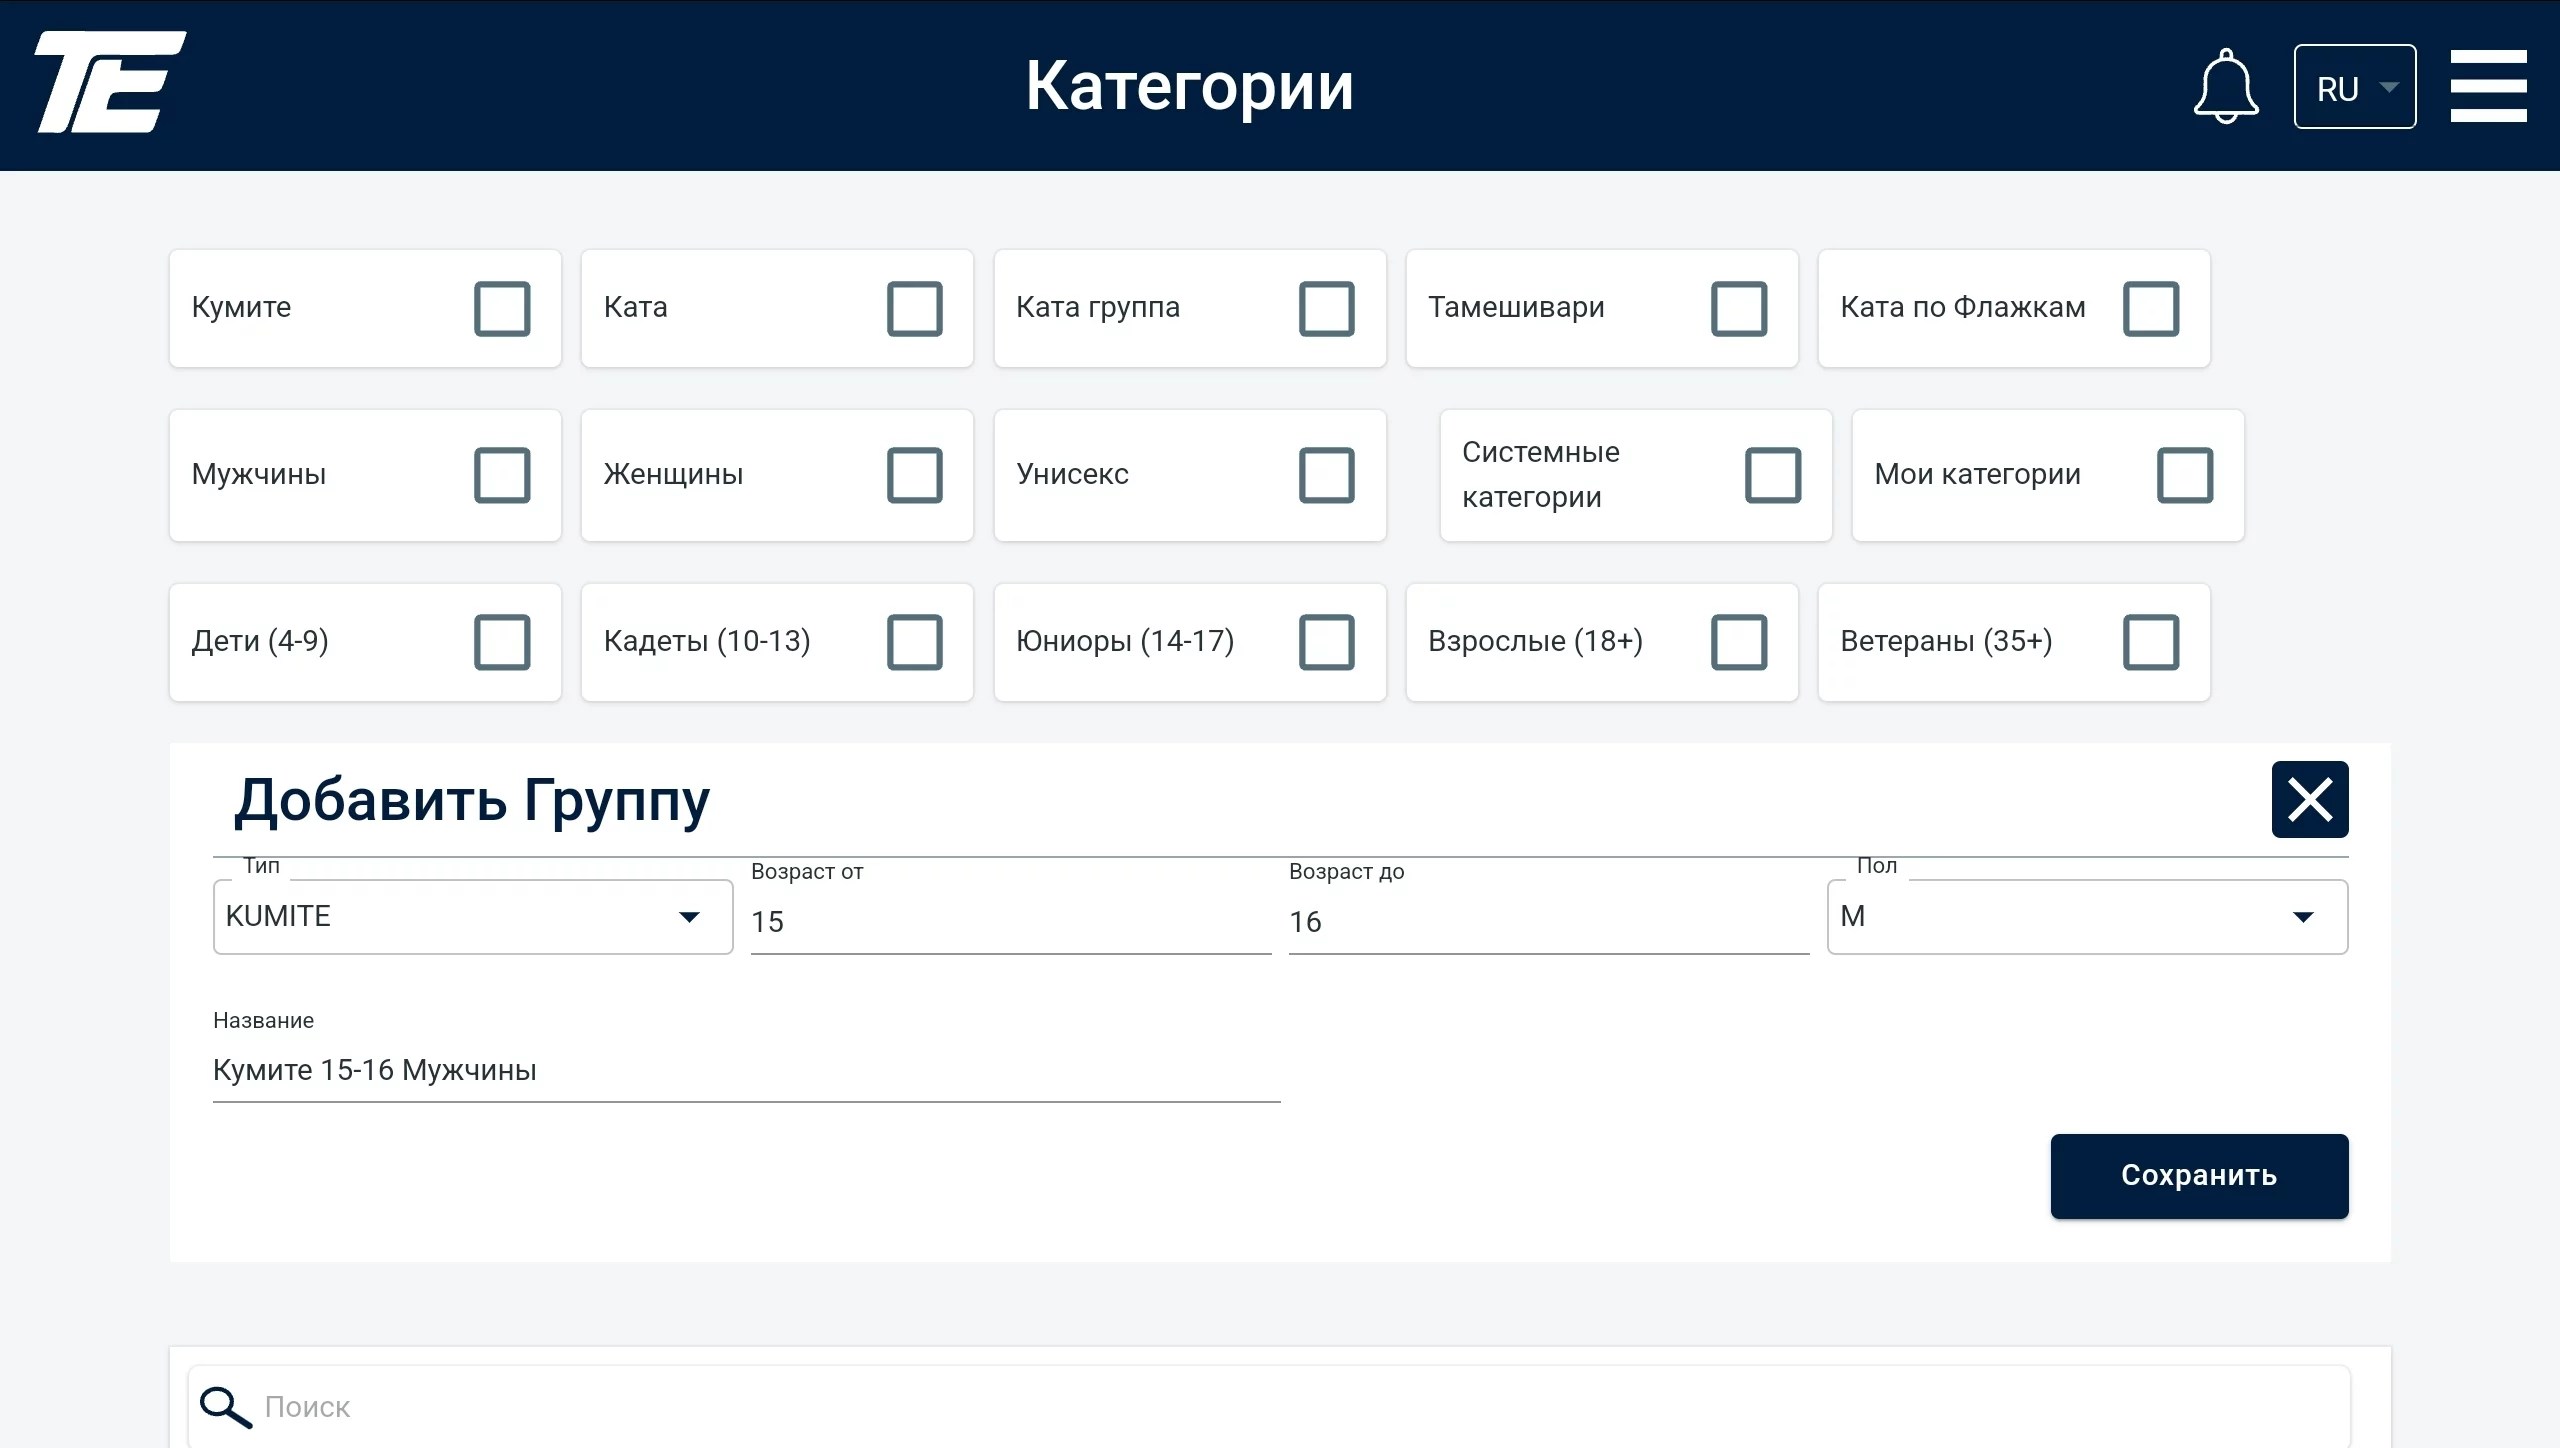
If needed, the category name can be changed (this feature is available for all categories, not only Kumite). To do this, simply click the field with the default name to enter a new one.
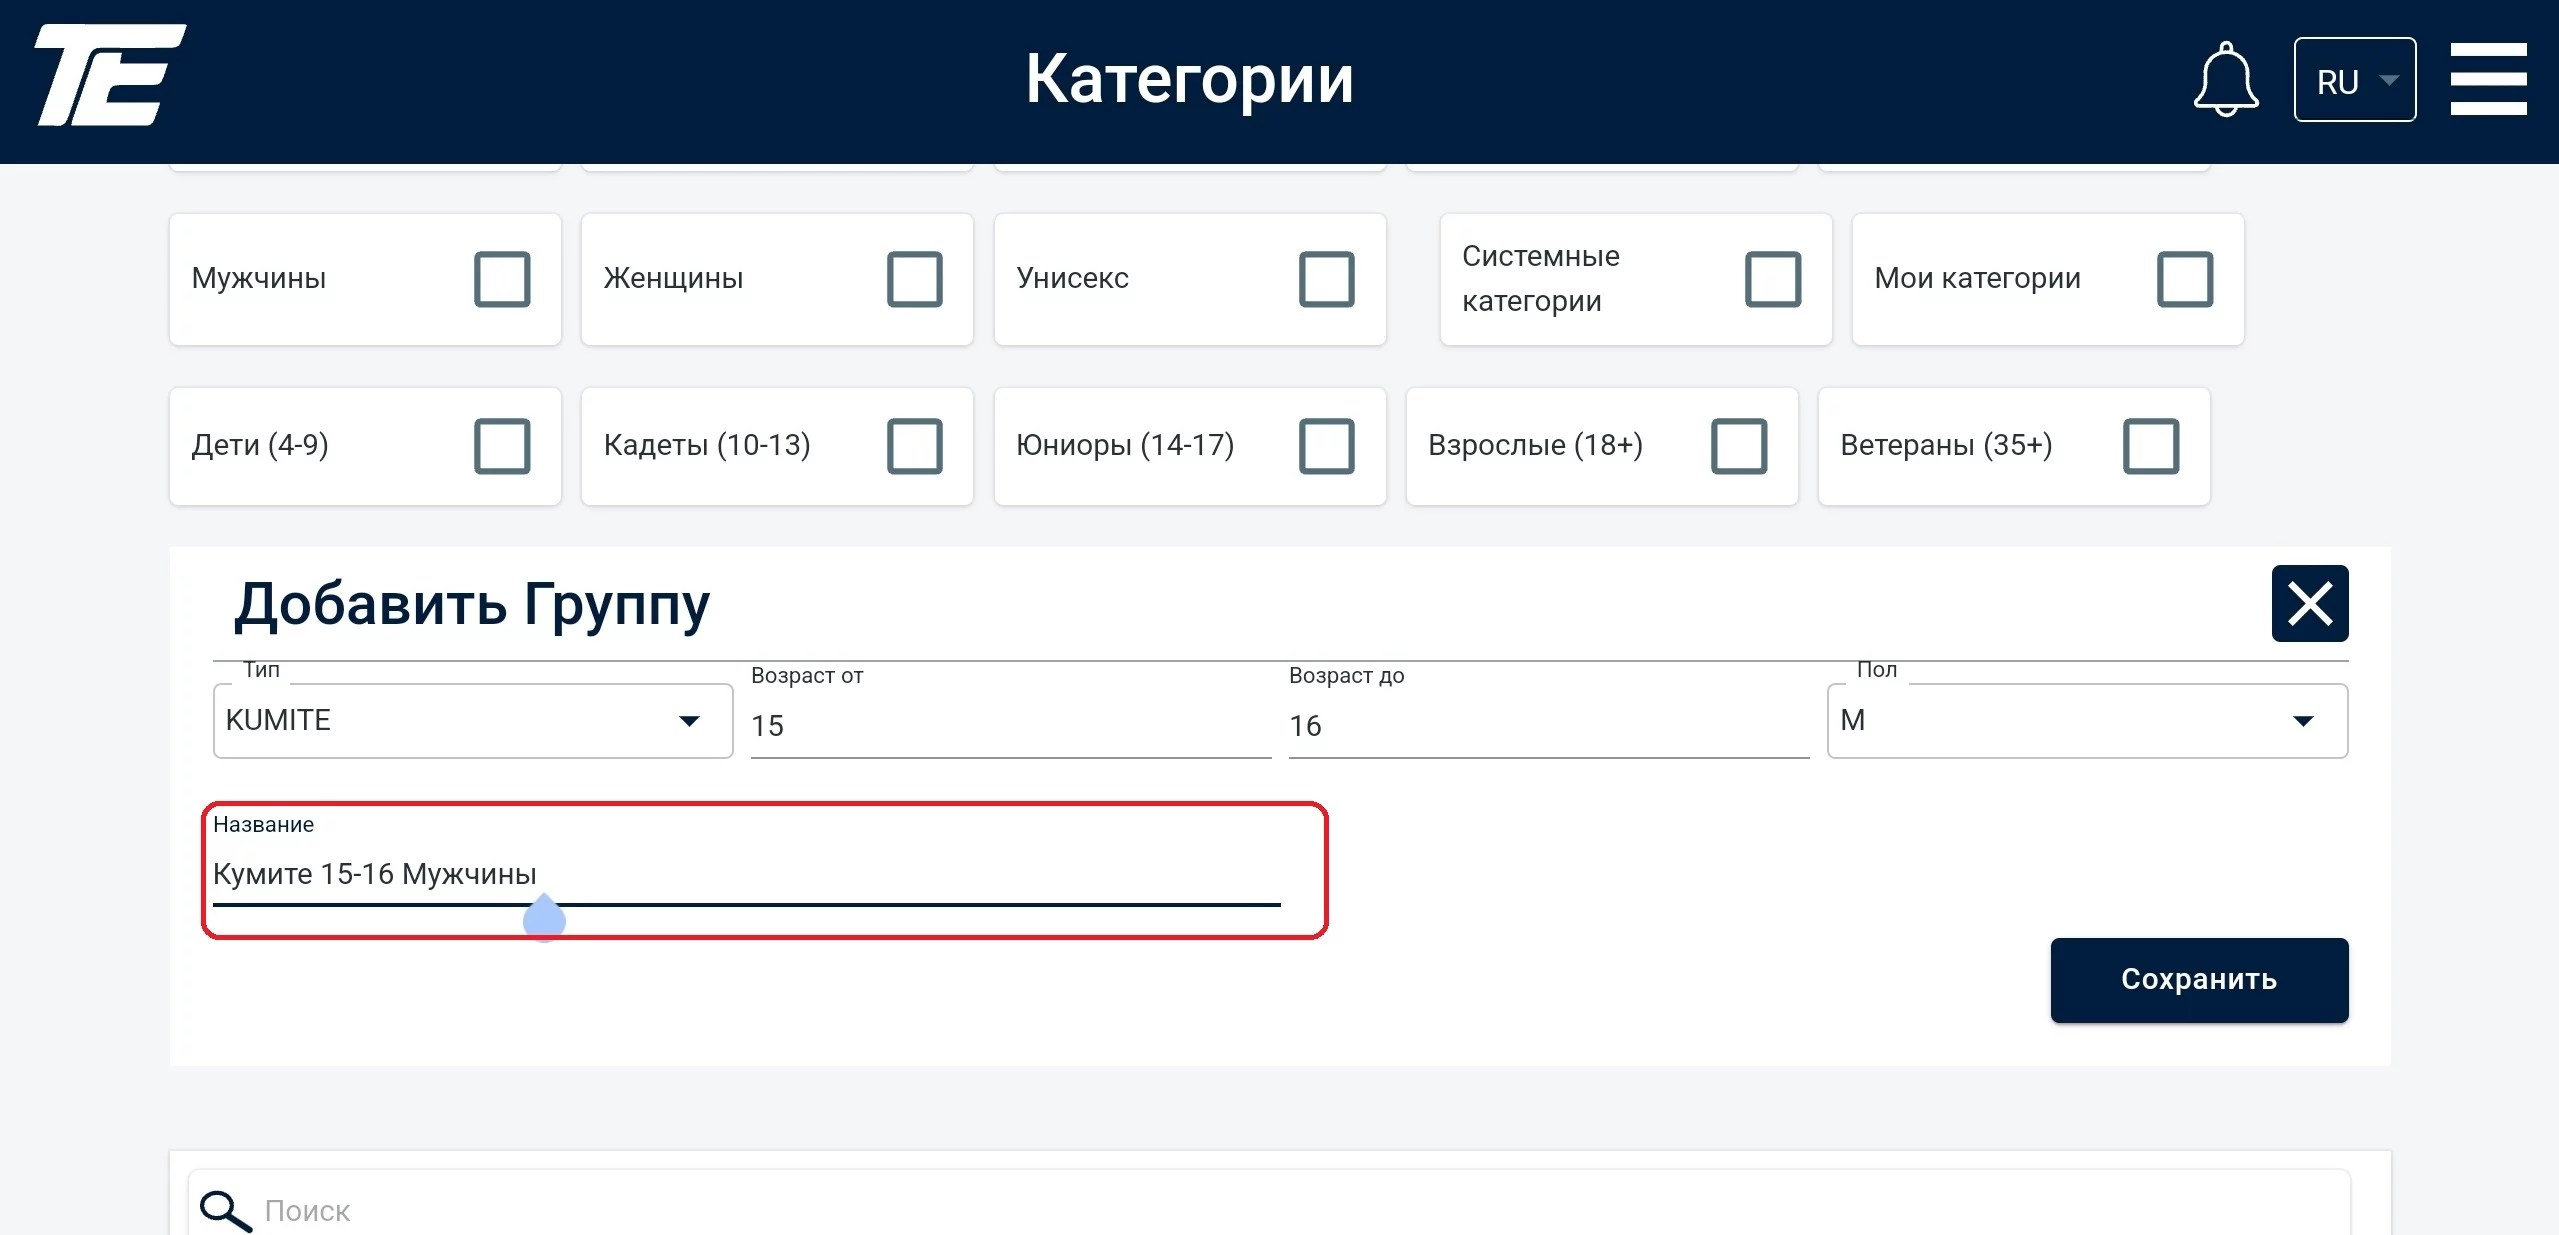
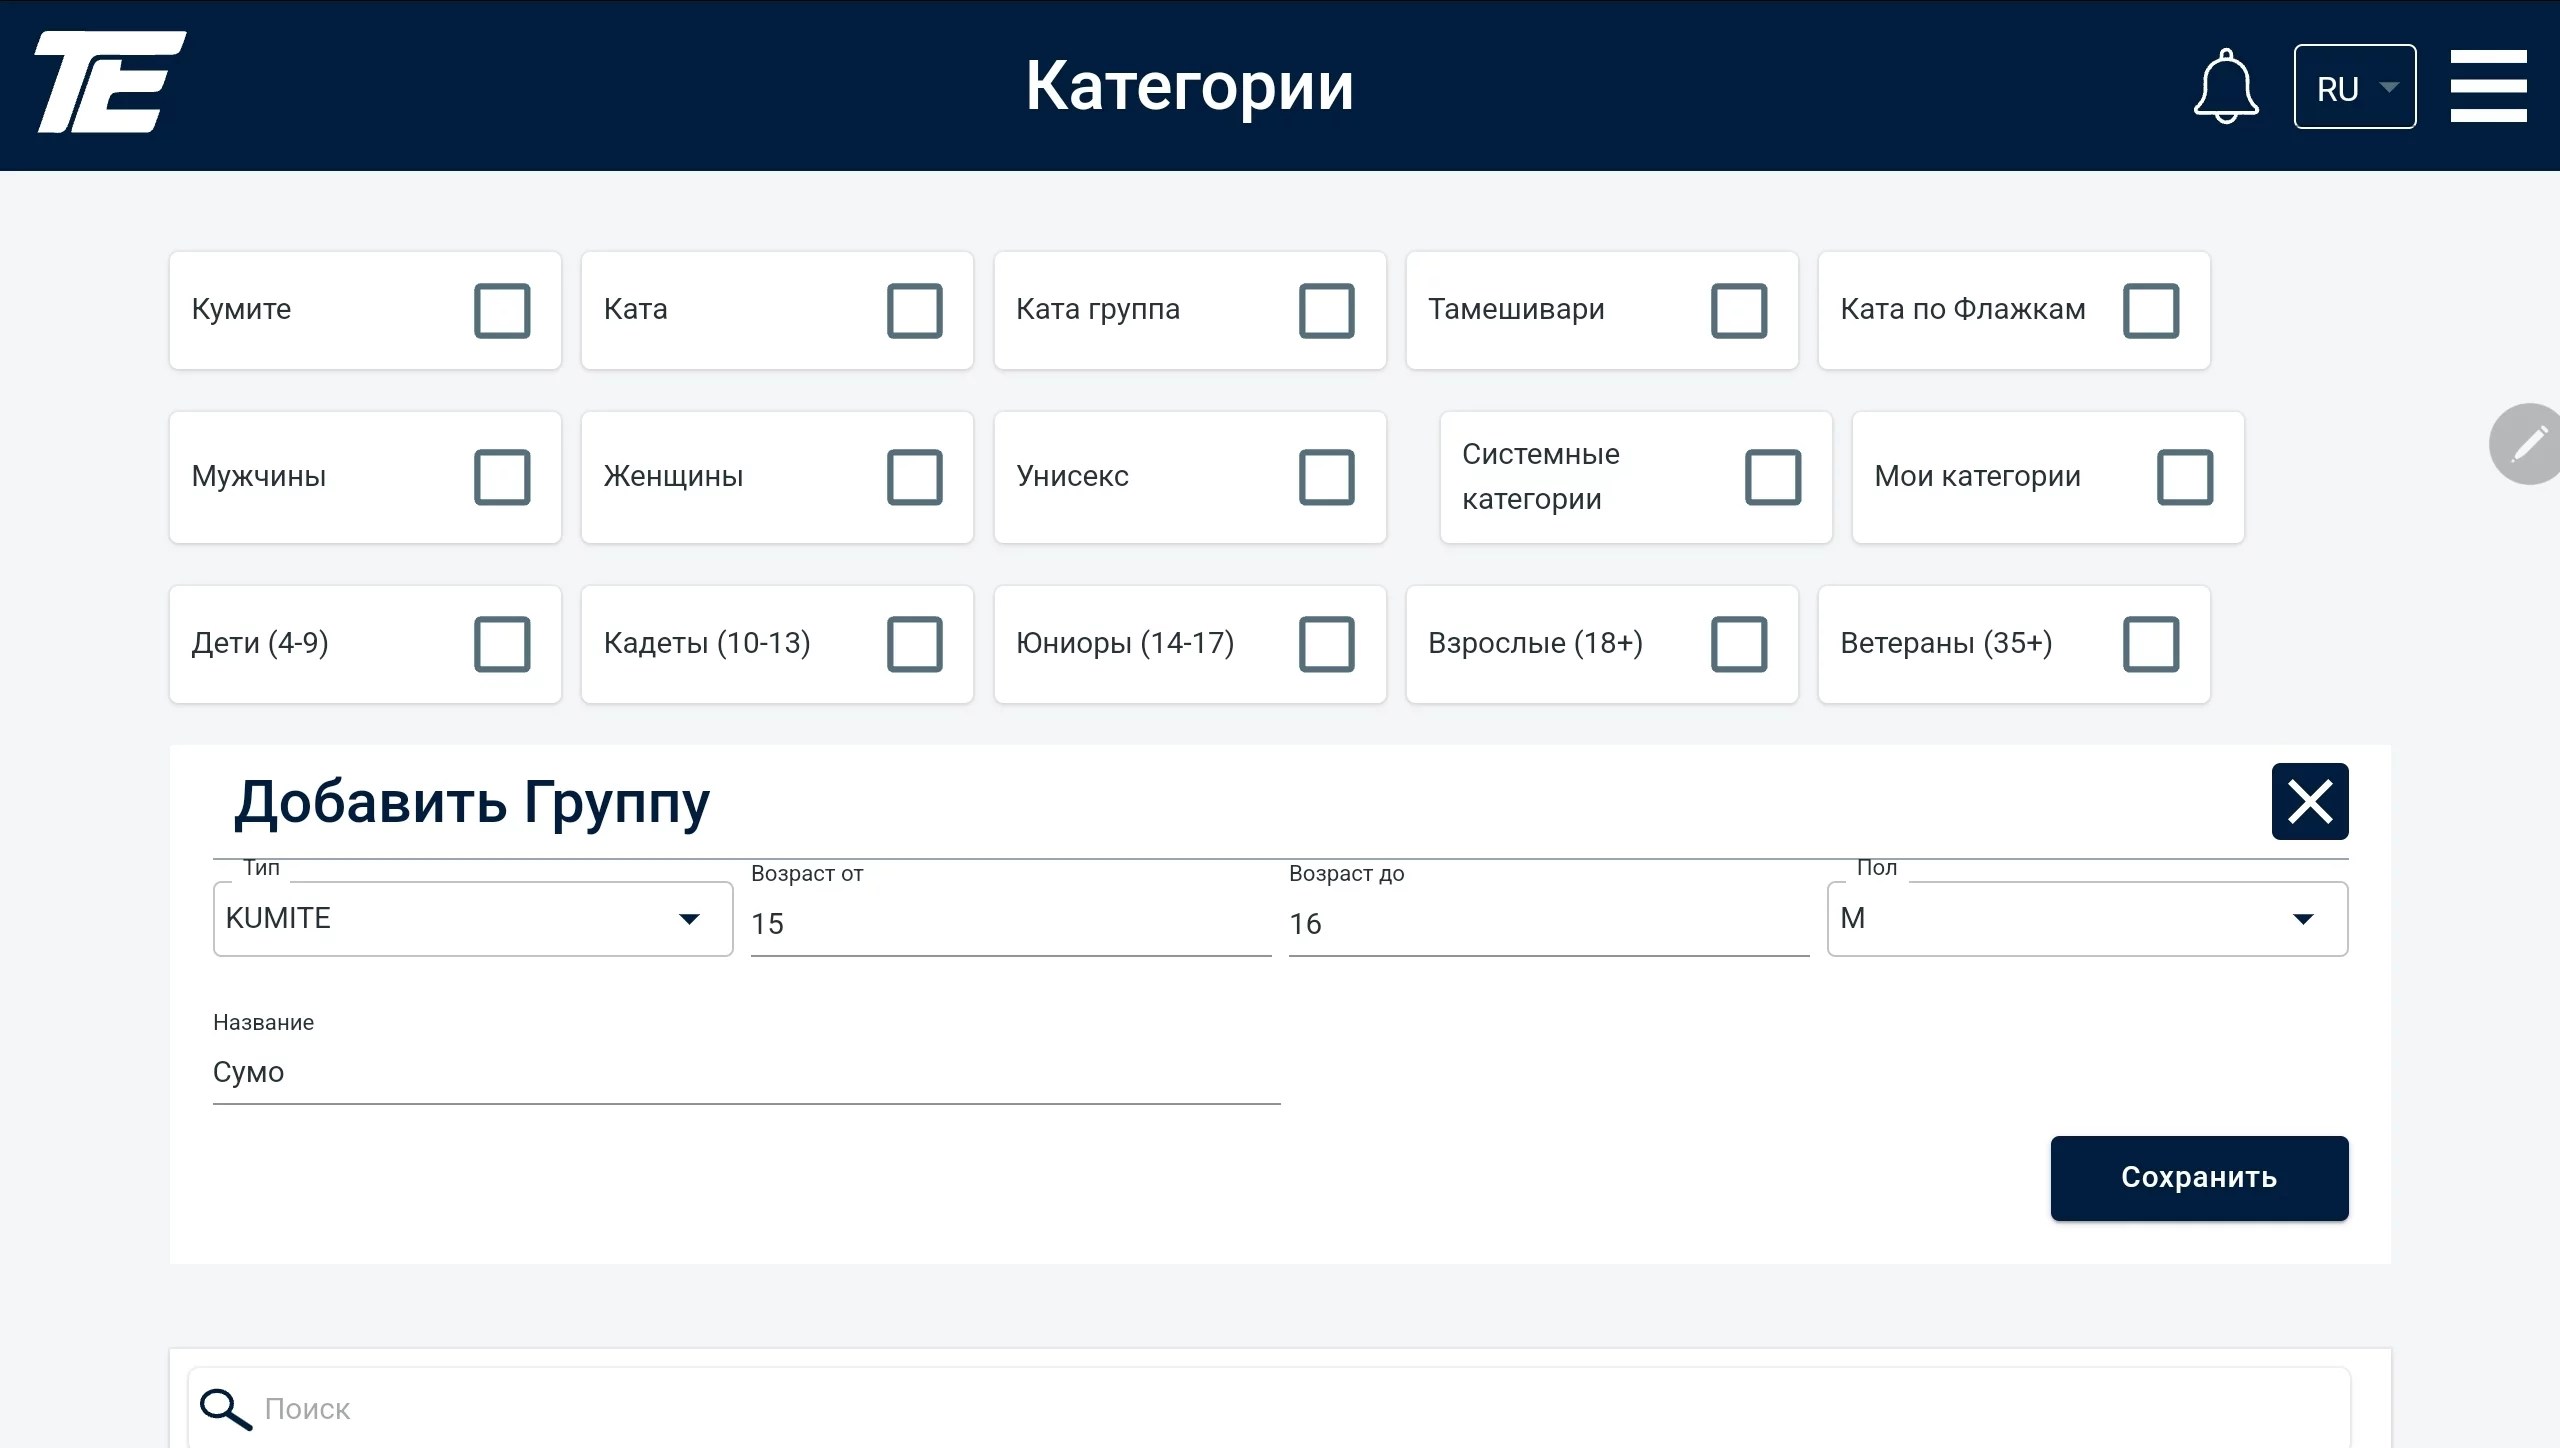
This is how the group will look in general view.
However, taking our clients’ requests into account, we have enhanced the functionality of this group. Now, within a single Kumite group, you can create subgroups of different weights.
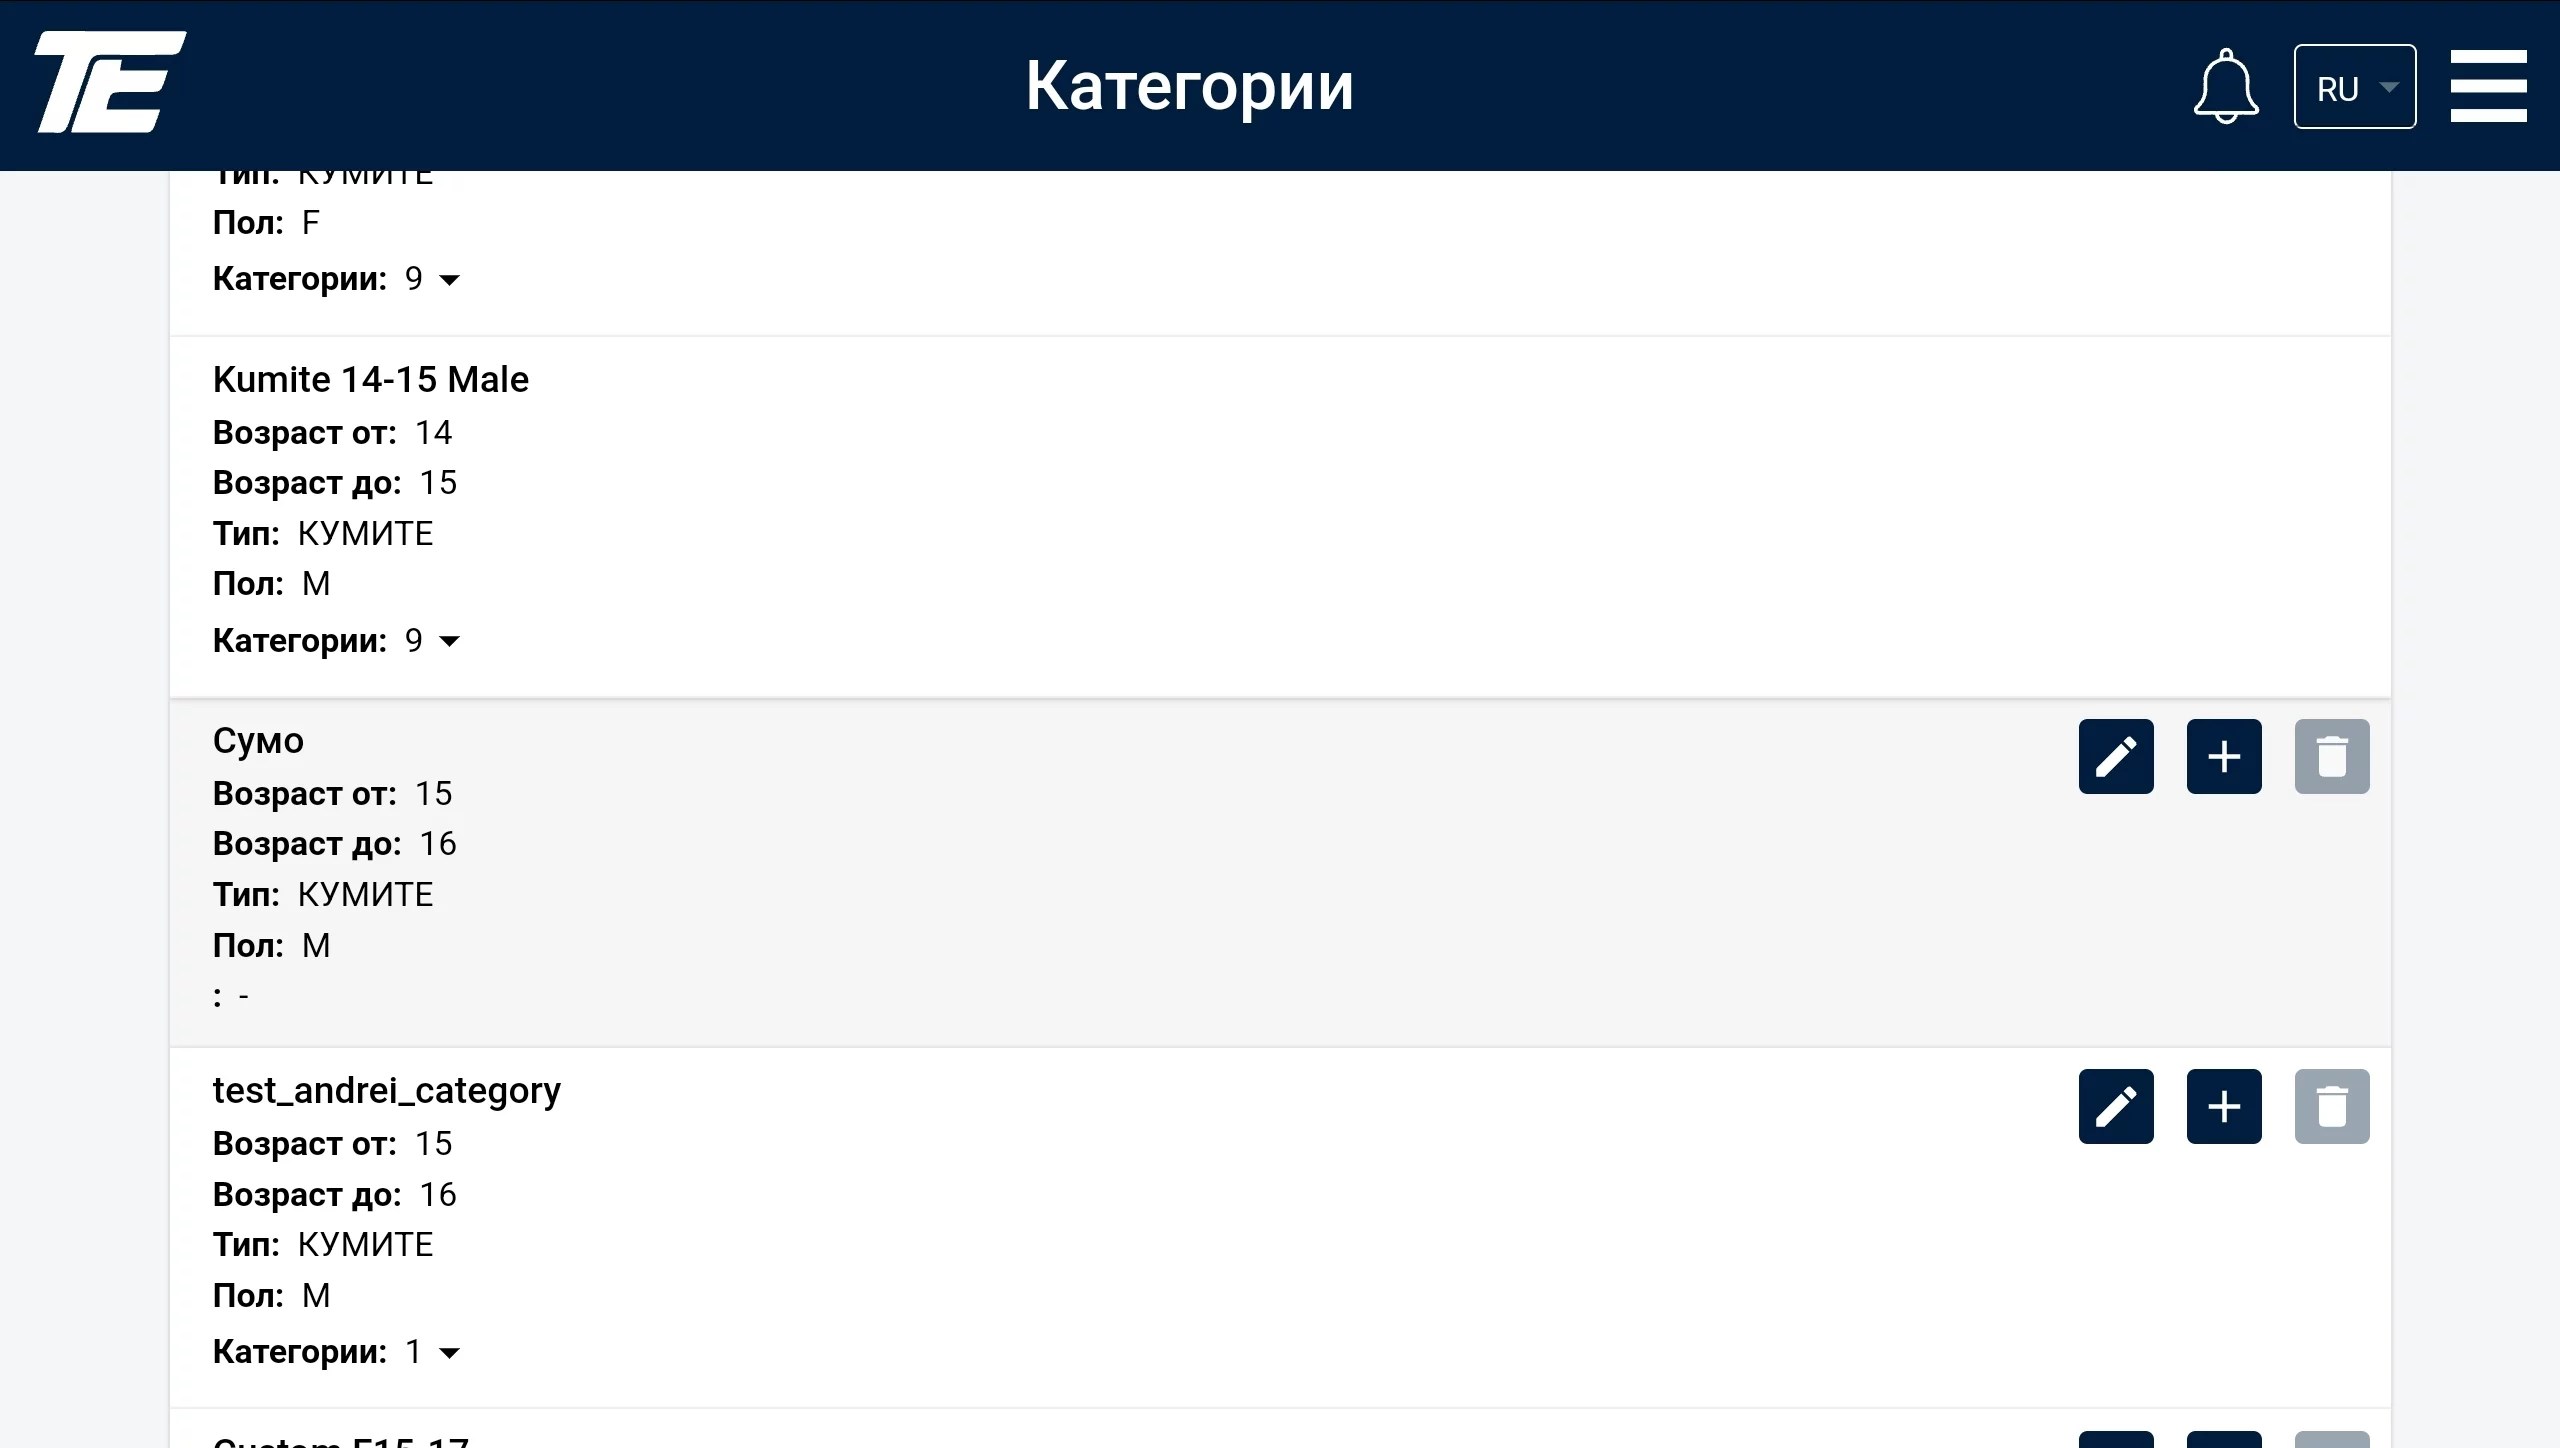
To add a category within a group, click the + icon.
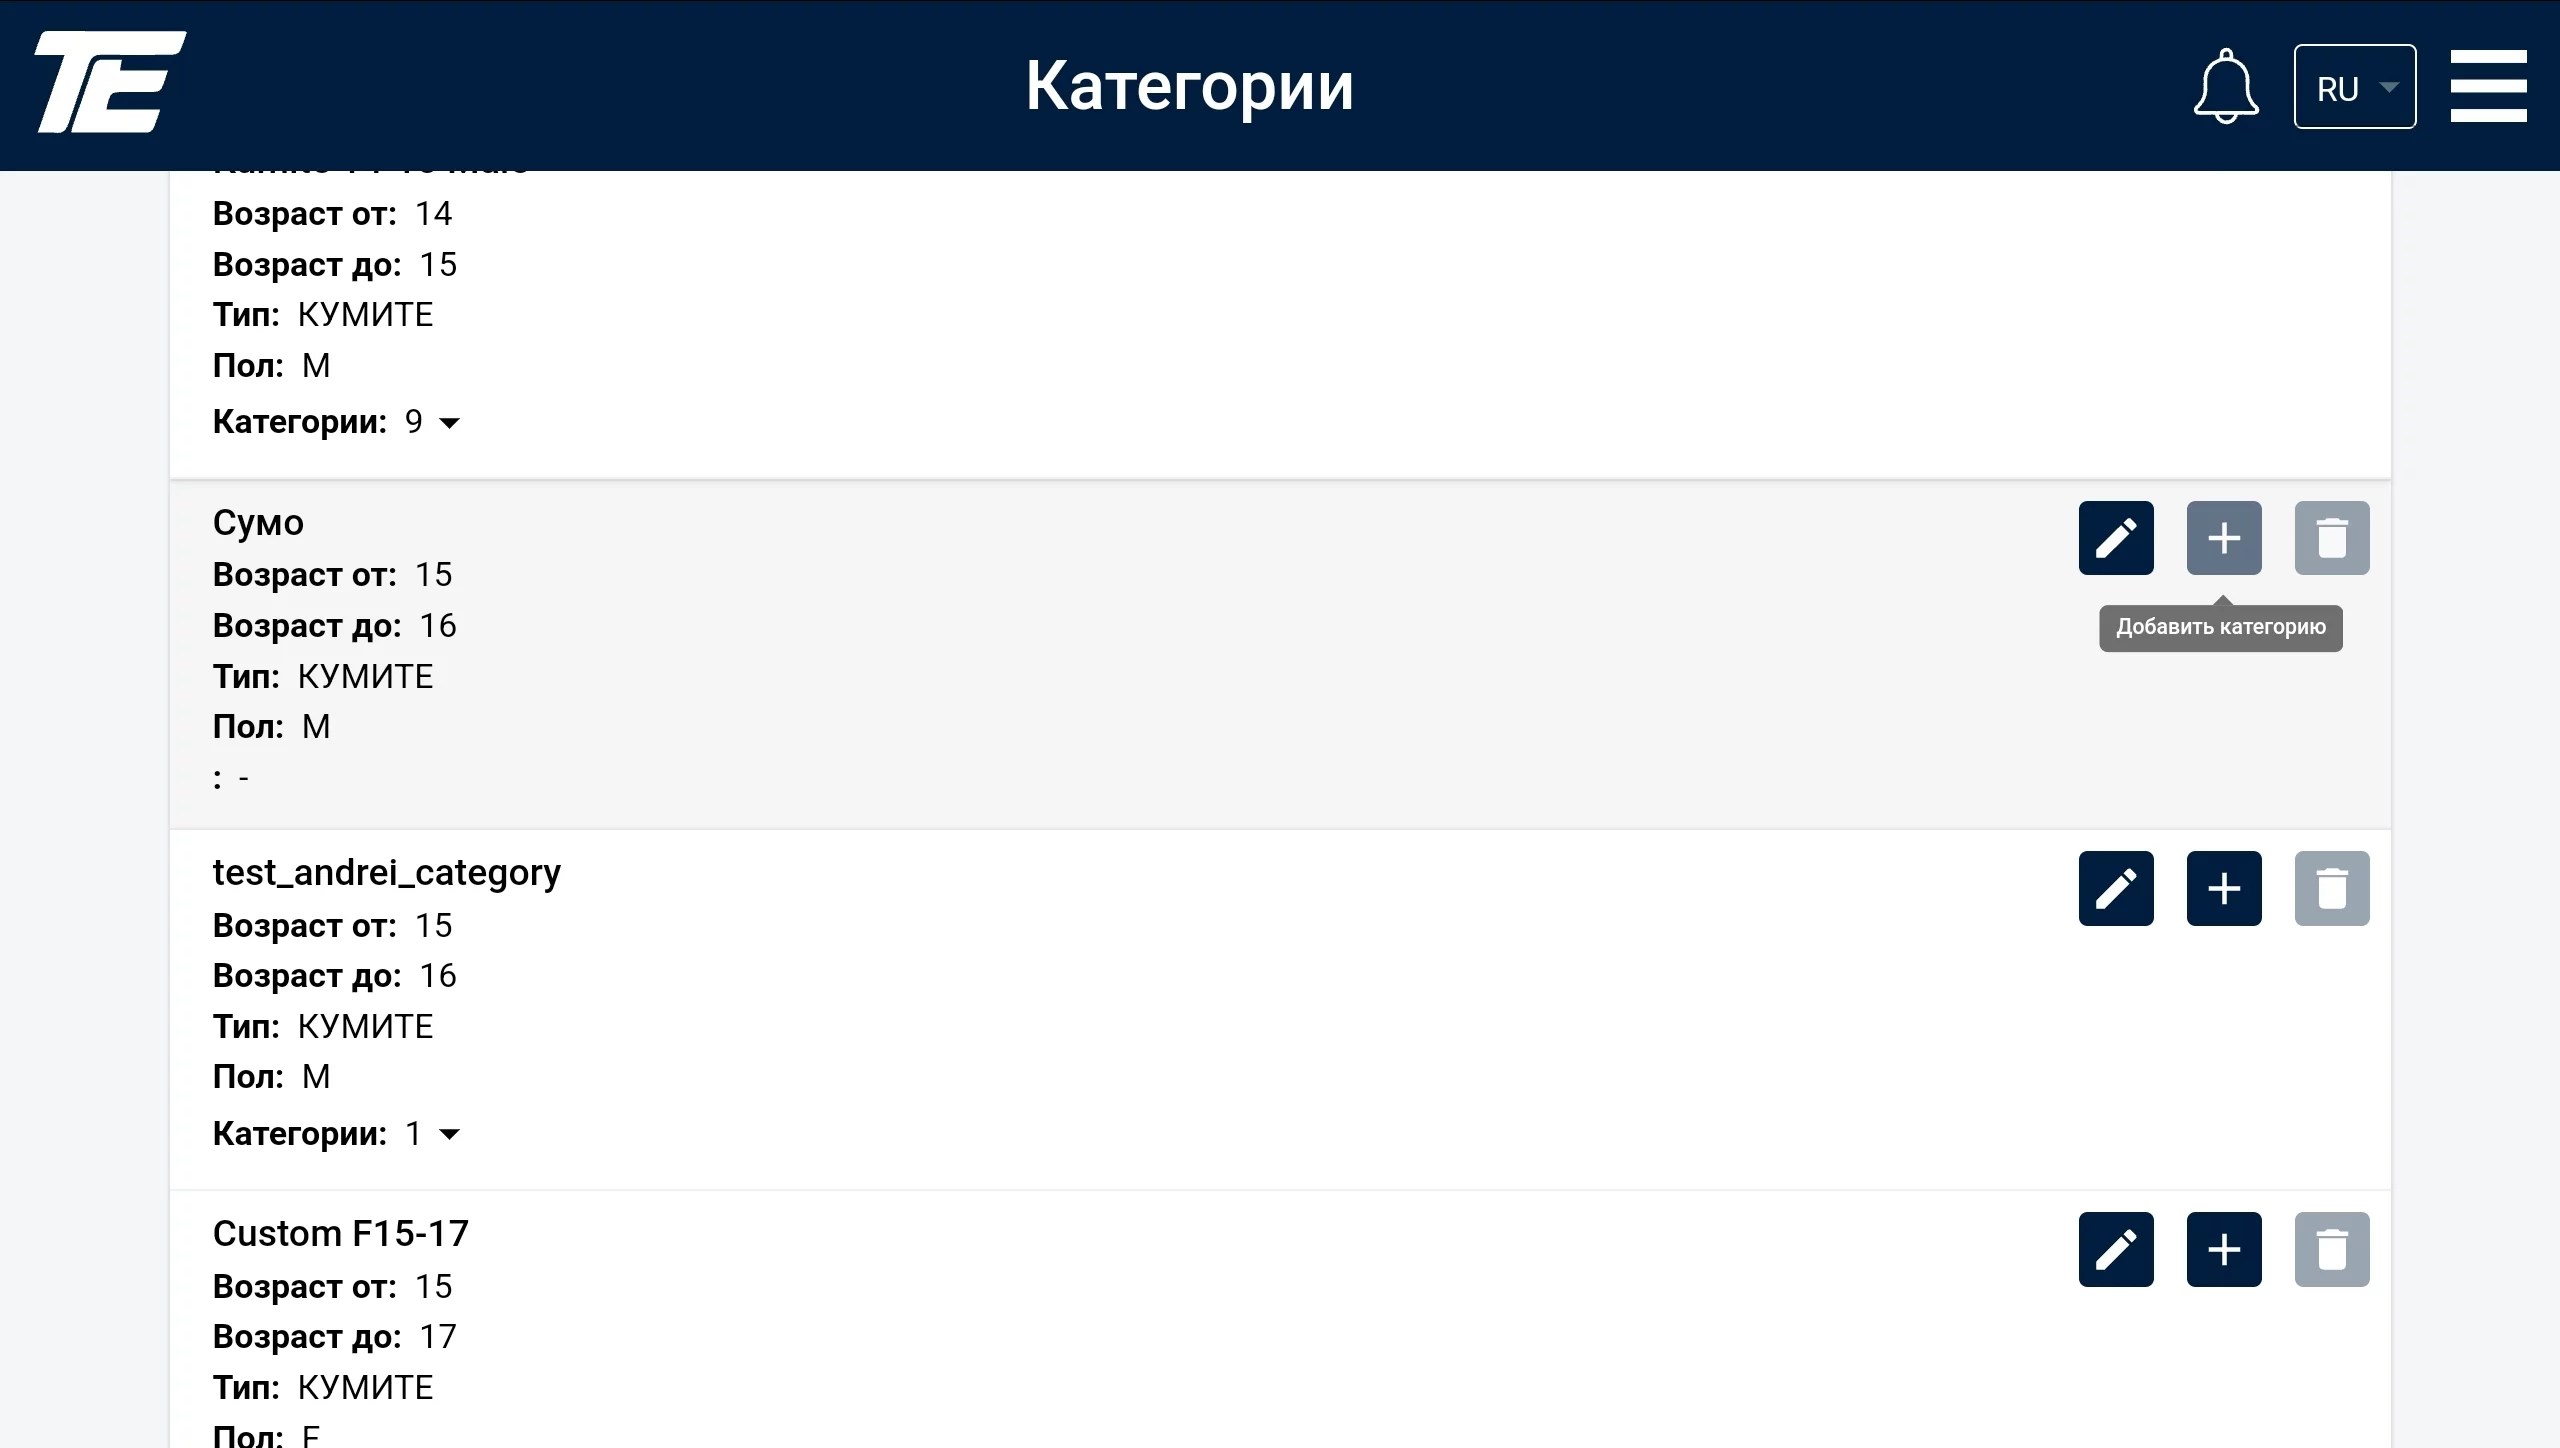
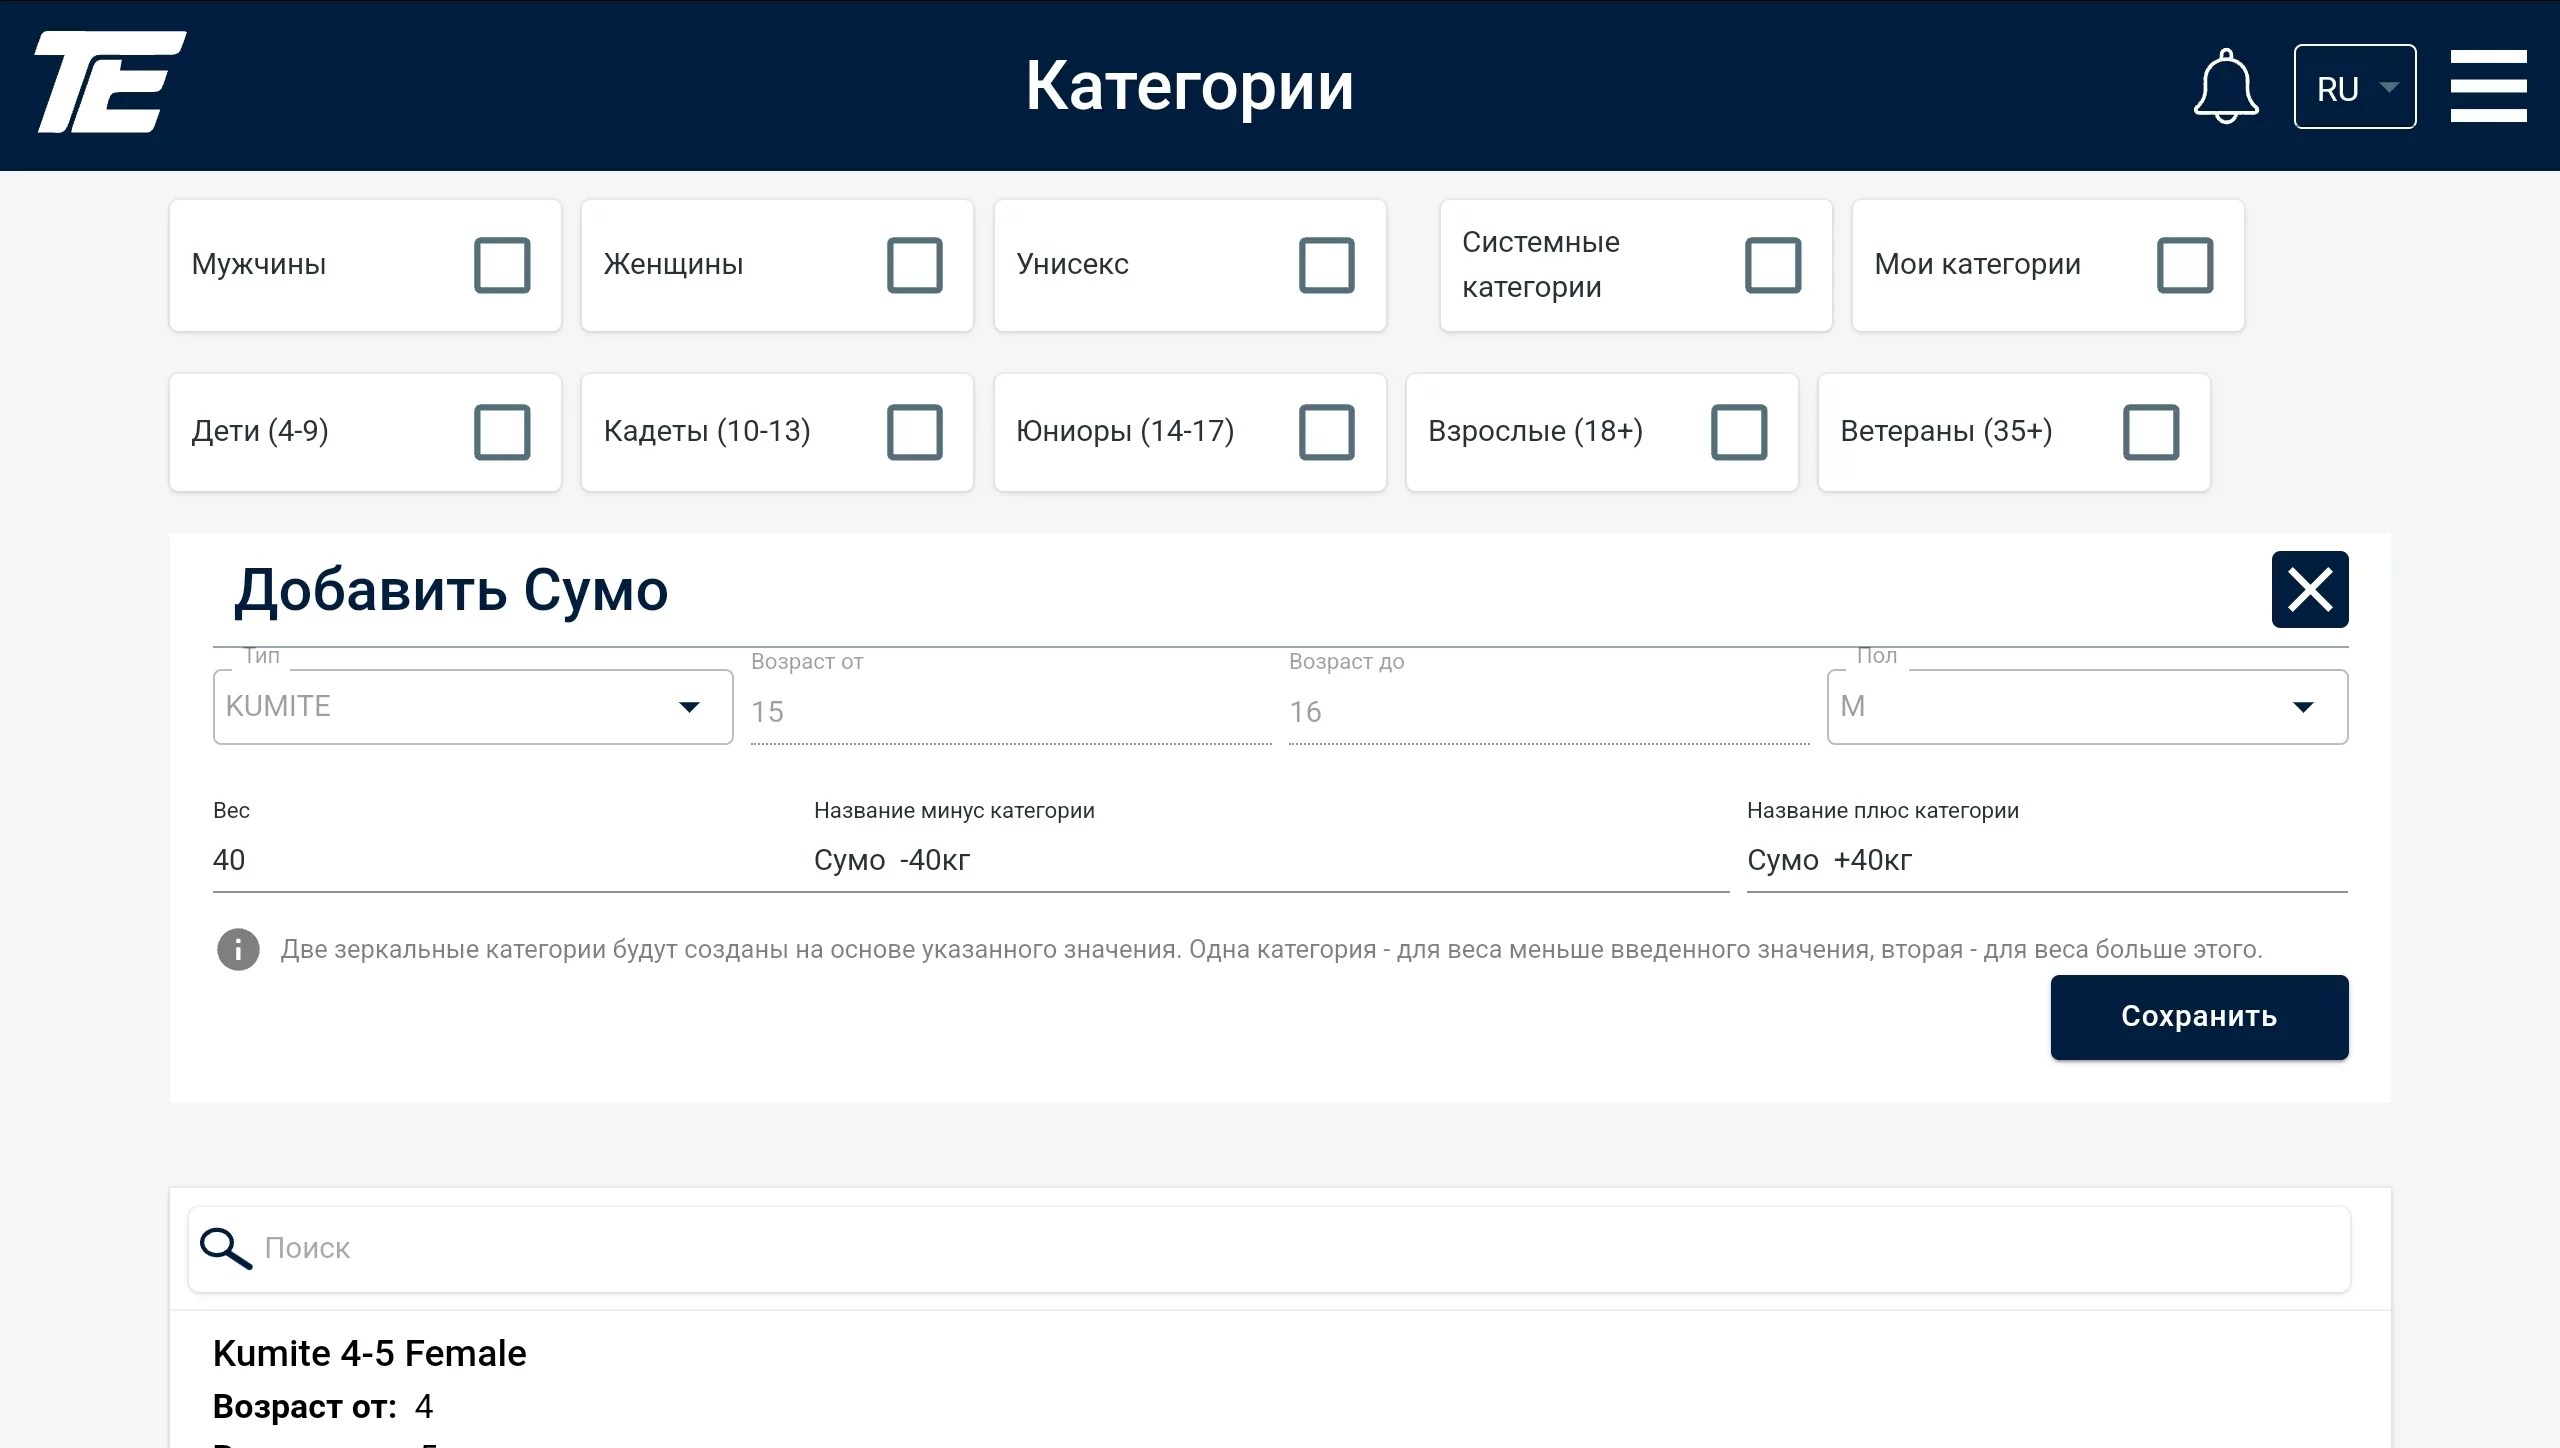
Next, you just need to specify the average weight for the participants of the category.
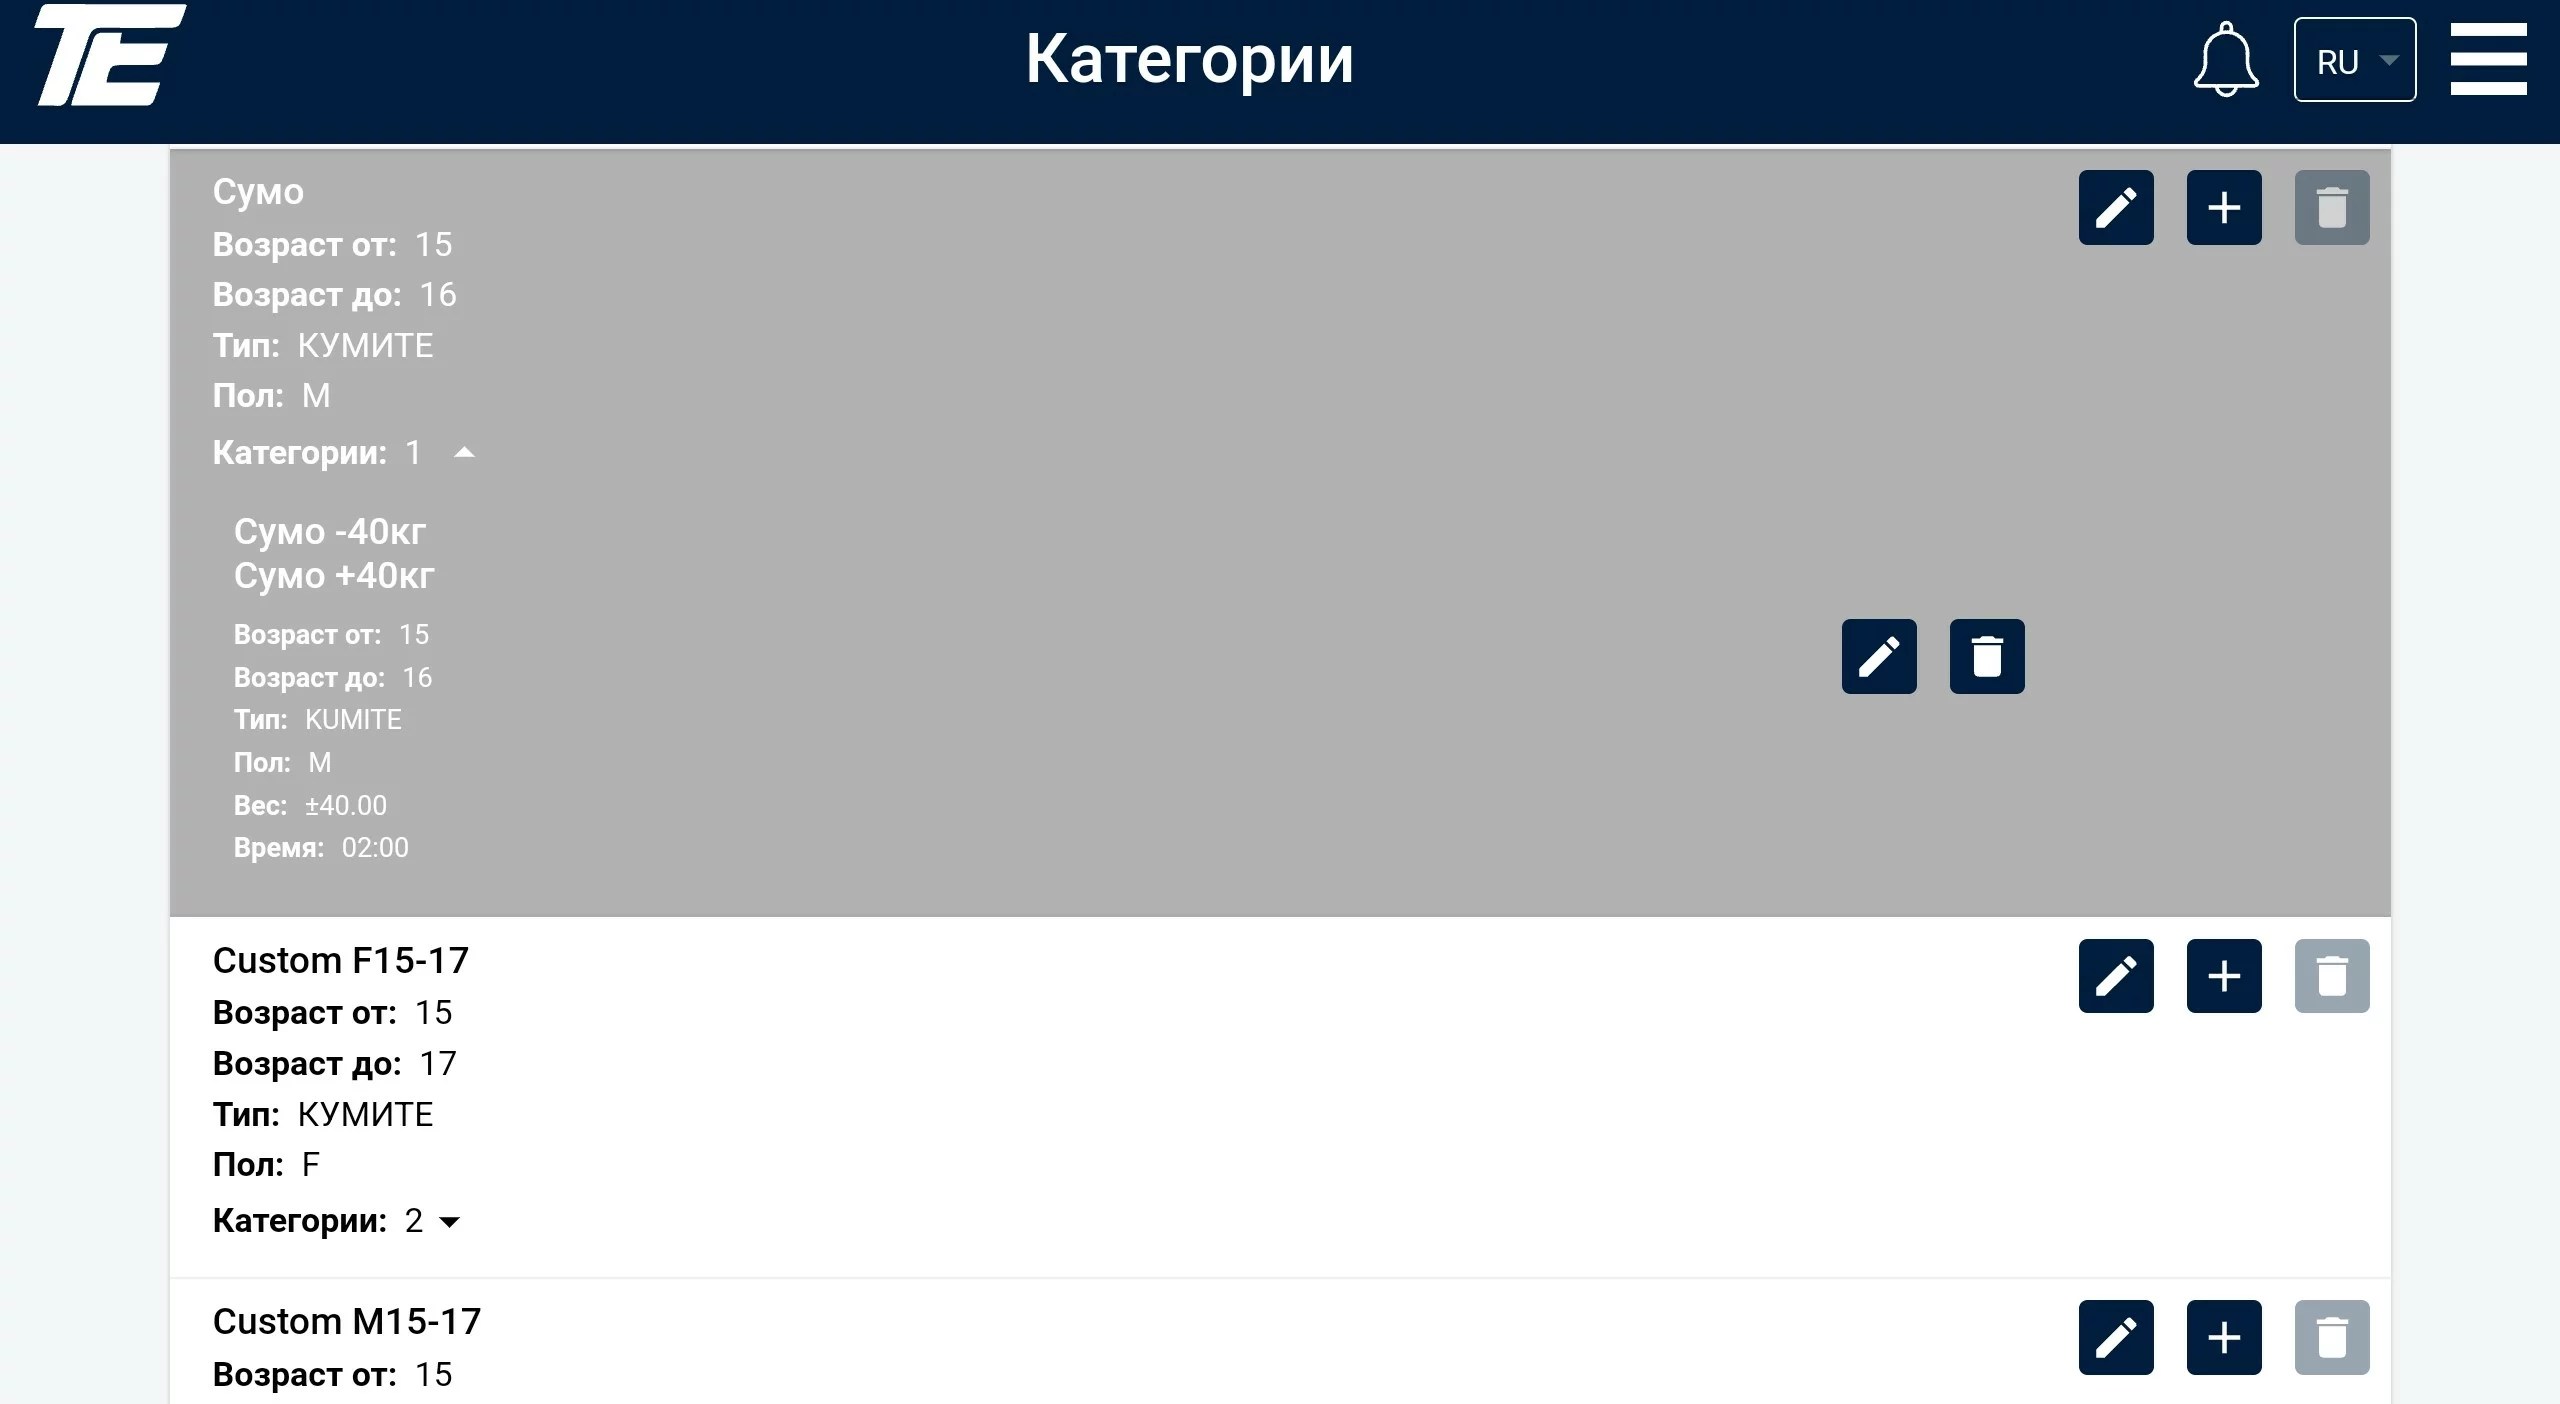
After a successful save, the category should take the following form:
Team kata is created on the same principle as regular kata.
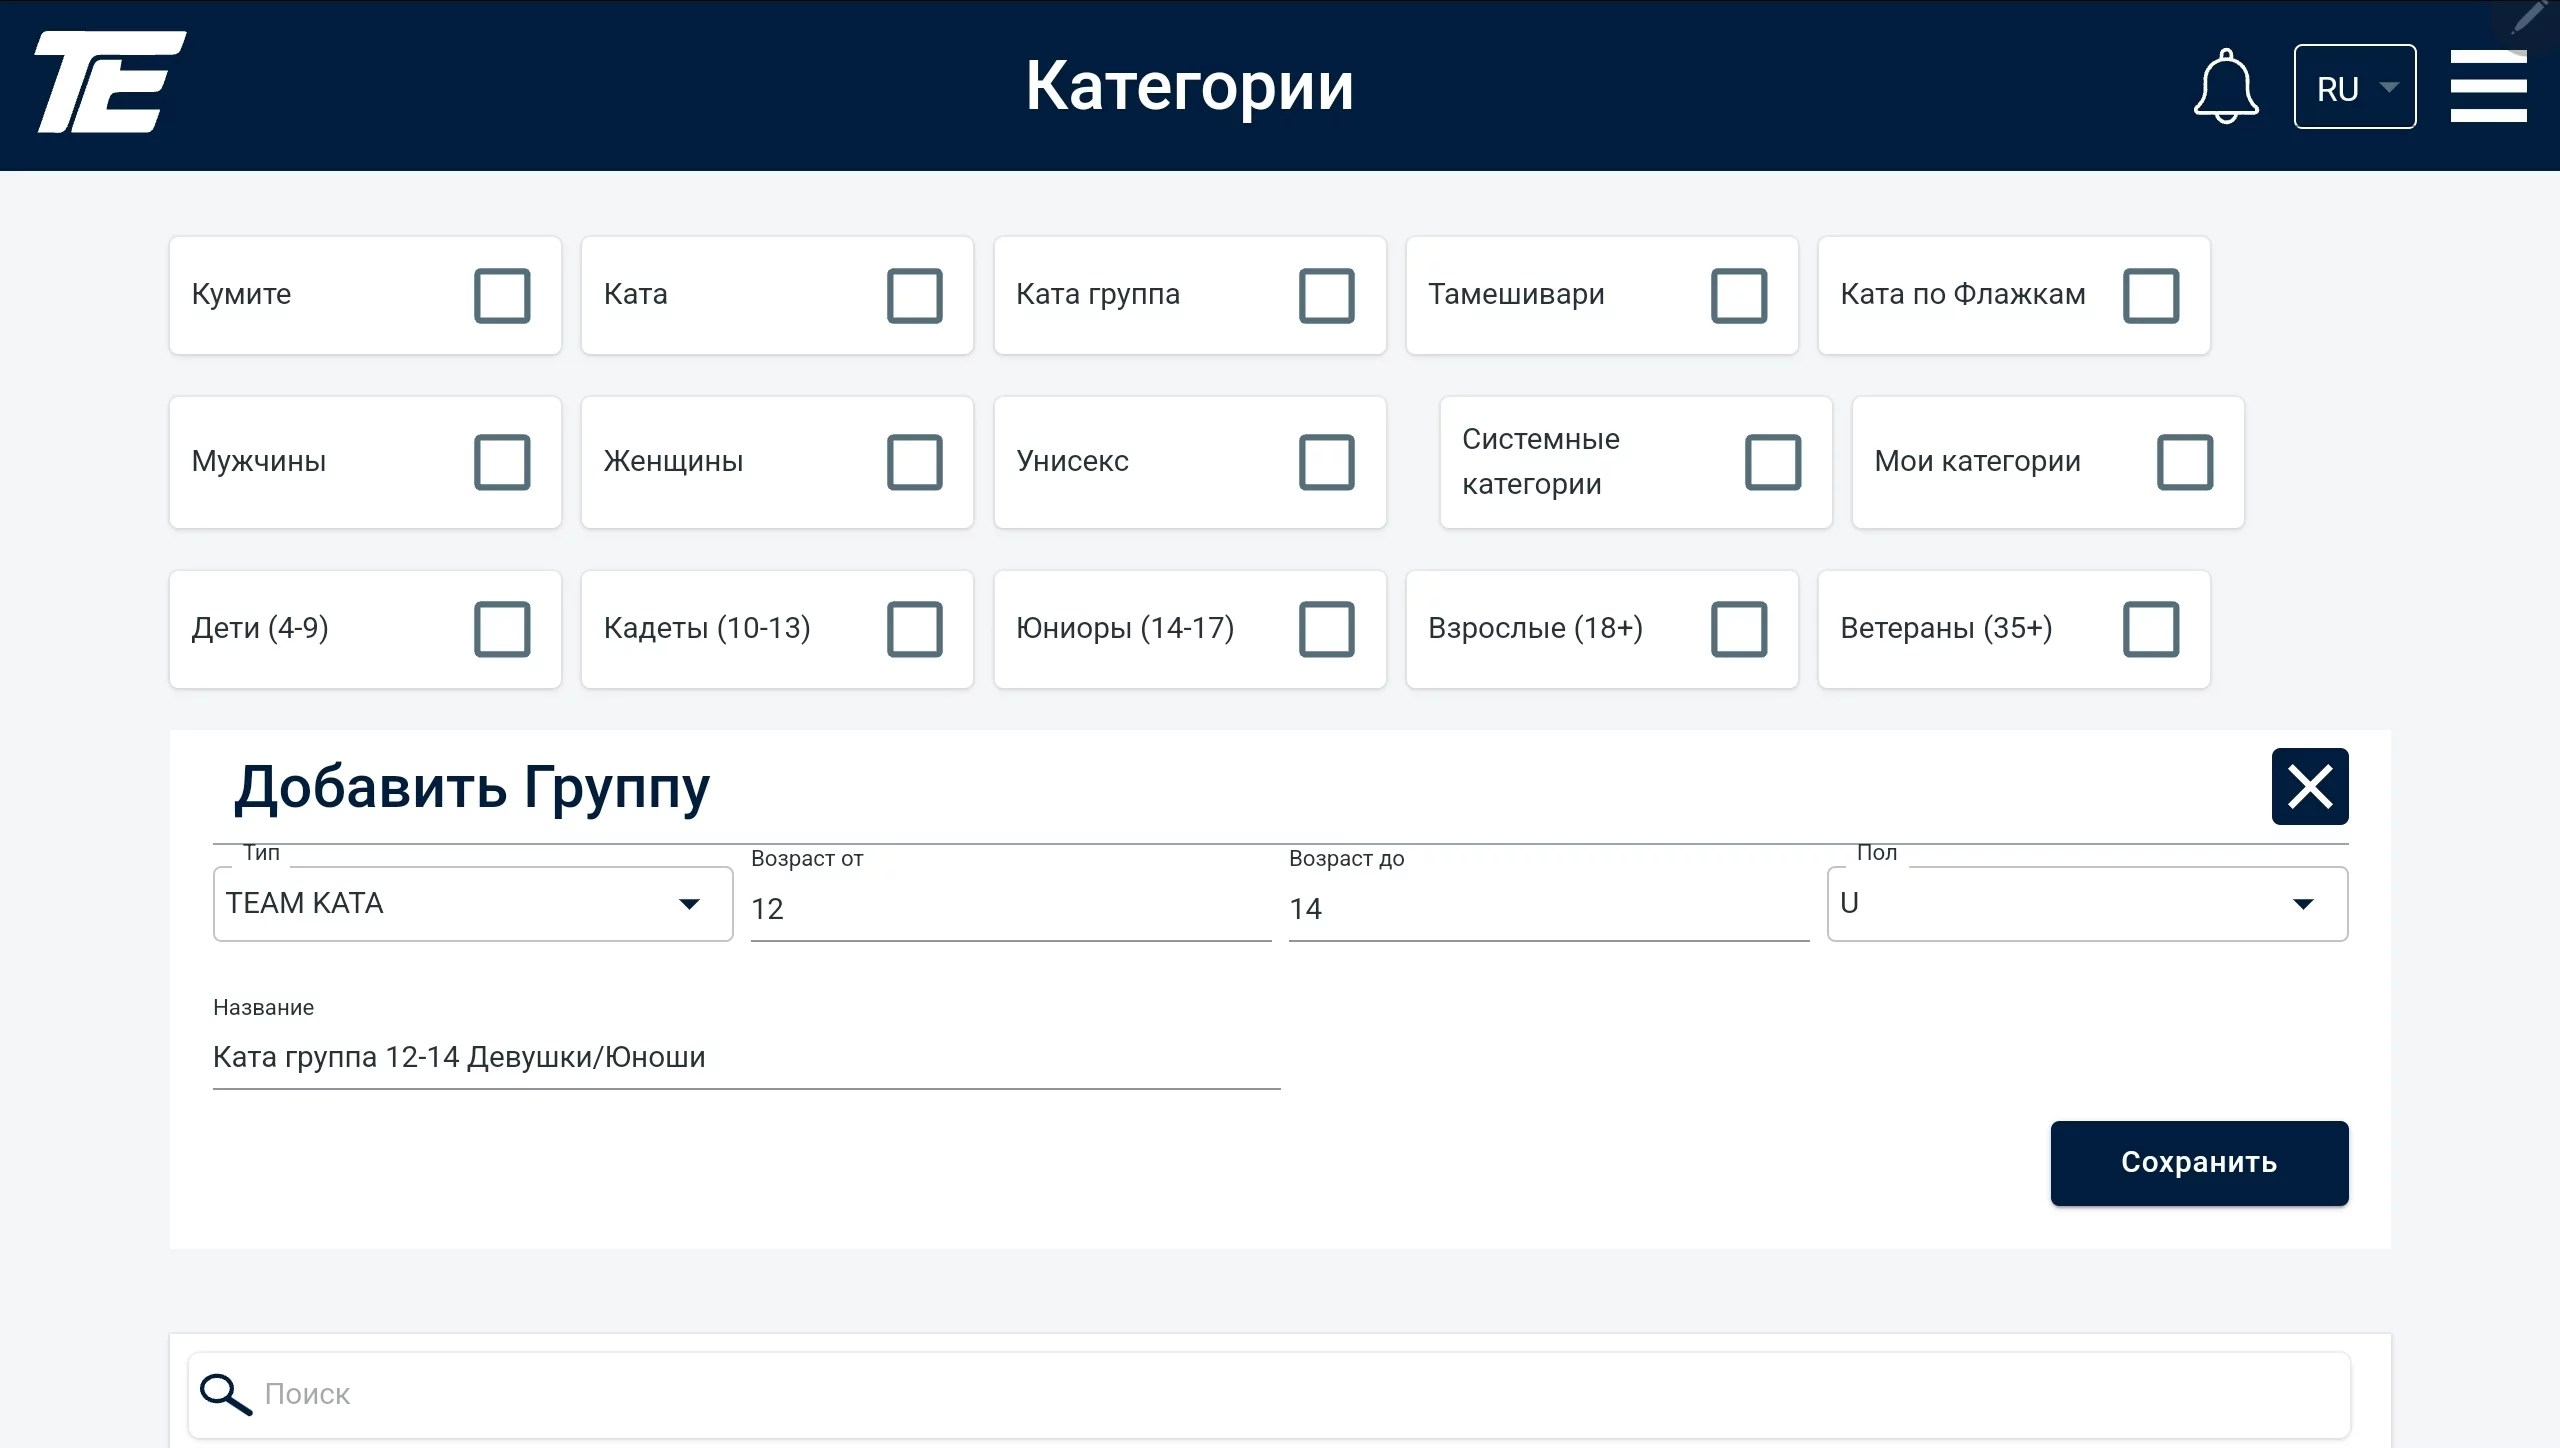
Where:
F — women,
M — men,
U — mixed category (for participants of both sexes)
Tameshiwari is the breaking of hard objects with unprotected parts of the body, practiced in karate.
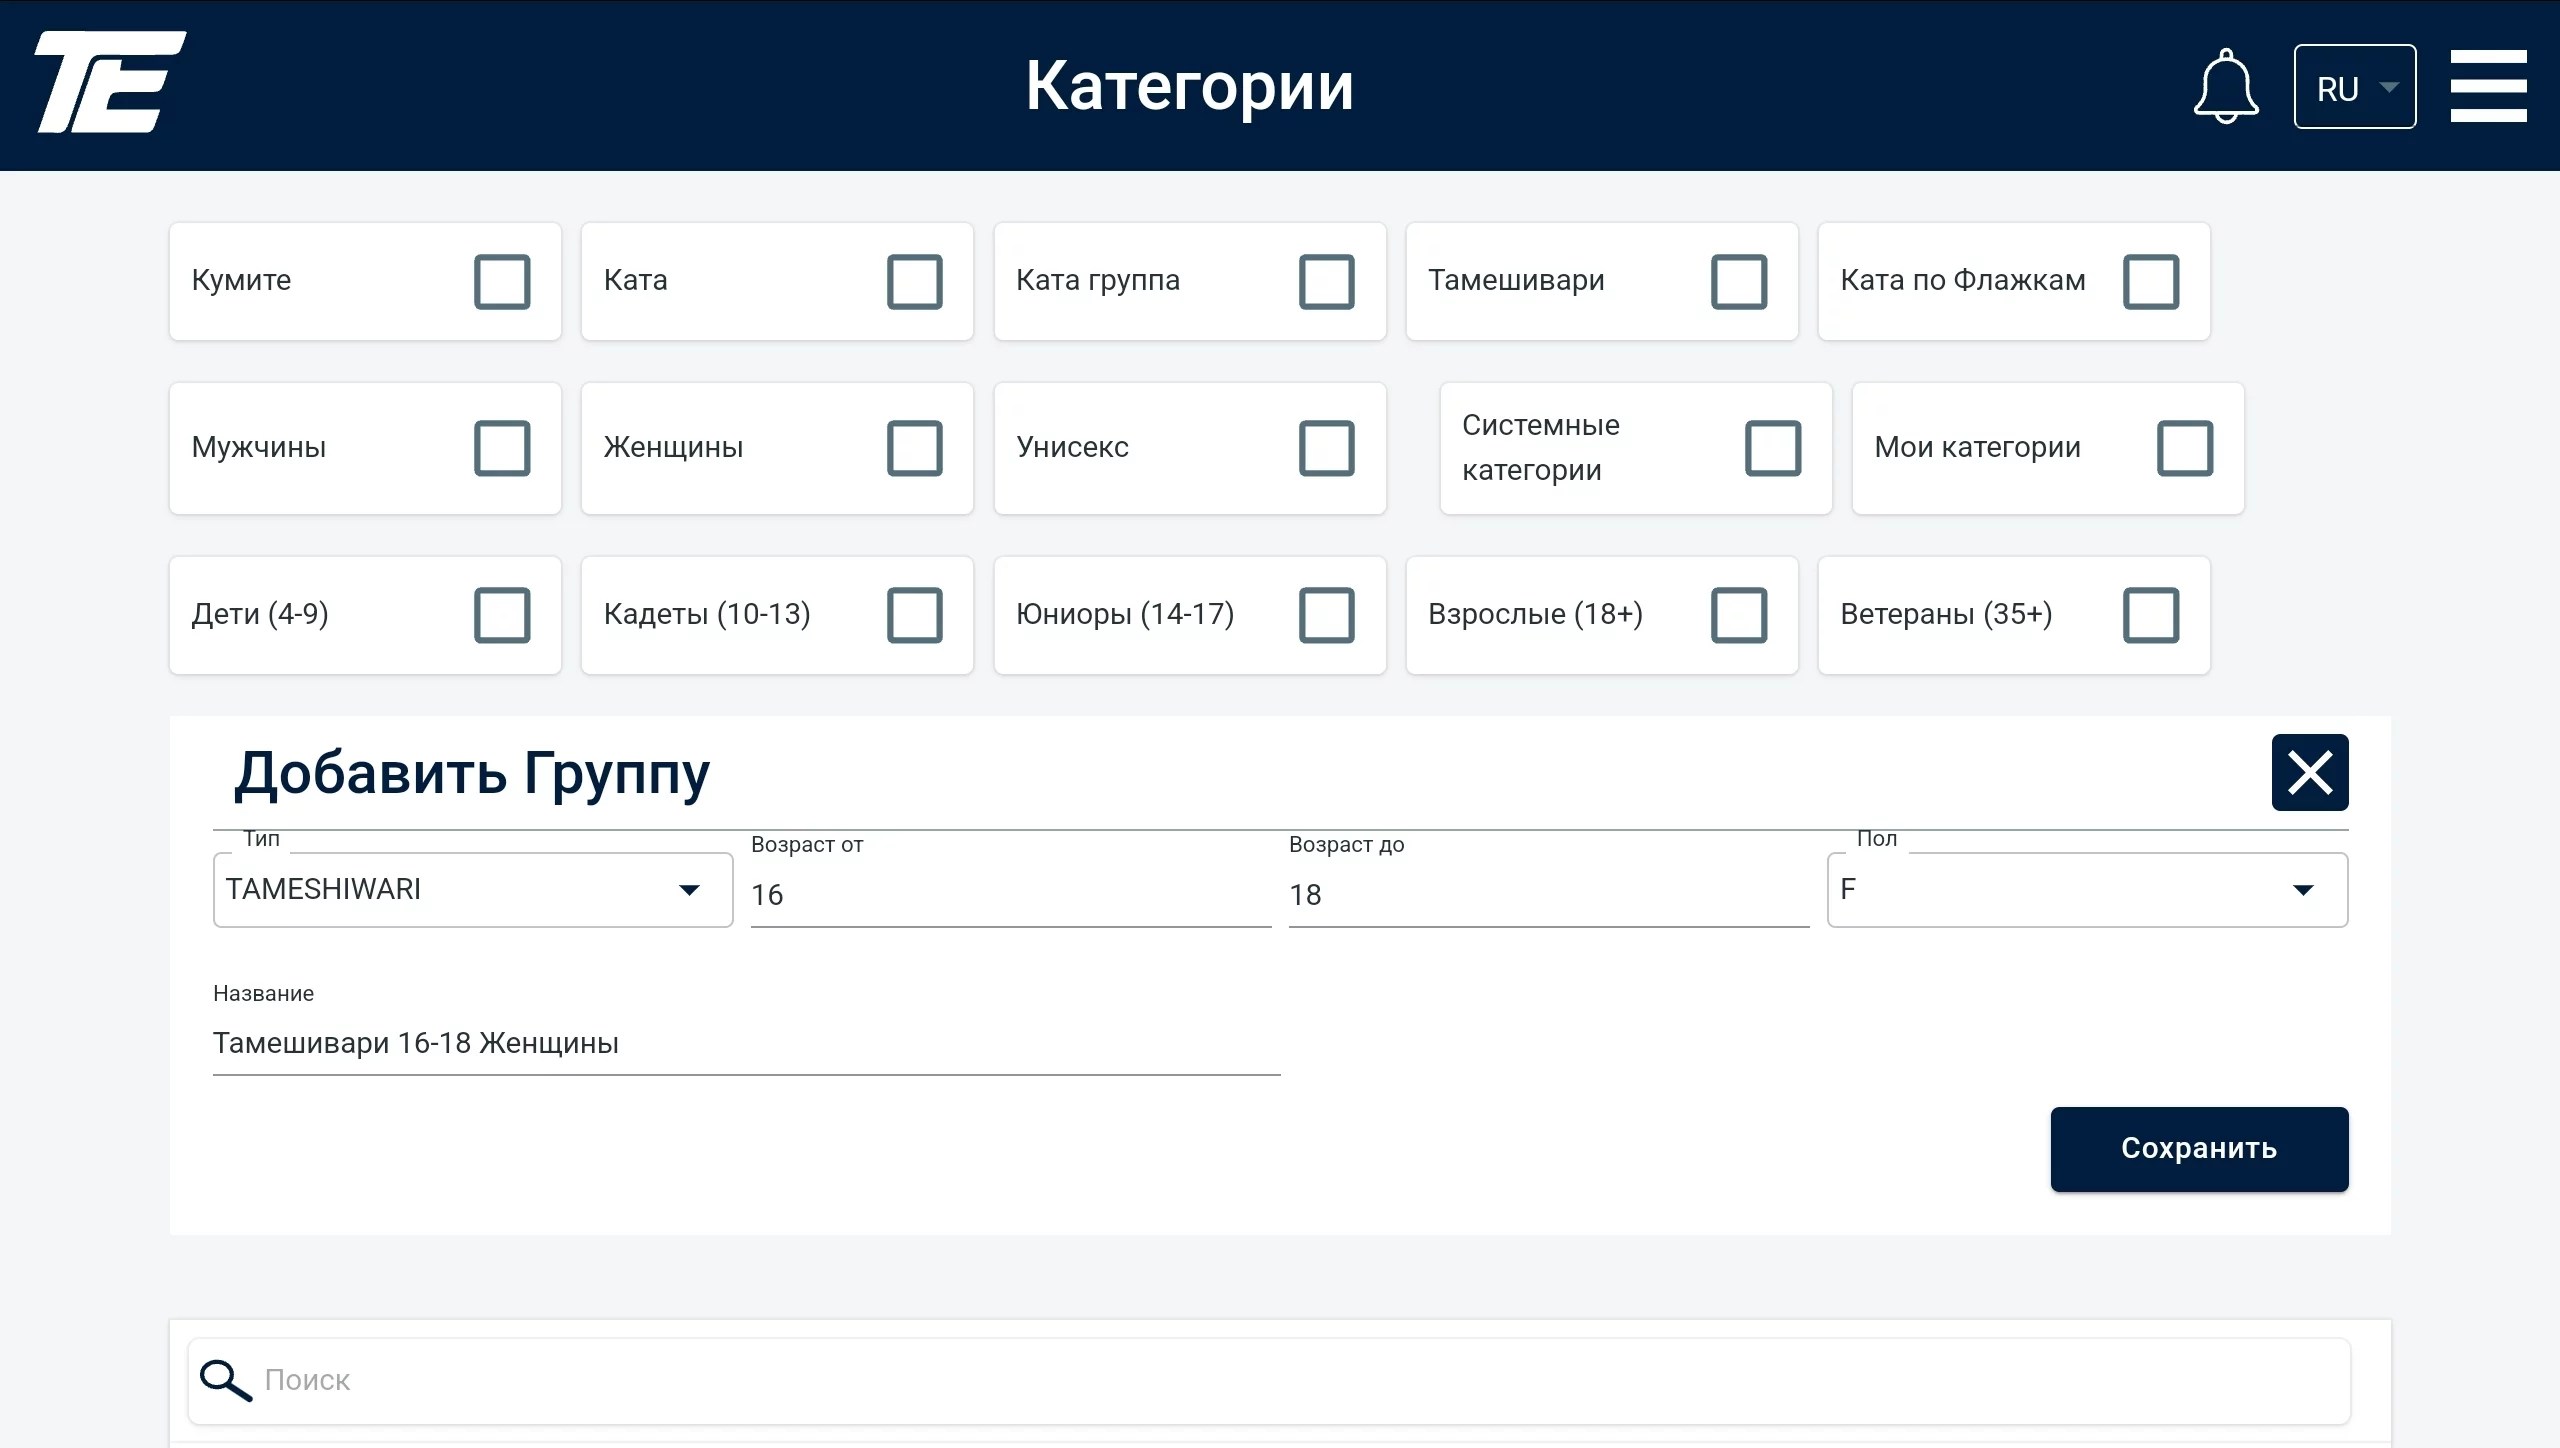
The category is easy to create and contains no subgroups.
Kata by Flags — this is a new feature offered to interested users.
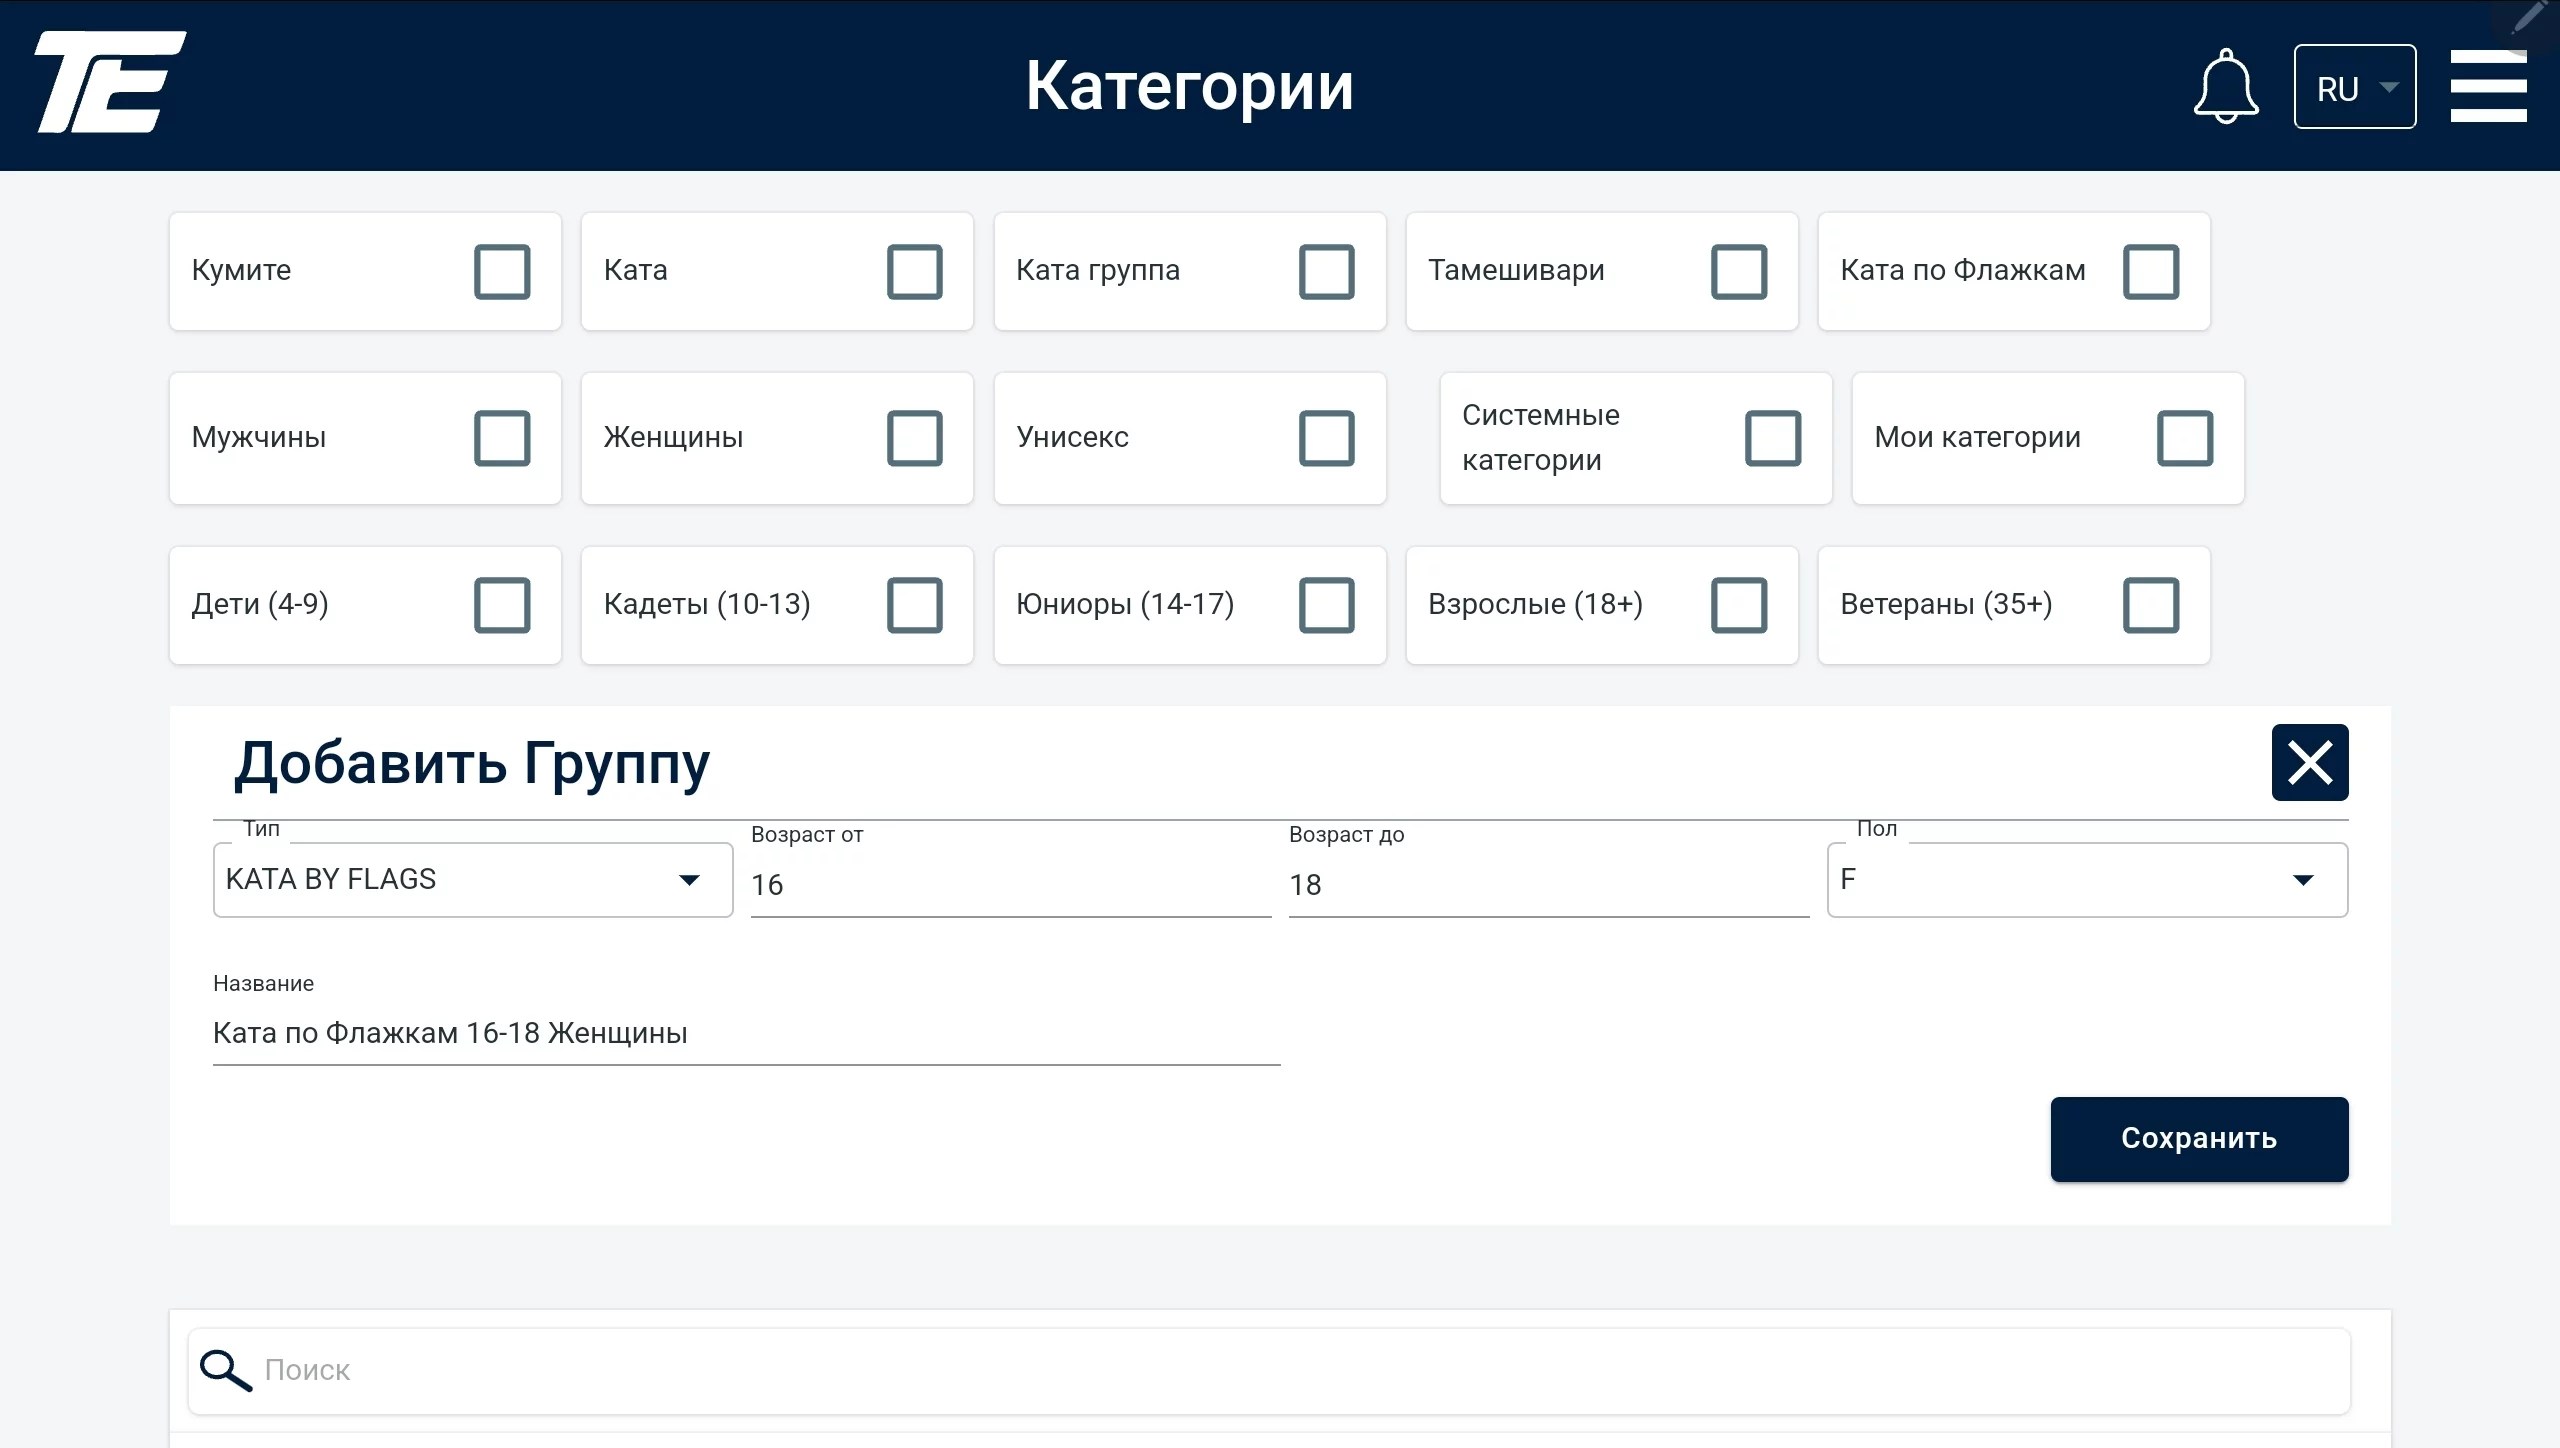
Before creating this category, we strongly recommend checking the requirements of the sporting regulations.
To assign categories to the tournament, go to the Tatami/Categories link
Next, go to the Assign Categories tab
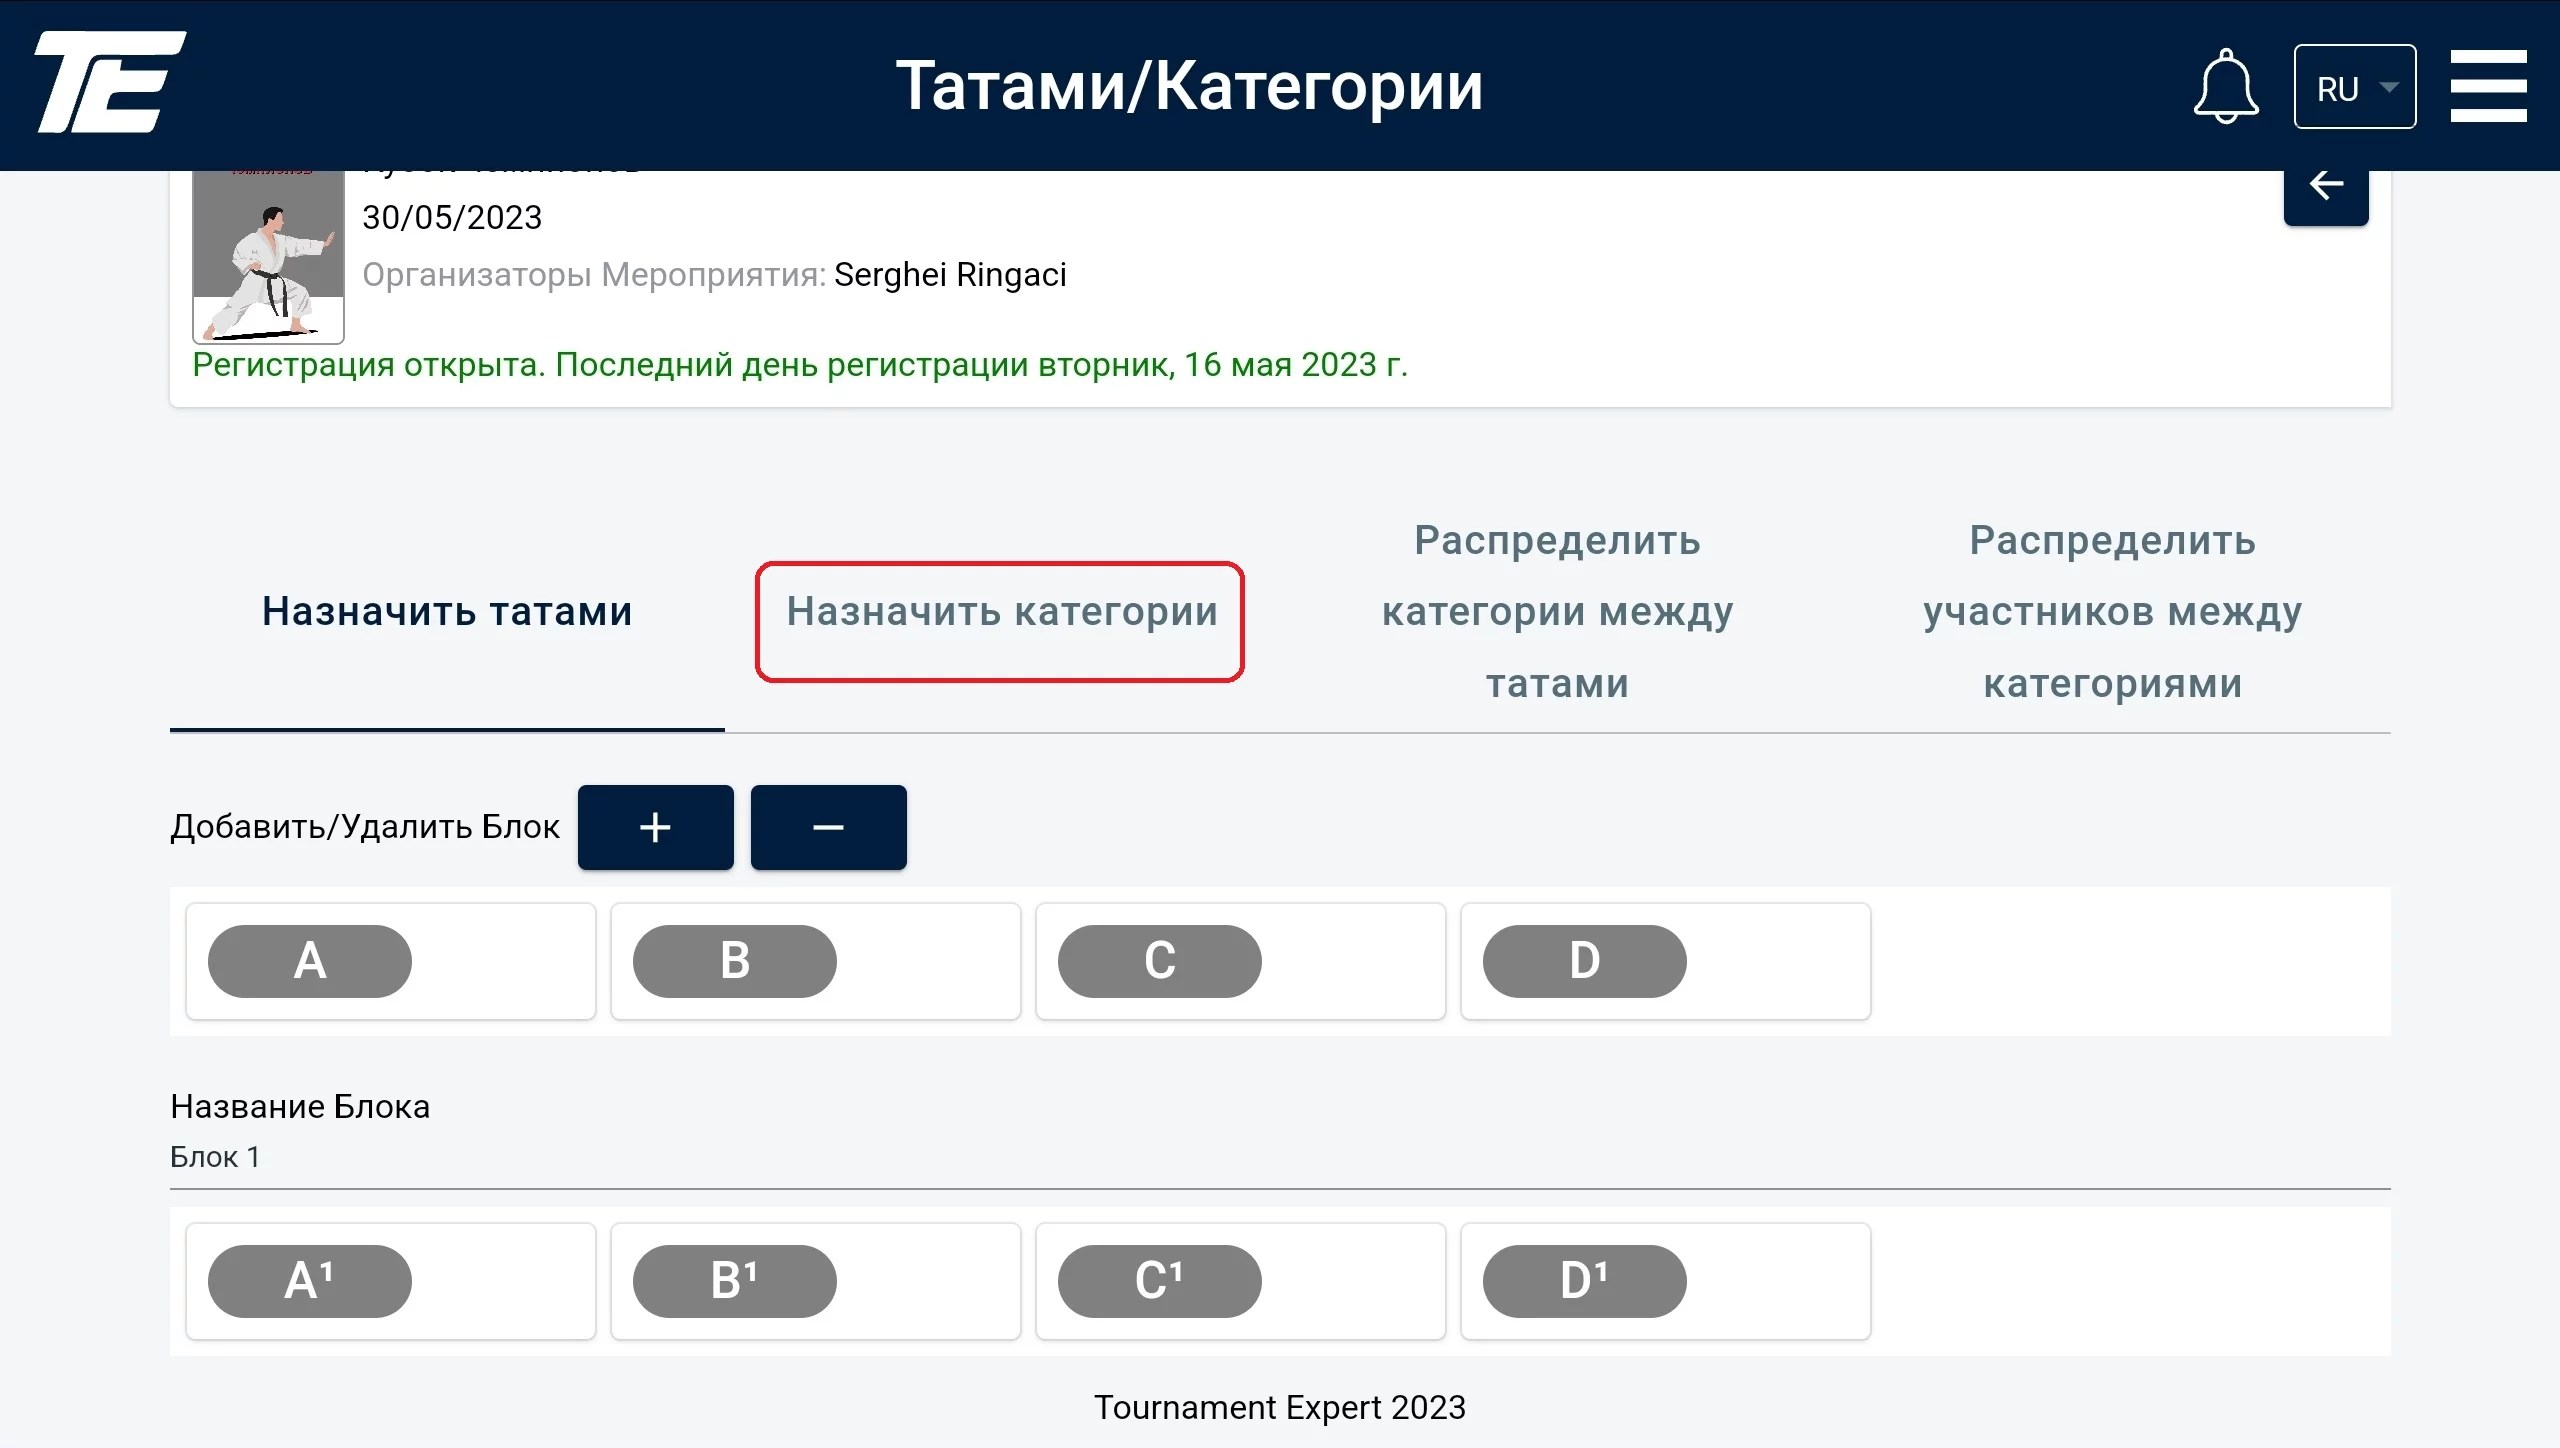
In front of you will appear a list of filters and a long list of all created categories.
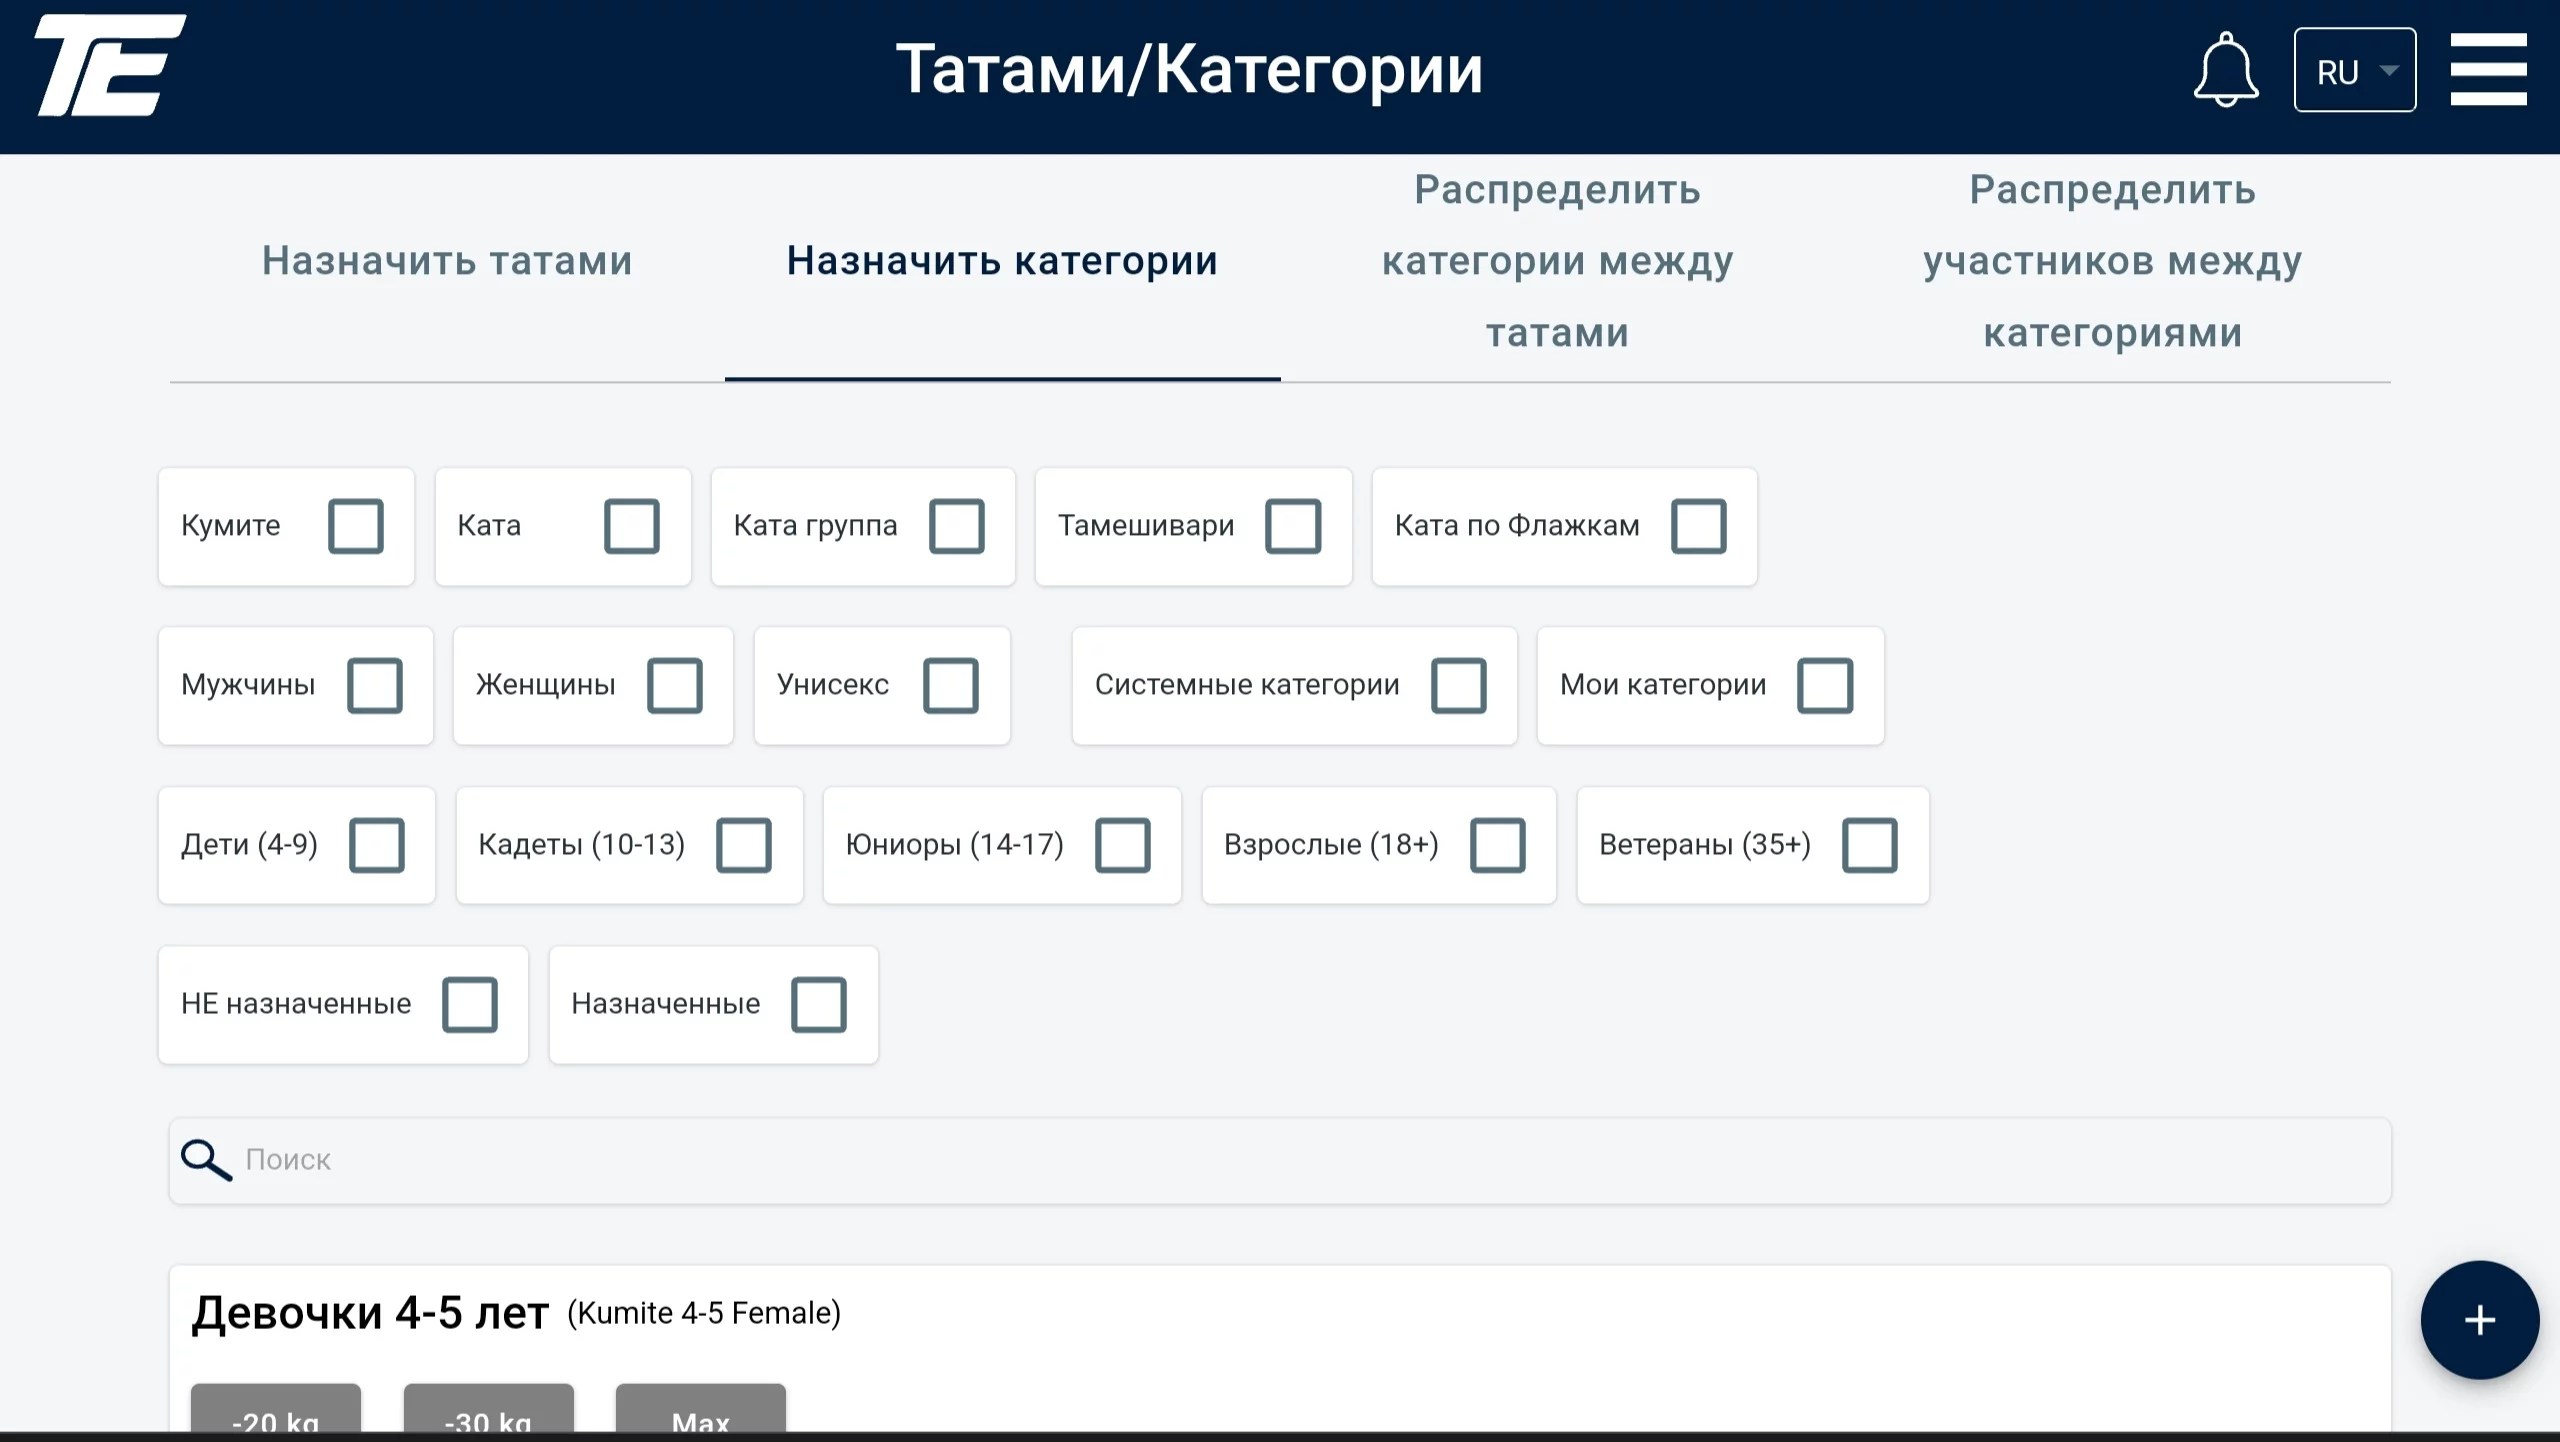
We recommend using the filters to simplify the process.
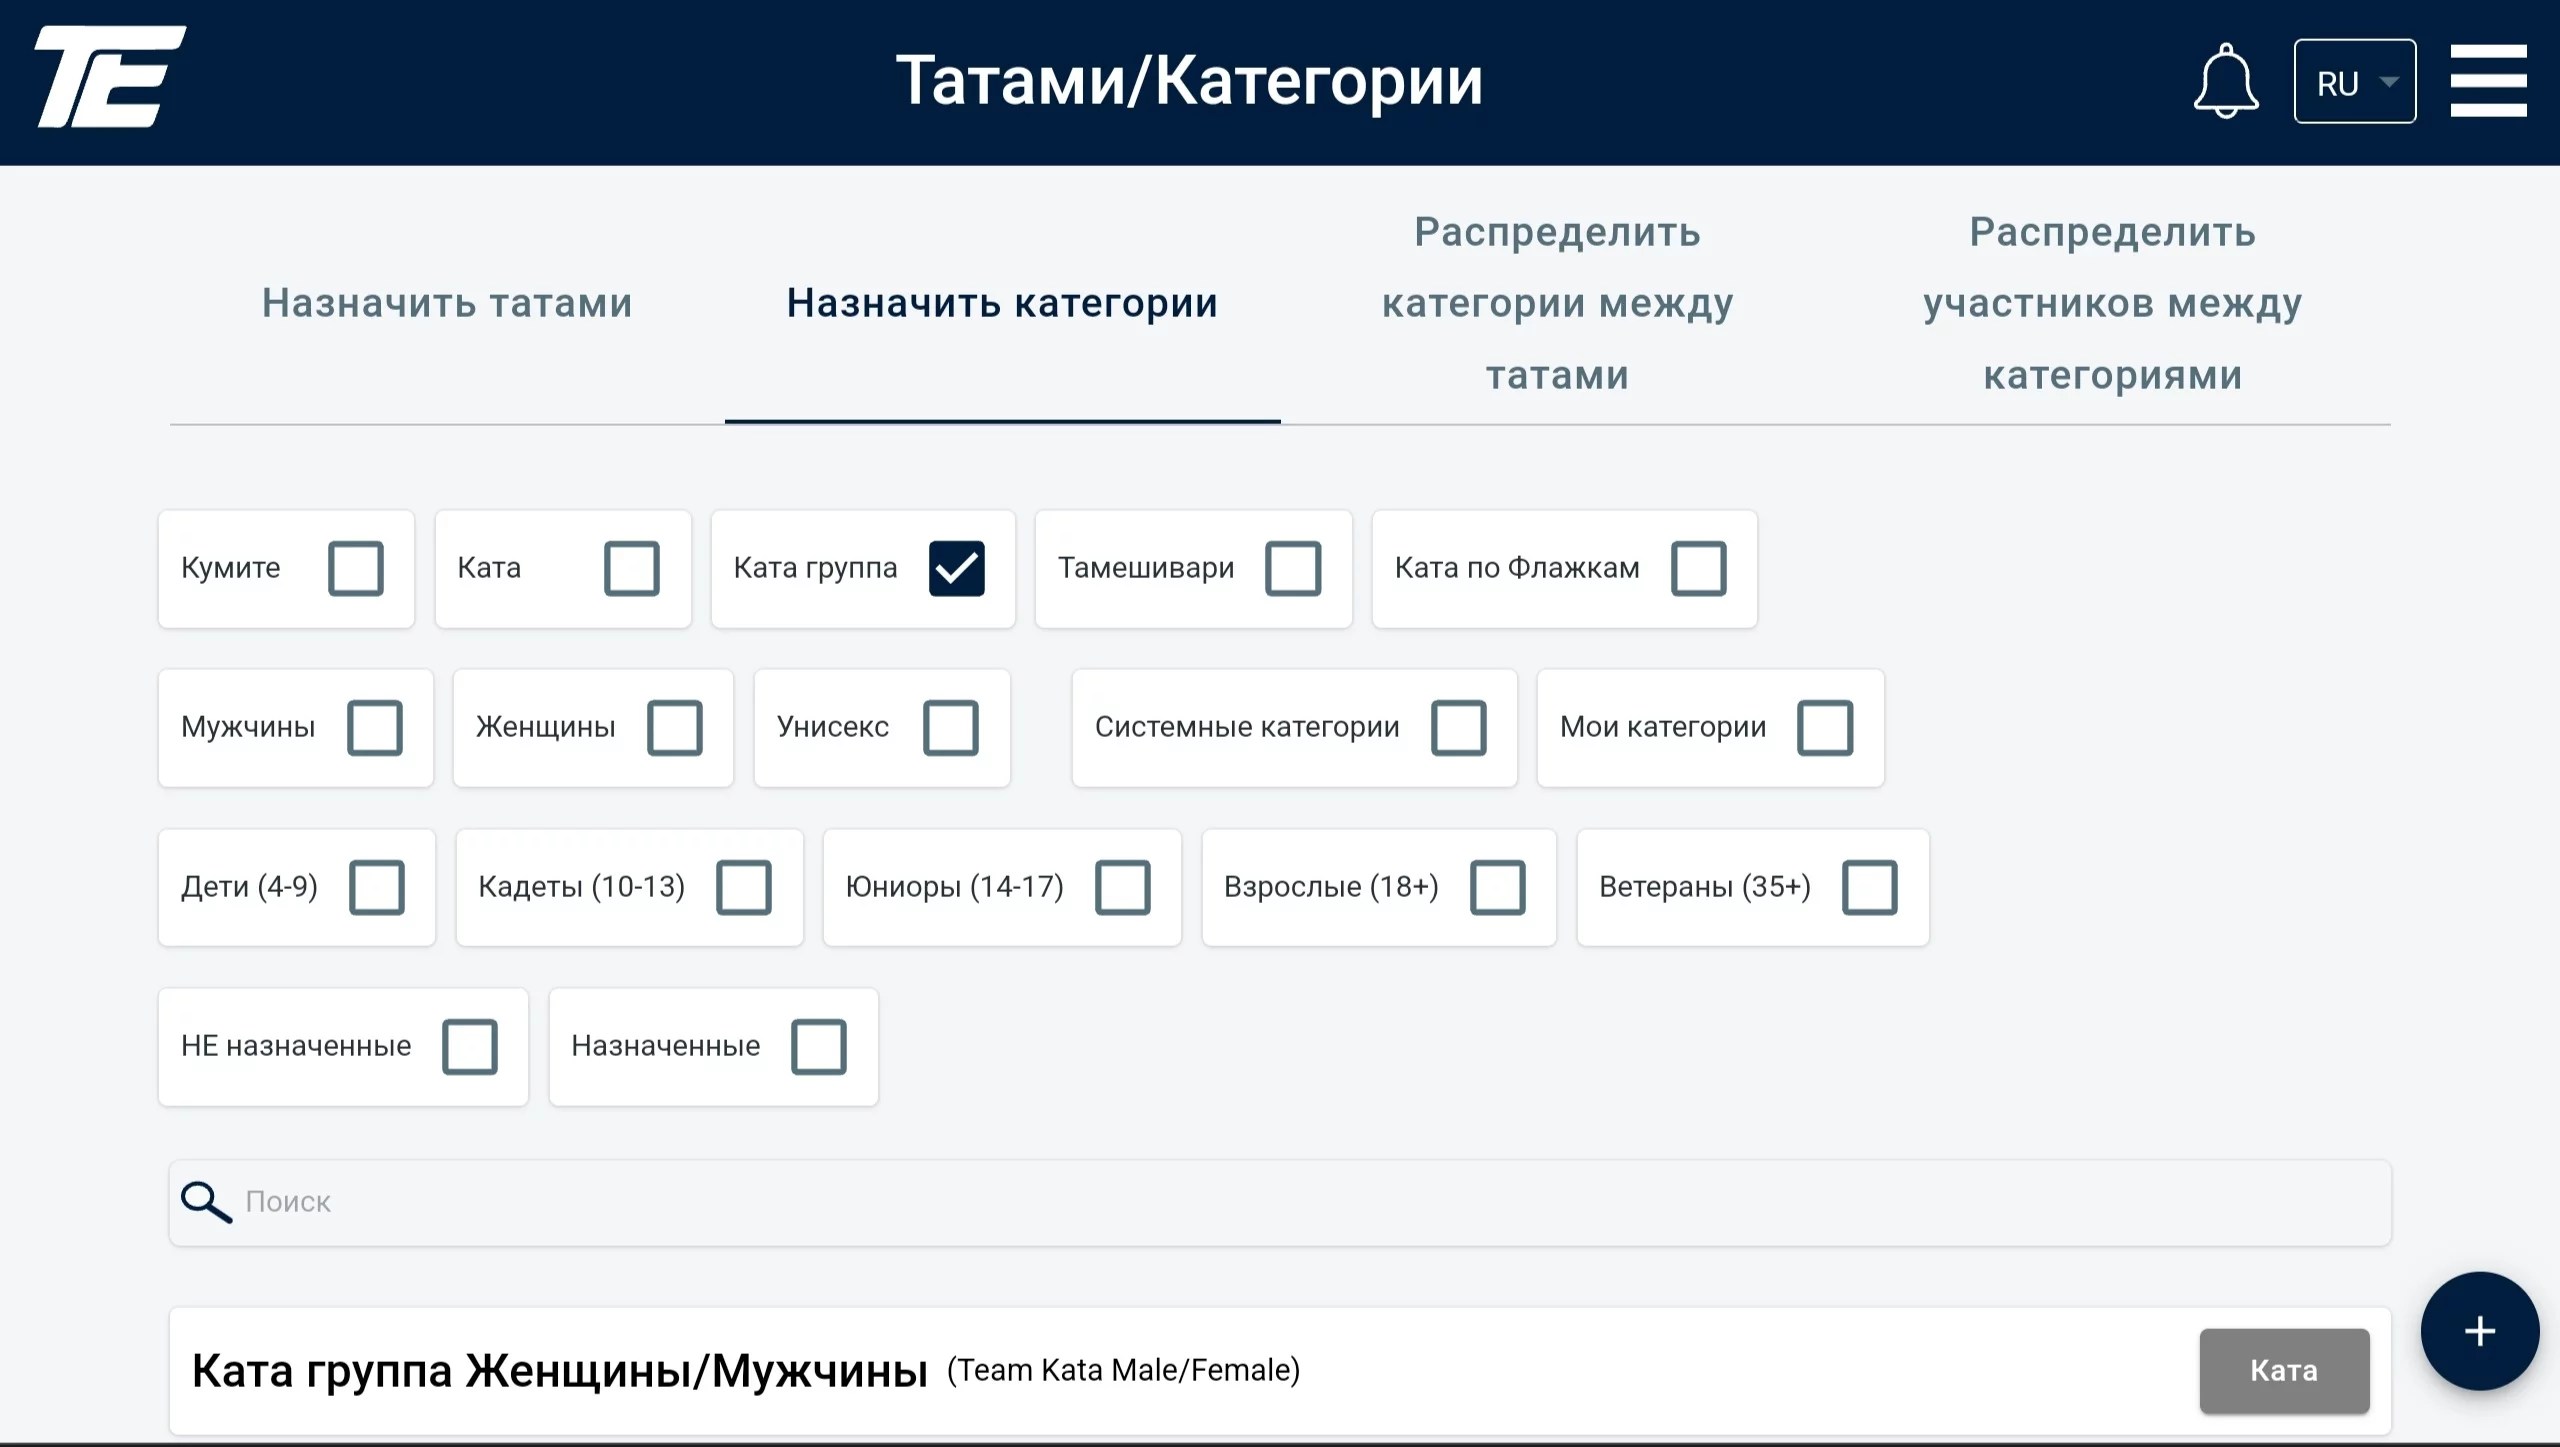
To assign the Kata category for the required age group, click the grey tile on the left. After that the tile color should change to blue. Next, click the + icon in the bottom right corner.
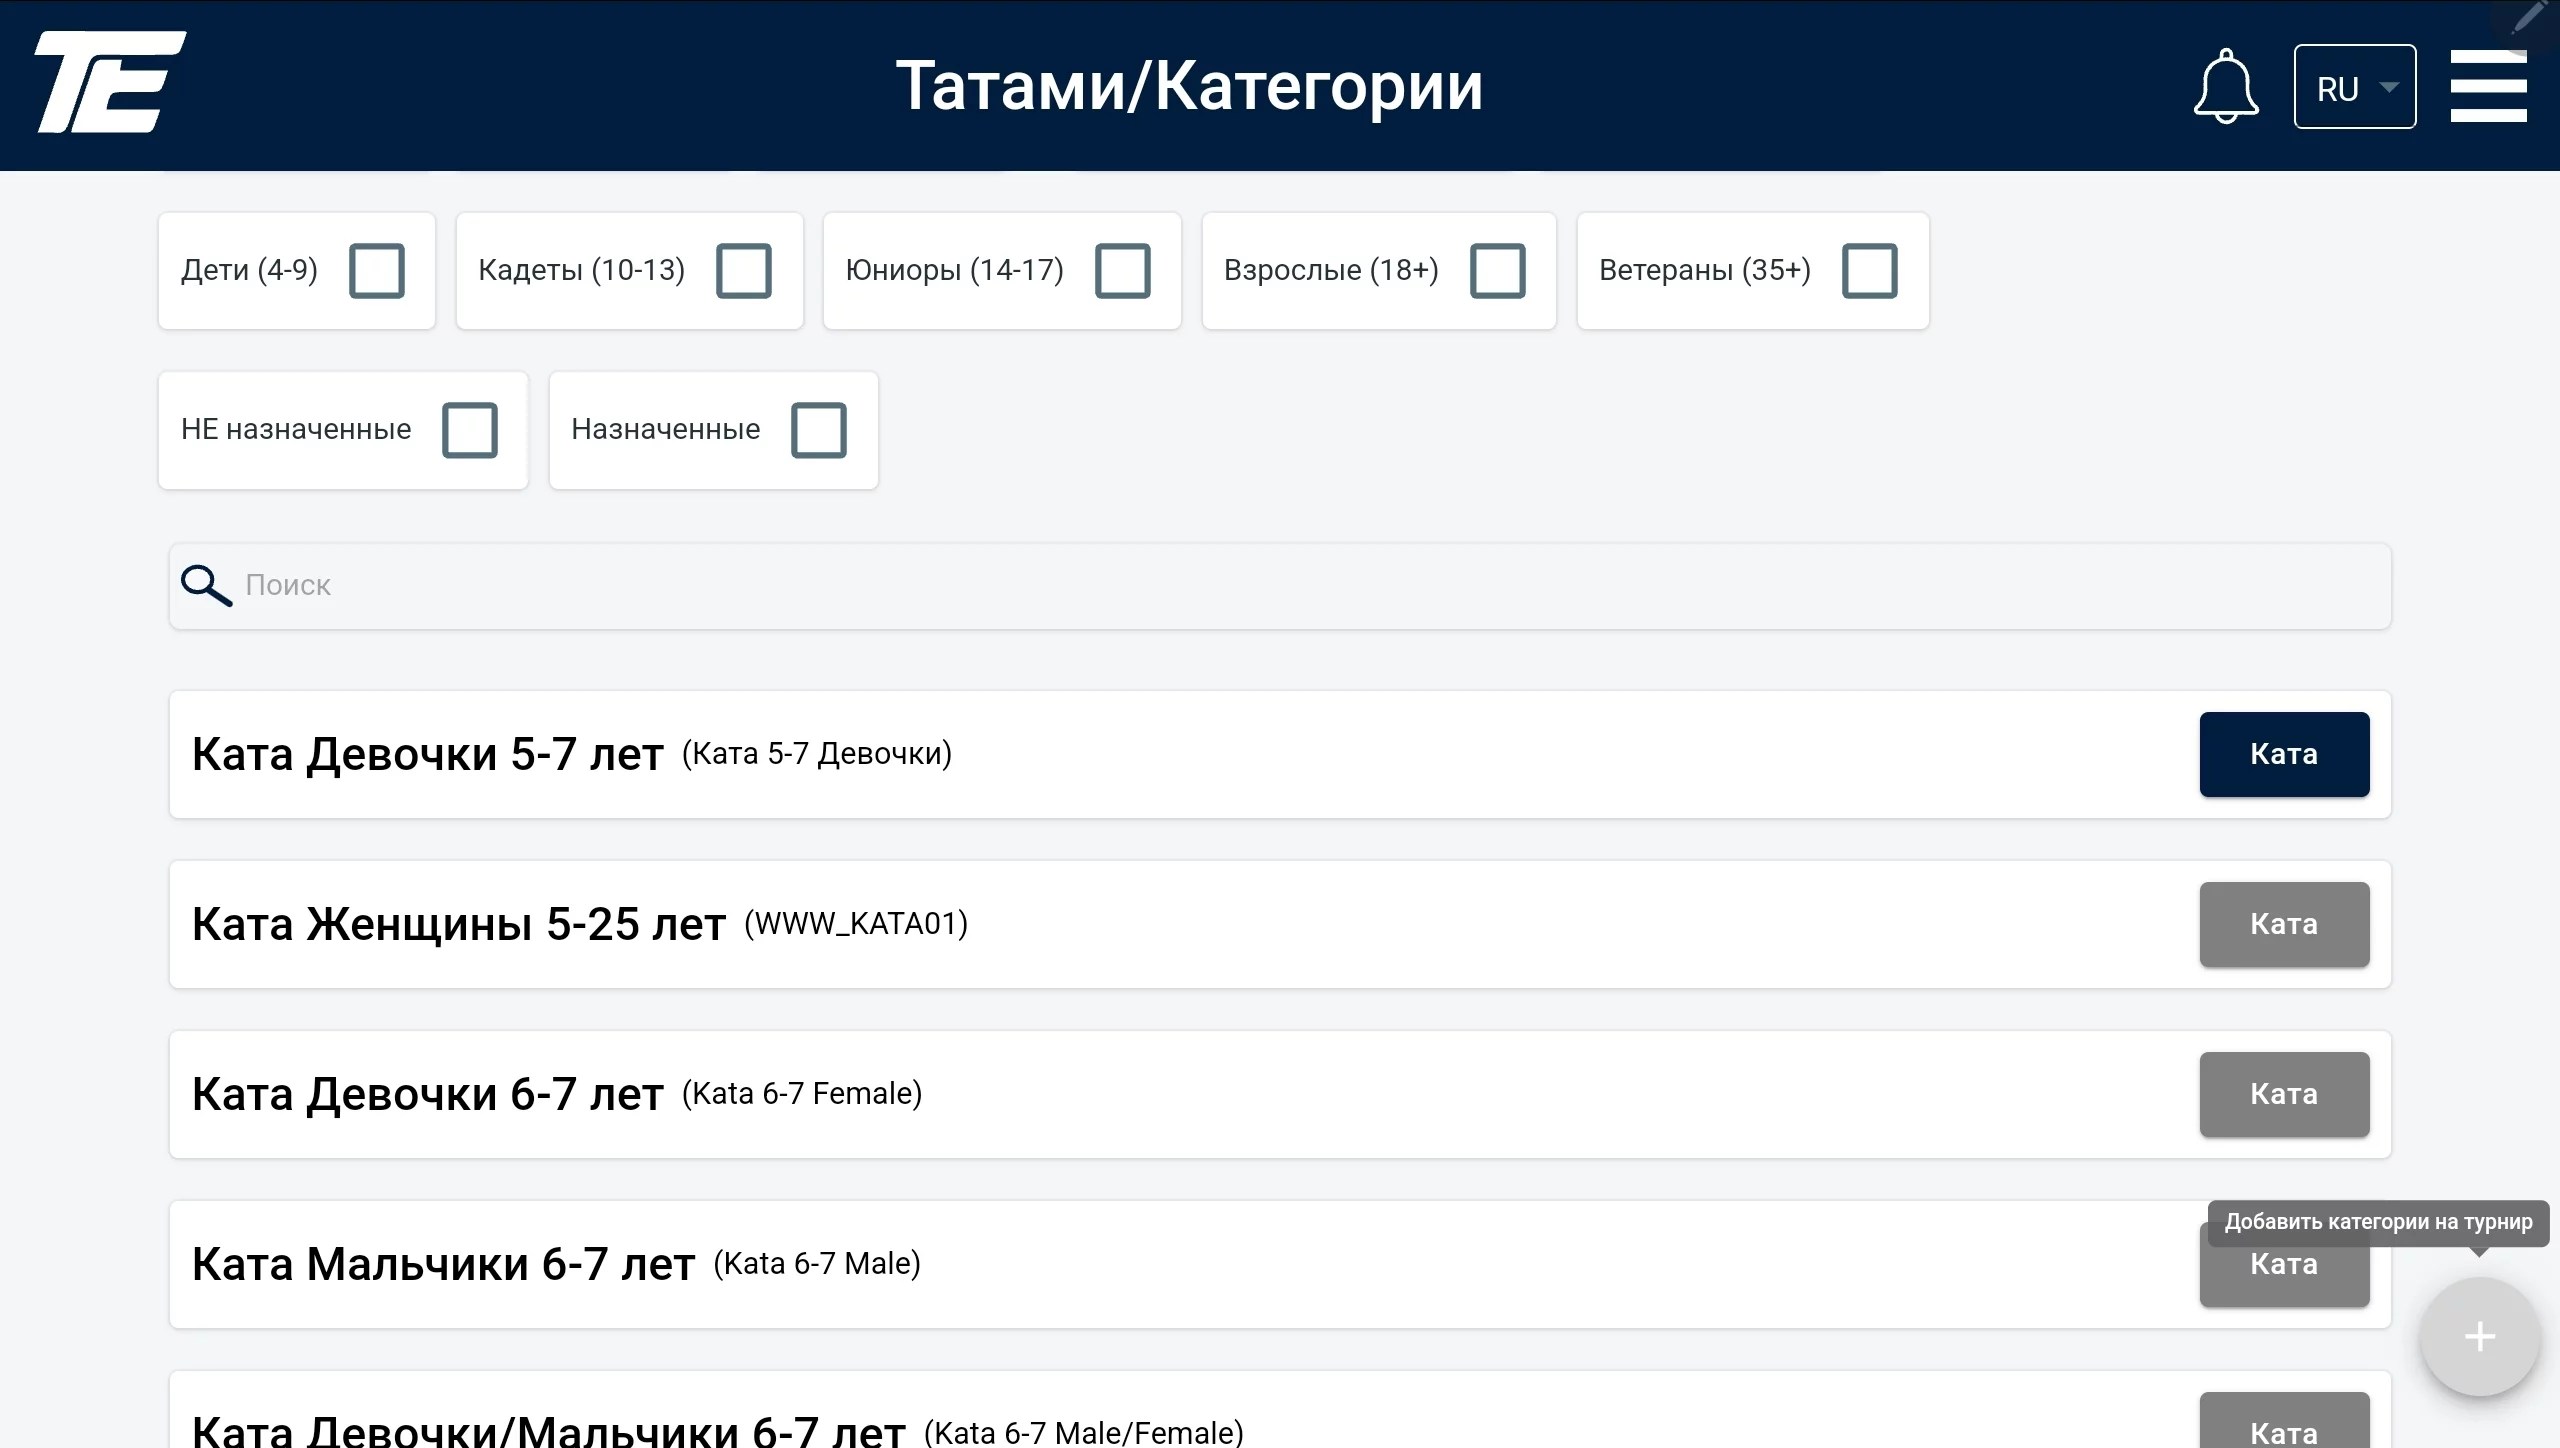
After that, an additional button will appear in the row of the selected category — a + sign on a white background. Pressing it, you will see a list of kata discipline names.
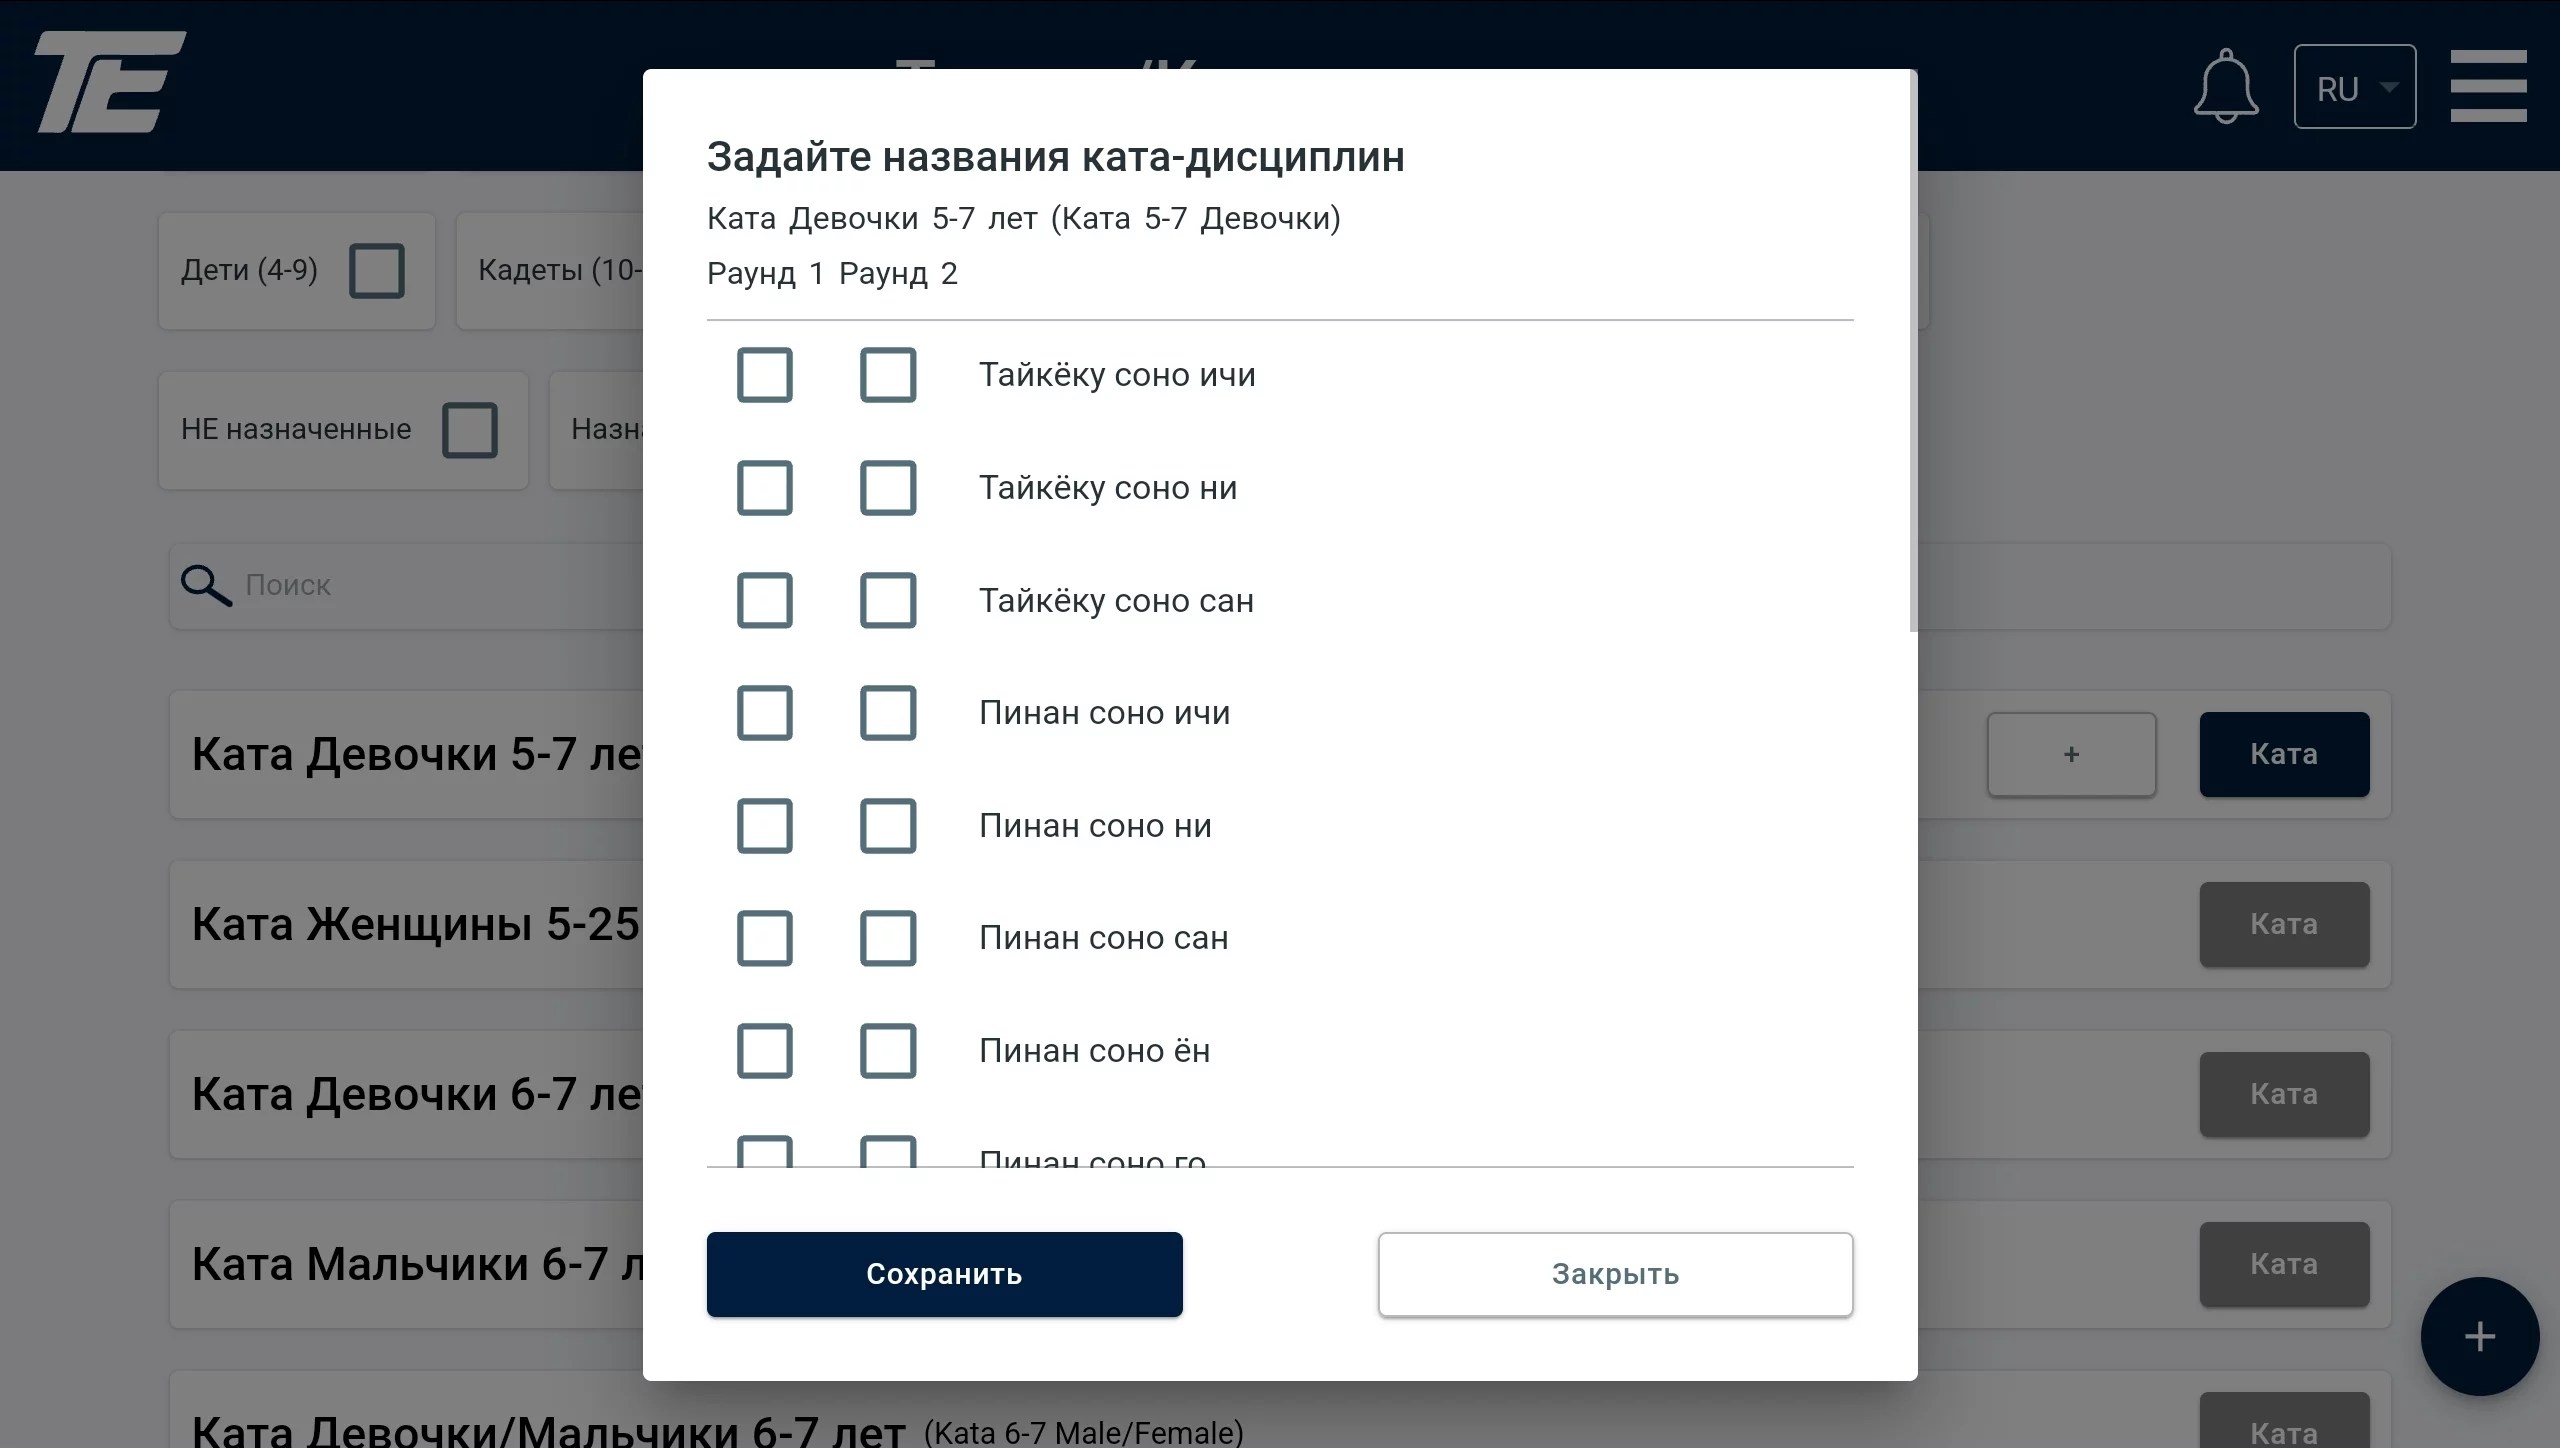
Tick the boxes of the disciplines that the participants are to perform during the competition. Then click save.
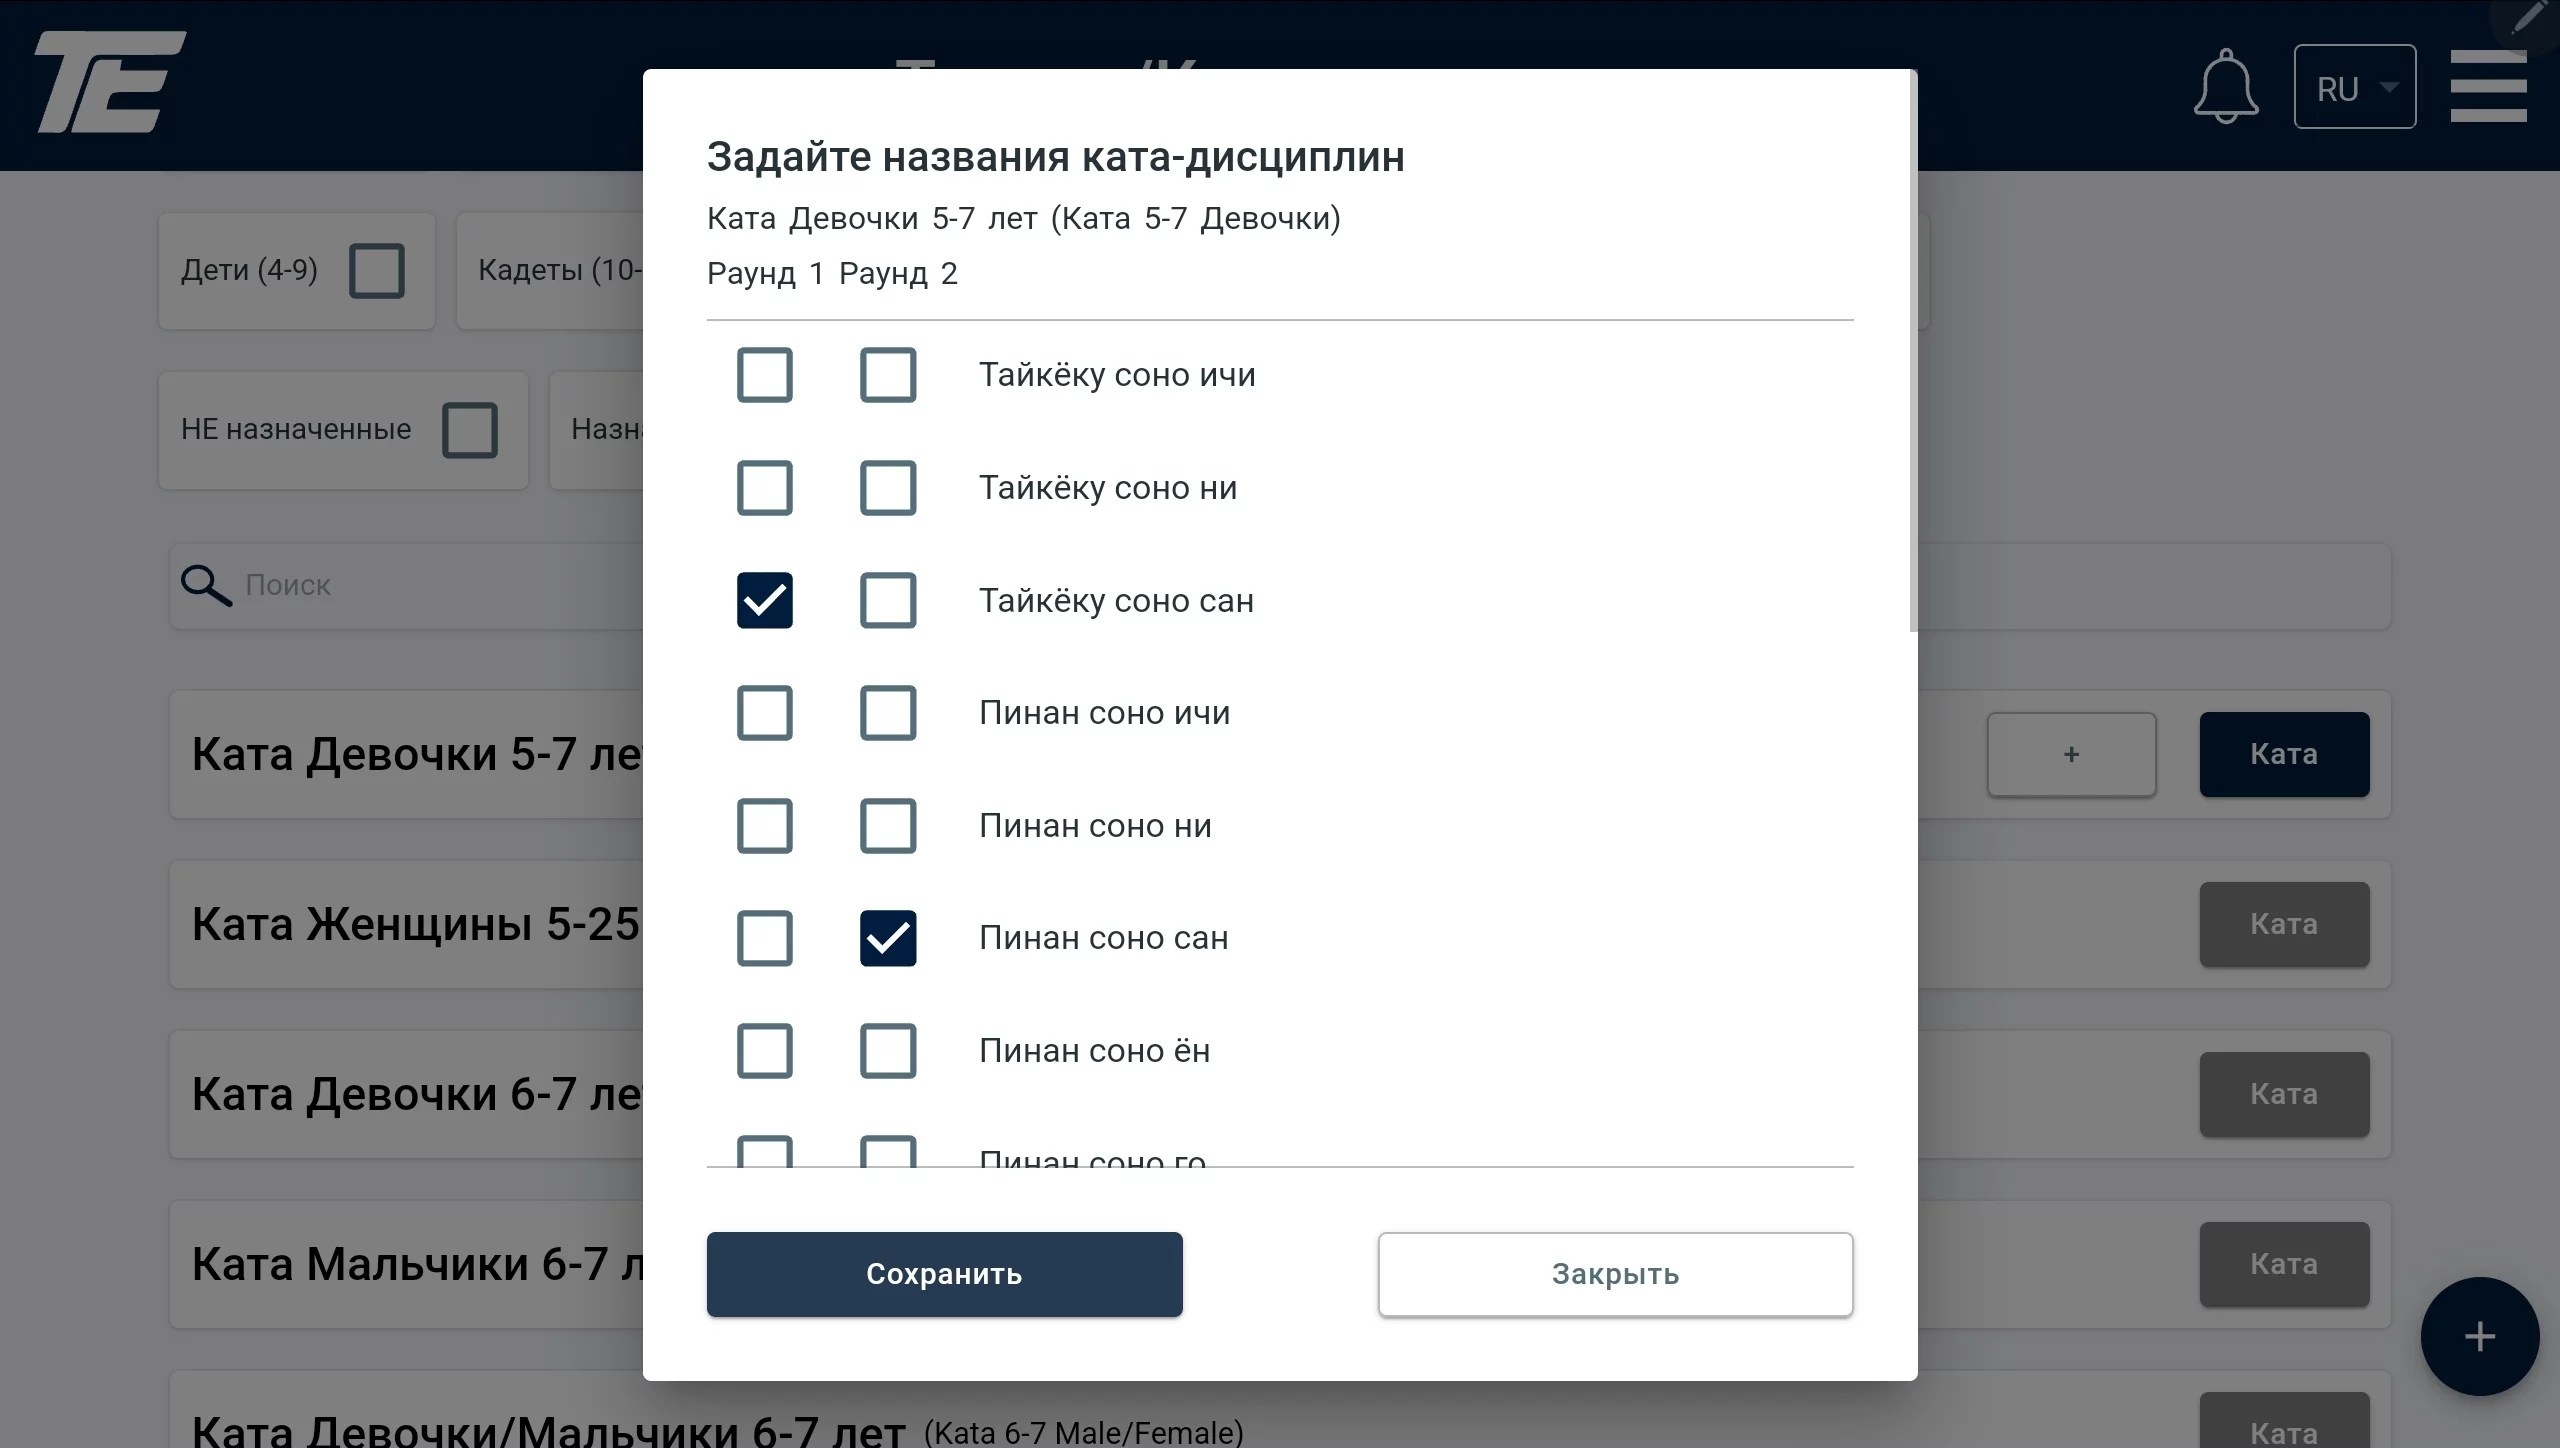
If the assignment is successful, you will see the selected items next to the category name.
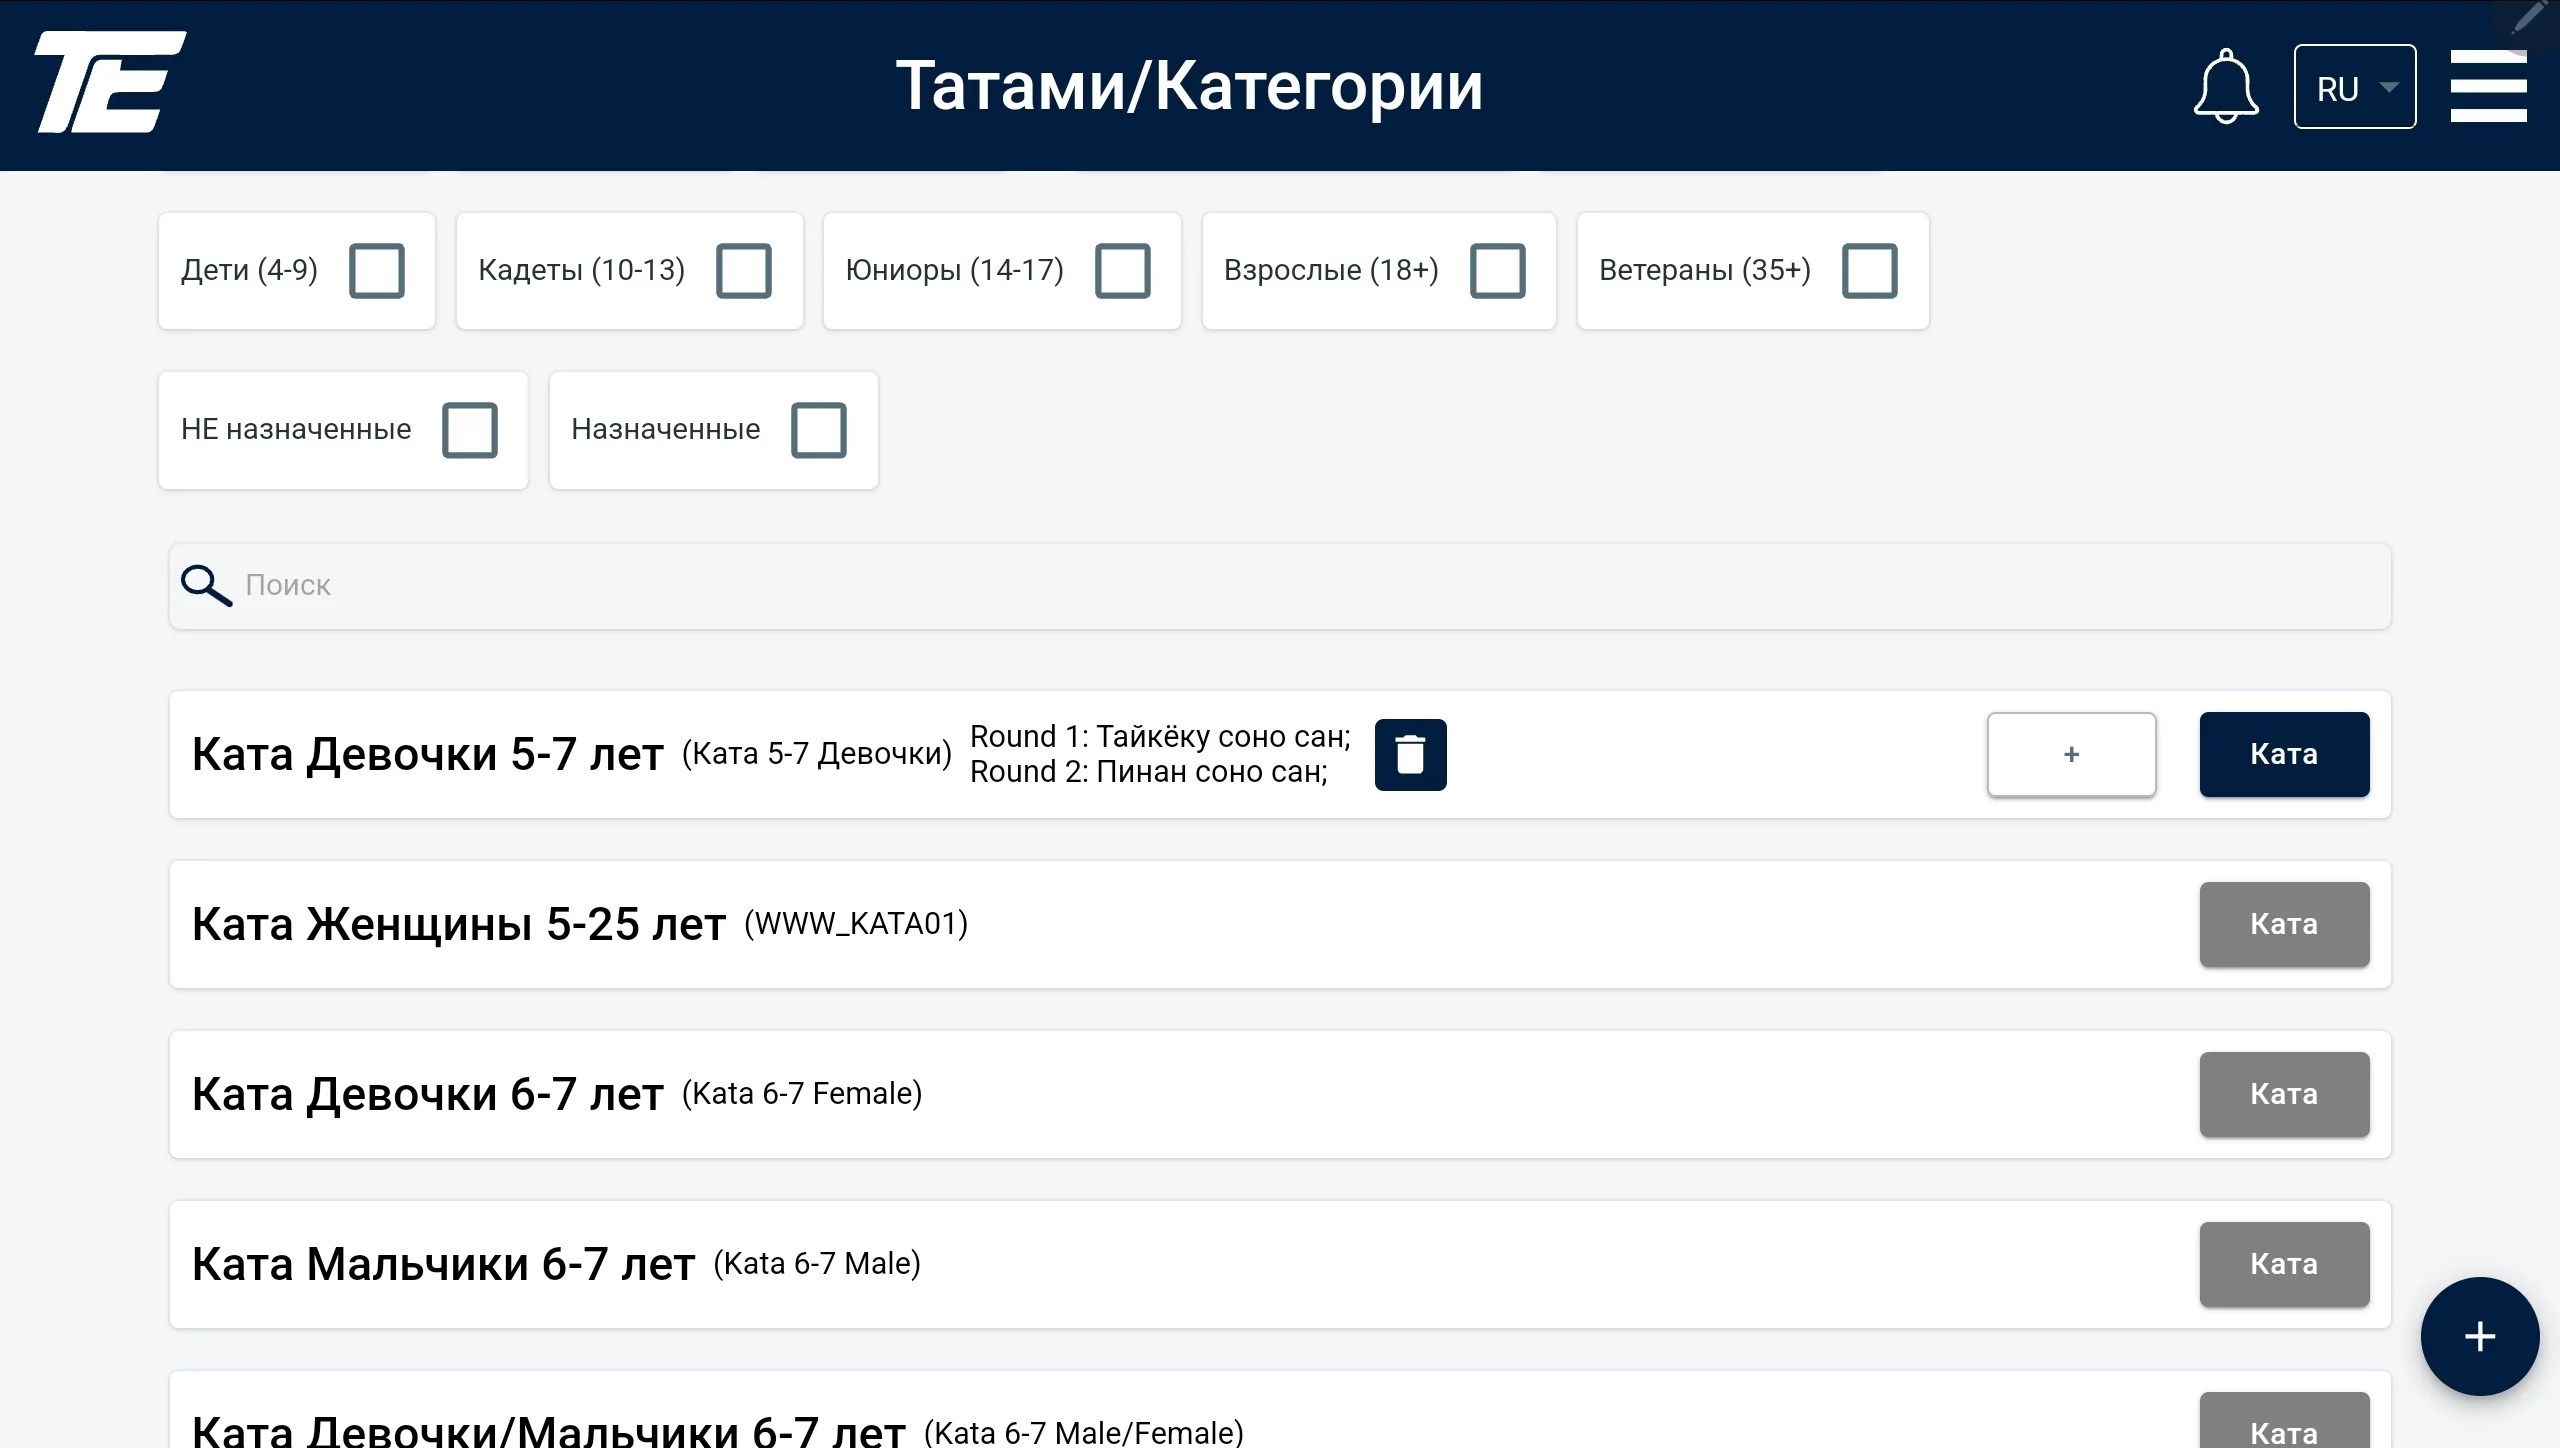
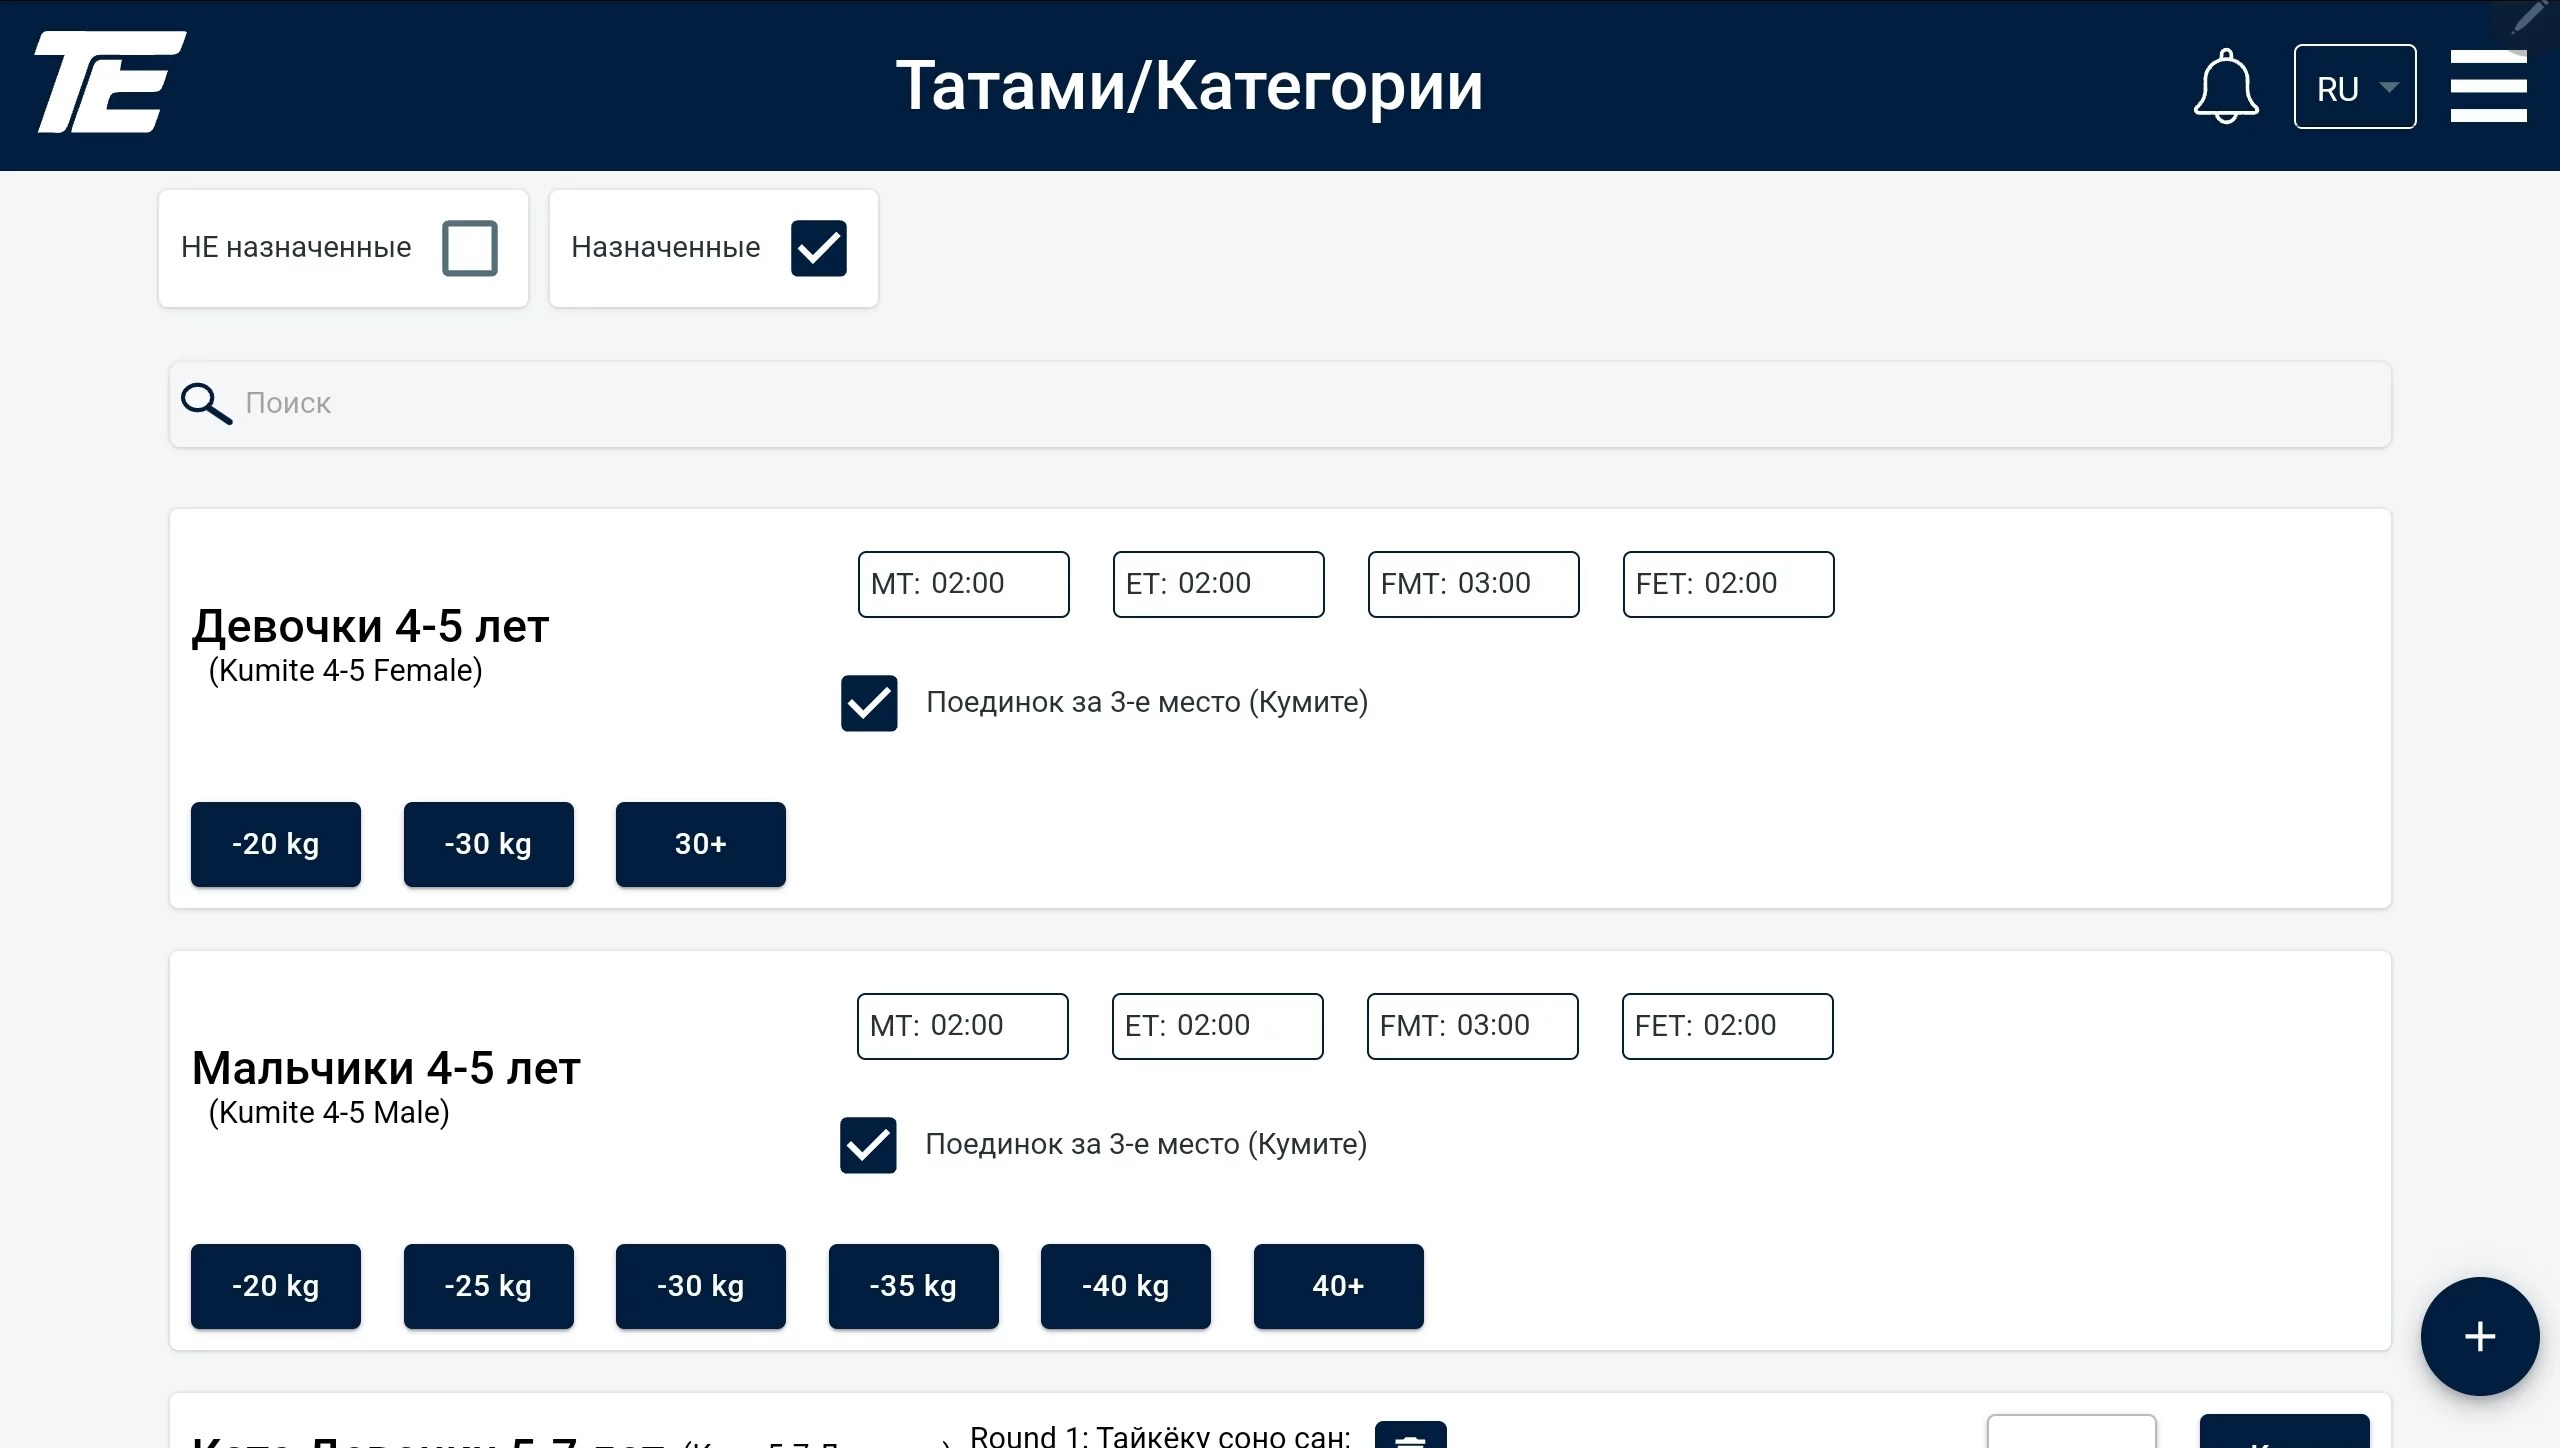
To assign the Kumite category, select the tiles with the expected weight of the participants — these categories will be represented at the tournament.
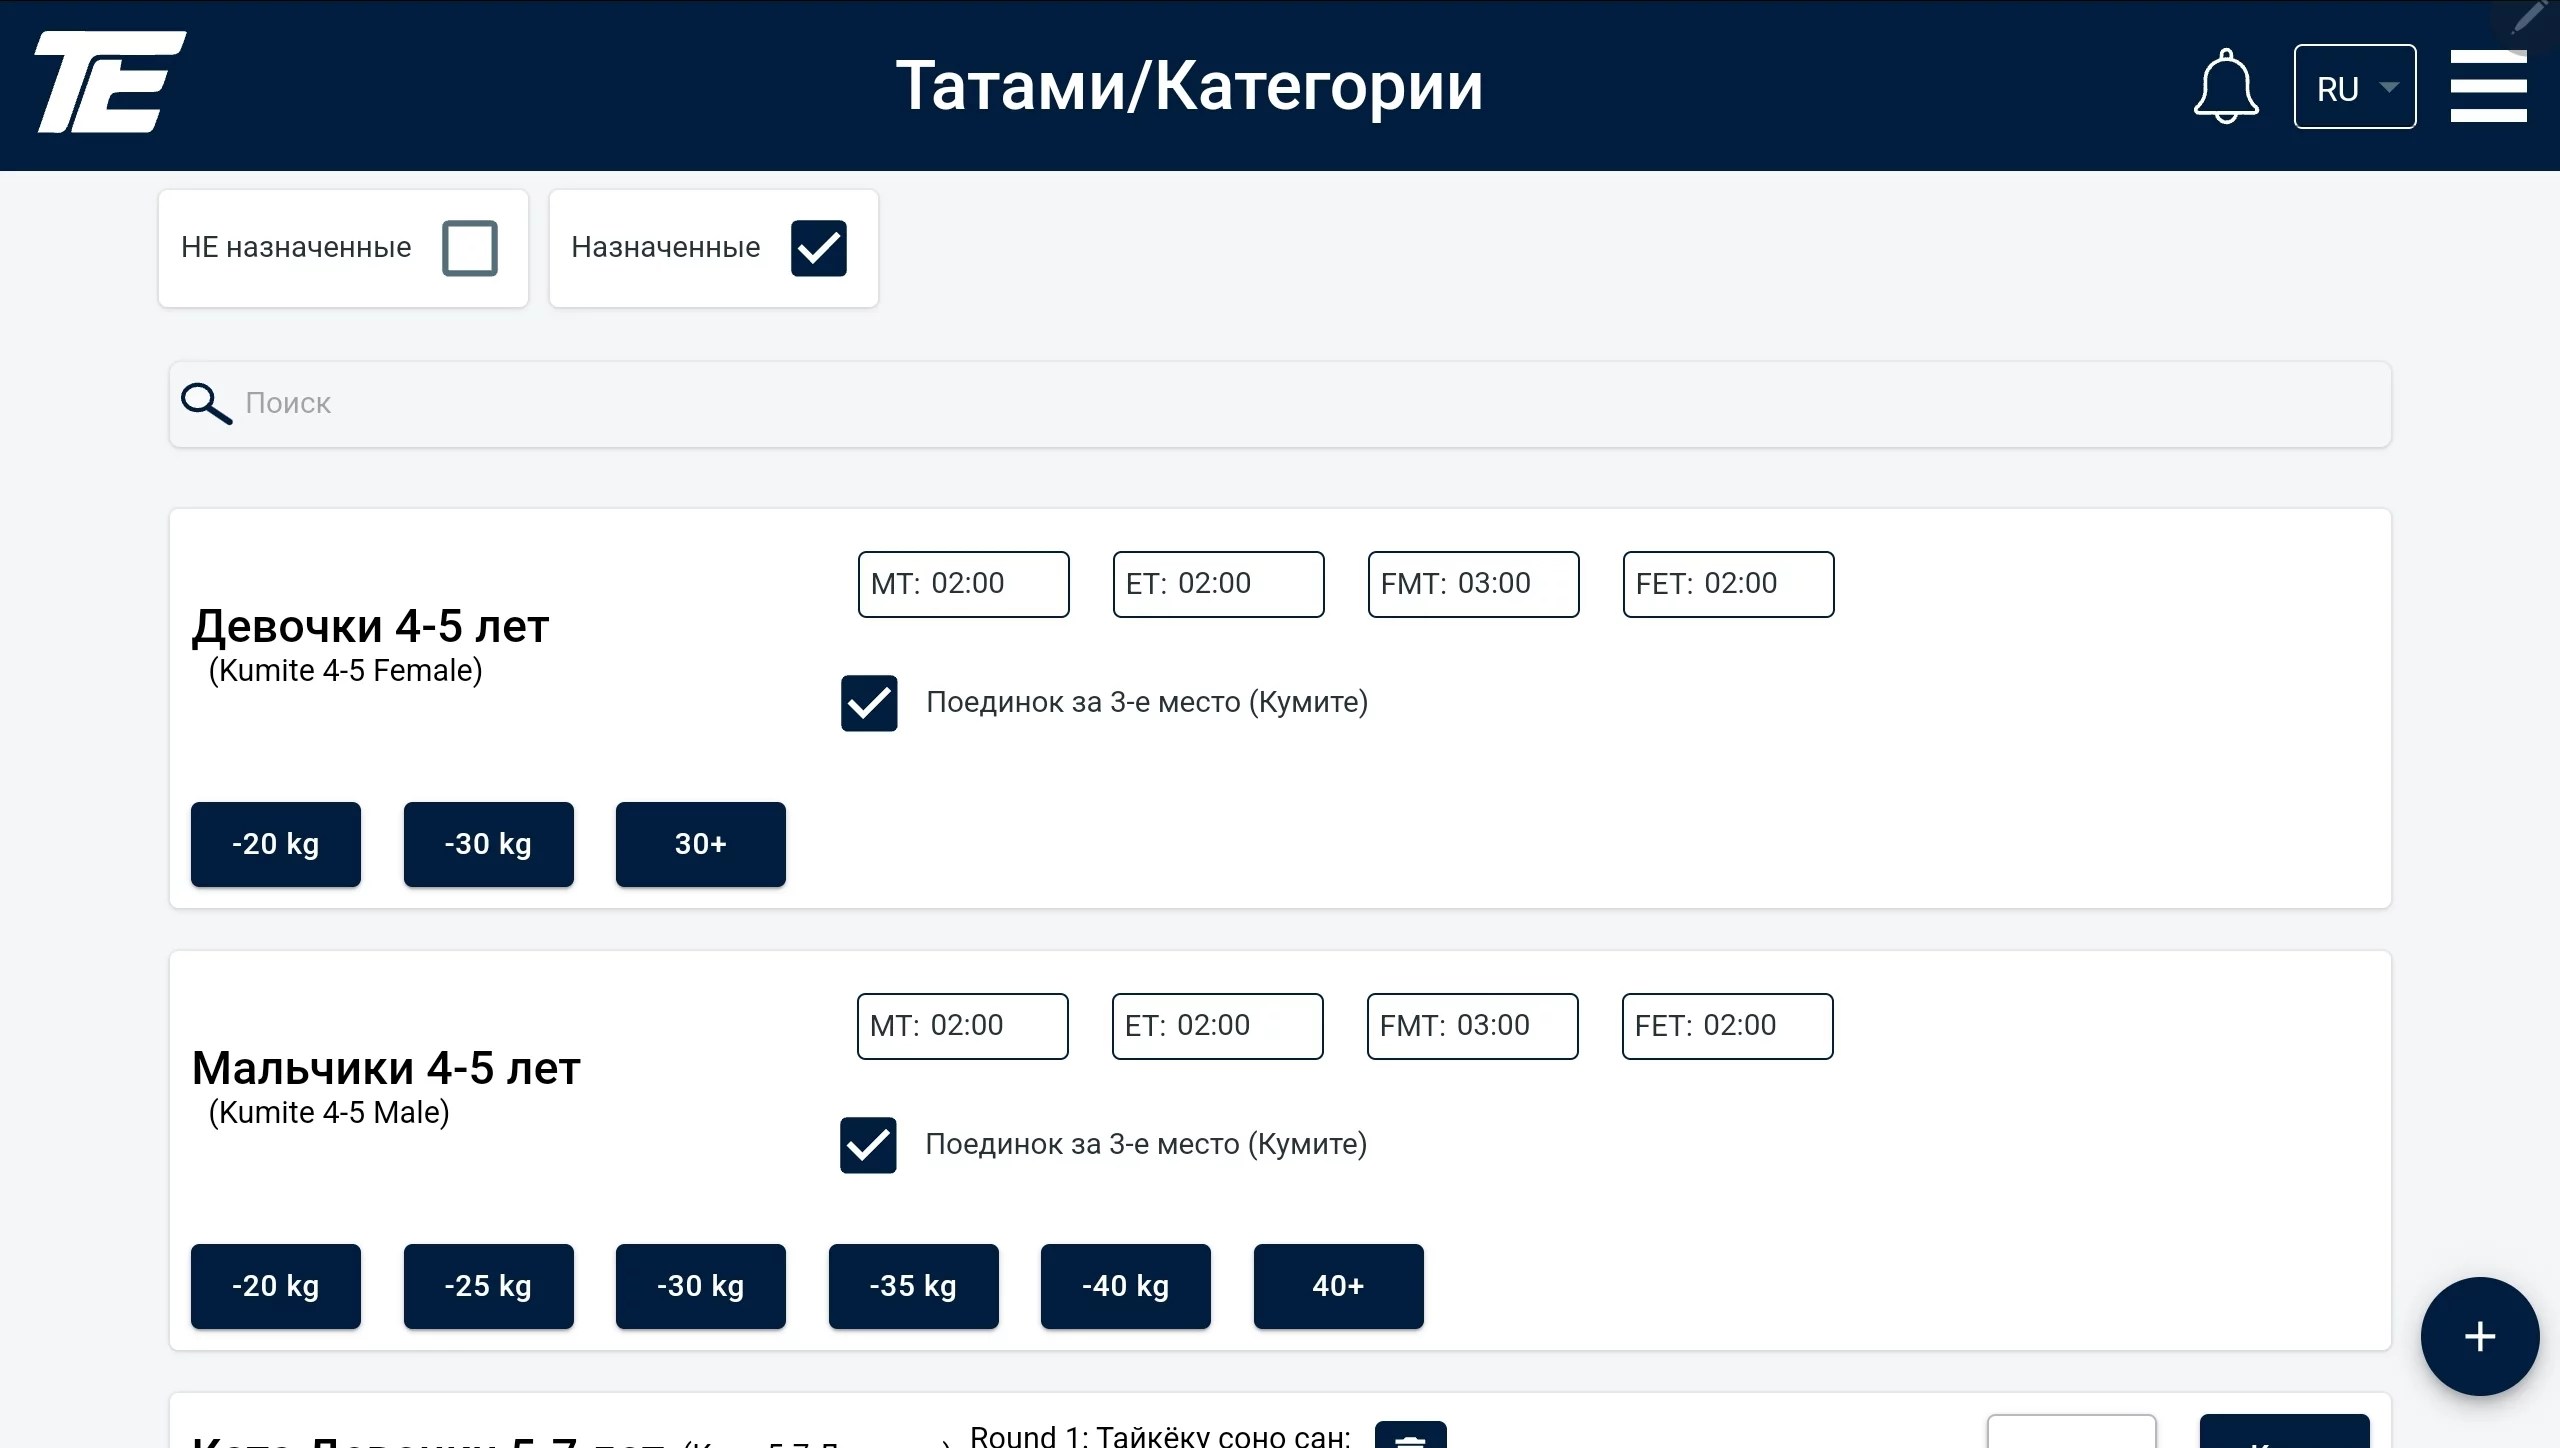
If you click the «+» icon, additional parameters for editing will appear.
If you click the «+» icon, additional parameters for editing will appear.
These parameters have program defaults, but the necessary corrections can be made.
MT (Main Time) — the main time of the match.
ET (Extra Time) — extra time if the fighters in the ring drew during the main time.
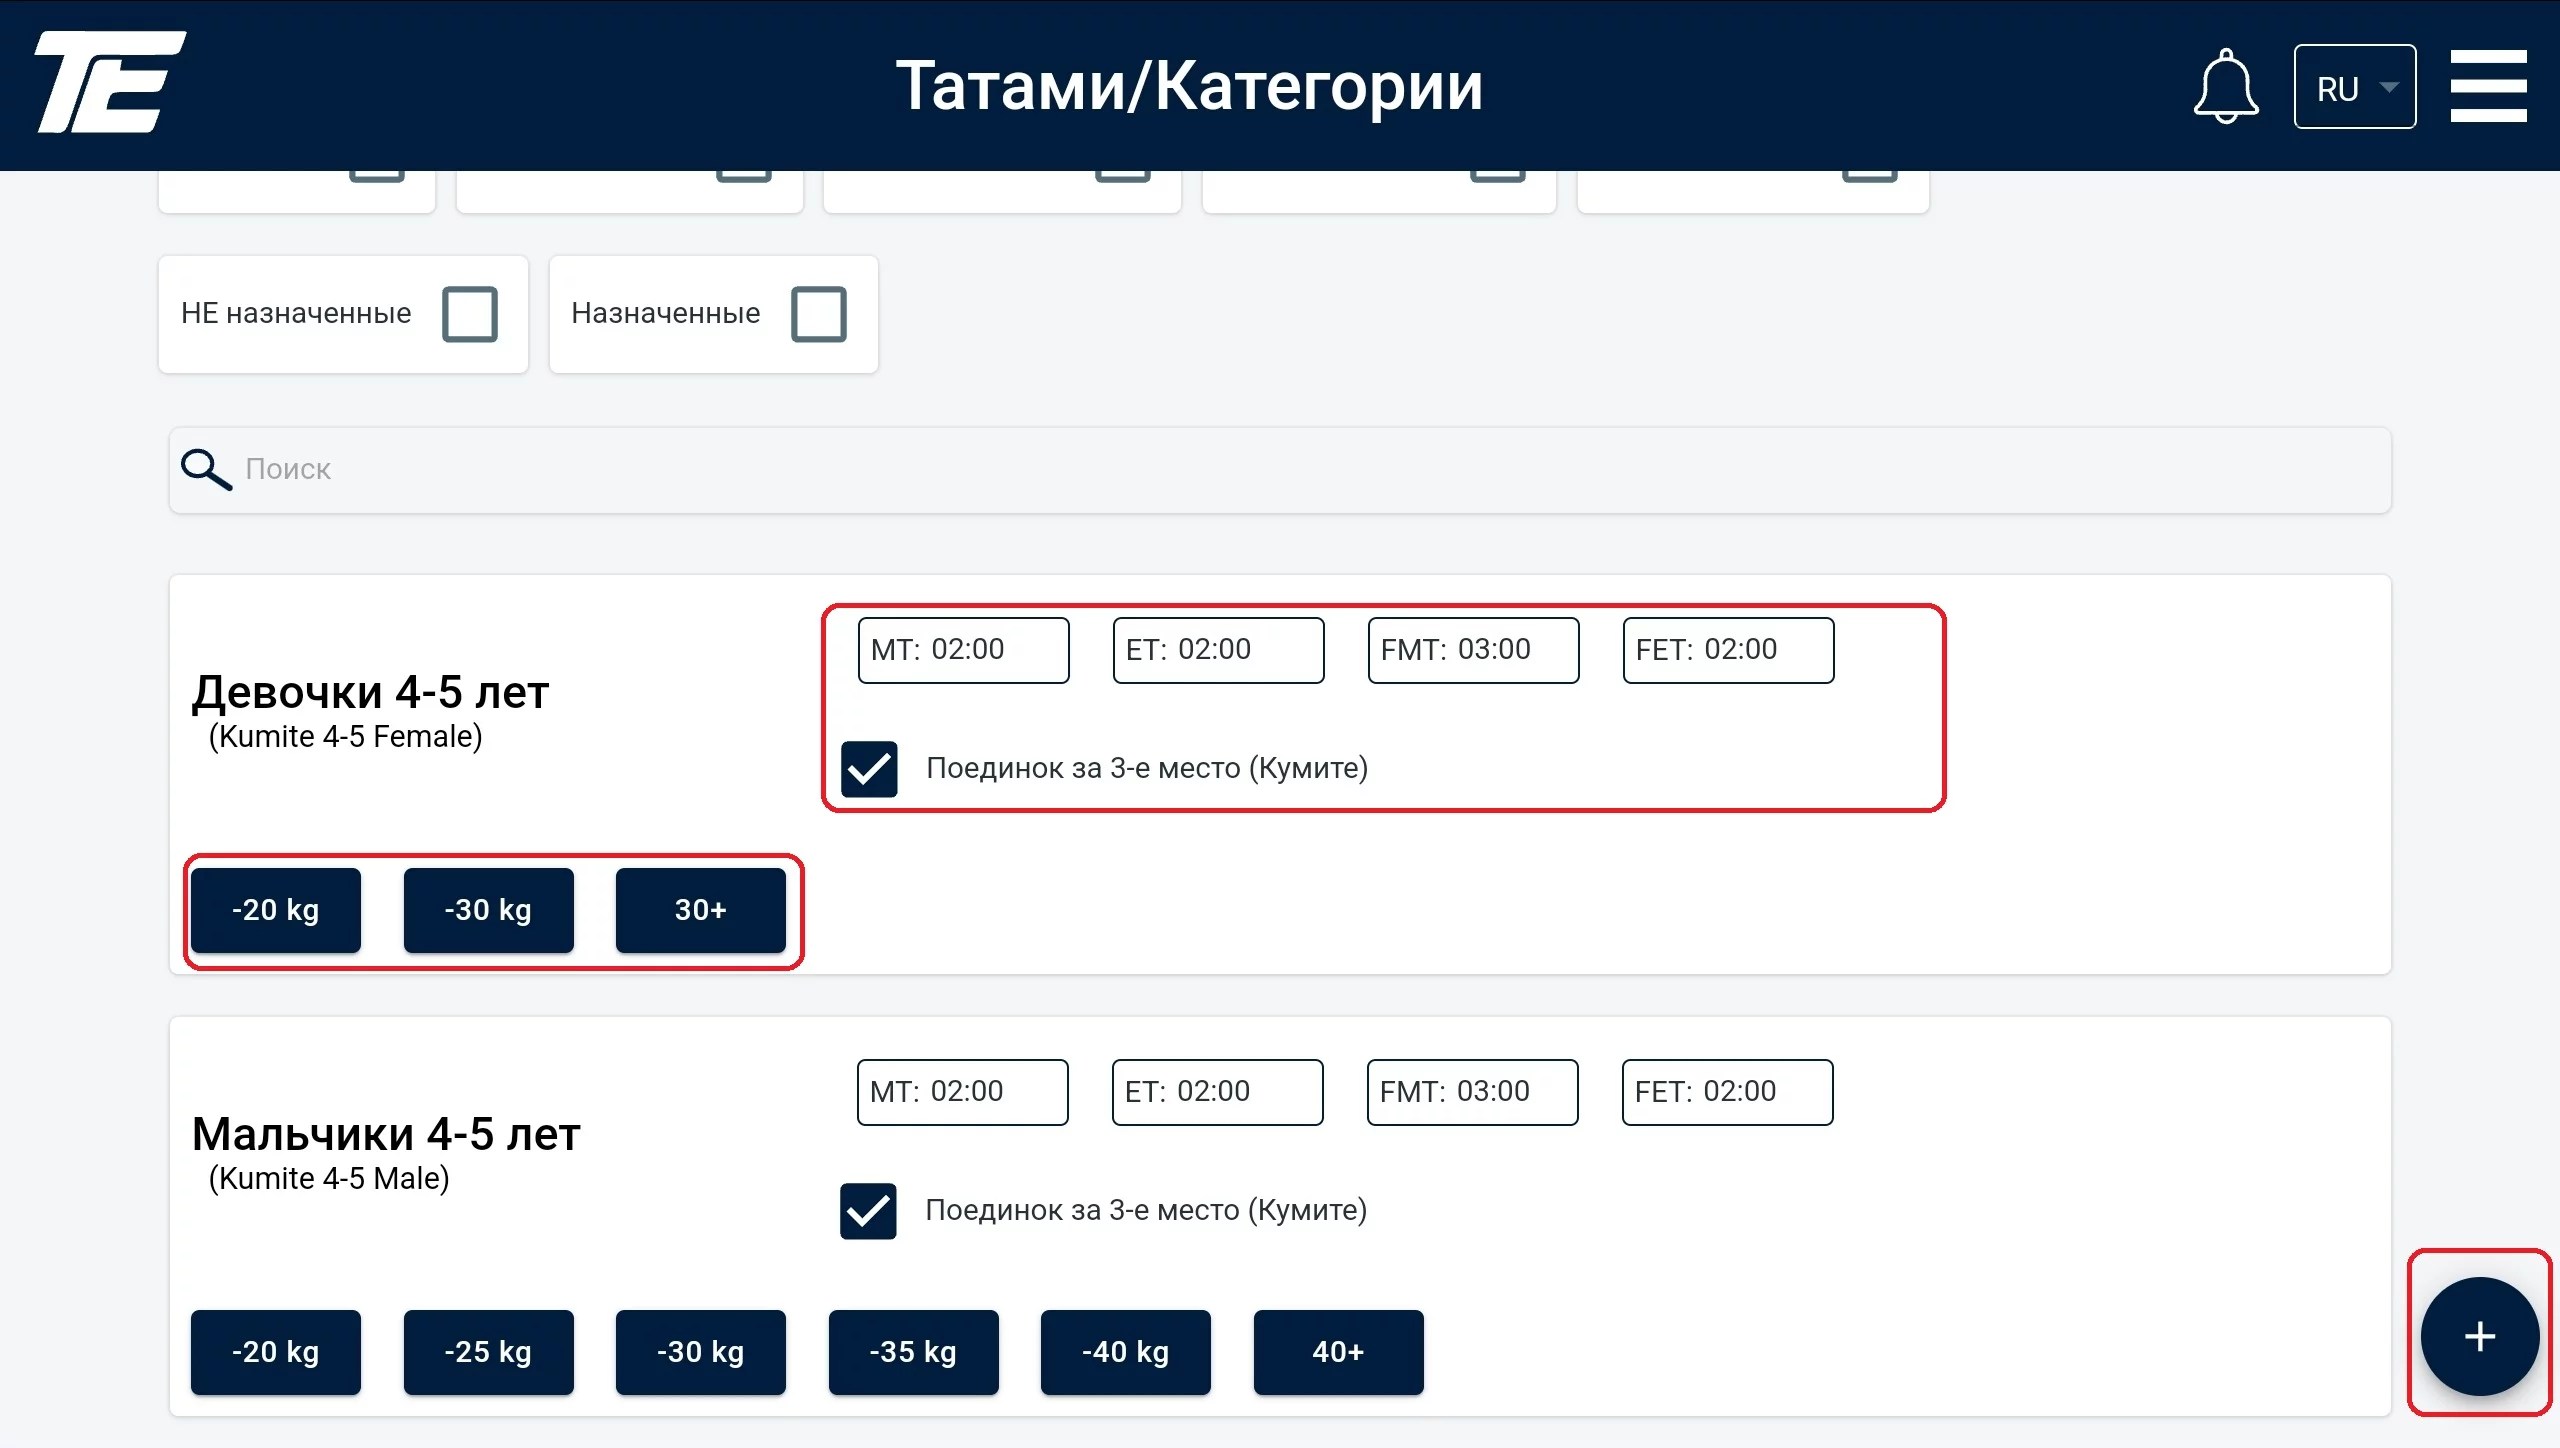
FMT (Final Main Time) — the main time allocated for the final of the category.
FET (Final Extra Time) — extra time if the fighters in the ring drew during the main time of the final.
To assign the Team Kata category for the required age group, click the grey tile on the left. After that the tile color should change to blue. Next, click the + icon in the bottom right corner.
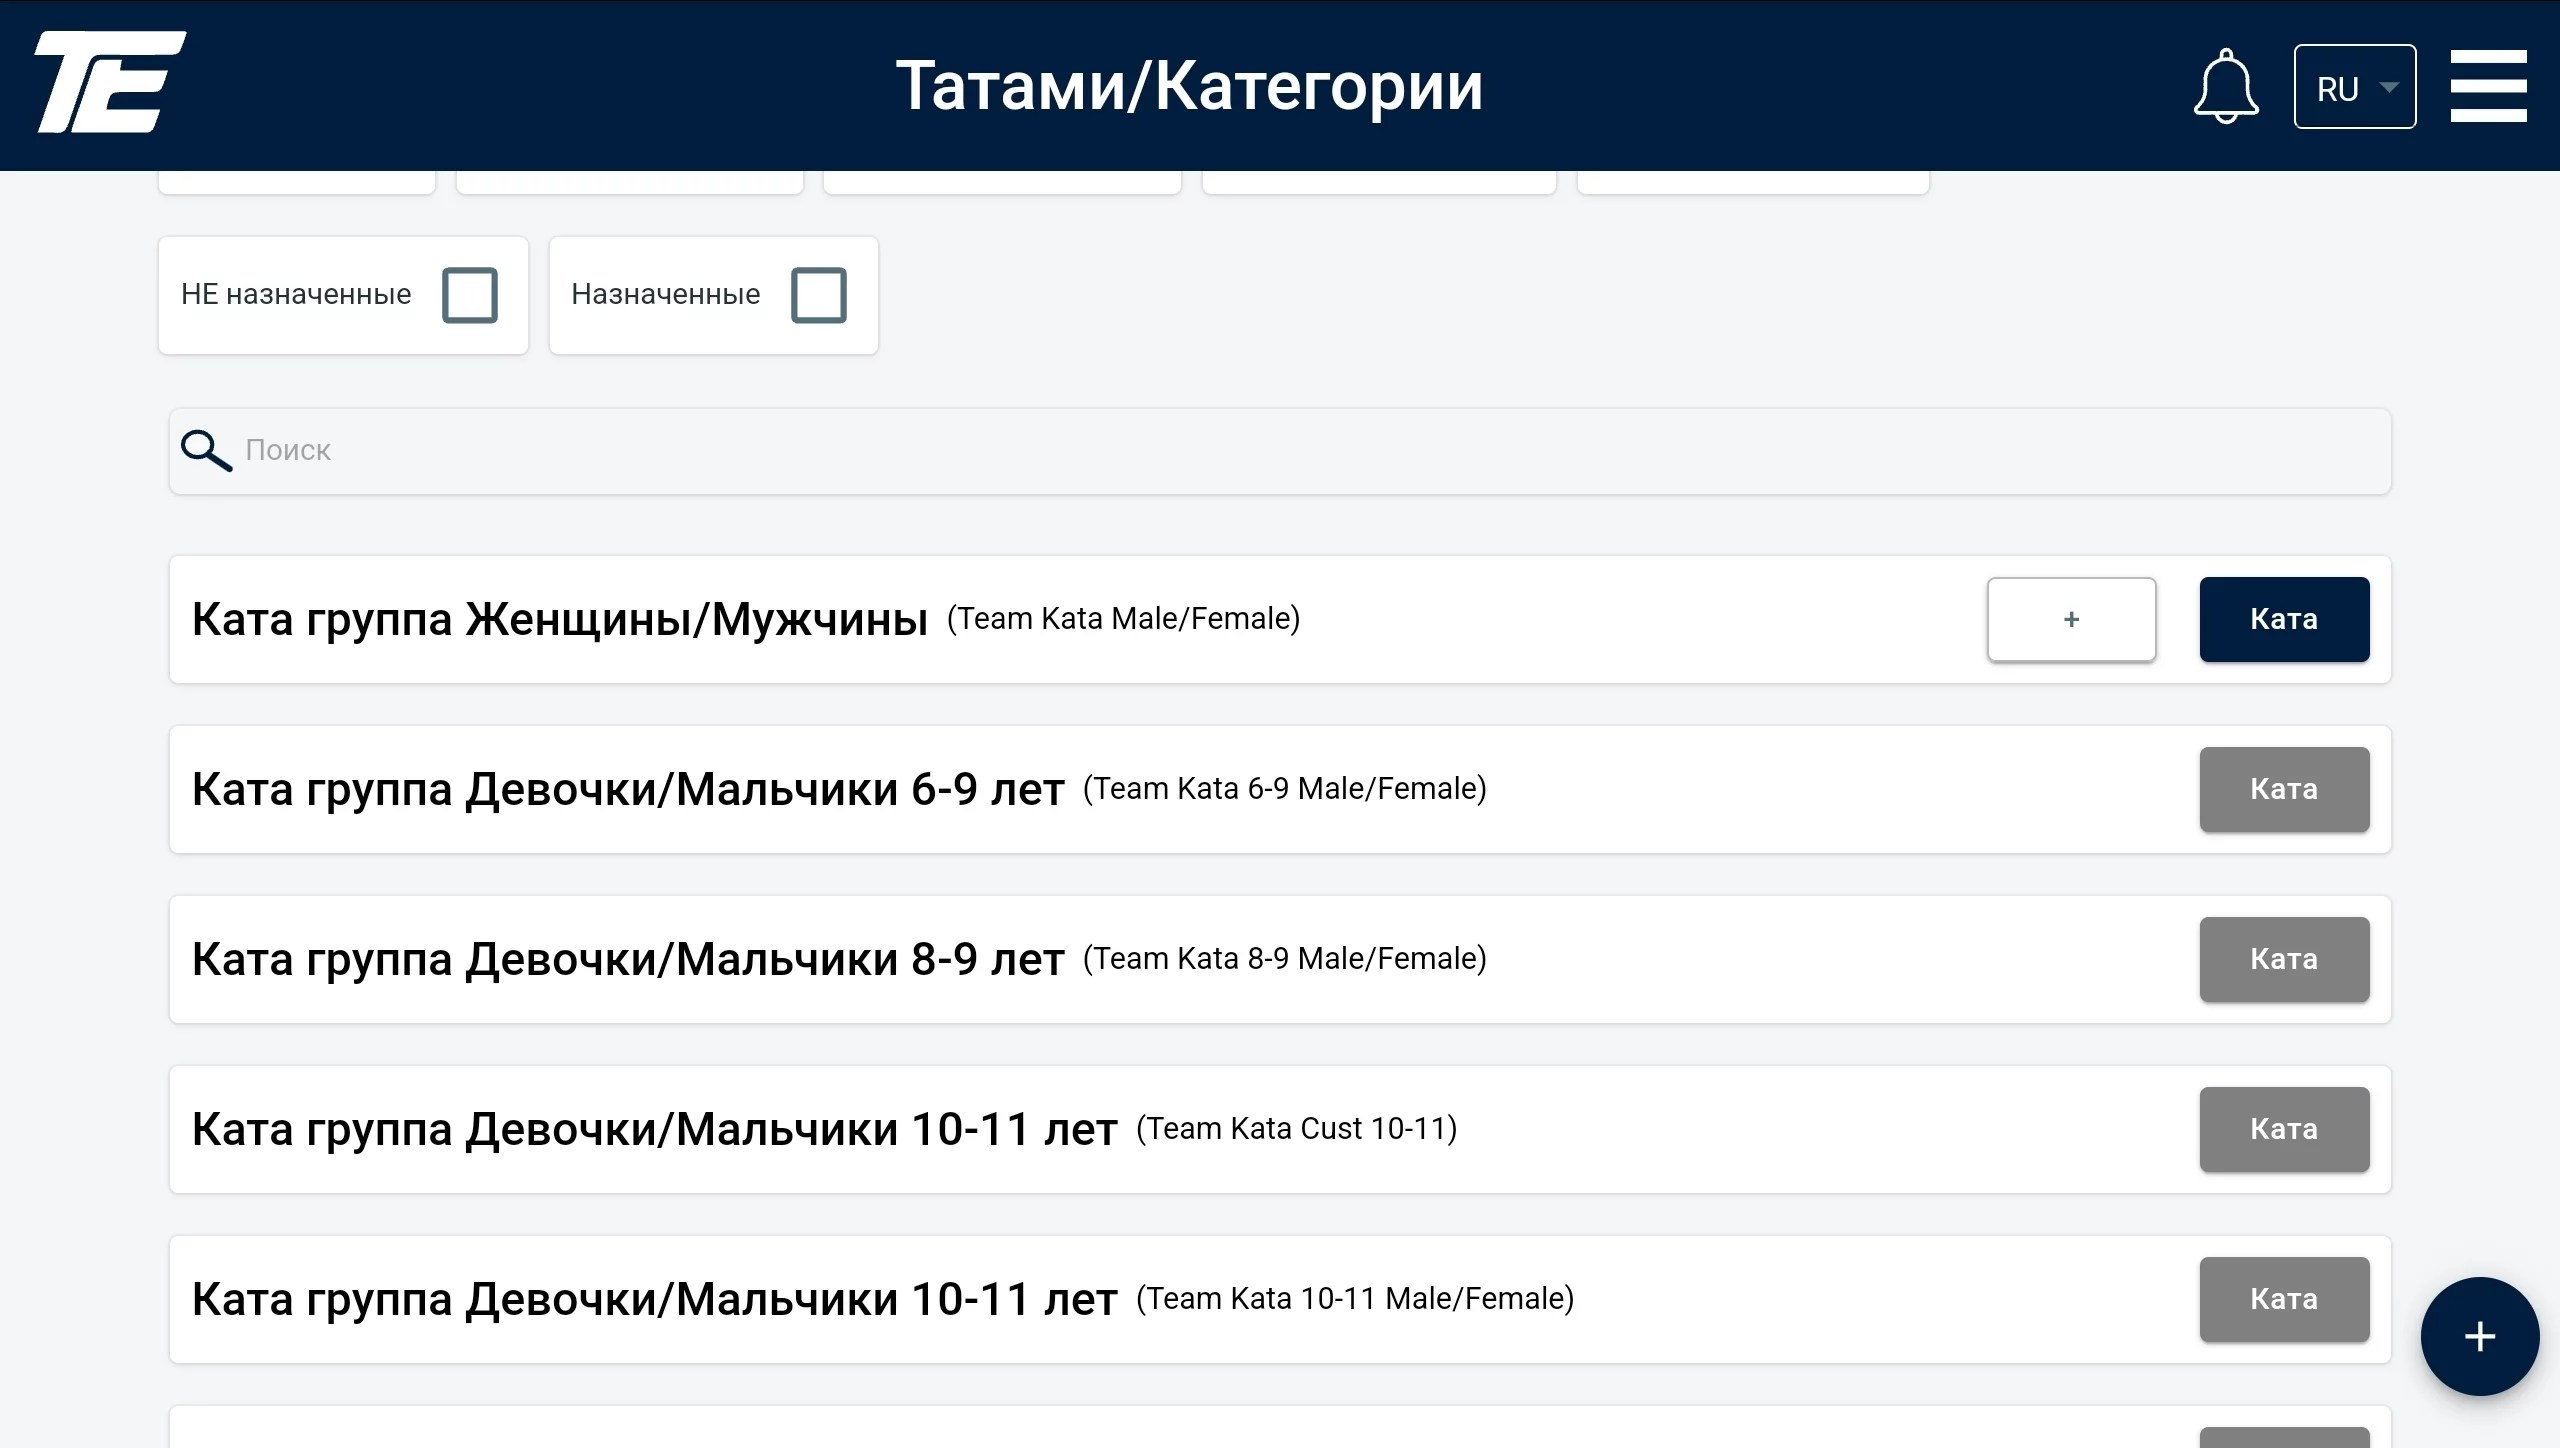
After that, an additional button will appear in the row of the selected category — a + sign on a white background. Pressing it, you will see a list of kata discipline names.
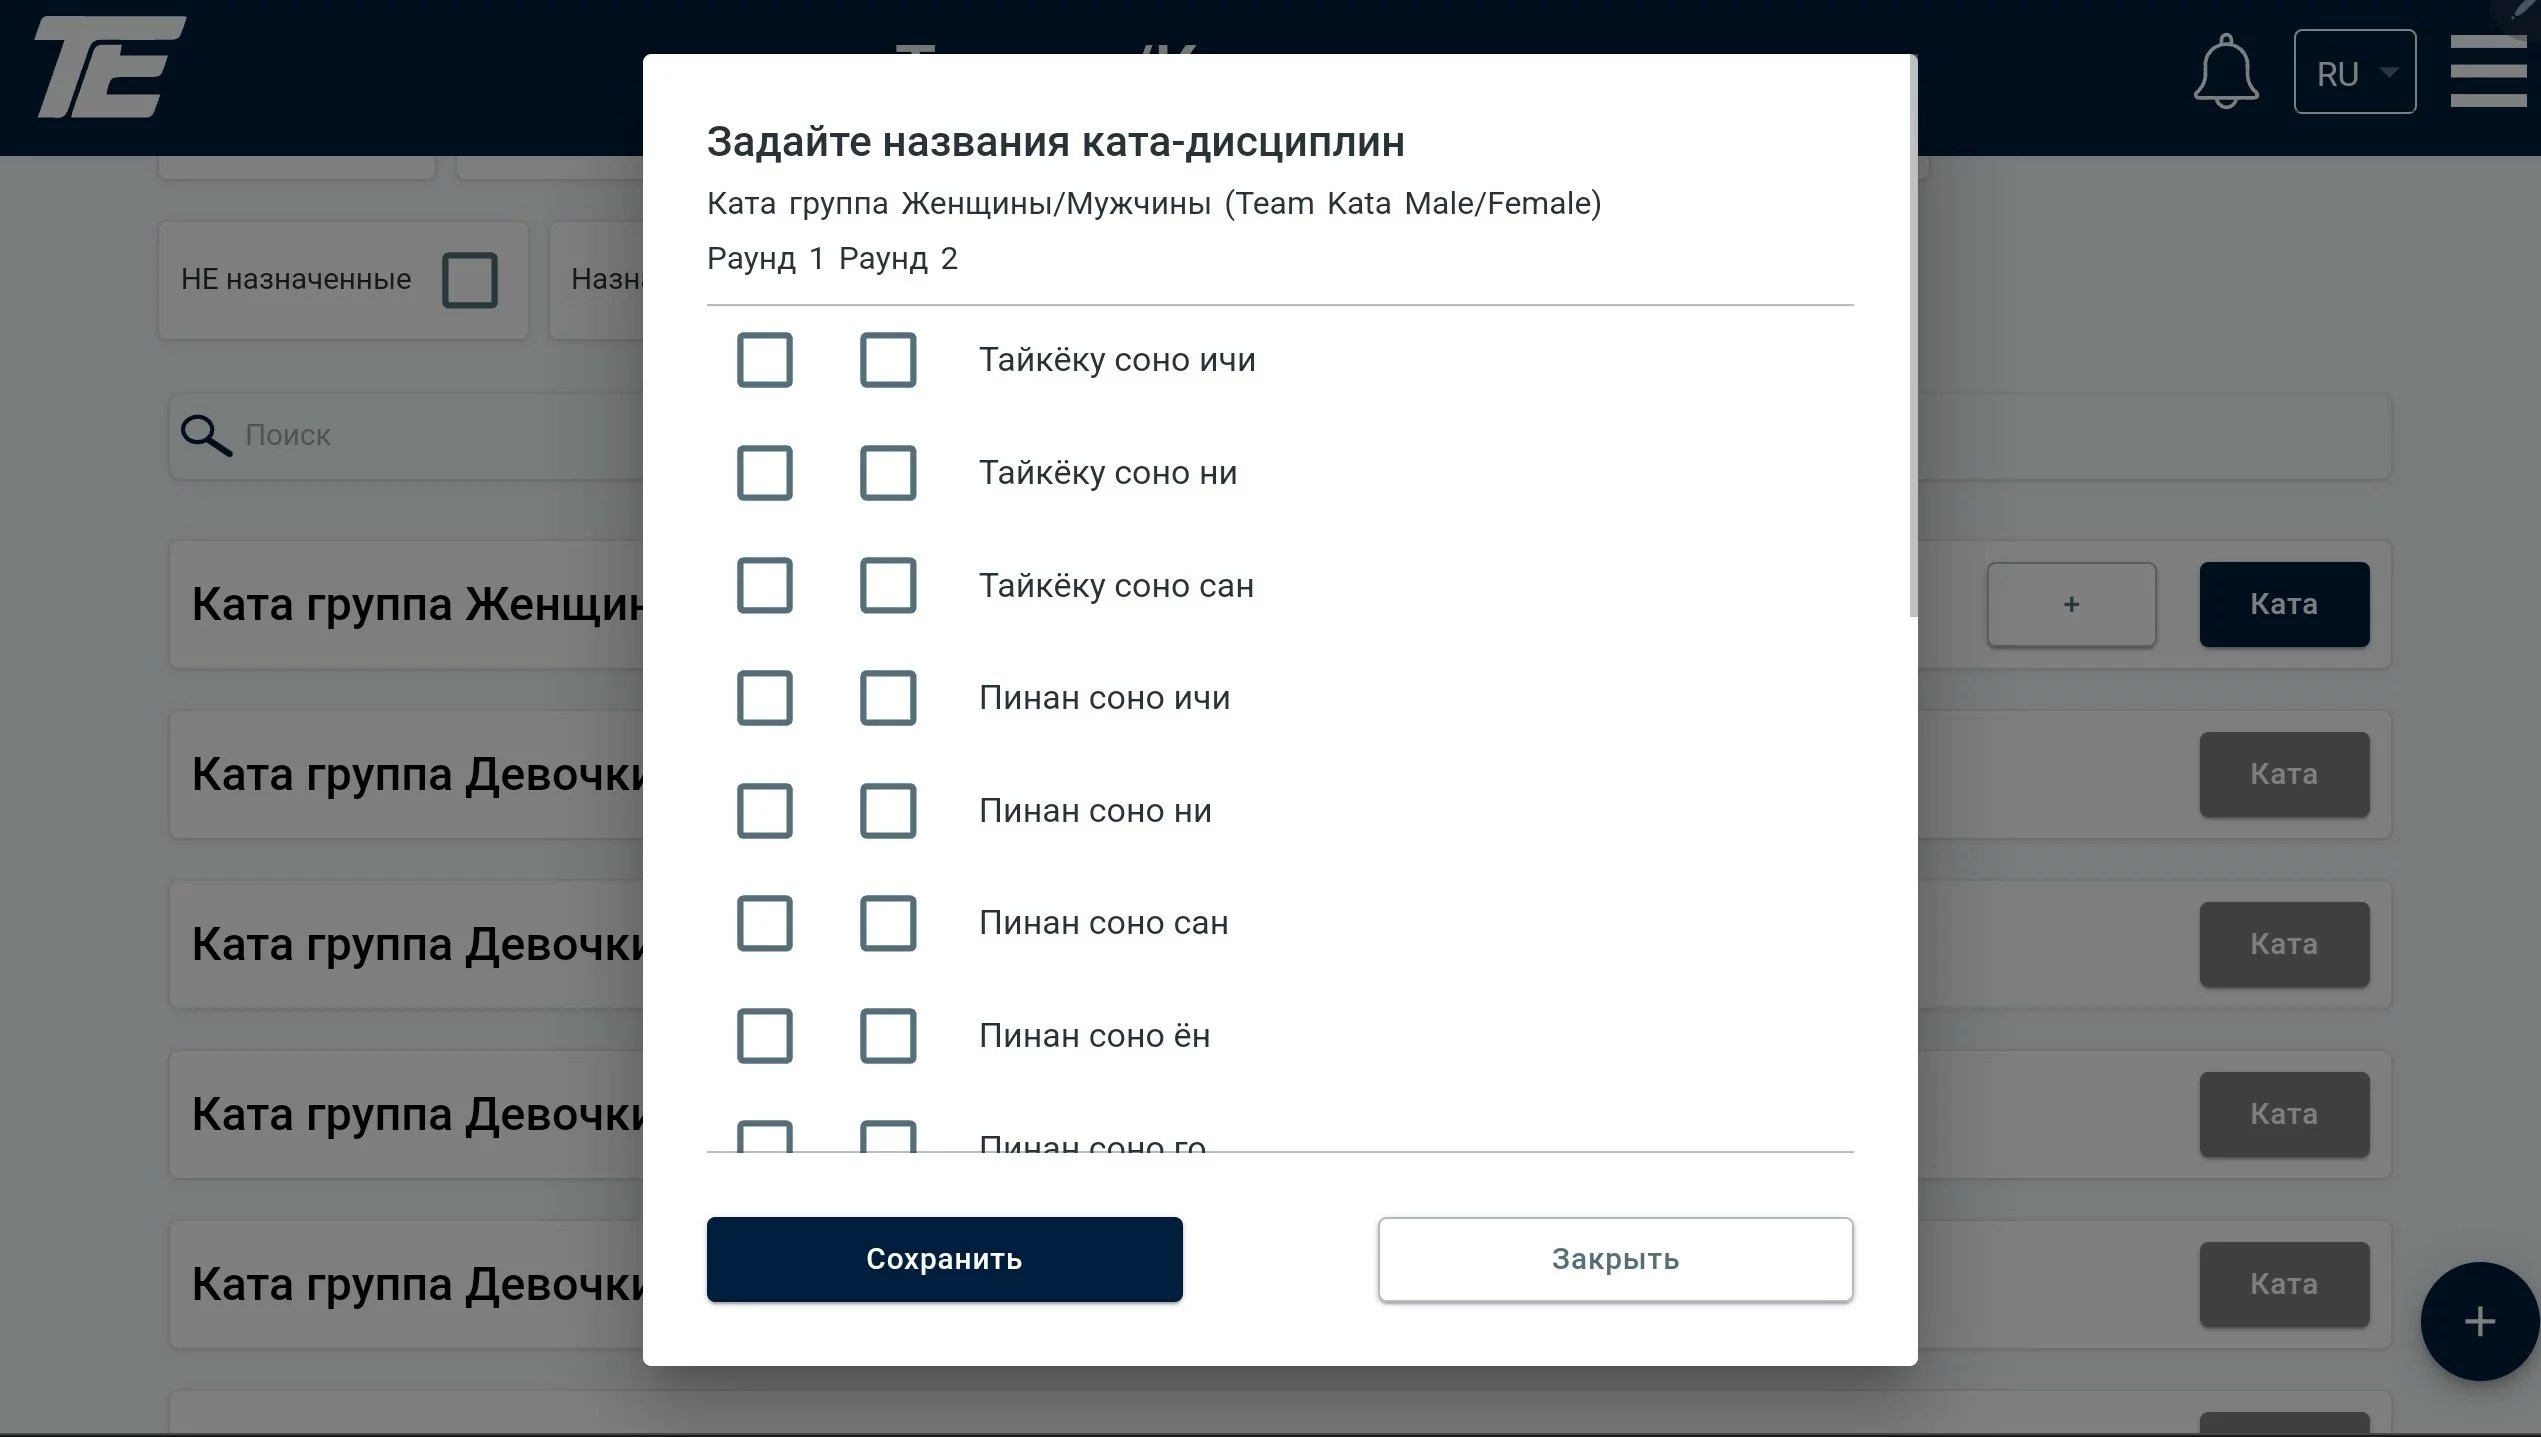
Tick the boxes of the disciplines that the participants are to perform during the competition. Then click save.
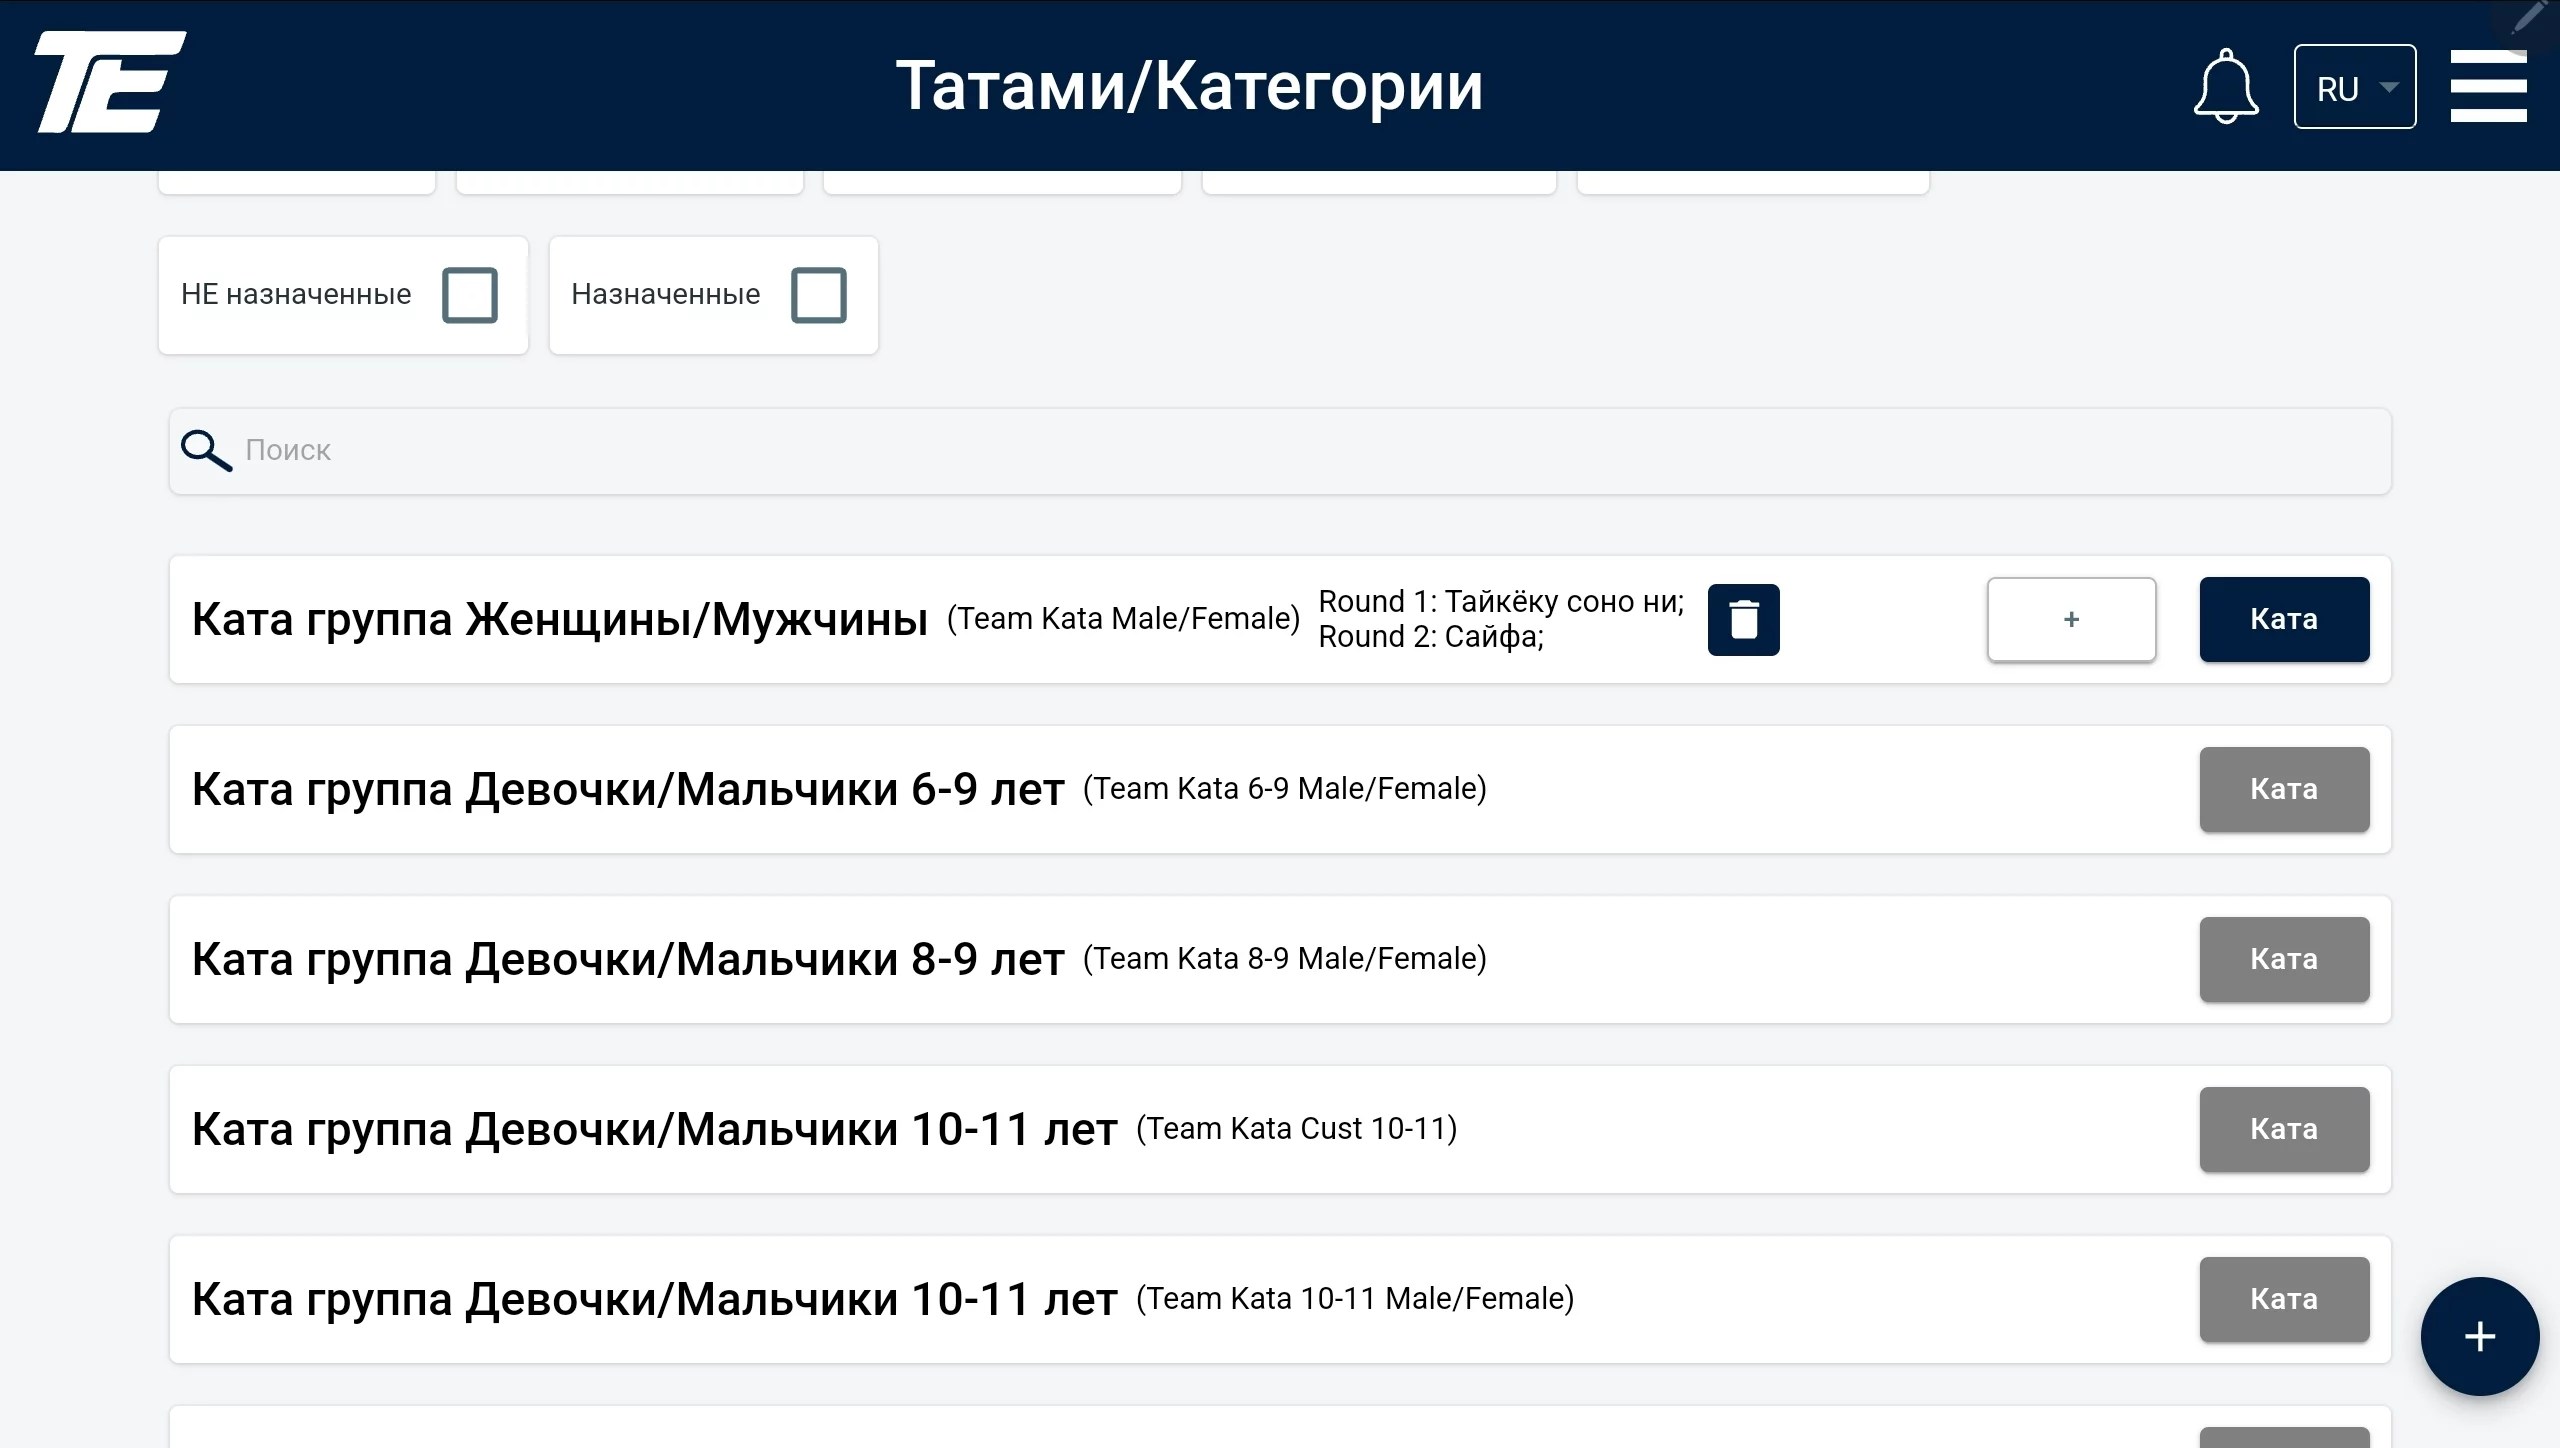
If the assignment is successful, you will see the selected items next to the category name.
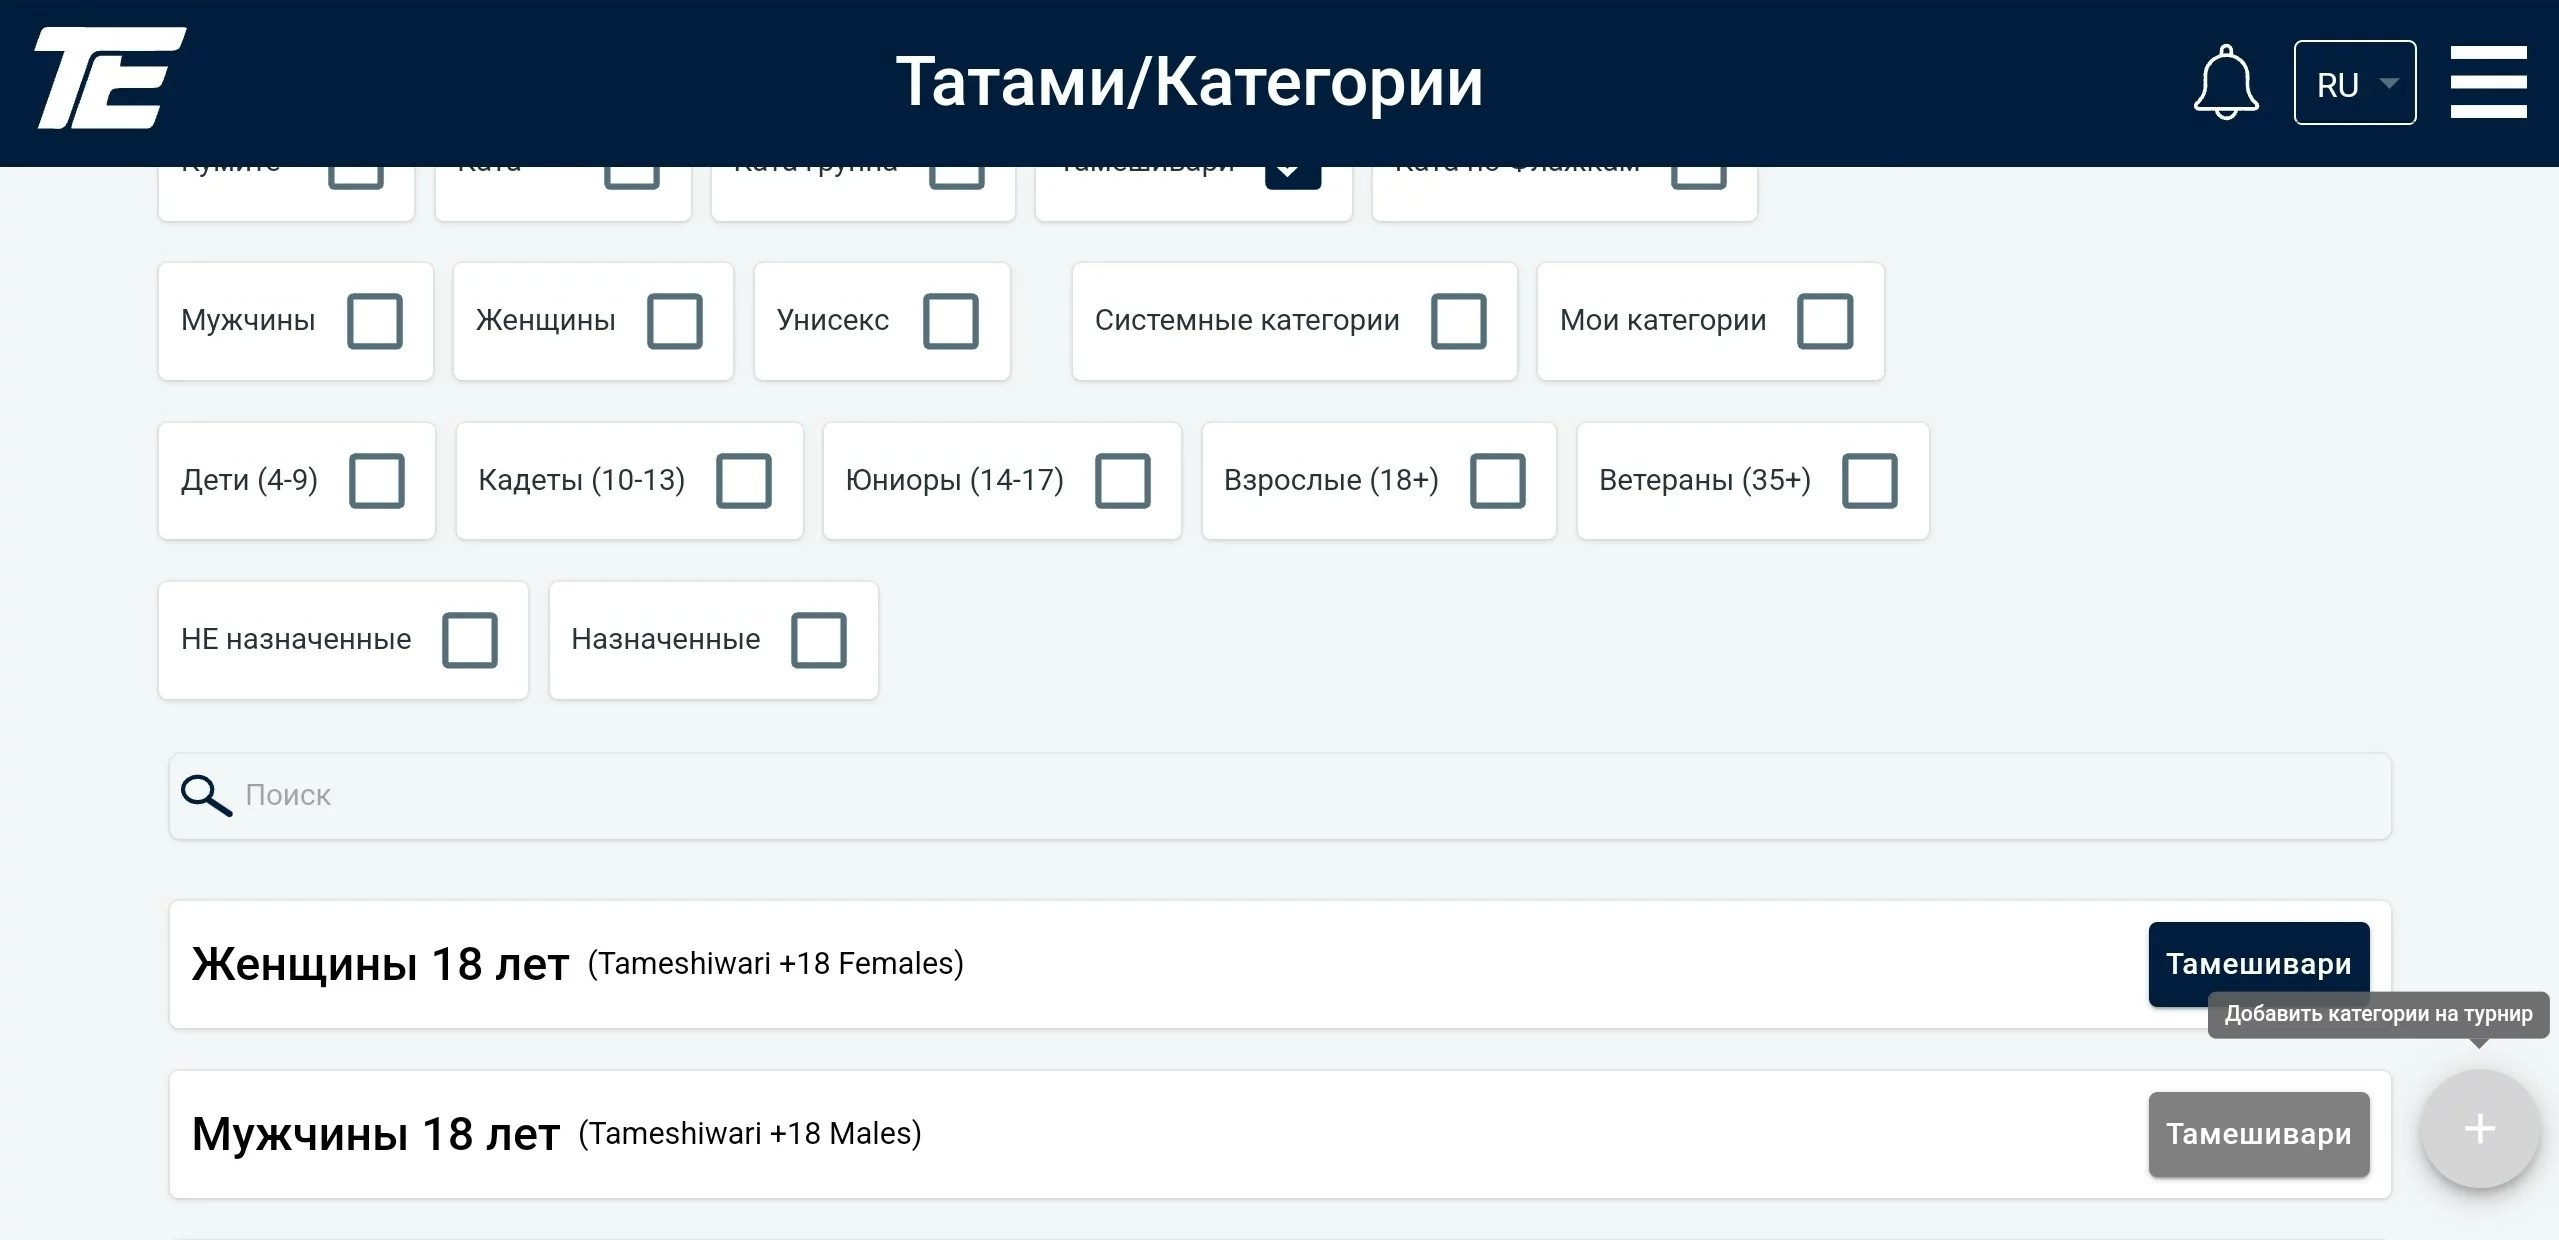
To assign the Tameshiwari category, click the grey tile on the left. After that the tile color should change to blue. Next, click the + icon in the bottom right corner. After that, a notification that the category has been successfully assigned should appear.
To assign the Kata by Flags category, click the grey tile on the left. After that the tile color should change to blue. Next, click the + icon in the bottom right corner. After that, a notification that the category has been successfully assigned should appear.
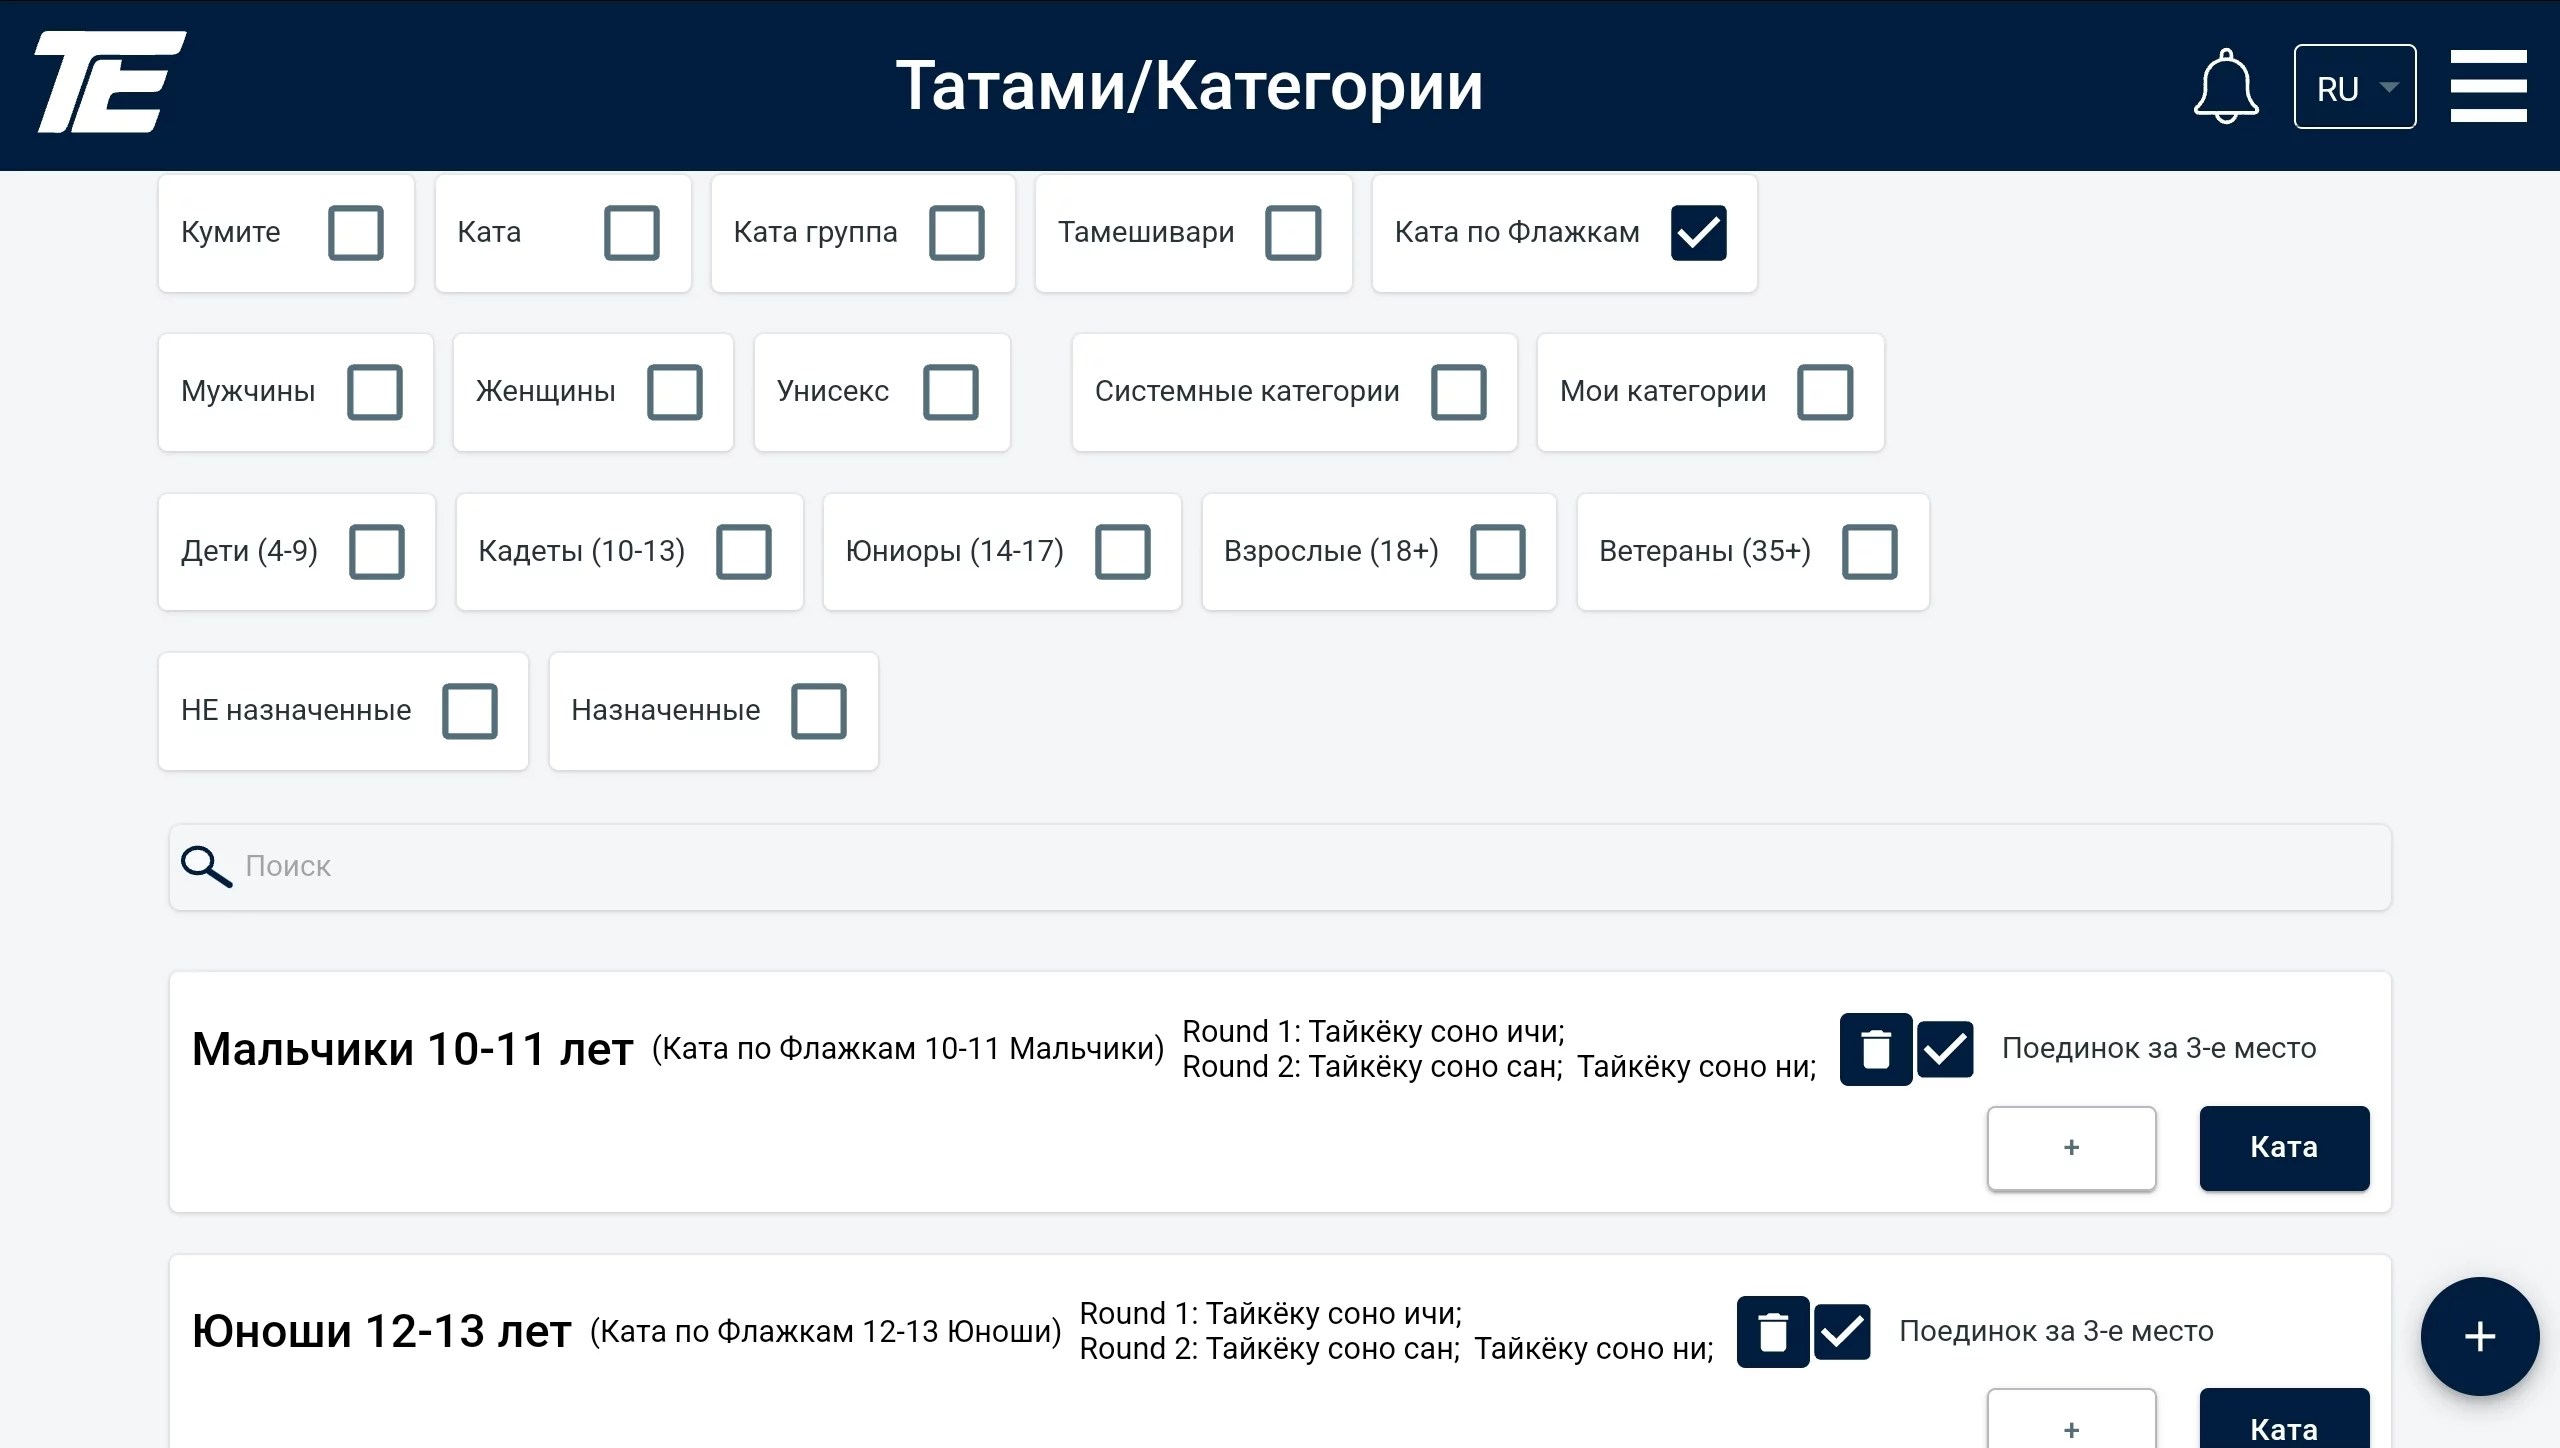
After all the categories you are interested in have been assigned, you can use the Assigned filter. This filter shows all the categories entered for the tournament.
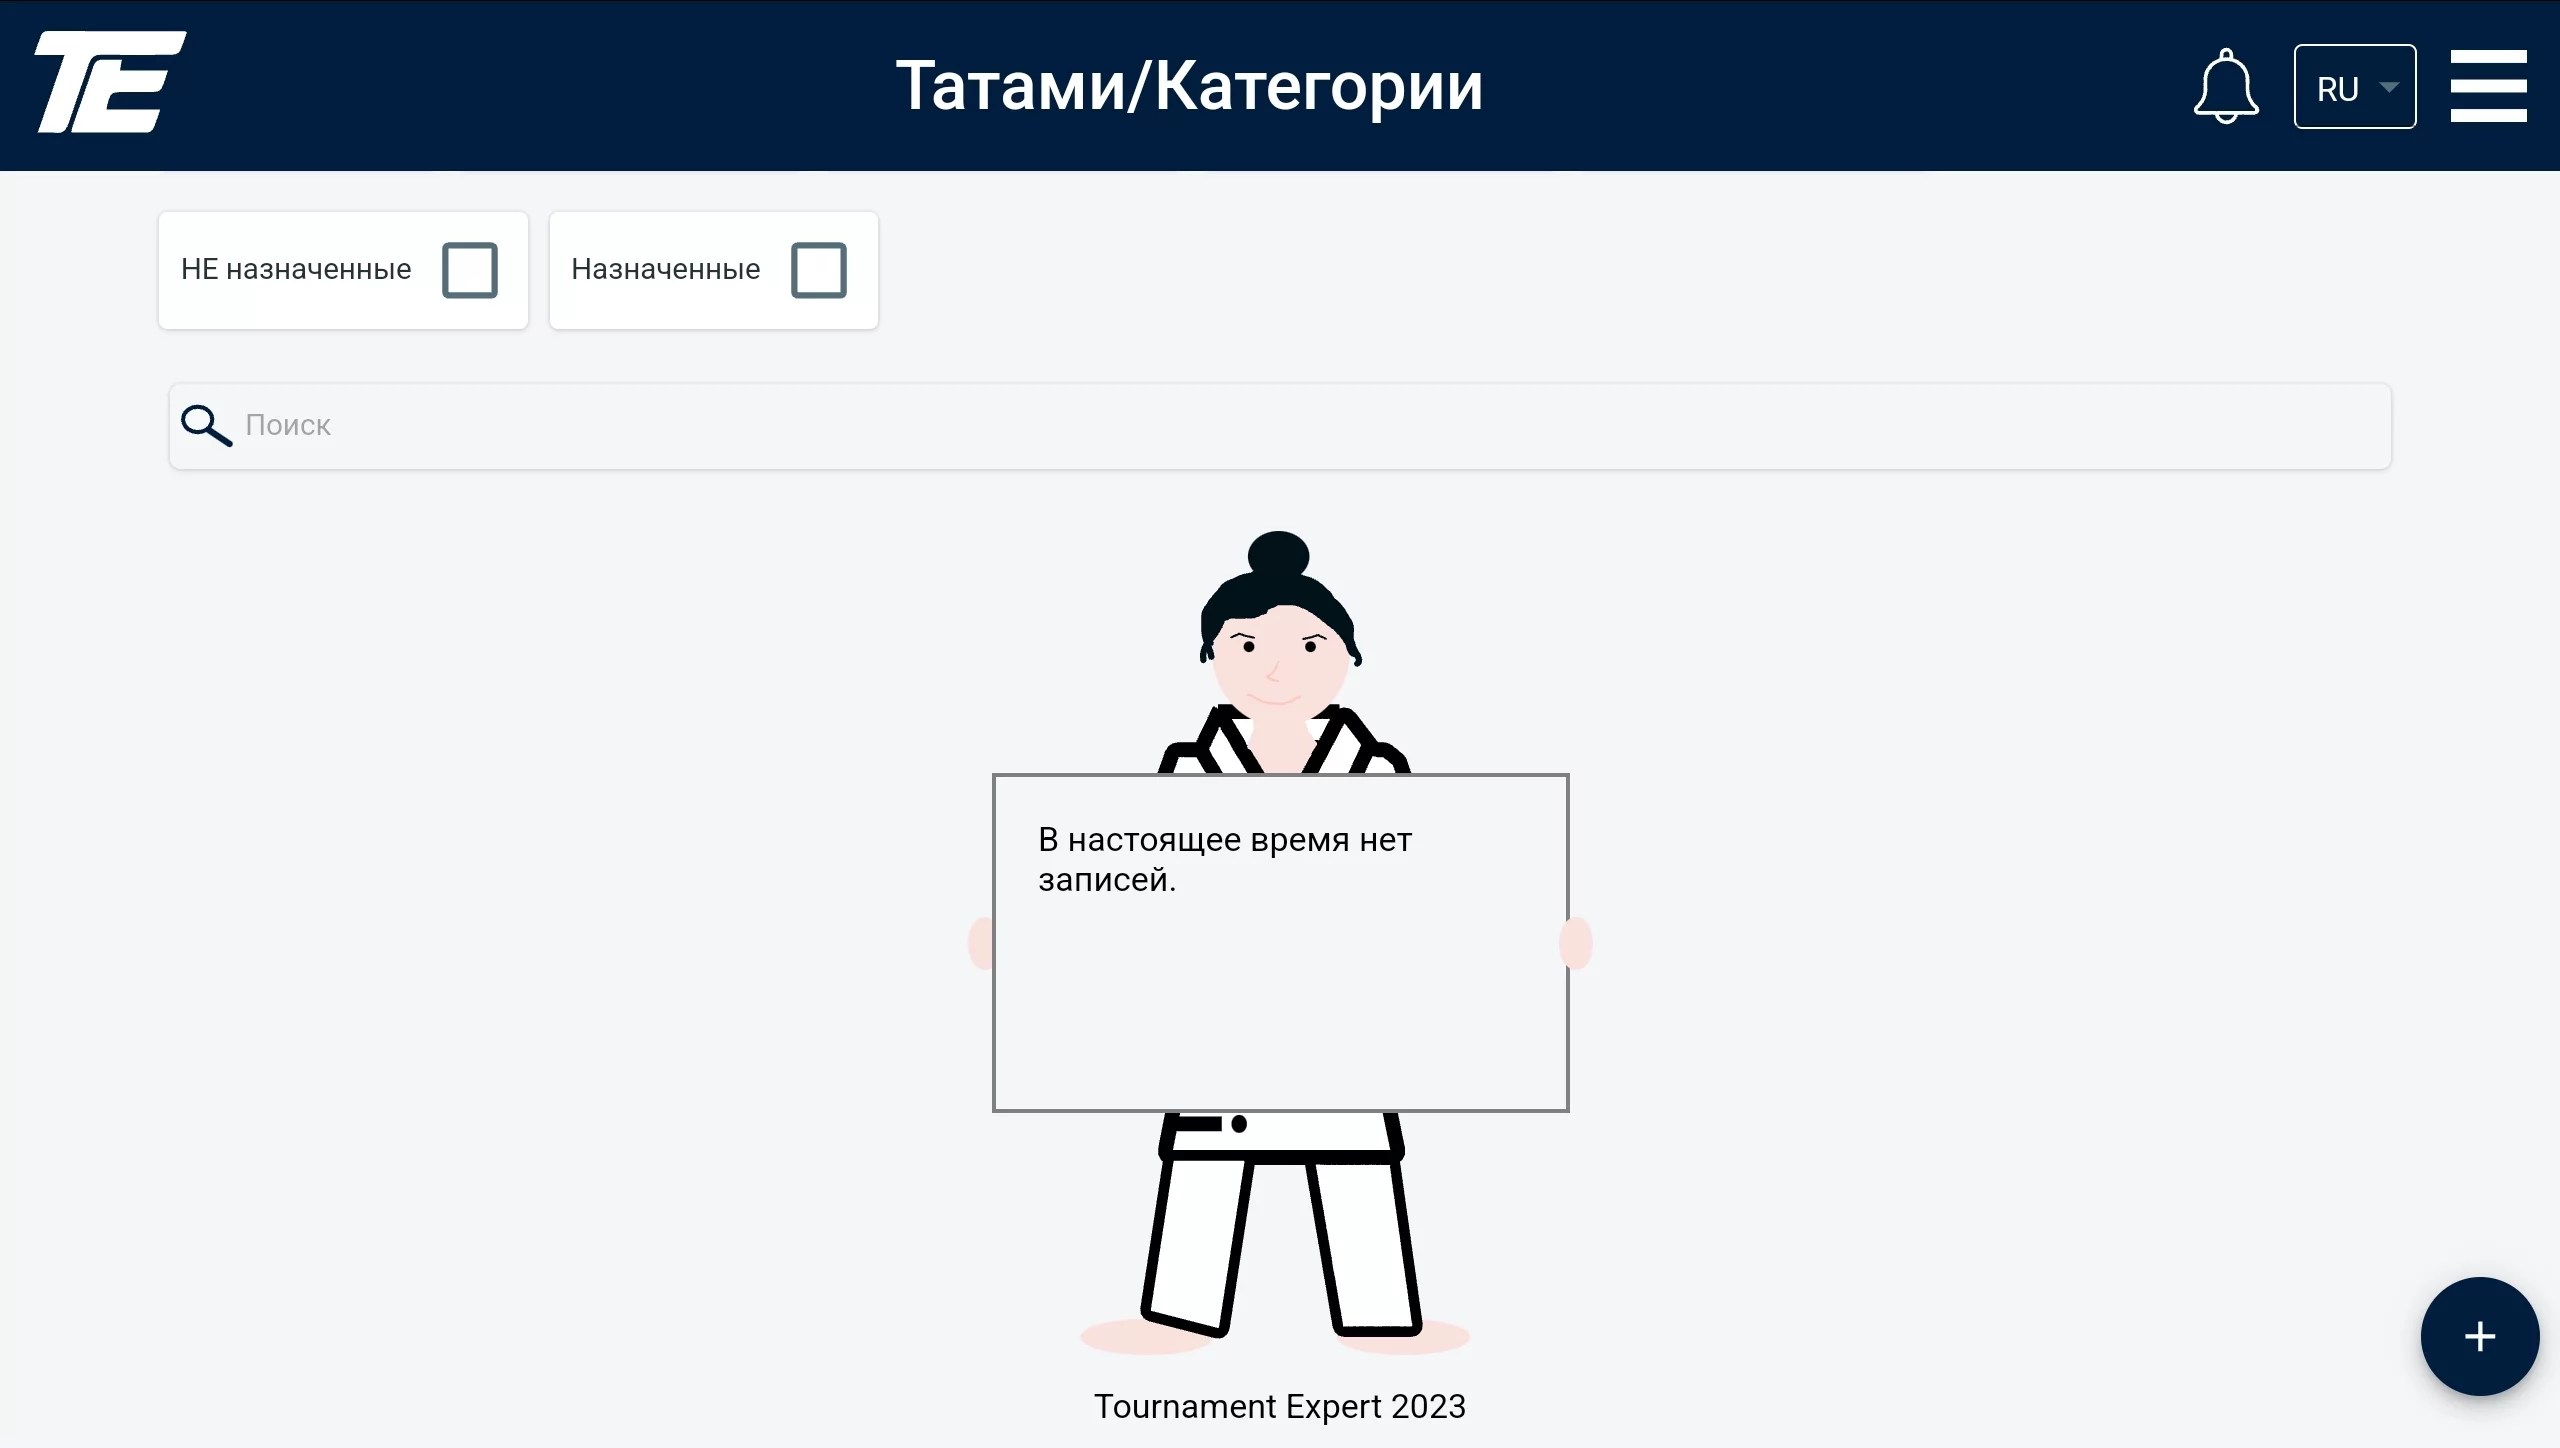
If none of the categories fits the filters you set, the web portal will issue the following notification:
The main purpose of this feature — to balance the load on the tatami during the tournament and distribute the workload across the tatami in accordance with the required requests.
Important note: the Distribute categories among the tatami and Distribute participants among the categories tabs can only be used after participants have been assigned to the tournament.
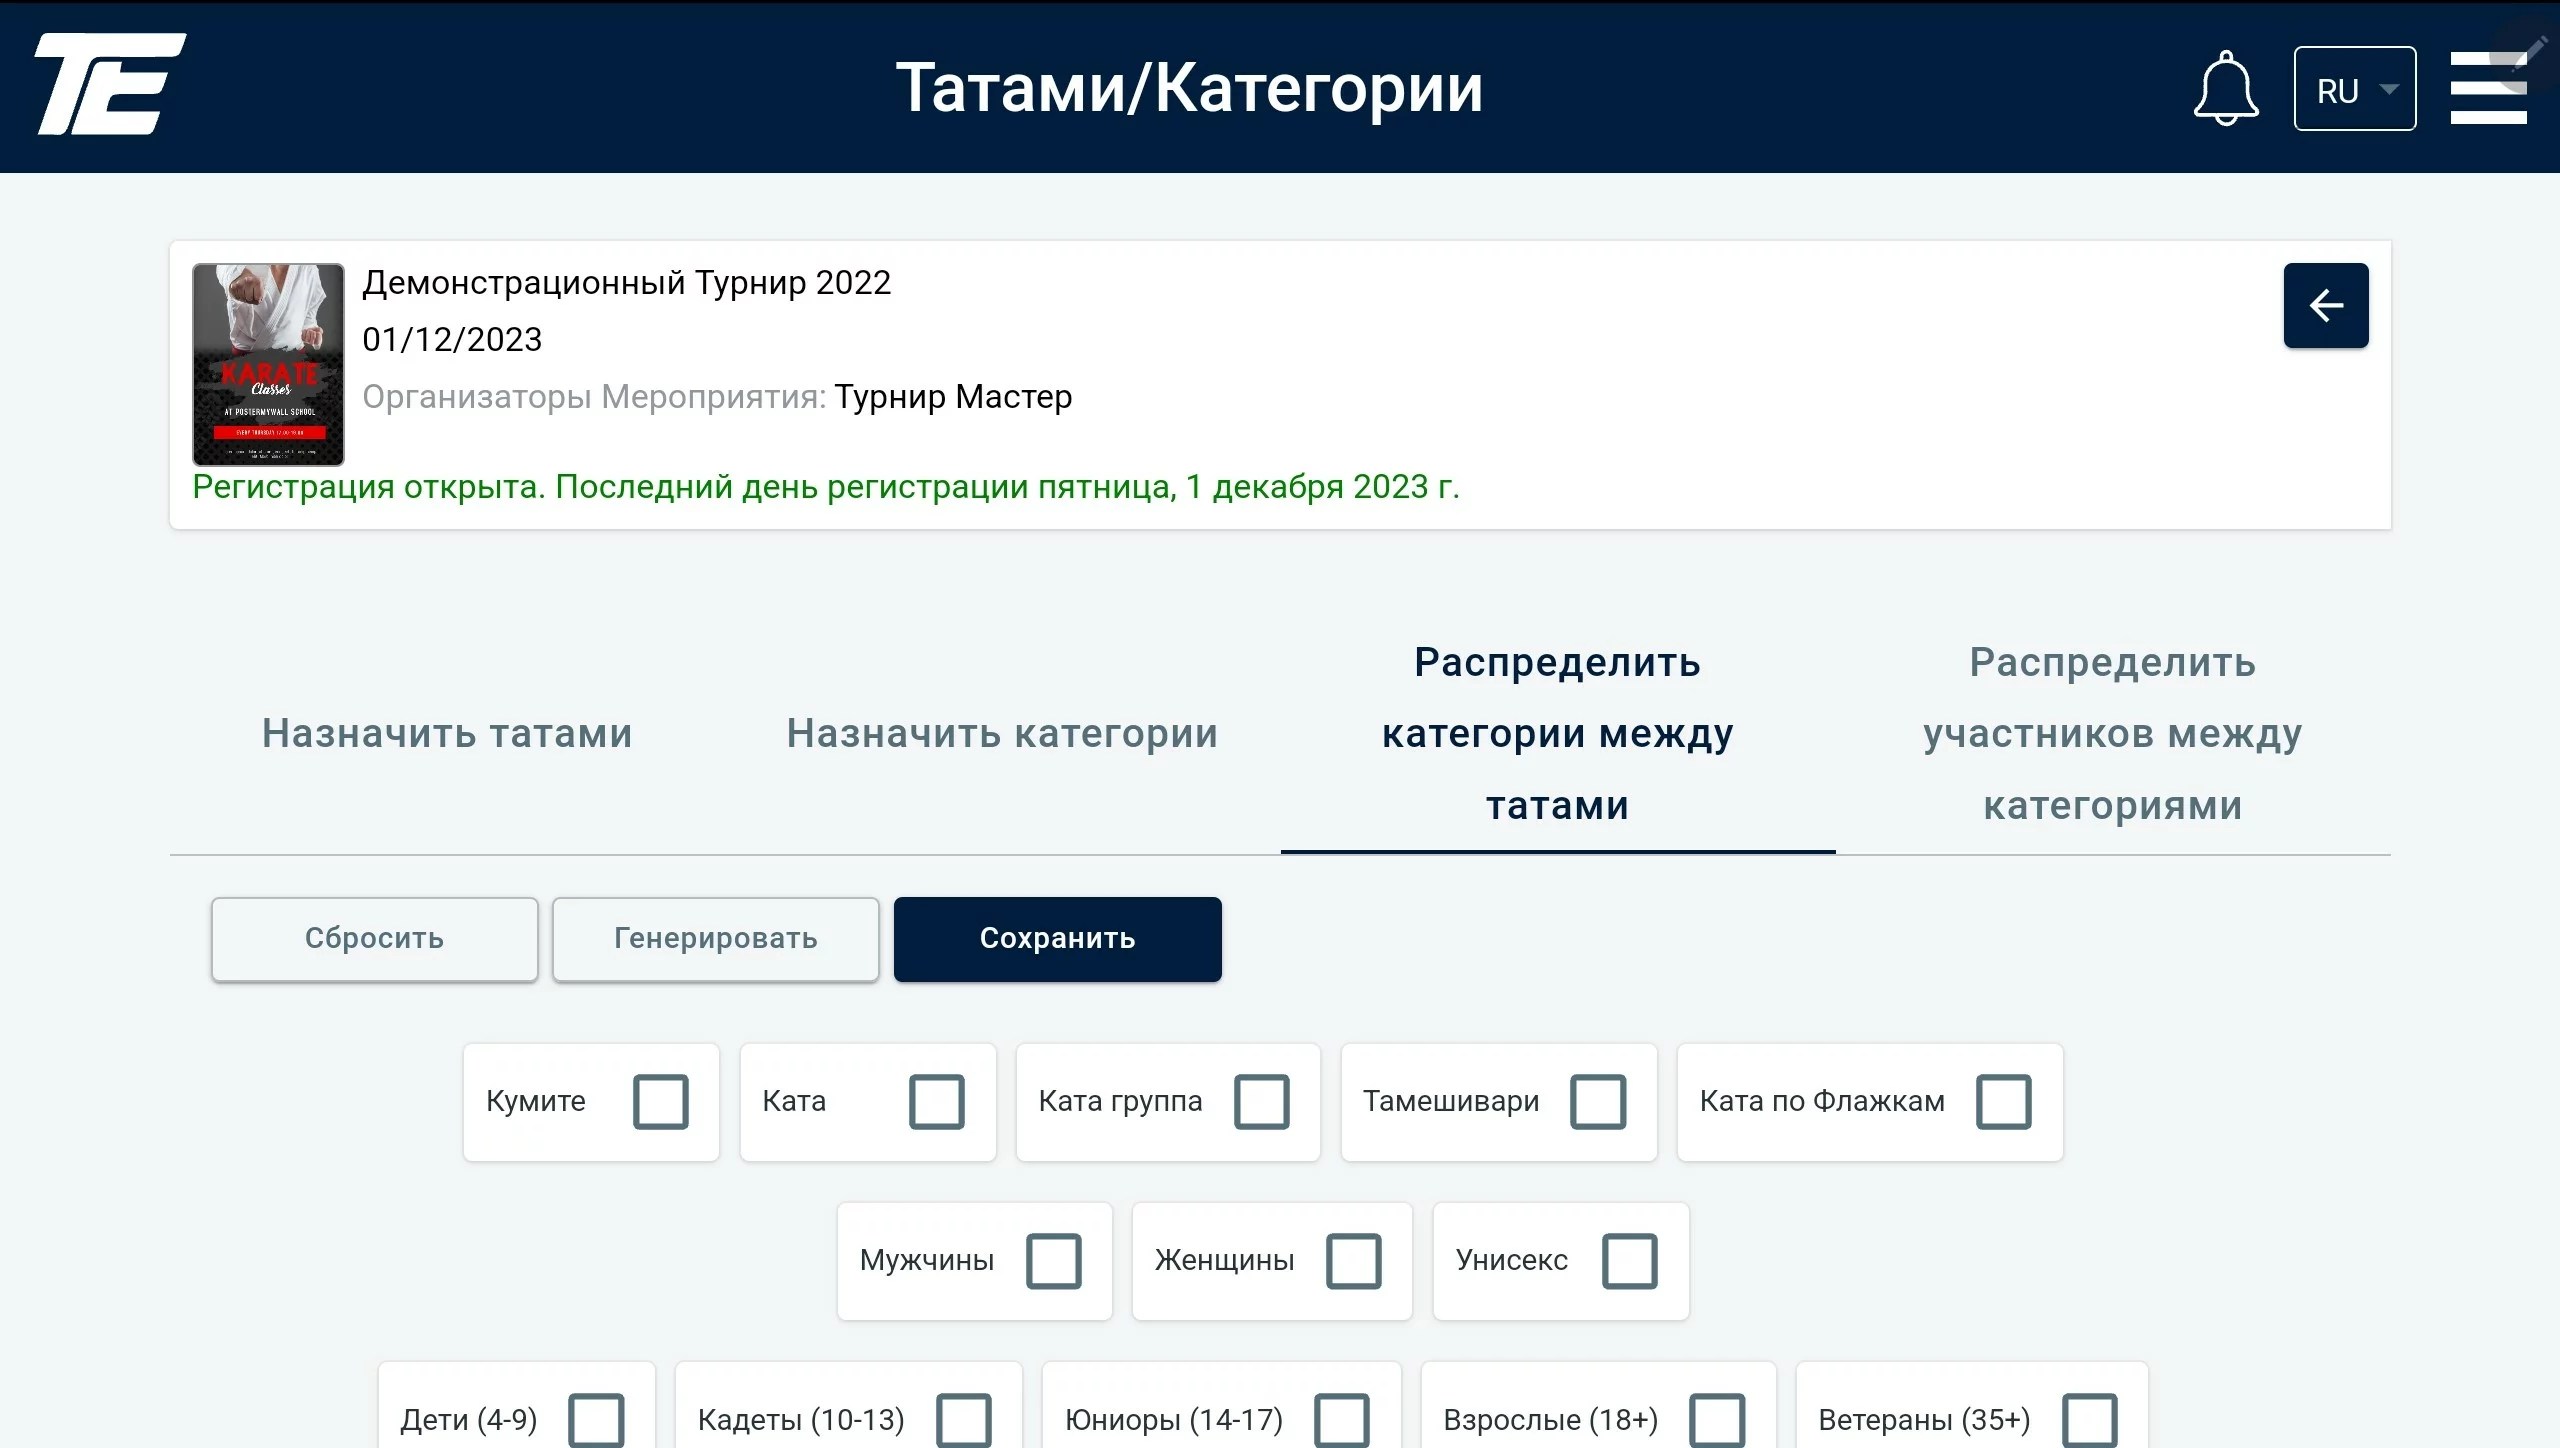
The example below shows a situation where the competition duration is completely different on three different tatami. This feature was developed to avoid such a situation or to create one artificially.
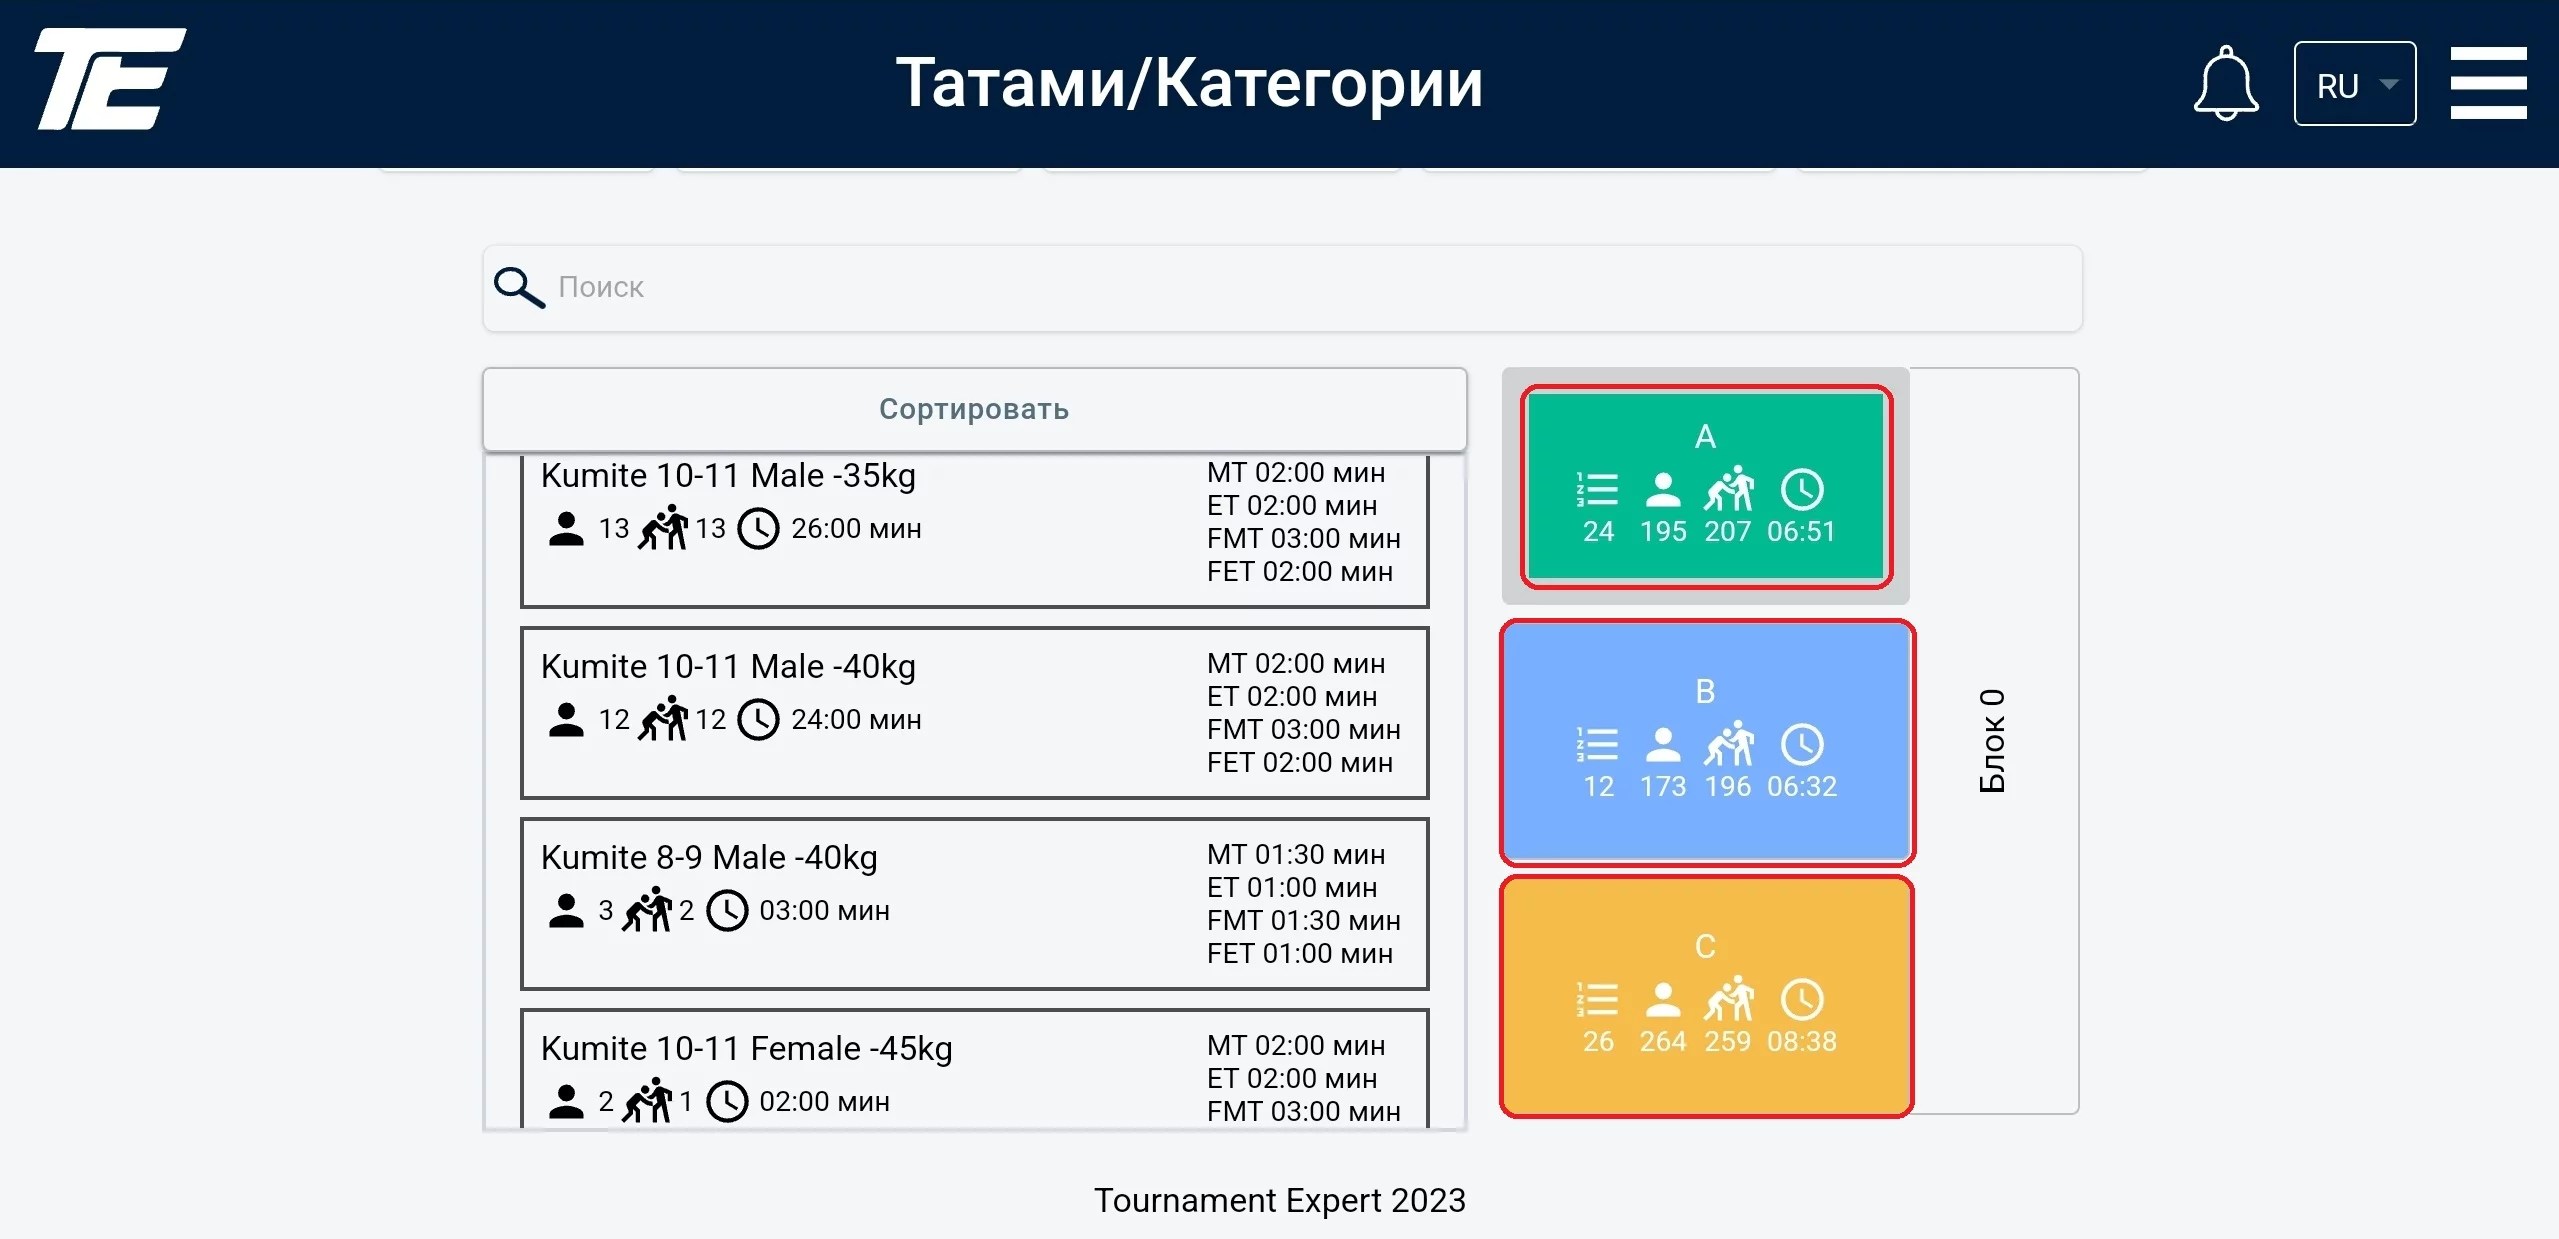
On first launch, the Distribute categories among the tatami form shows a random distribution of all entered categories across all tatami.
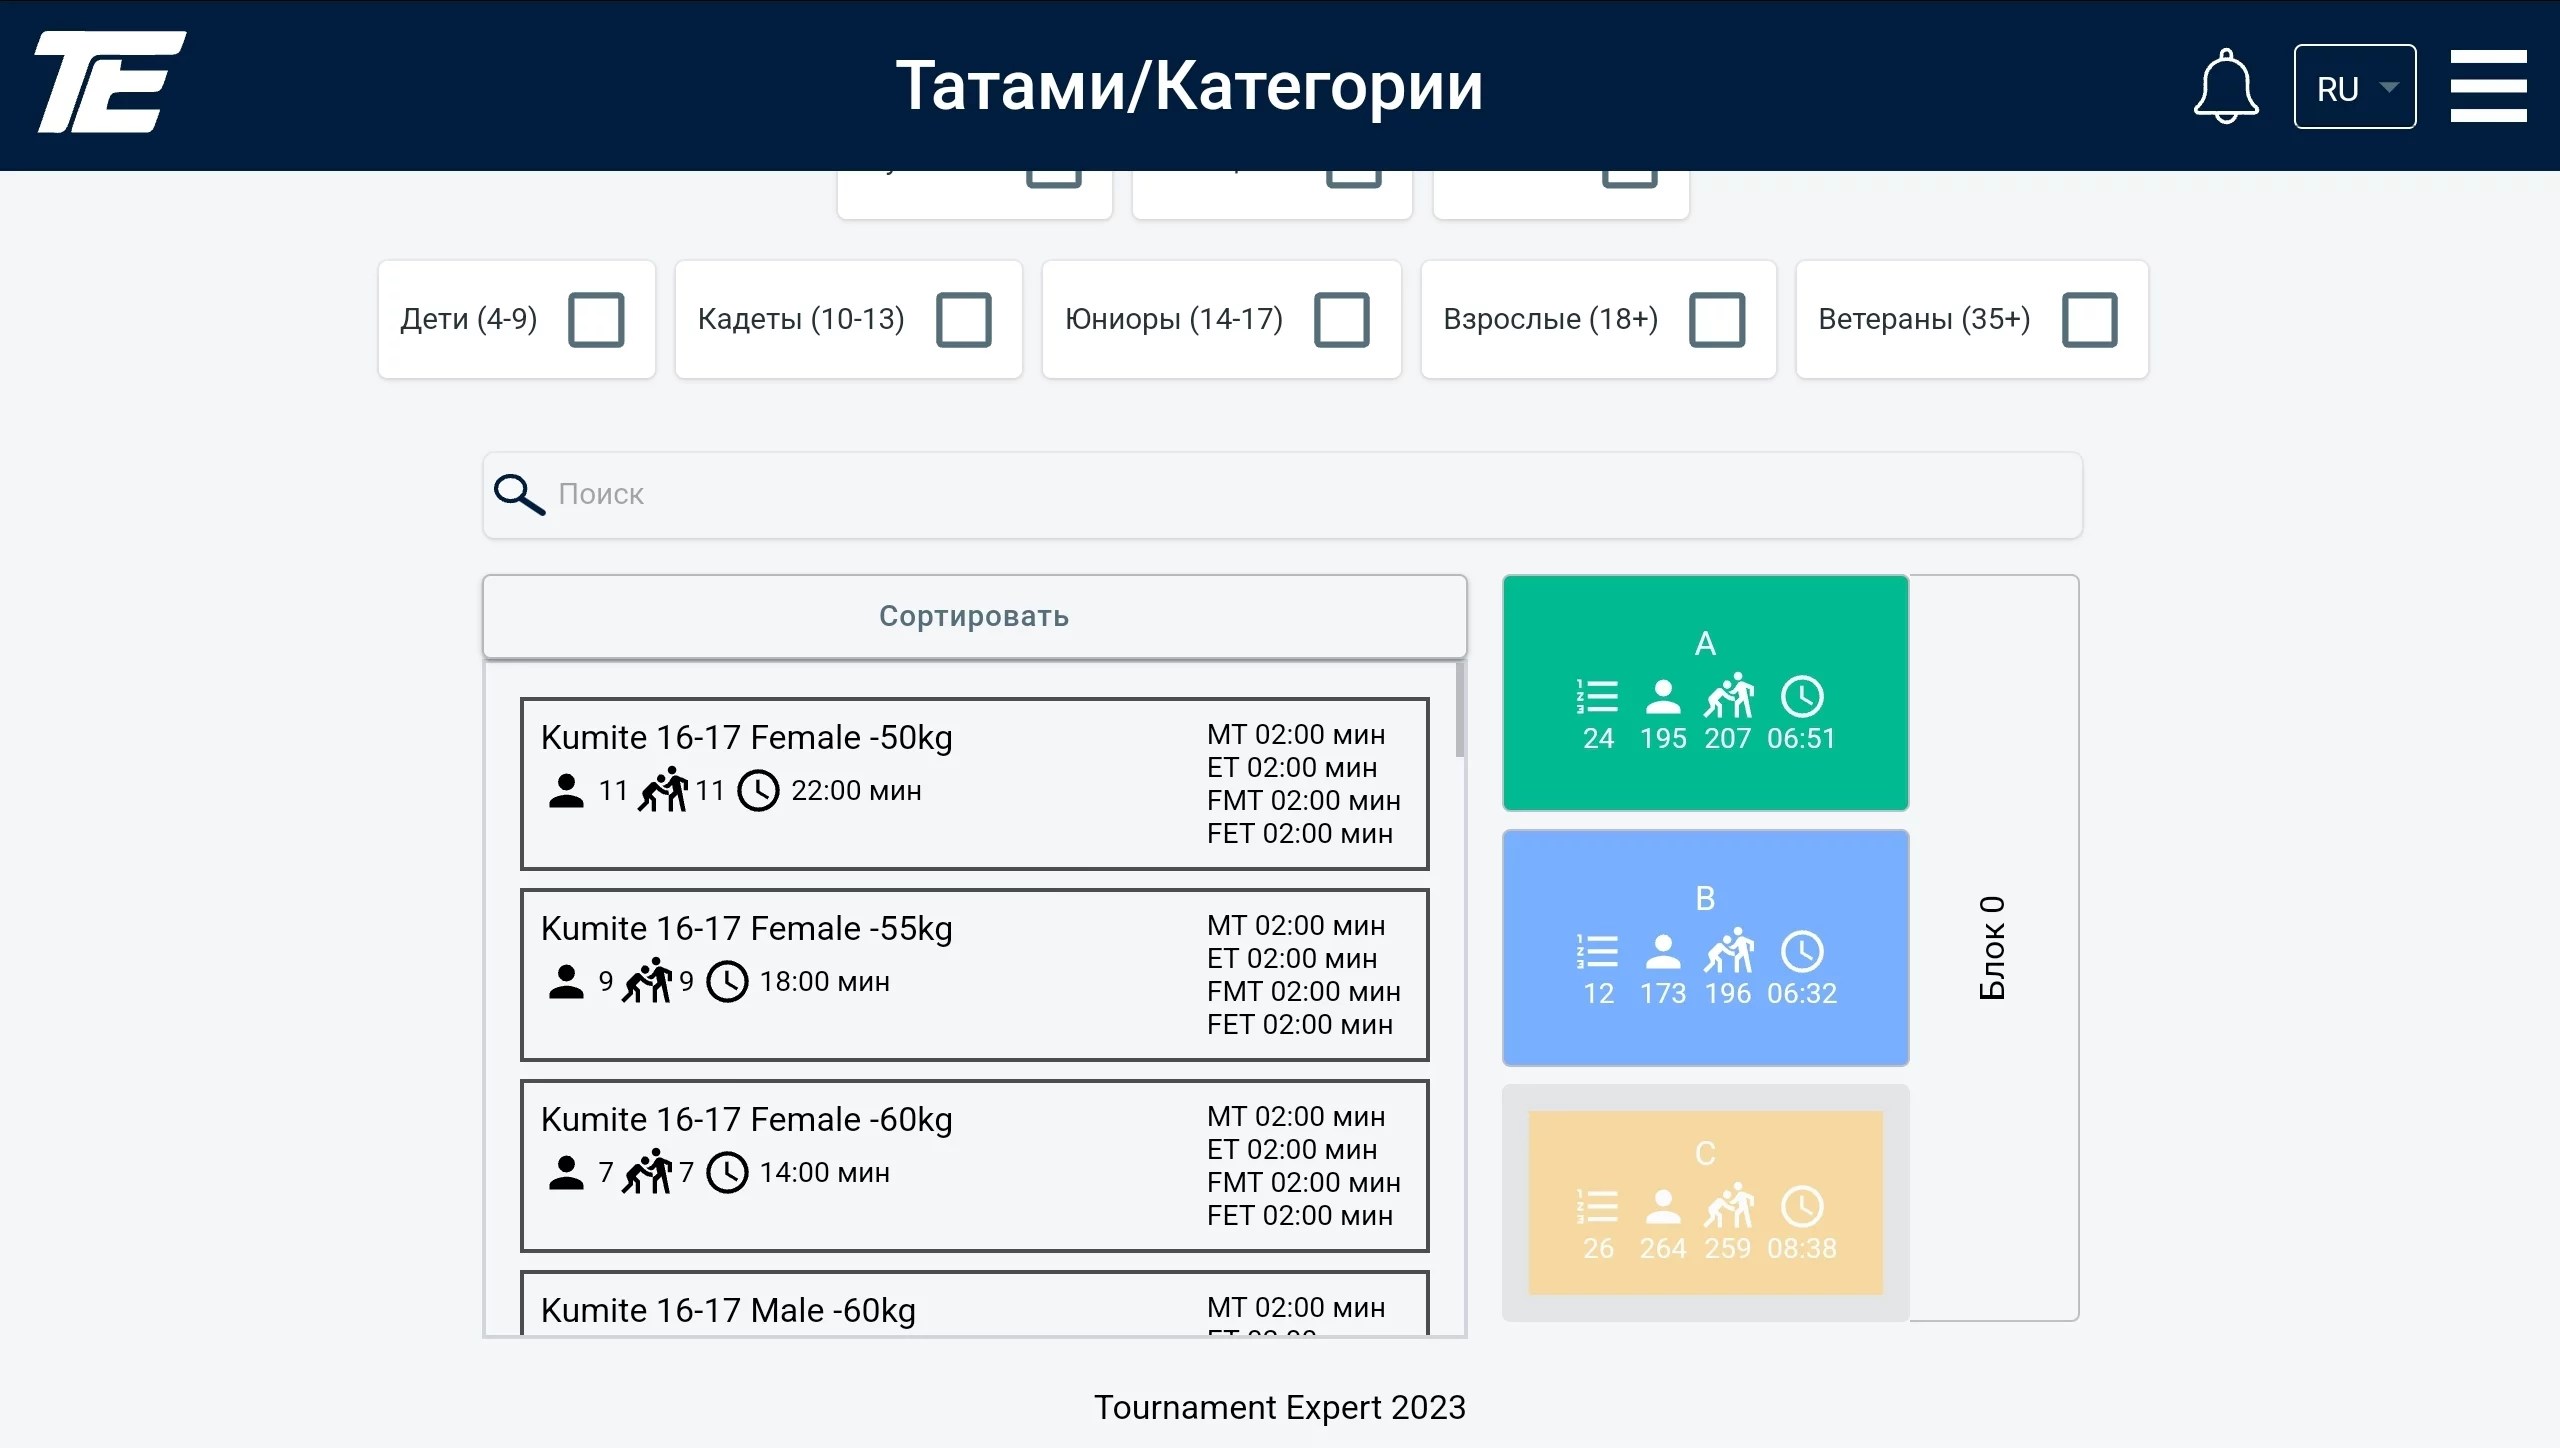
The “Sort” button works as a primary filter. It arranges the categories as follows: from the youngest age and lowest weight to the maximum.
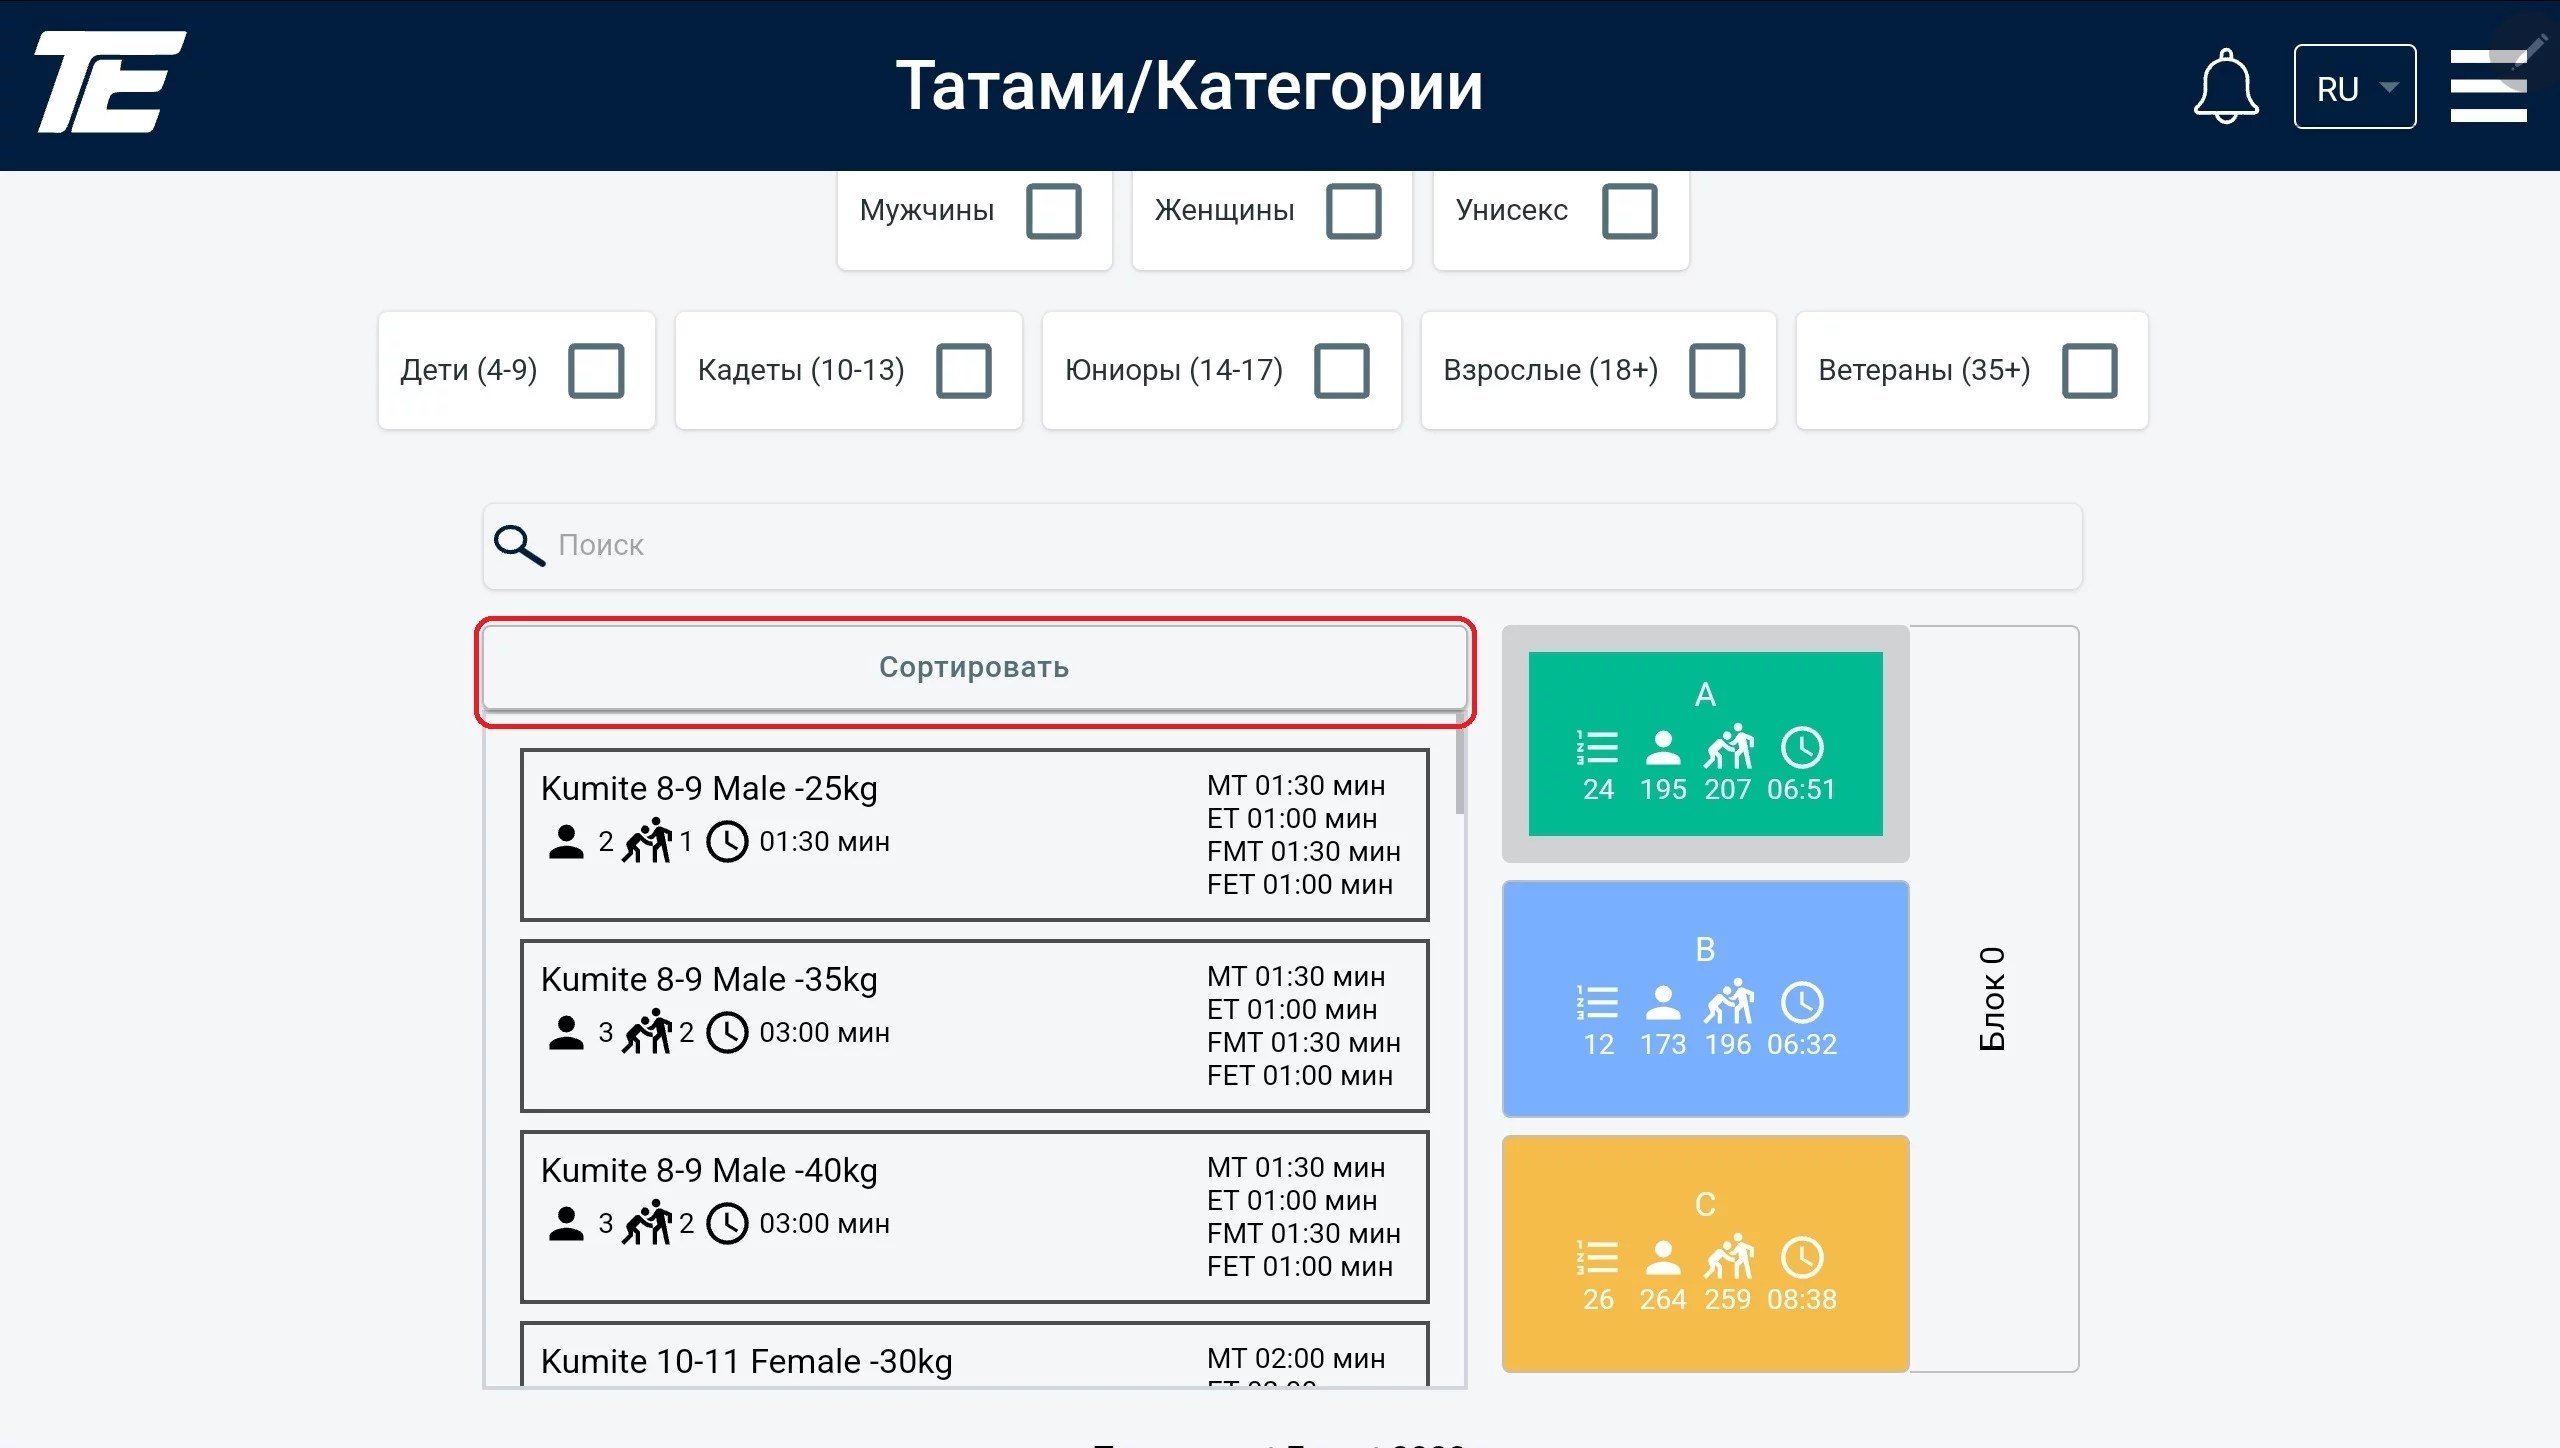
The total number of participants in a category / on a tatami. Depends on the total number of participants registered in that category.

The total number of matches in a category / on a tatami. Depends on the number of matches between participants according to the protocol (presence or absence of a match for 3rd place).

The total number of categories on a tatami. Depends on the total number of categories on the tatami.

The total time to finish the matches in a category / on a tatami. This is the total time obtained from the calculation of the time taken for one category * the number of categories.

The “Generate” function is intended to automatically balance the load on all tatami.
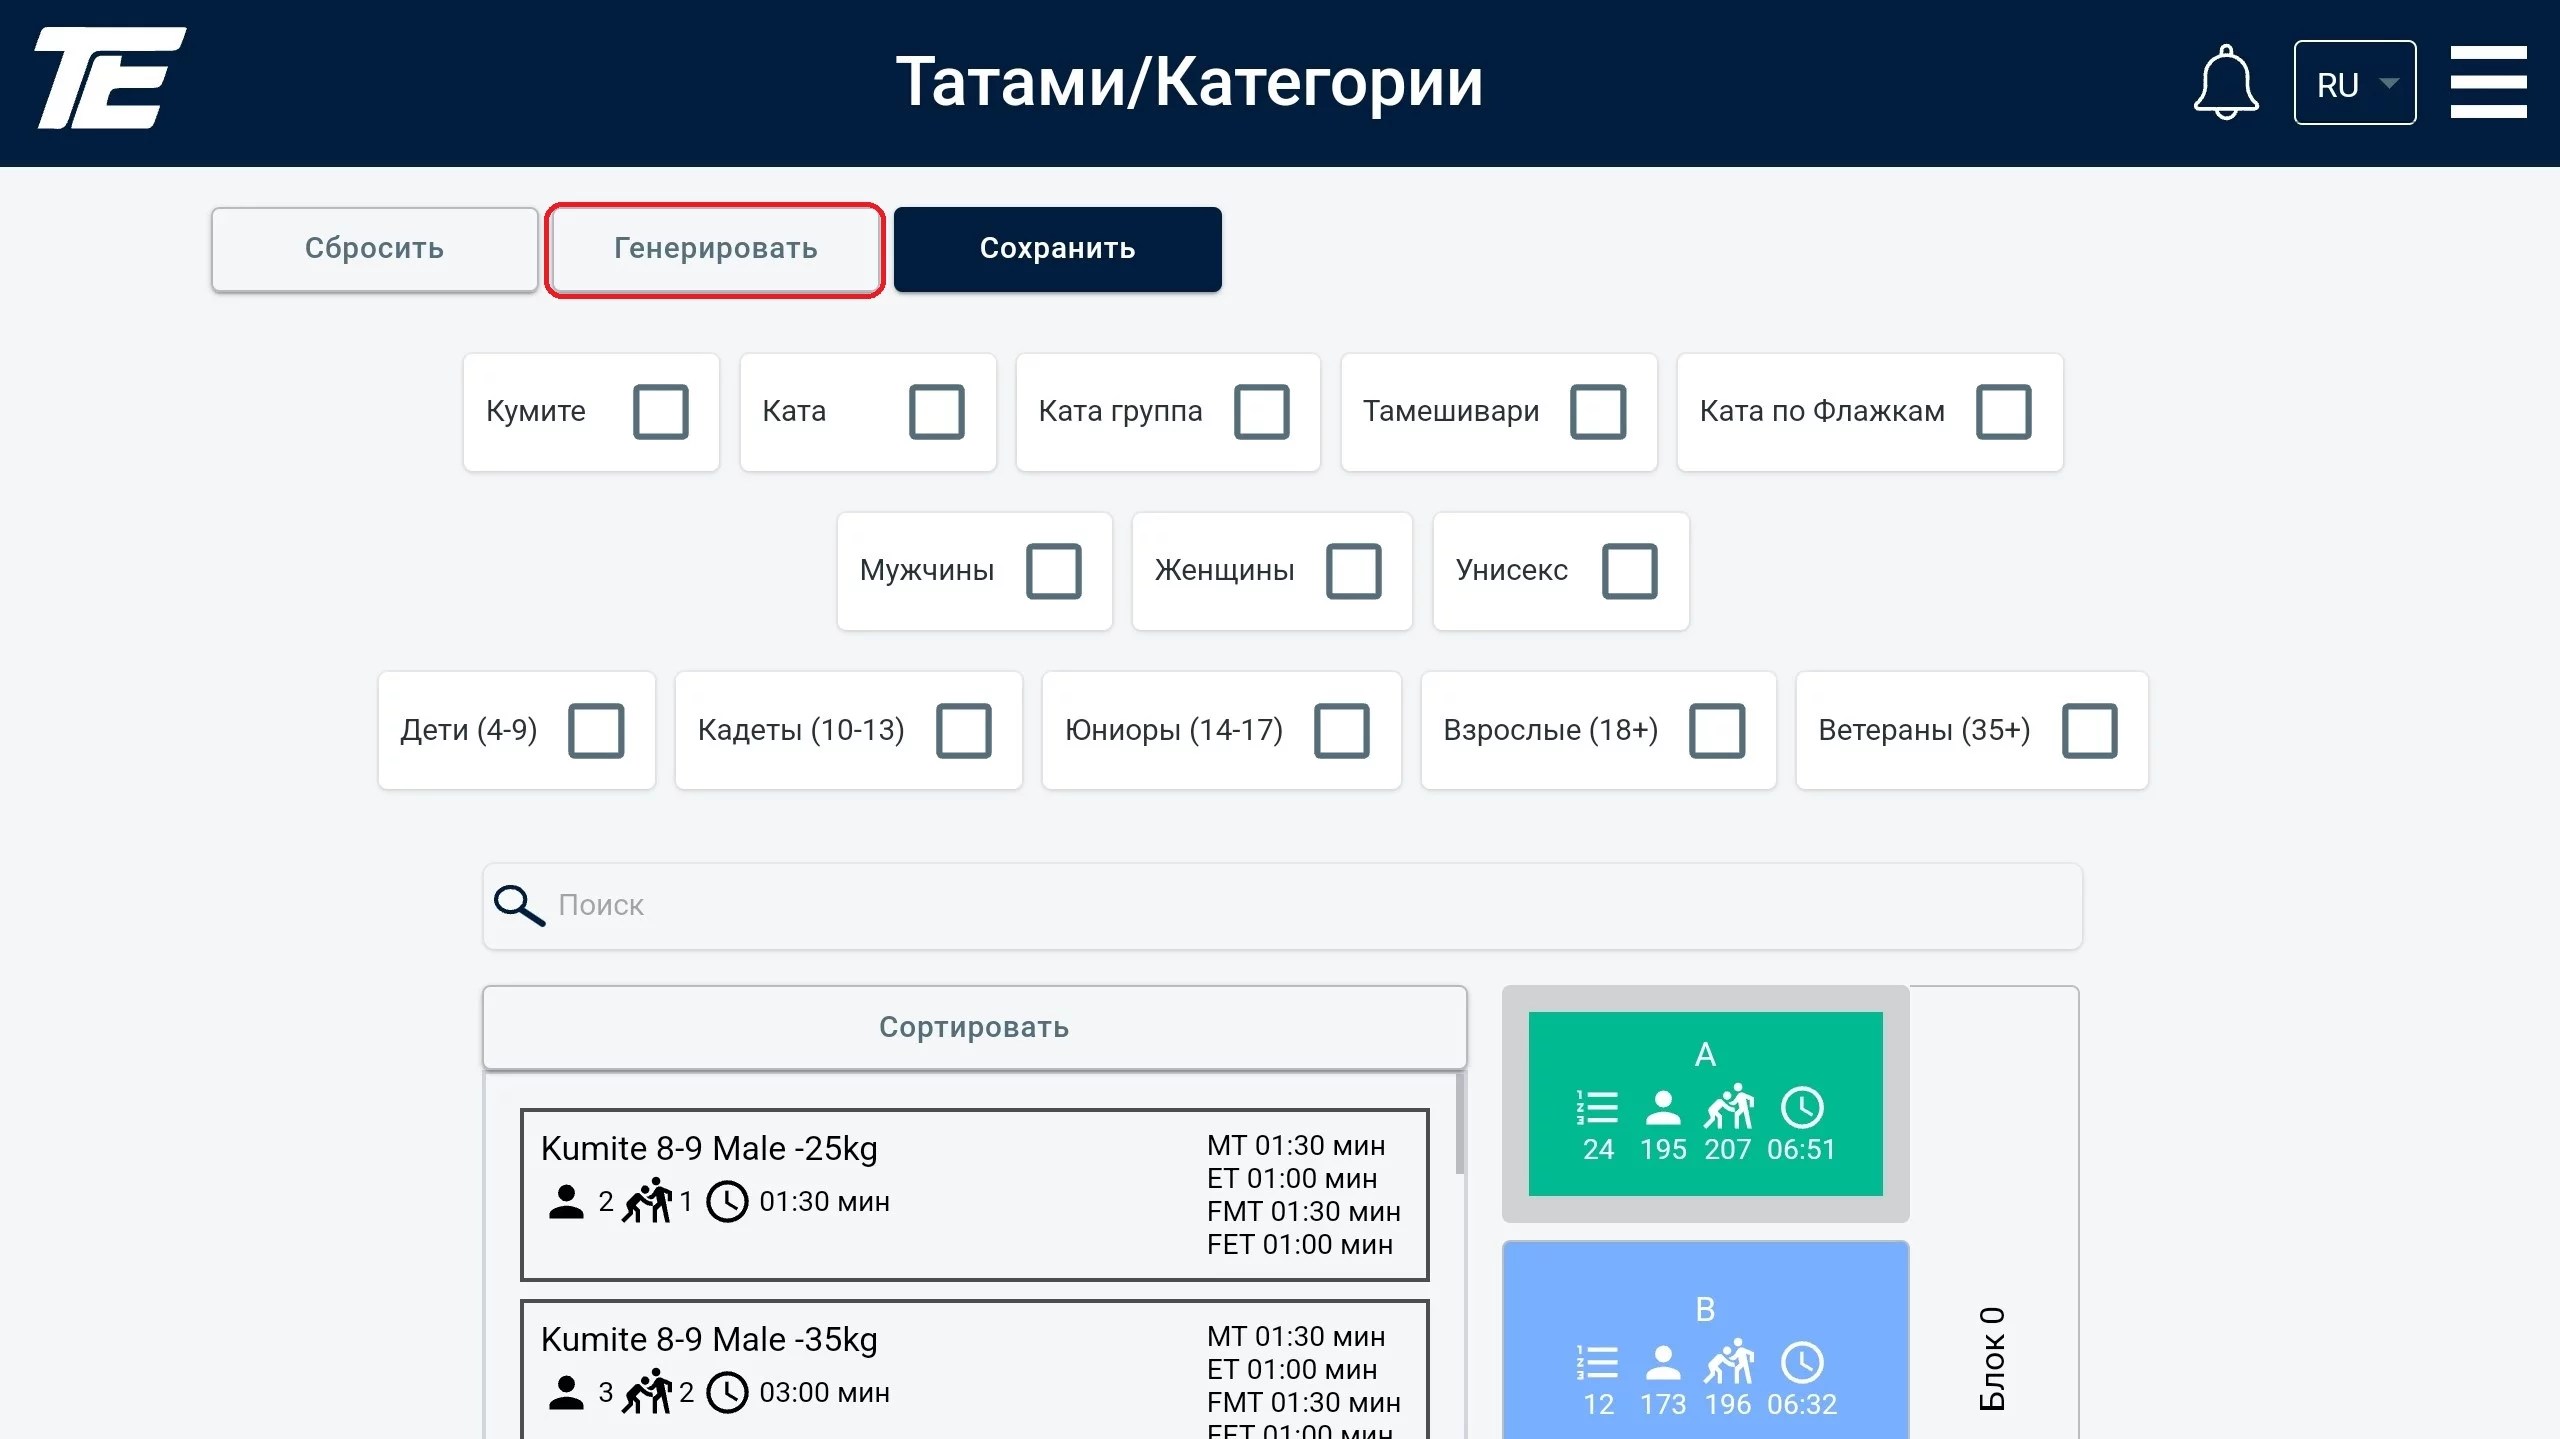
This function is based on time metrics — the time on all tatami should be approximately the same.
The “Reset” function is used to cancel all the latest changes.
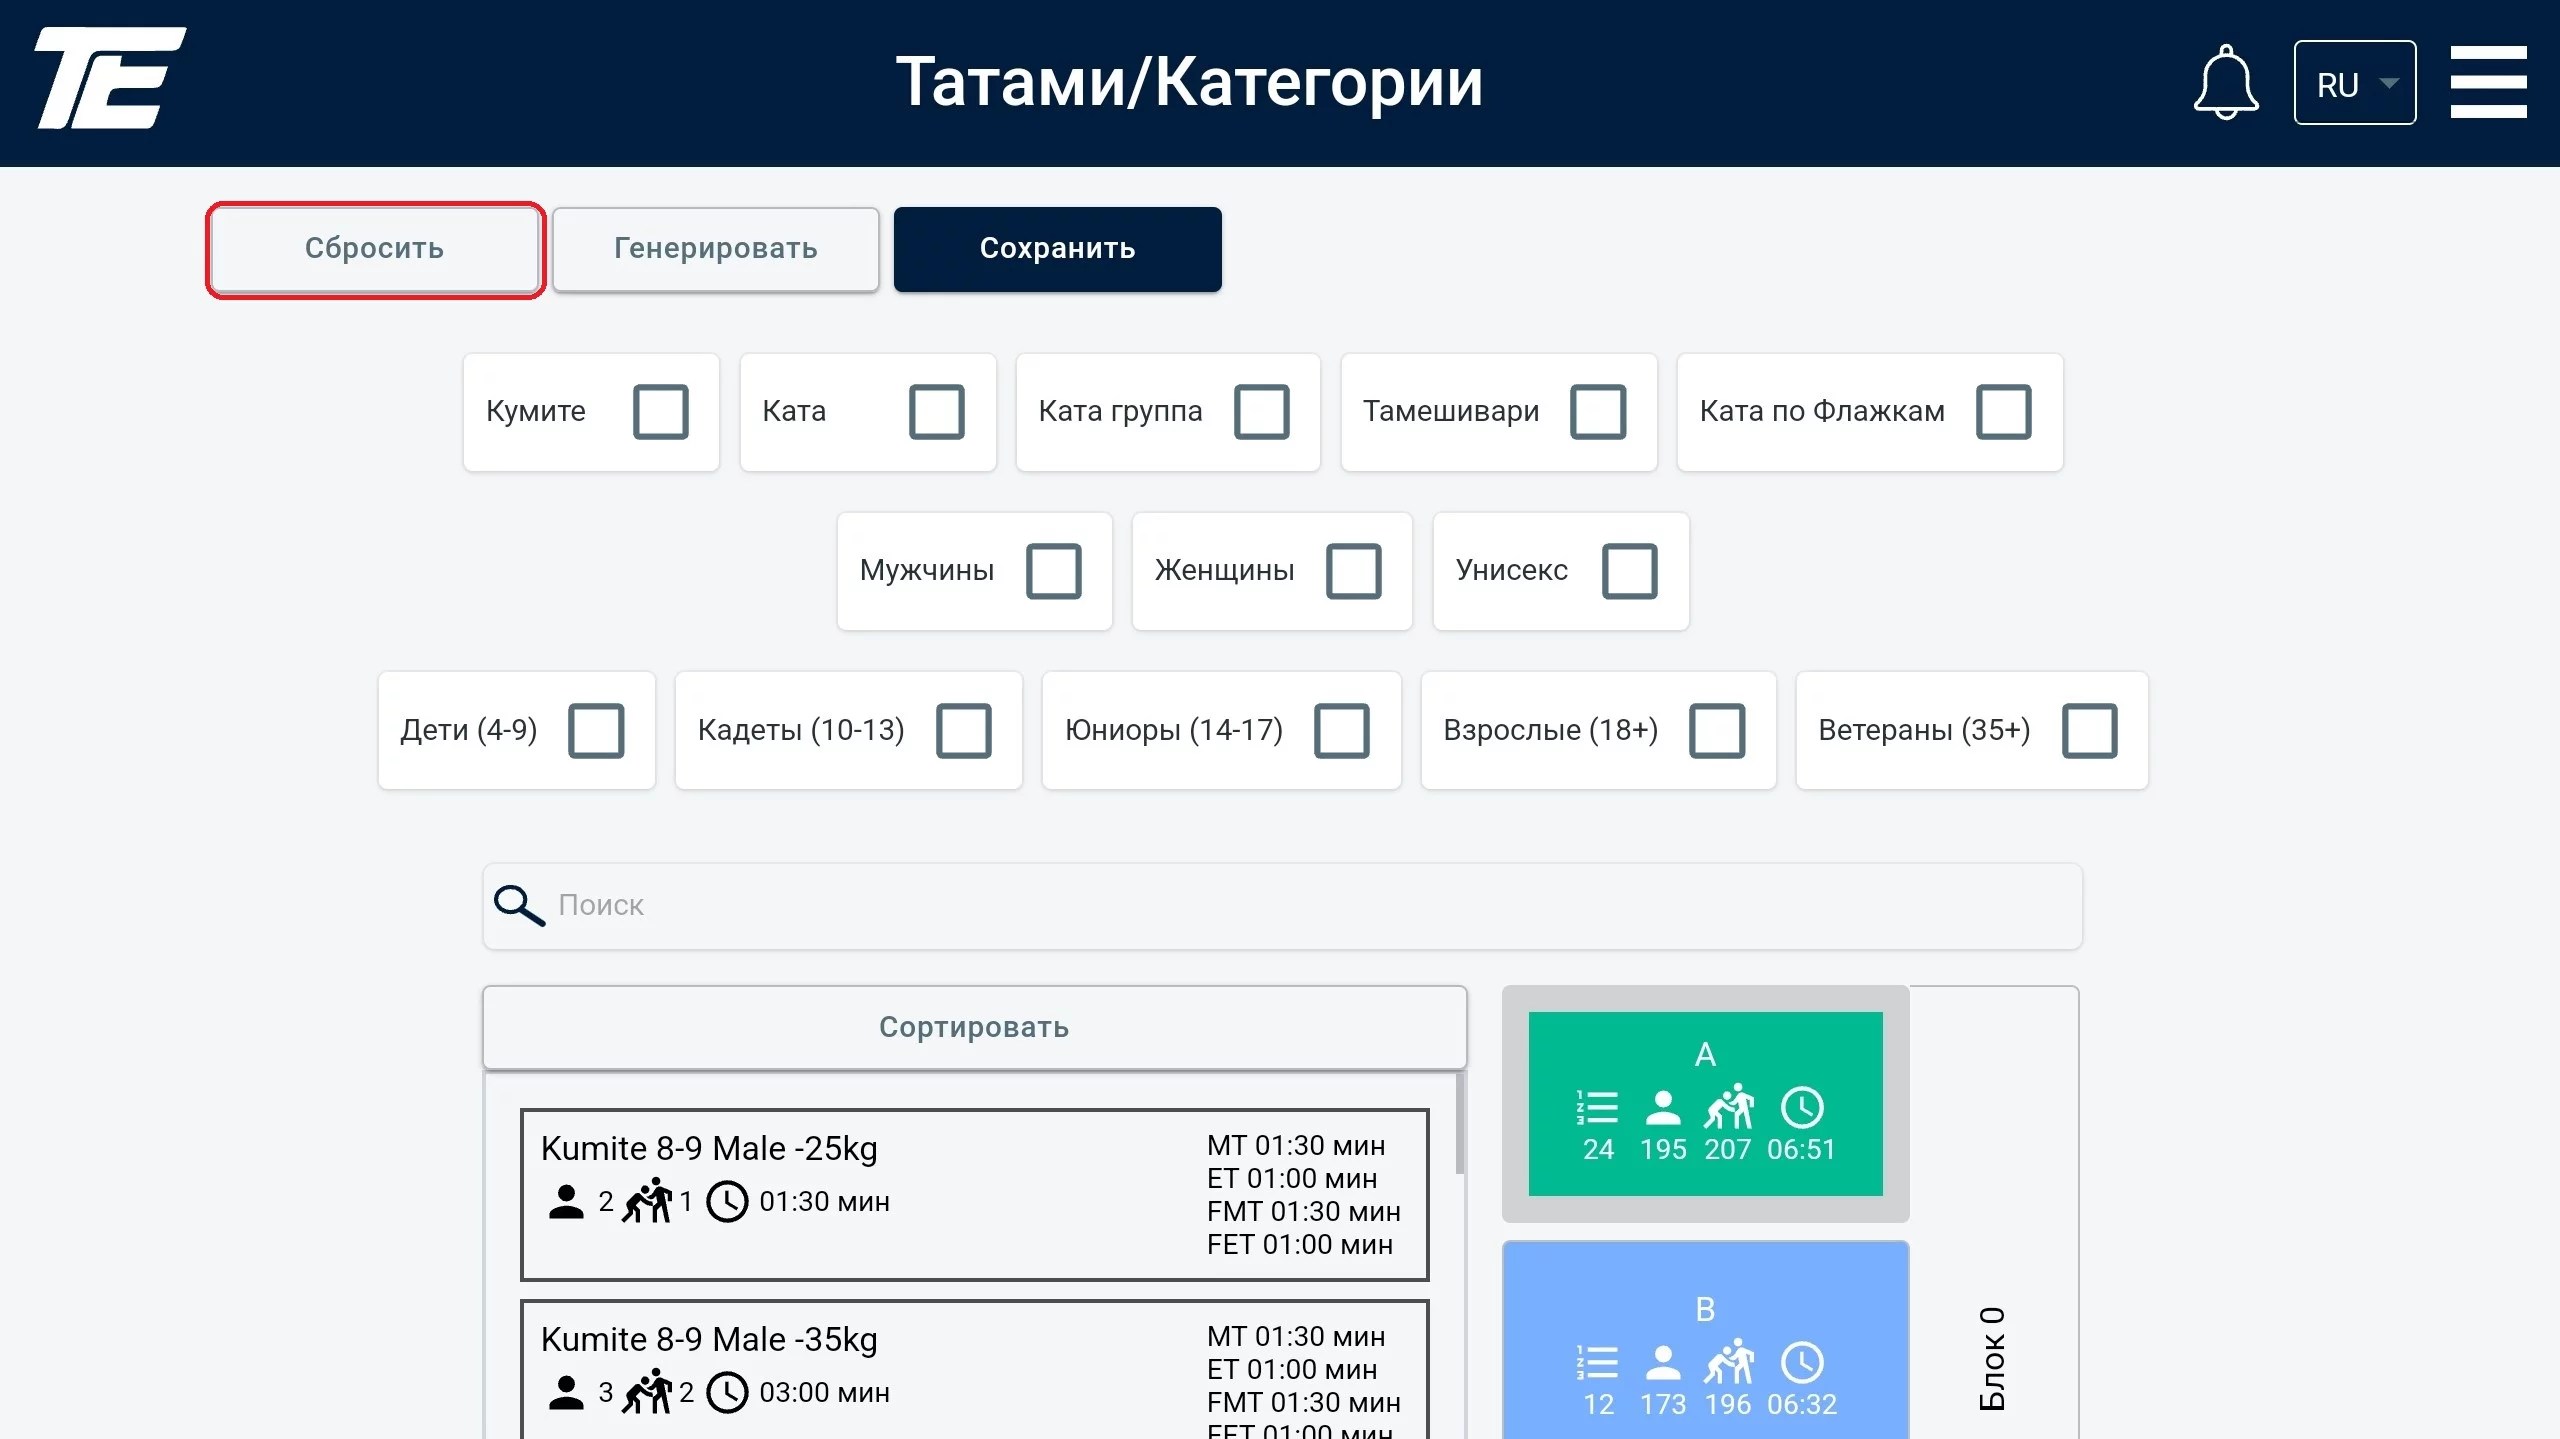
If you want to keep all the changes, click the “Save” button.
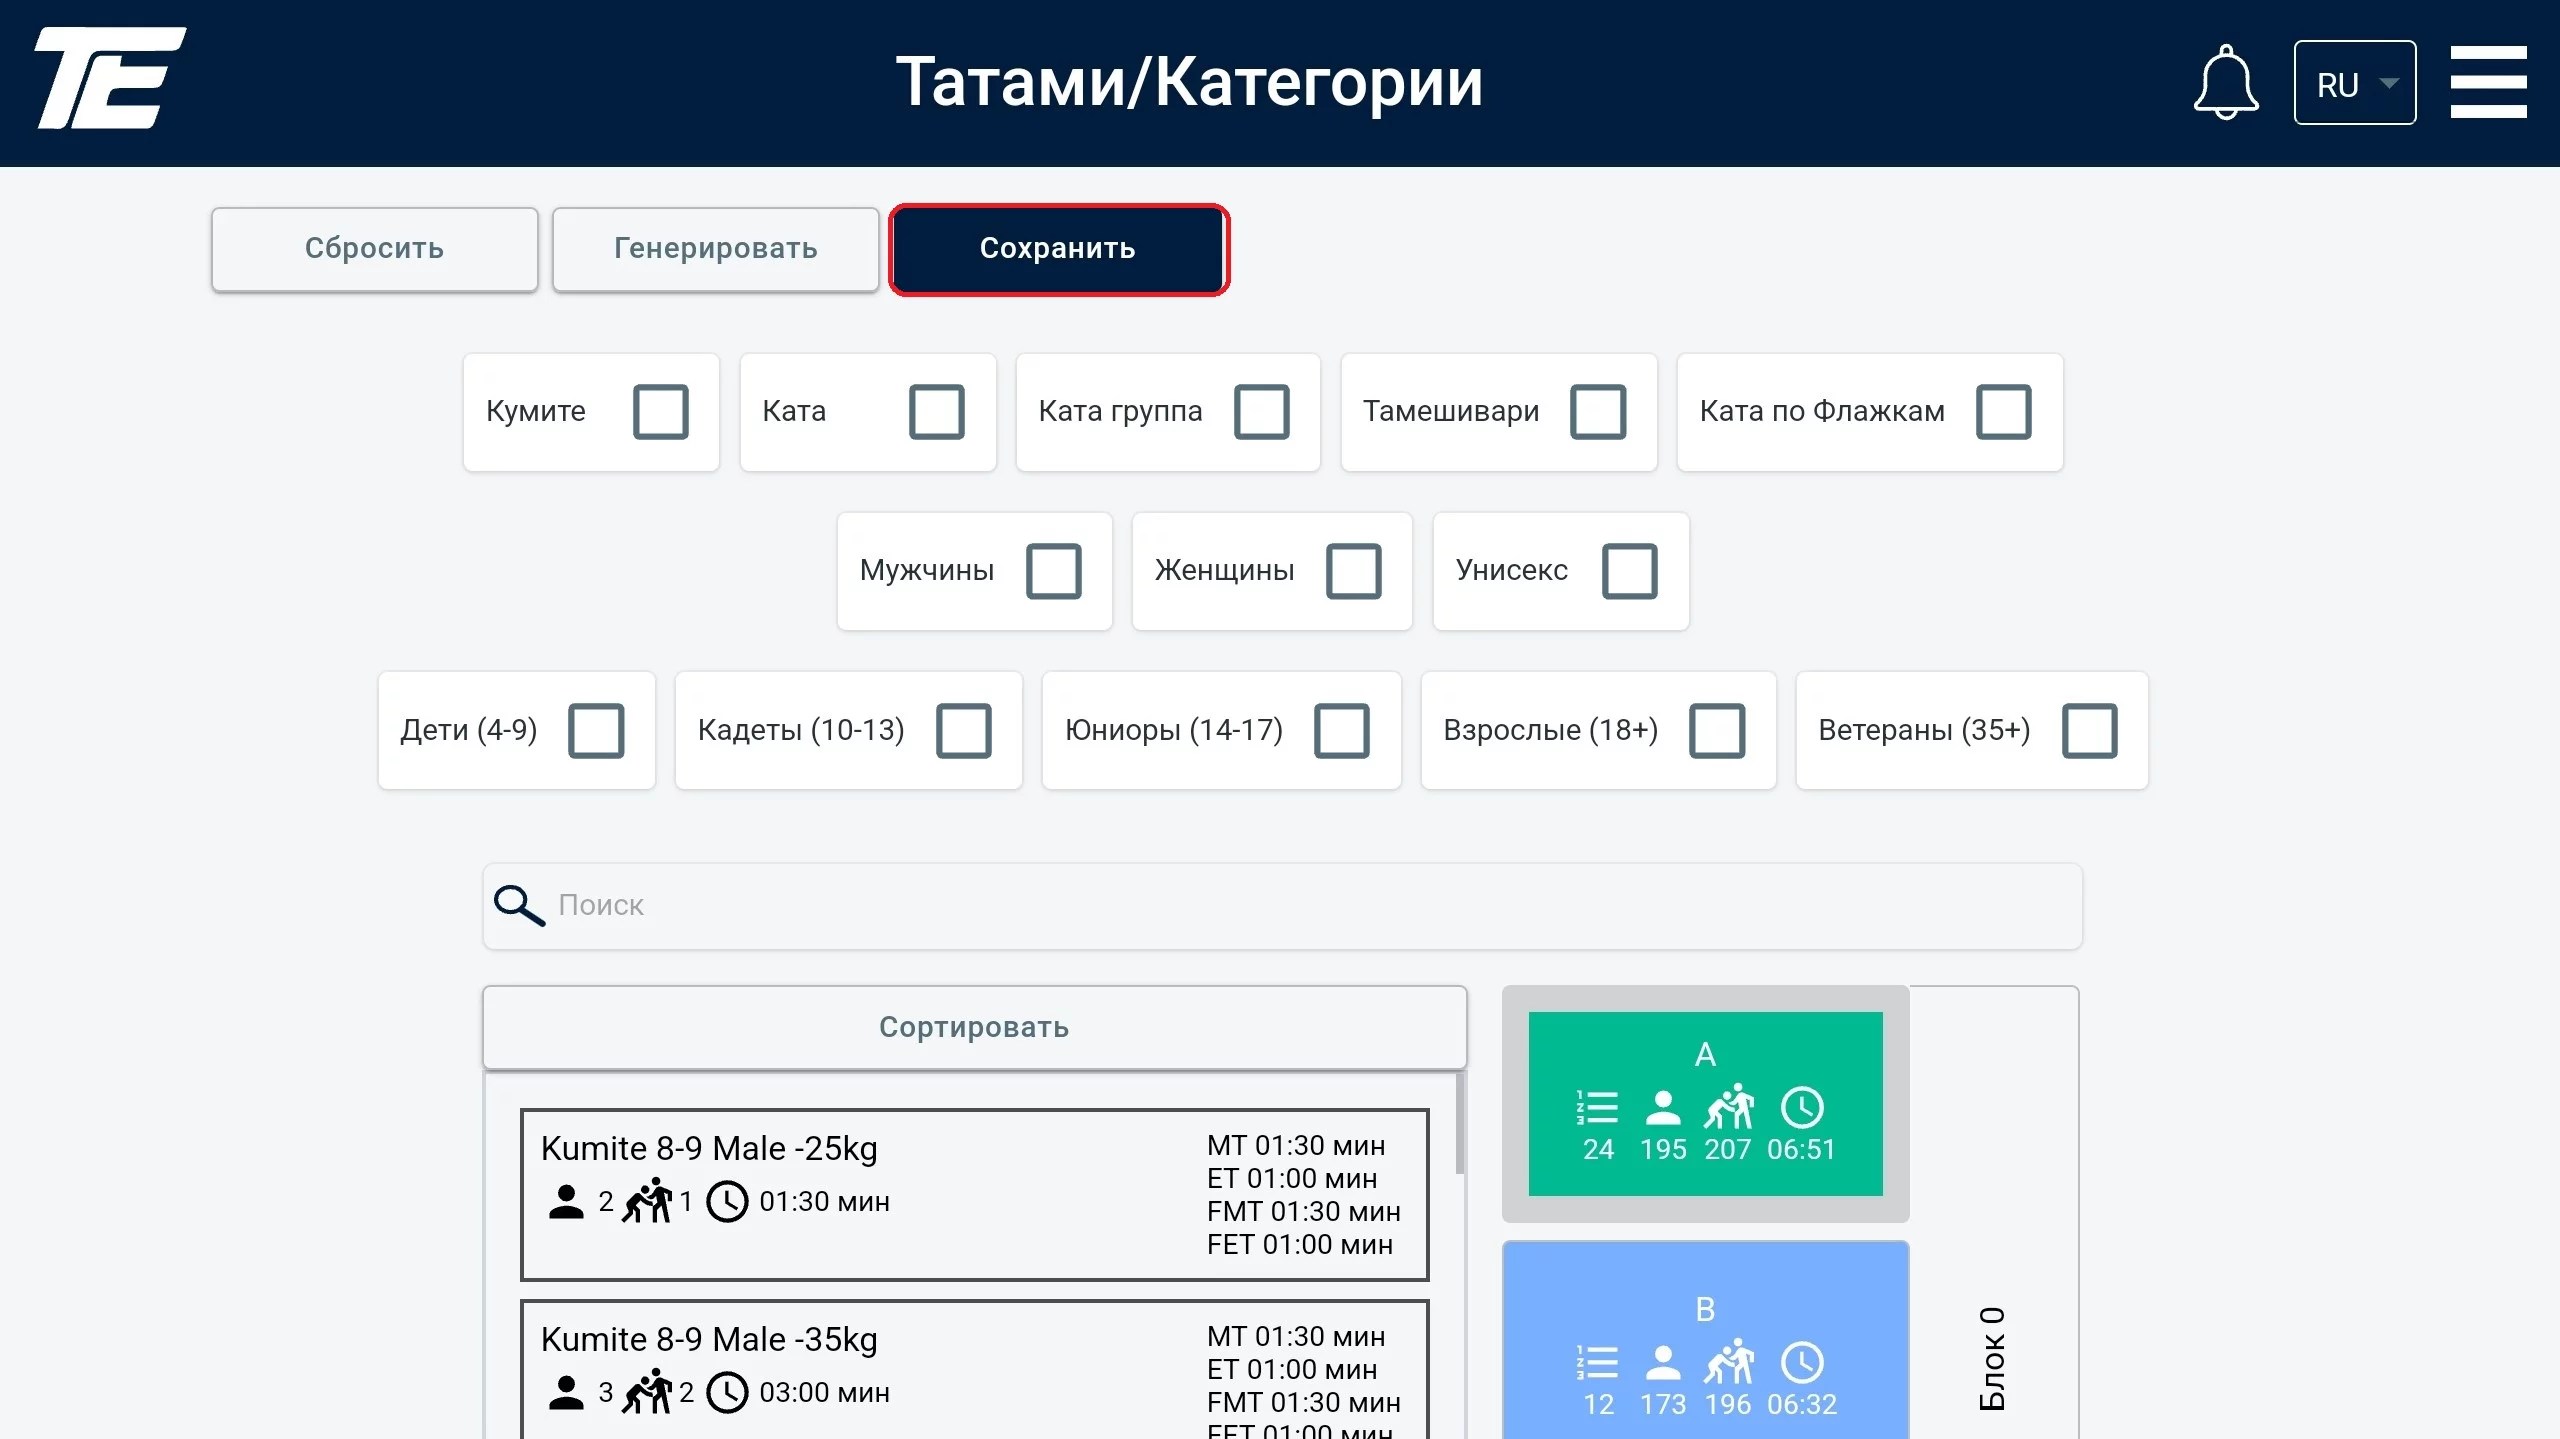
To find the category you need, enter its full name in the search field. After that, pay attention to the numbers under the pictograms on the tatami. Where the values are not 0 — that is the category you are looking for.
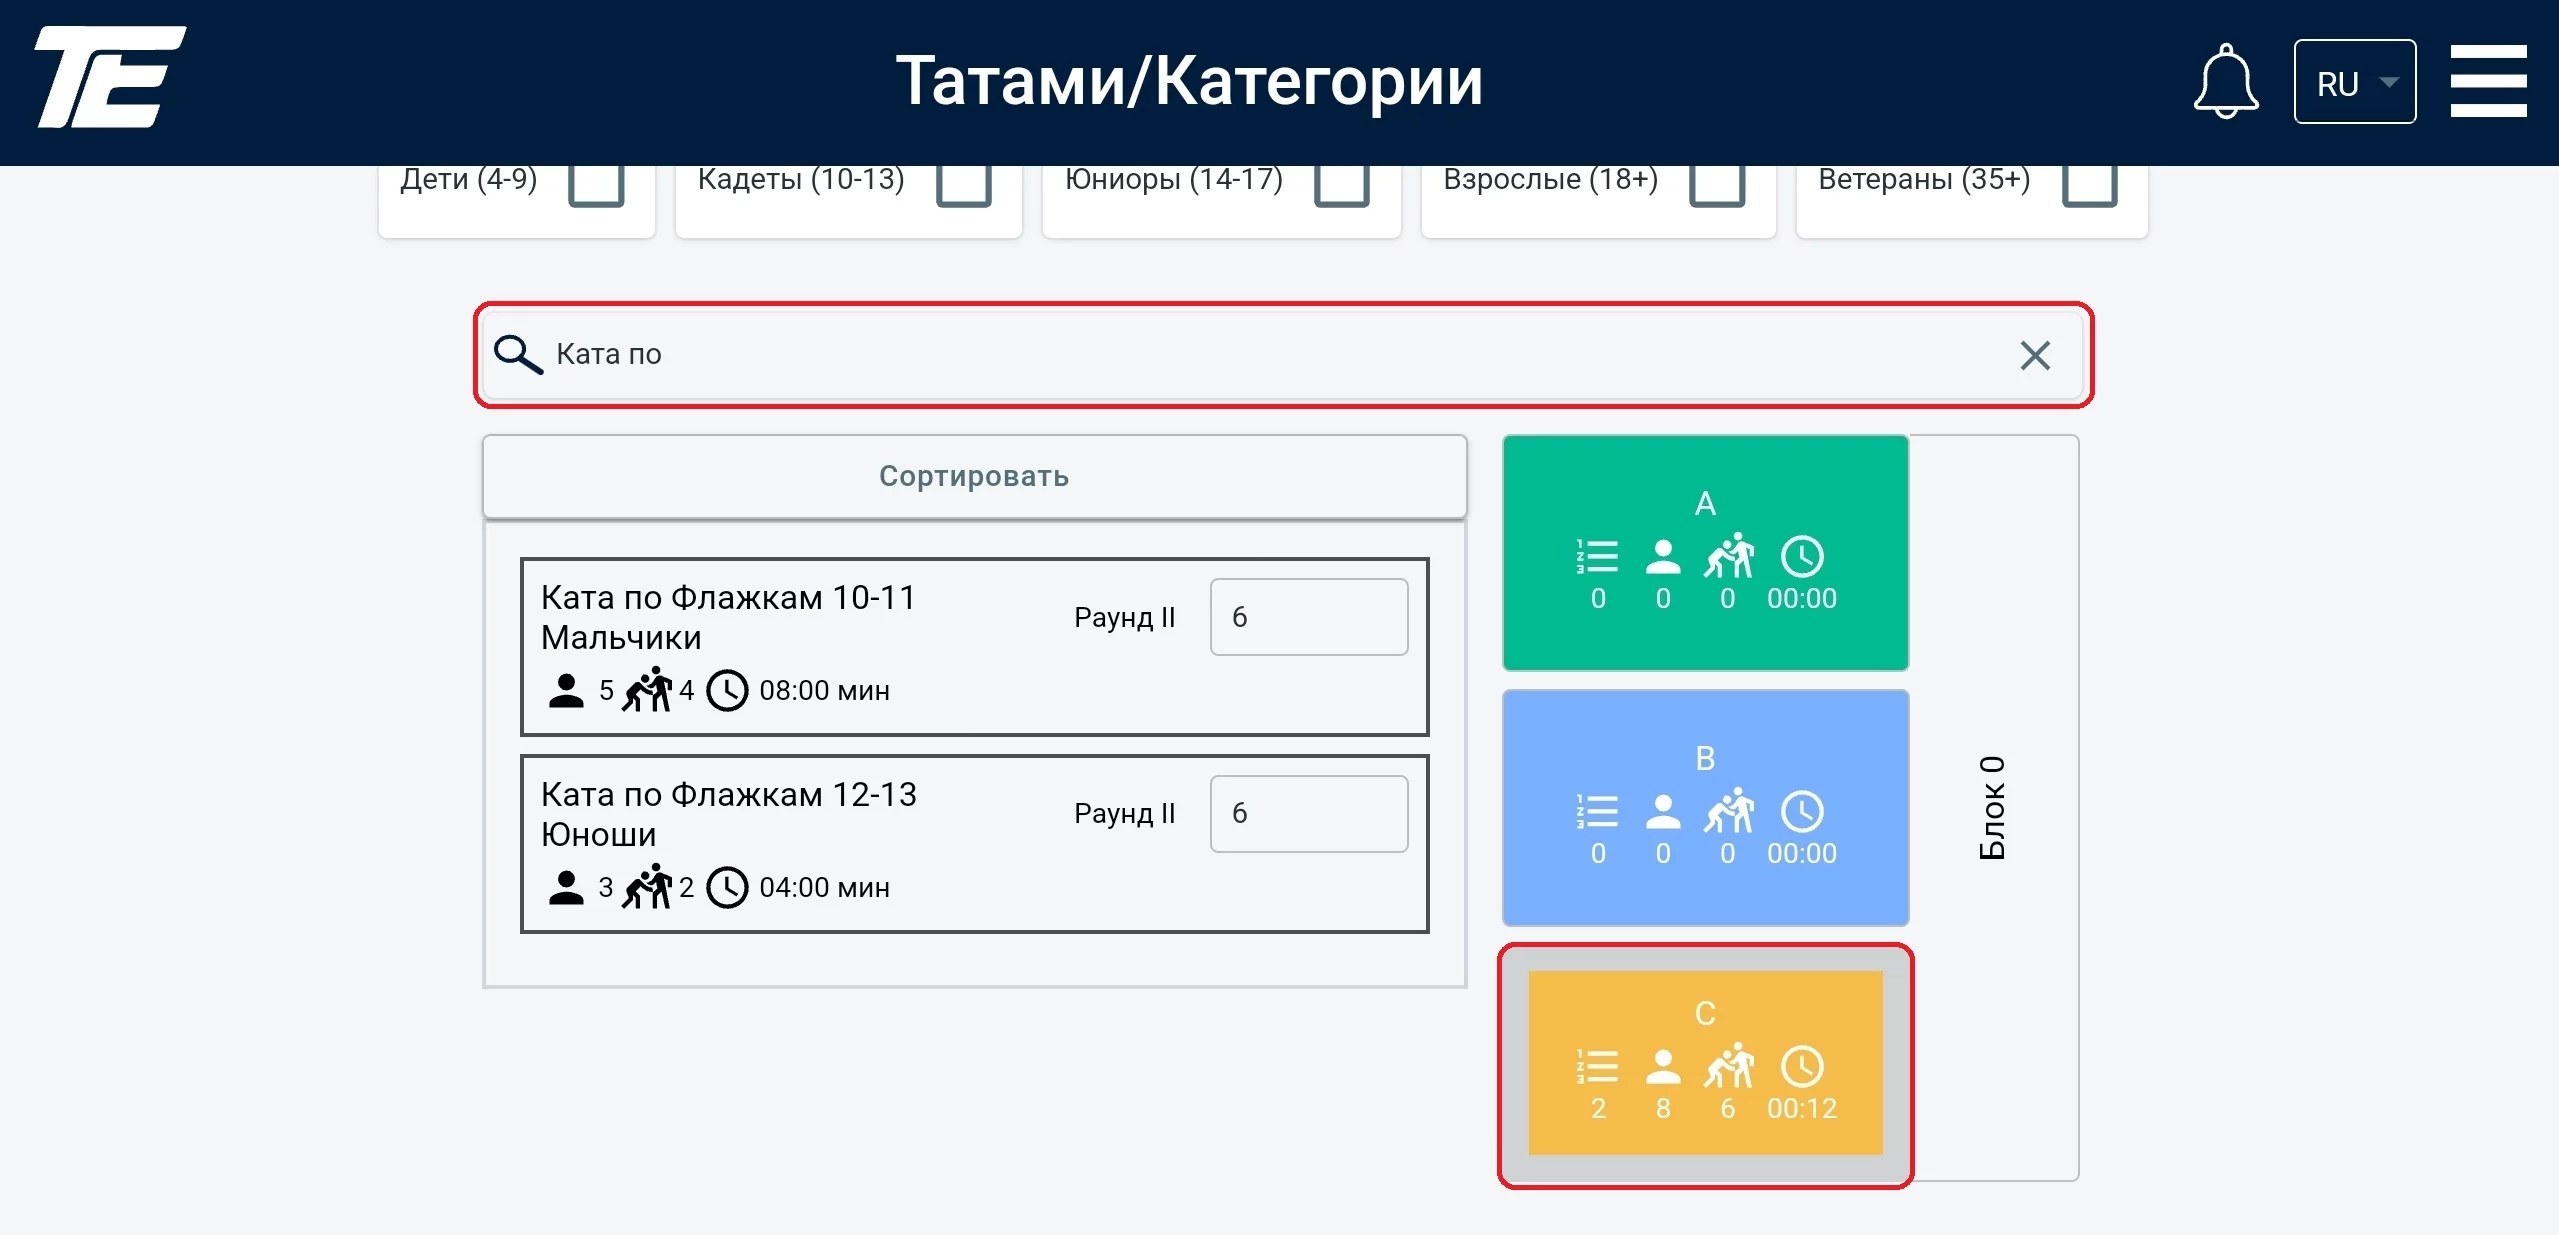
If you need to change the order of categories on a tatami, hold the left mouse button and drag the category up or down in the list.
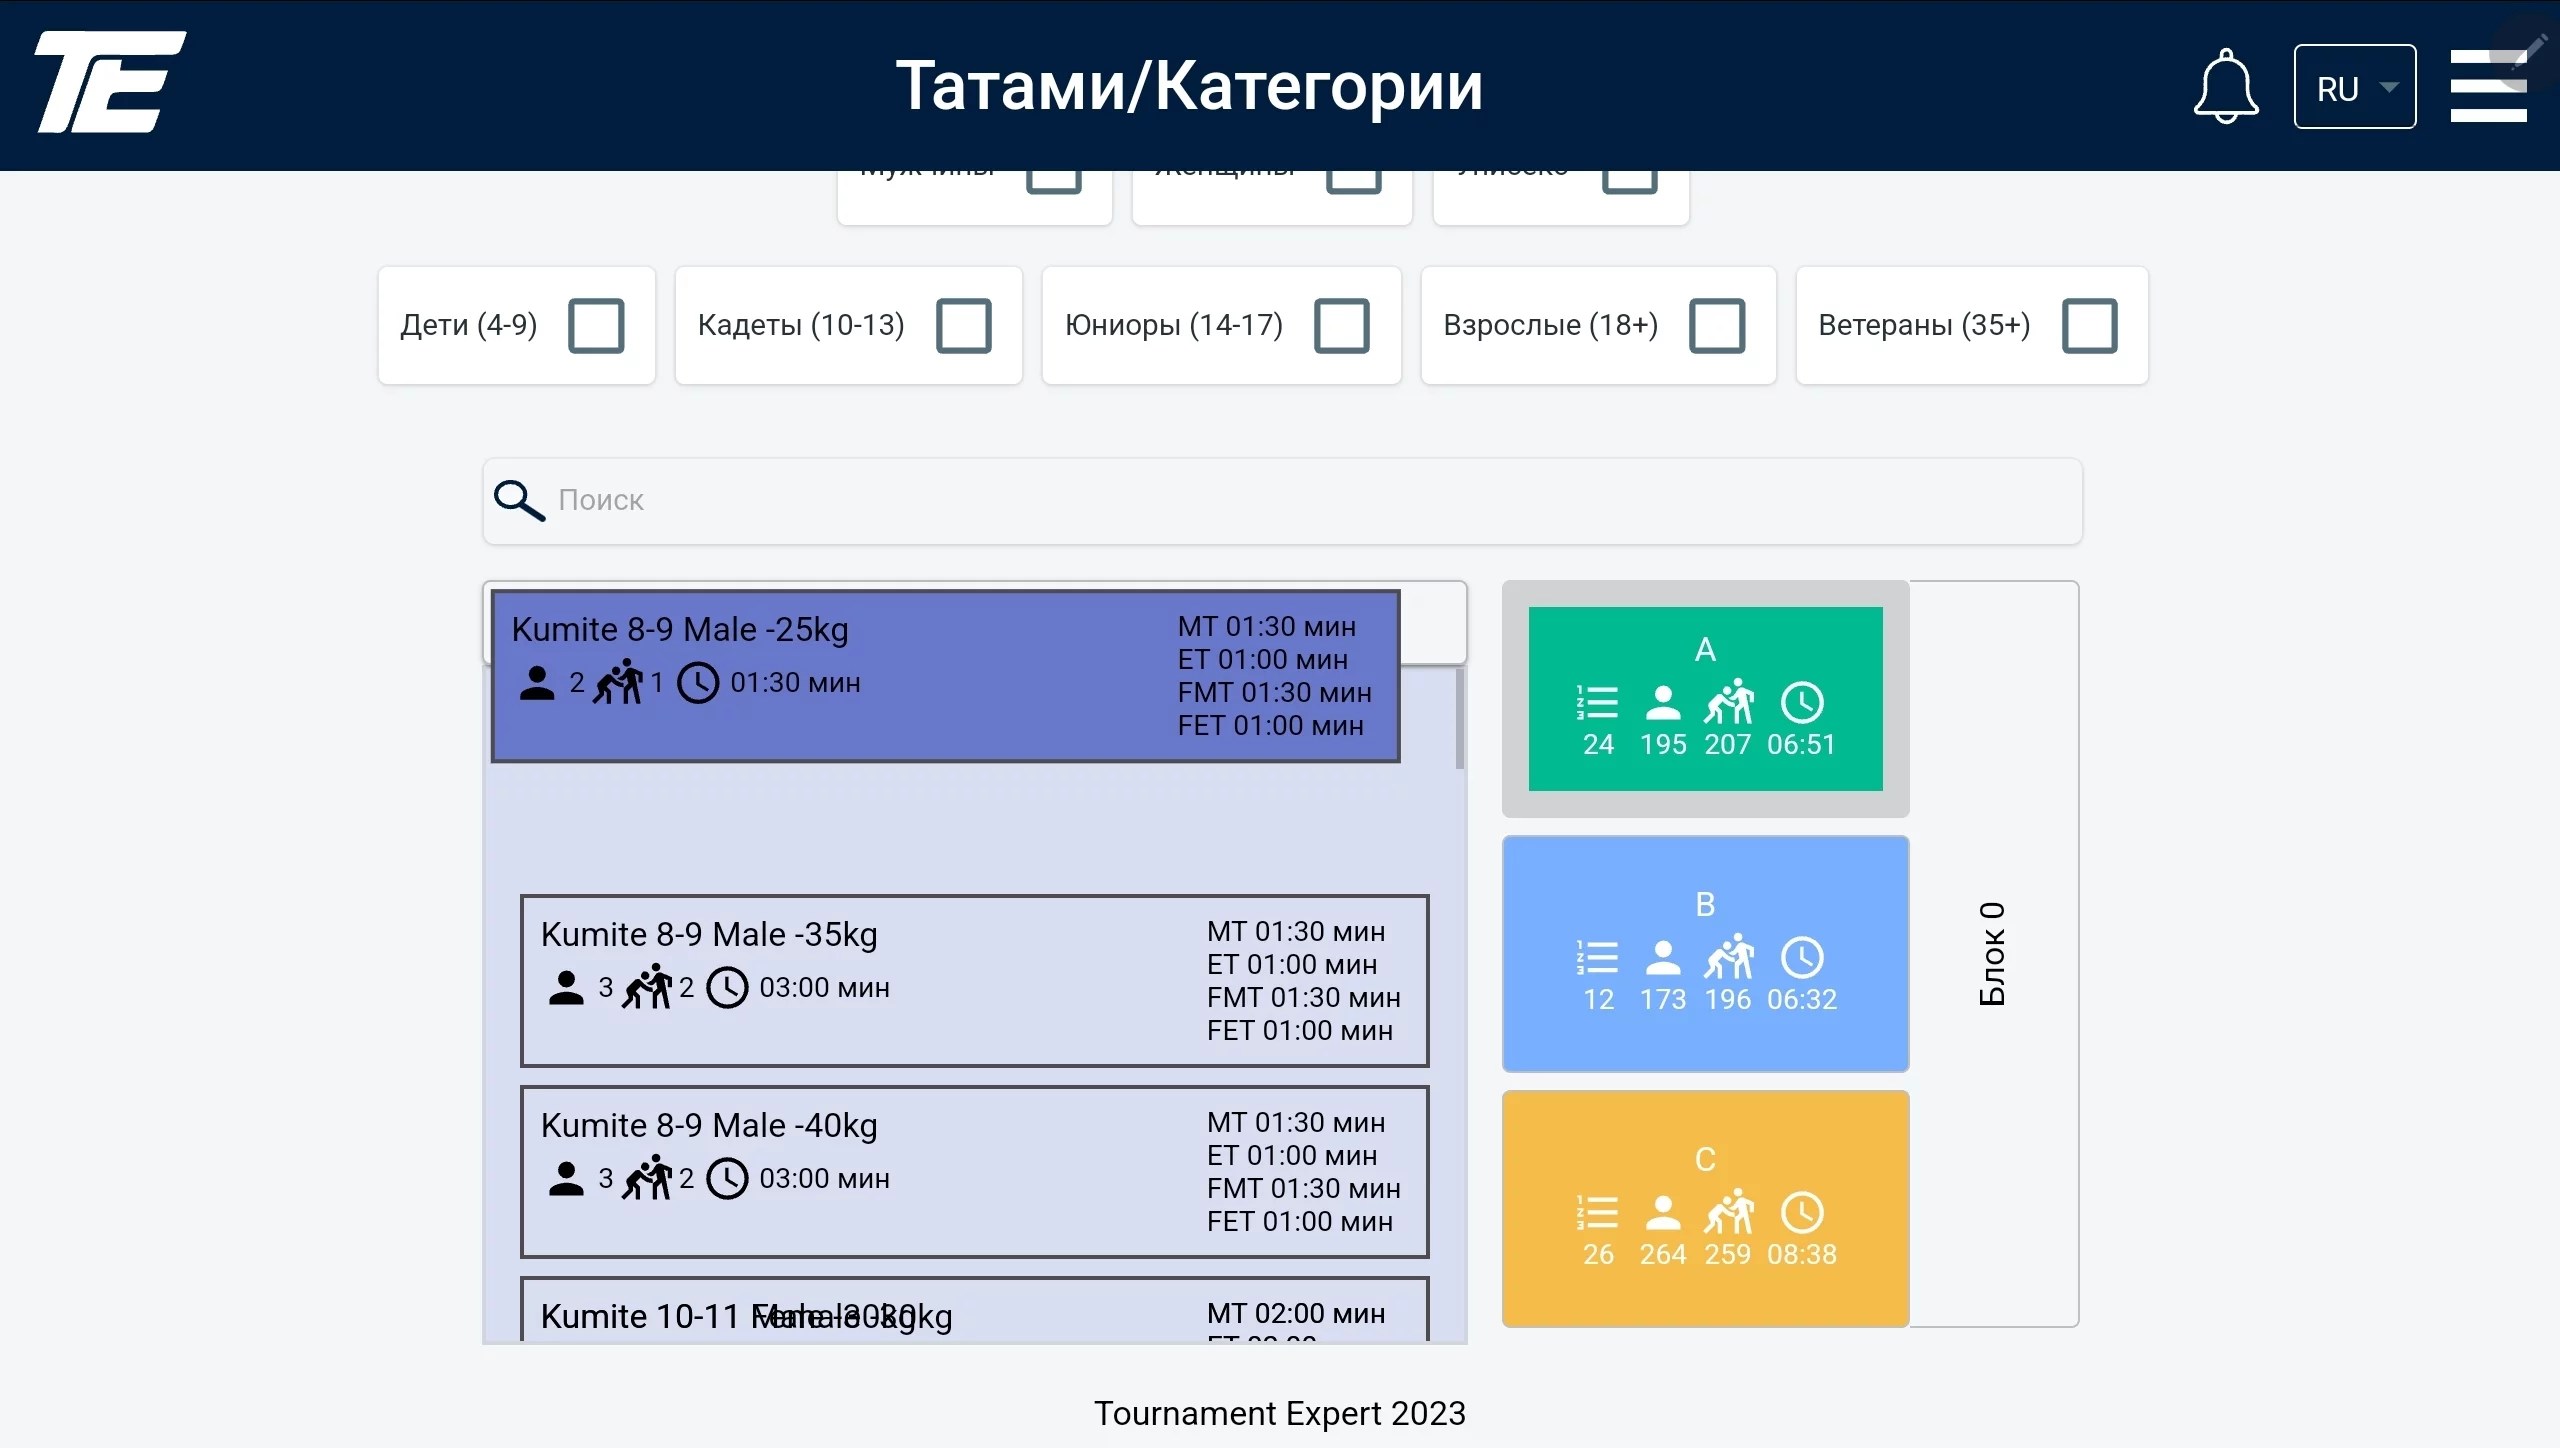
Similarly, if you need to move a category from one tatami to another. The tatami you are currently working on is outlined with a grey border.
Some categories may include a second round. To set the number of participants in the second round, find the category you need in the list. Then, set the required number of participants in the allocated field.
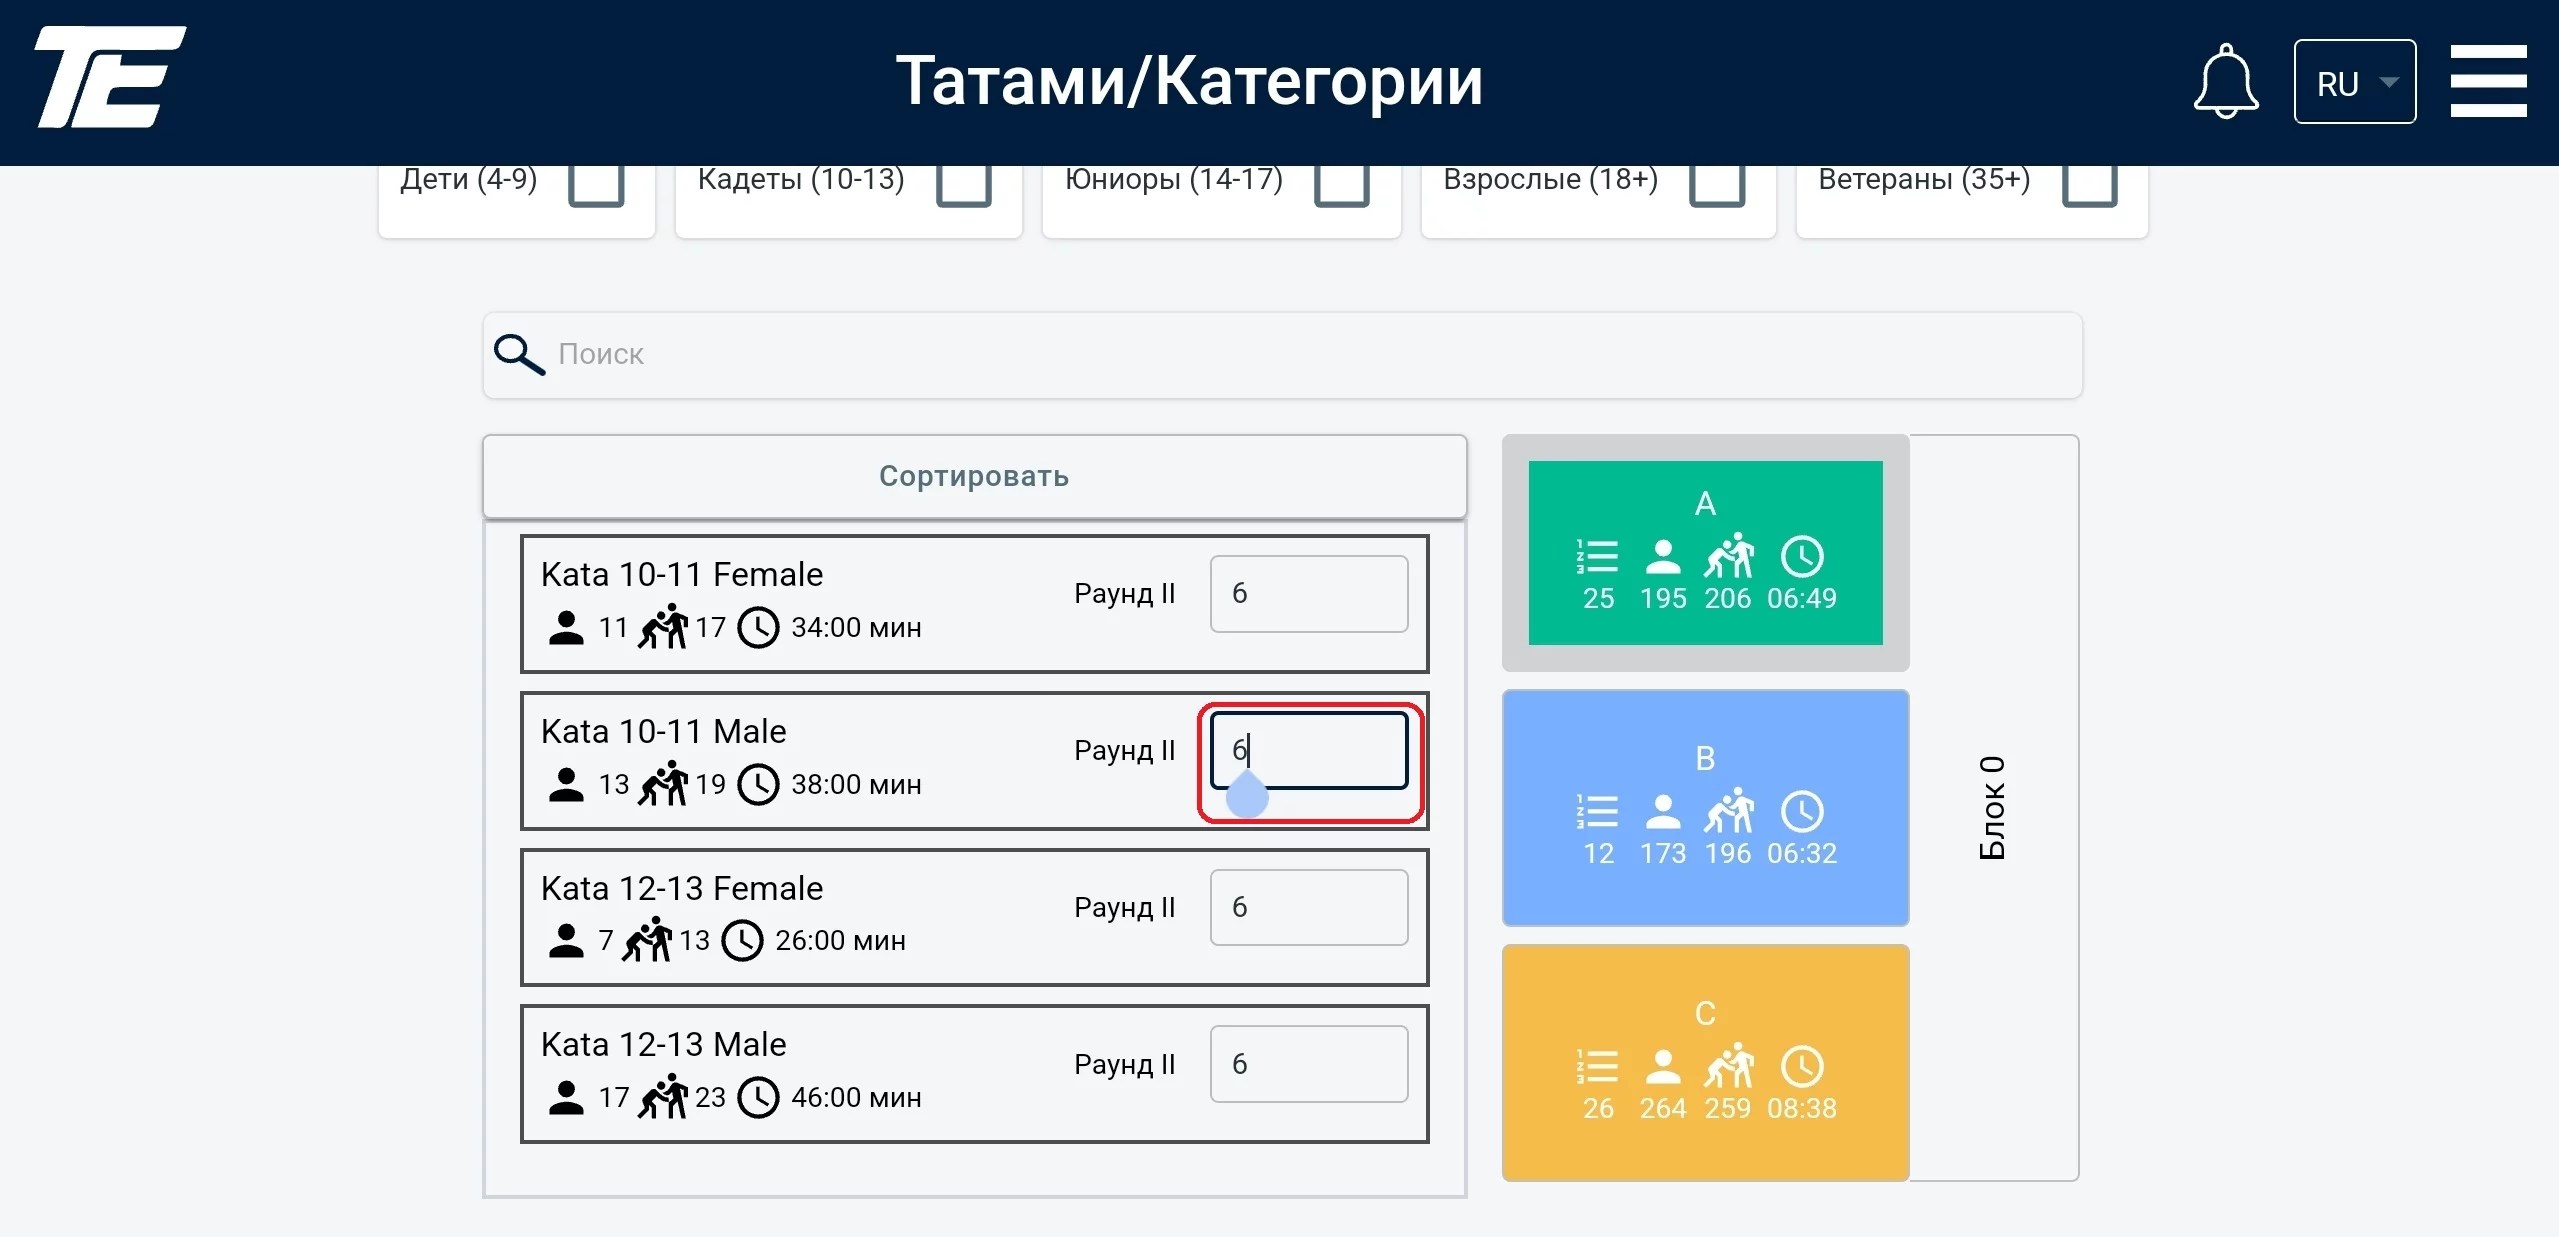
Note: this feature is valid only for Kata and its variations.
The main purpose of this feature — to split or merge participants within categories in accordance with the required requests.
Important note: the Distribute categories among the tatami and Distribute participants among the categories tabs can only be used after participants have been assigned to the tournament.
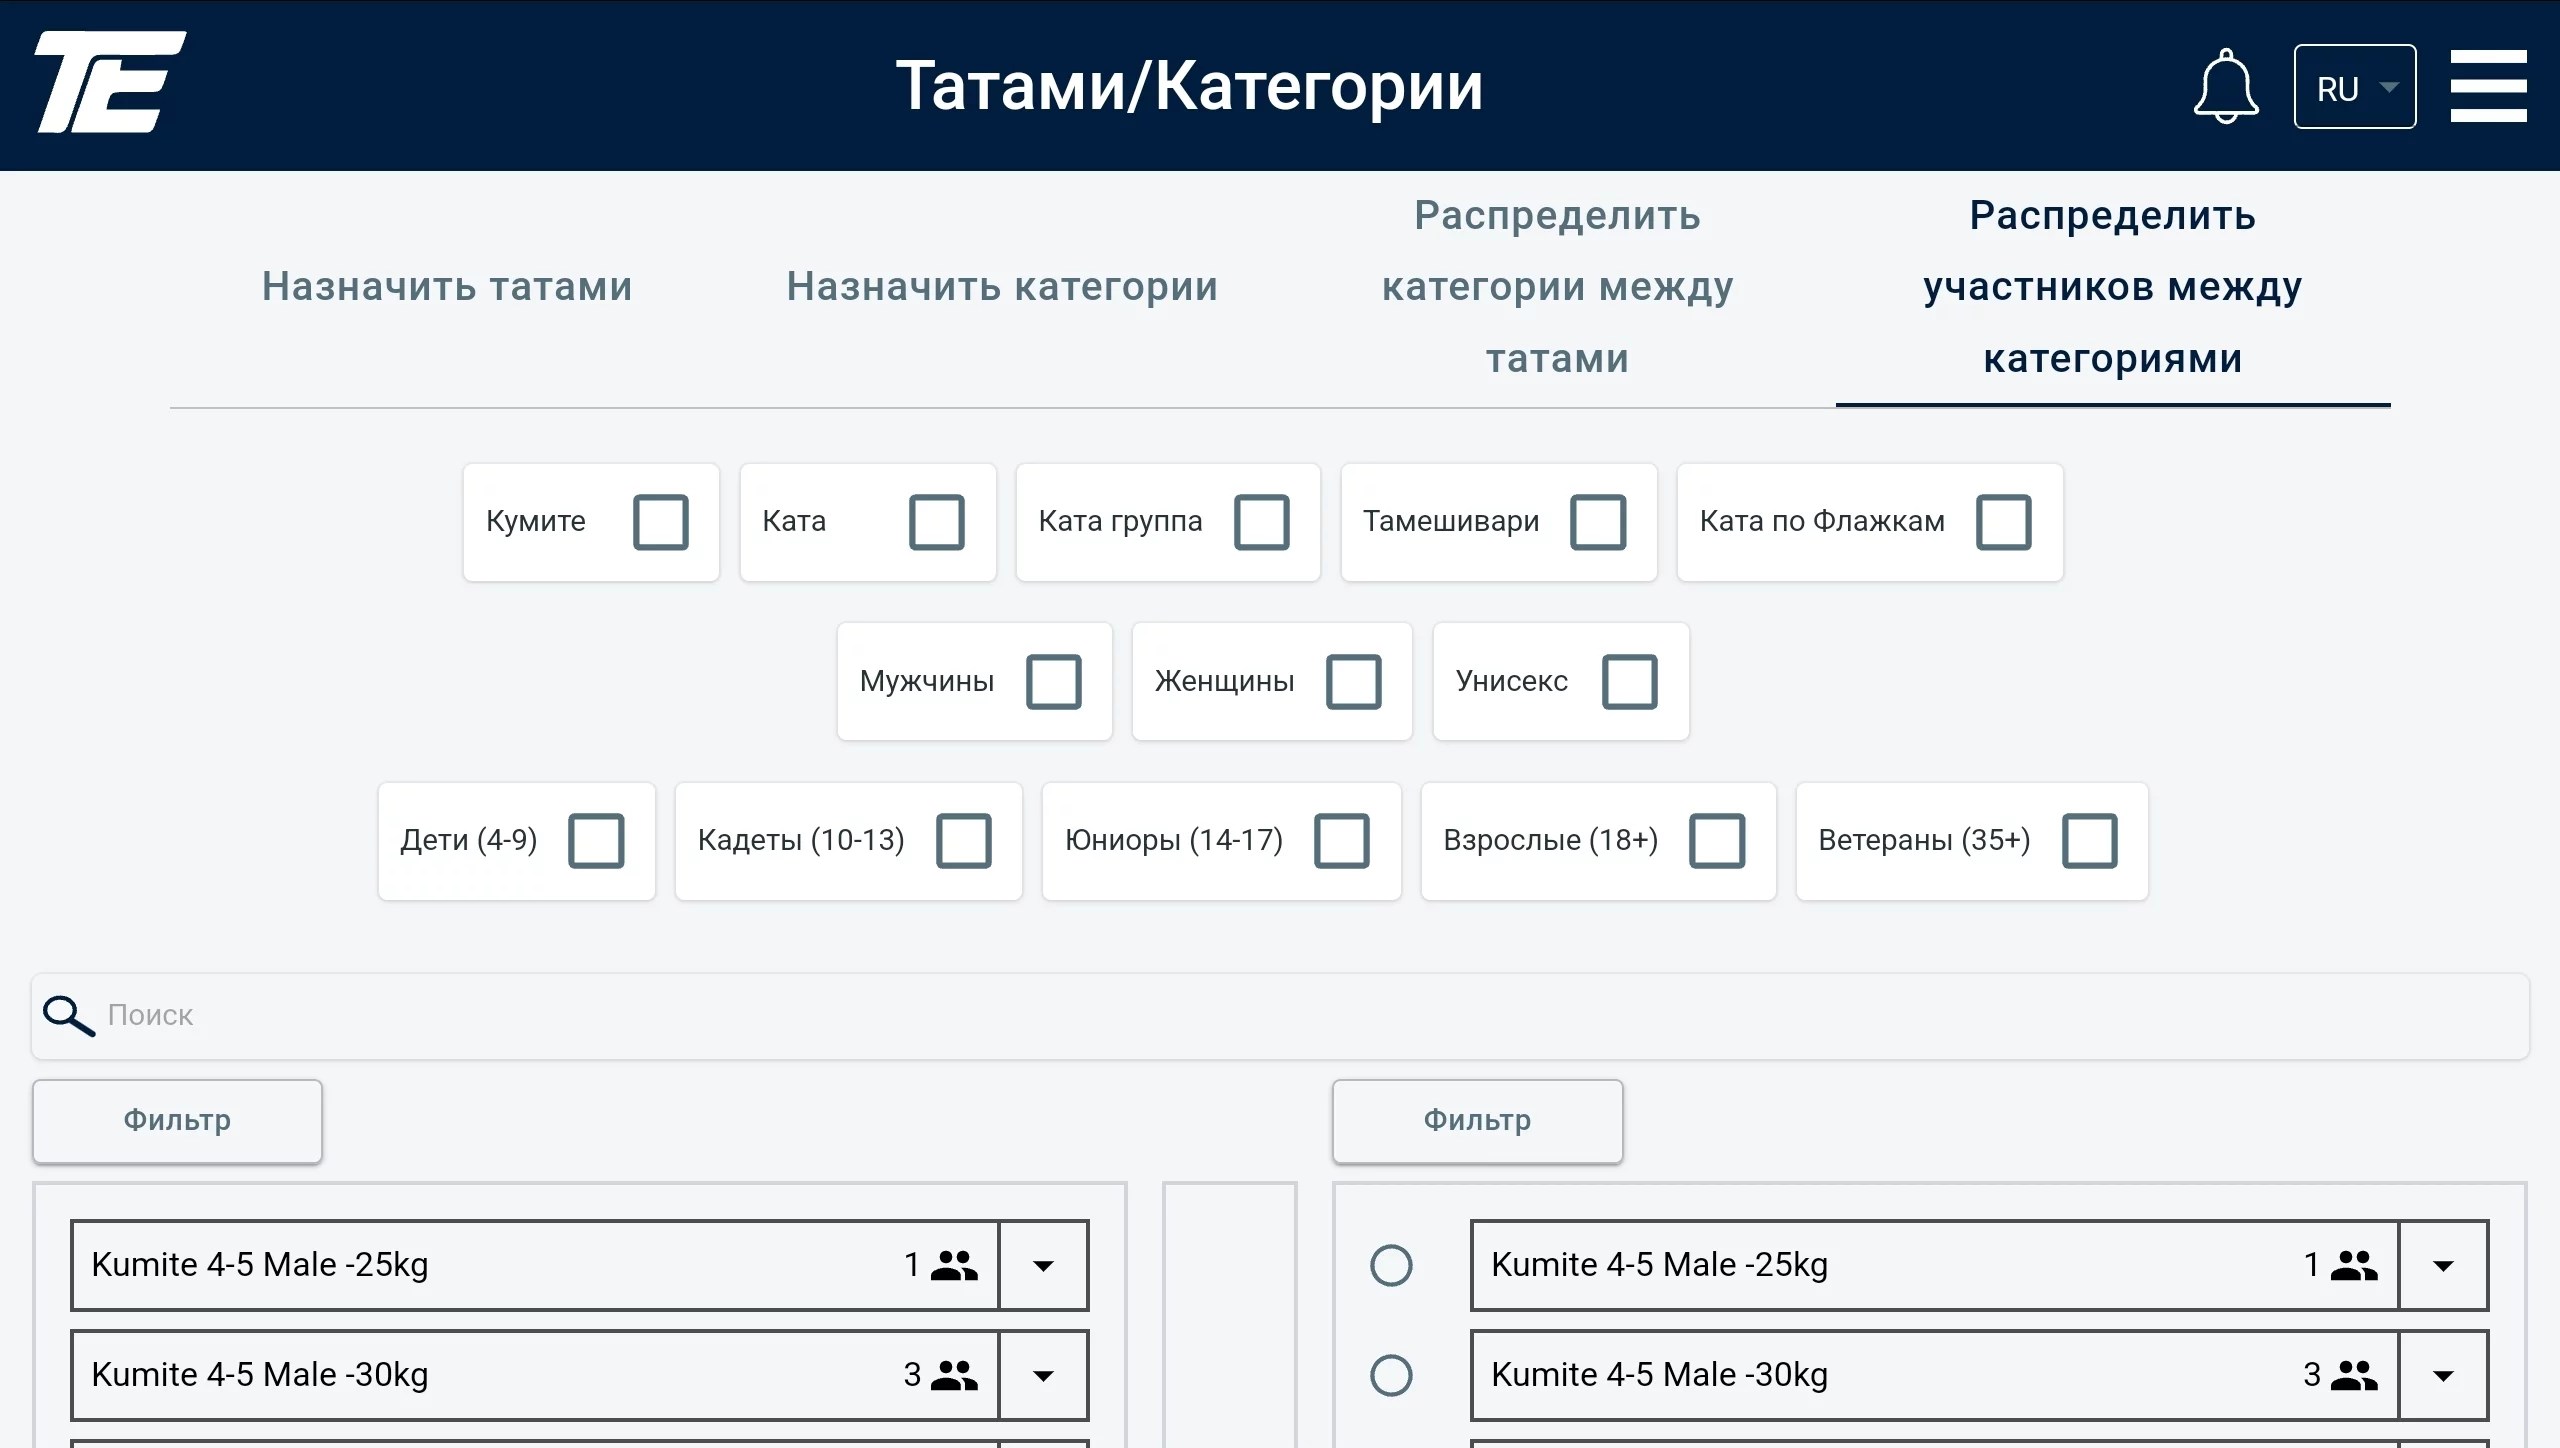
The left column — the list of categories from which participants should be moved or copied. The right one — how the final version of the category should look.
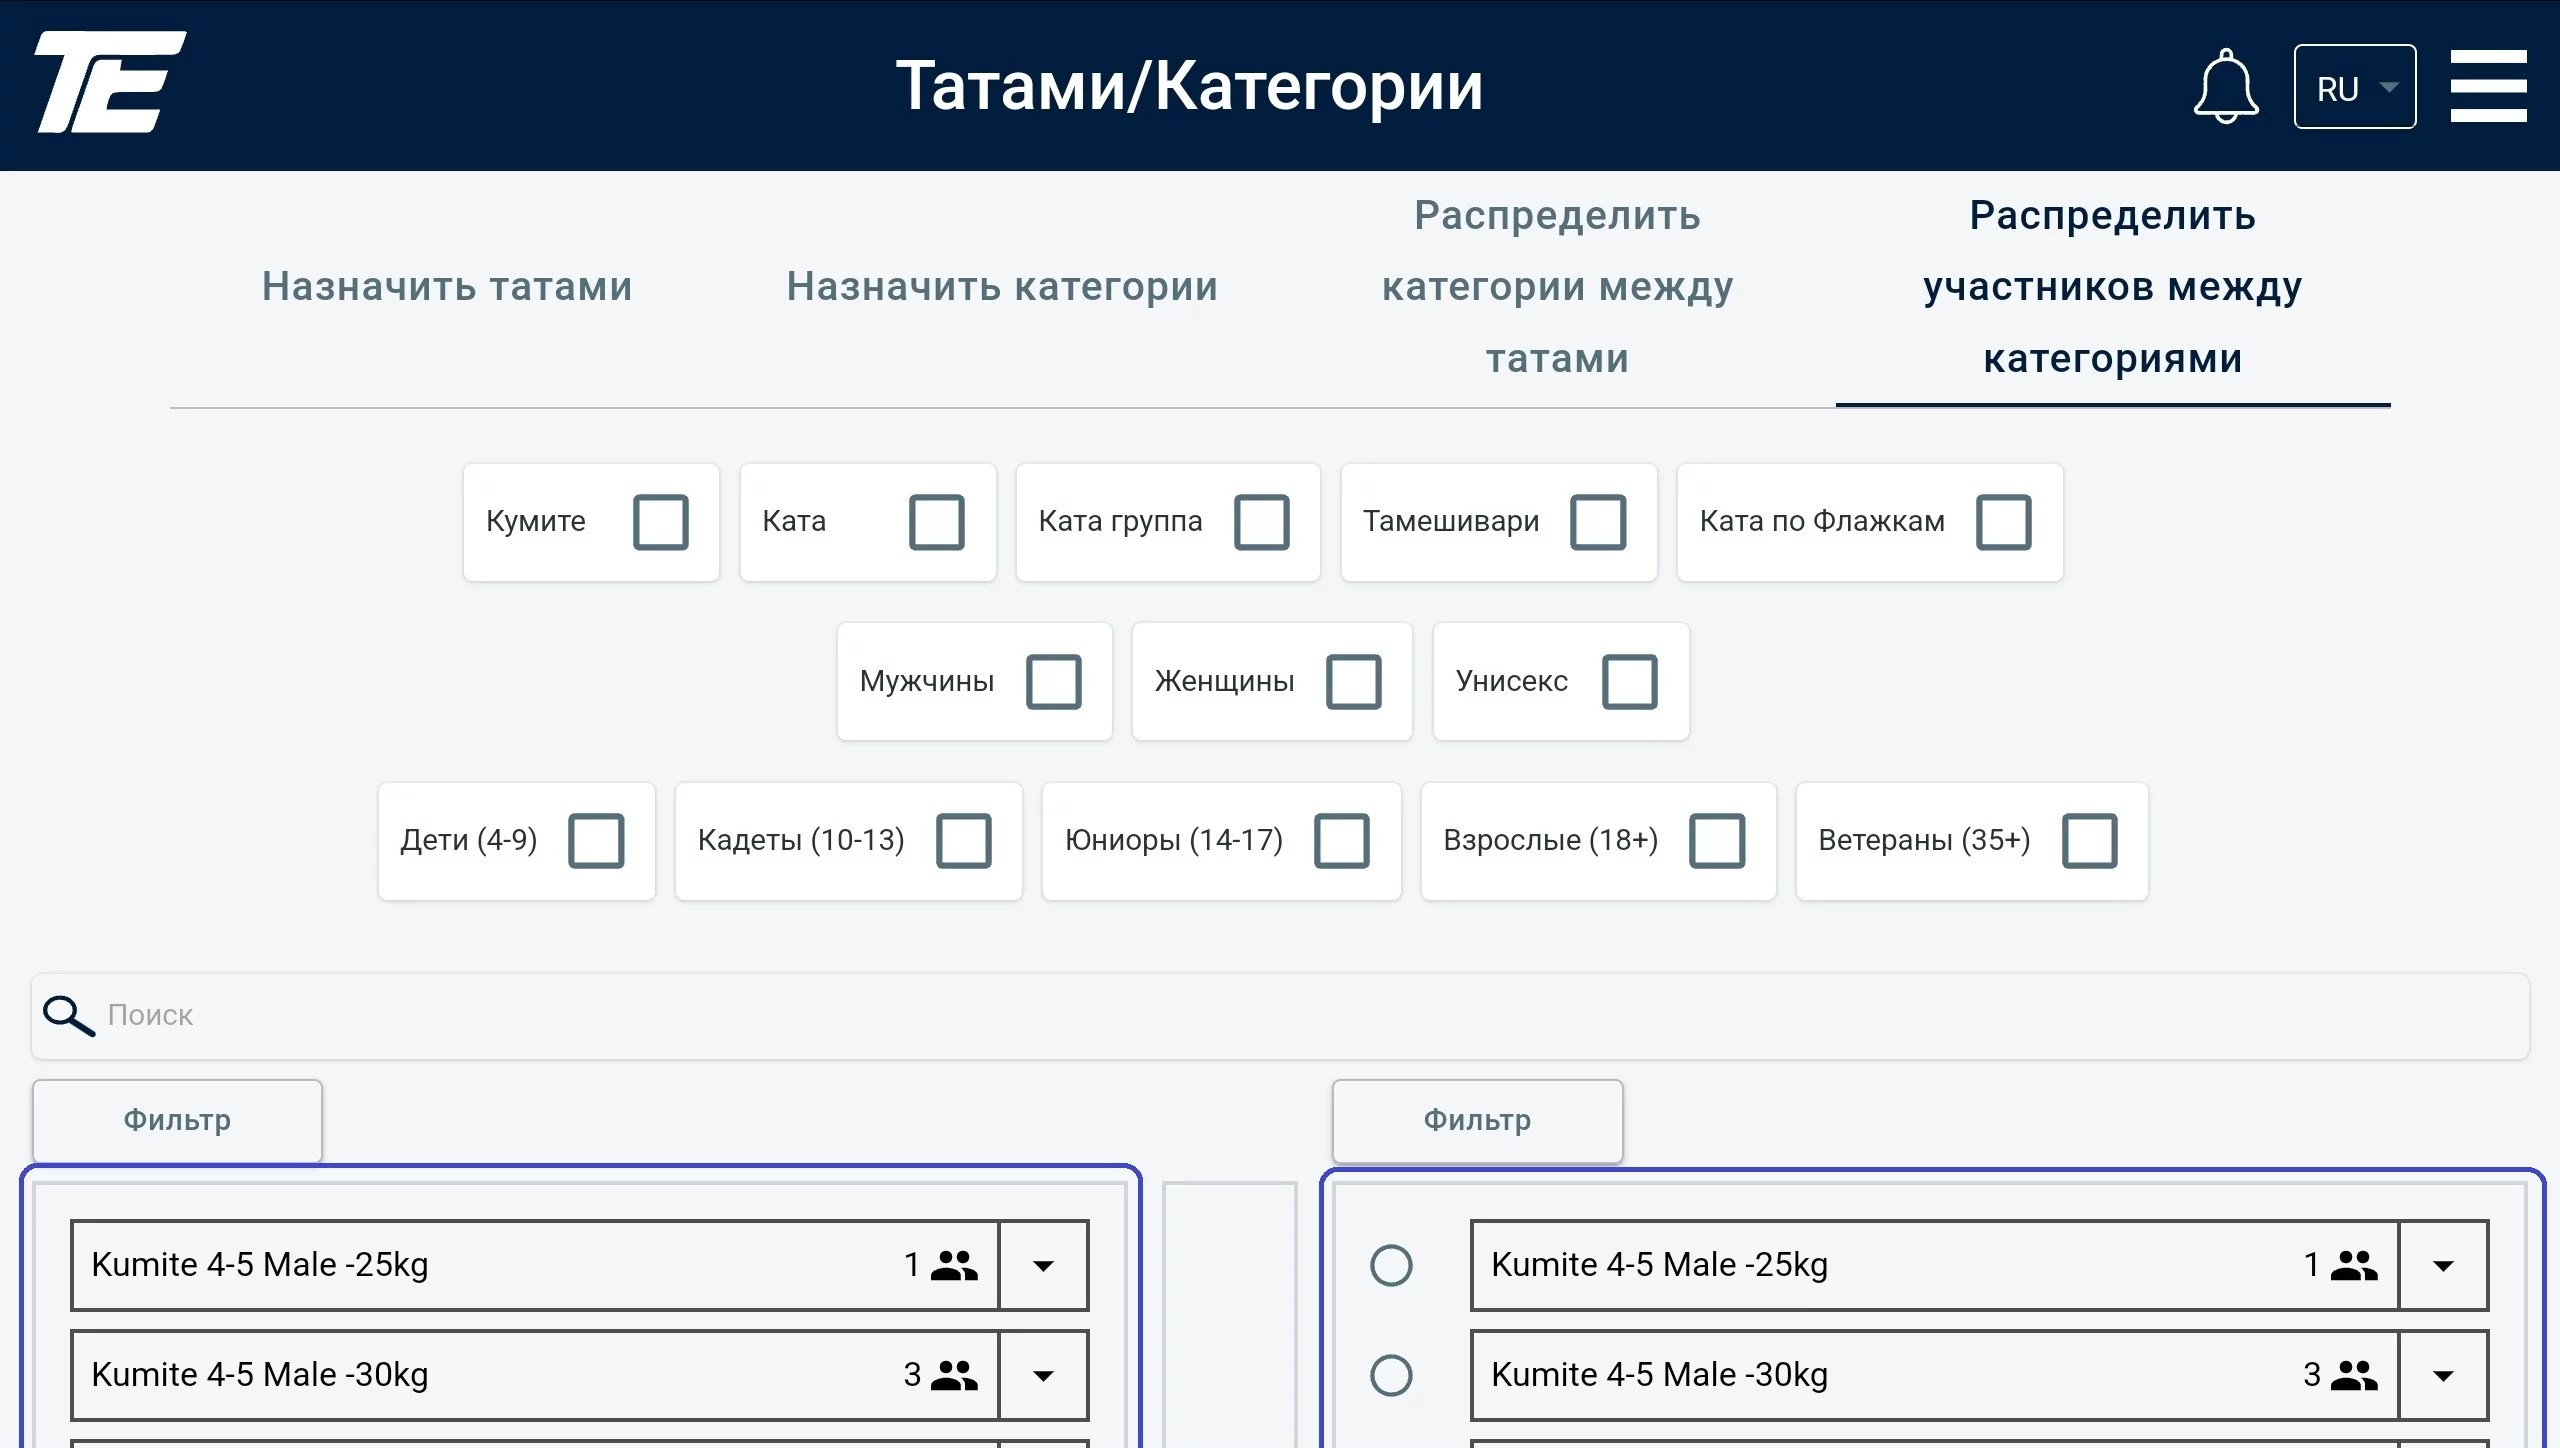
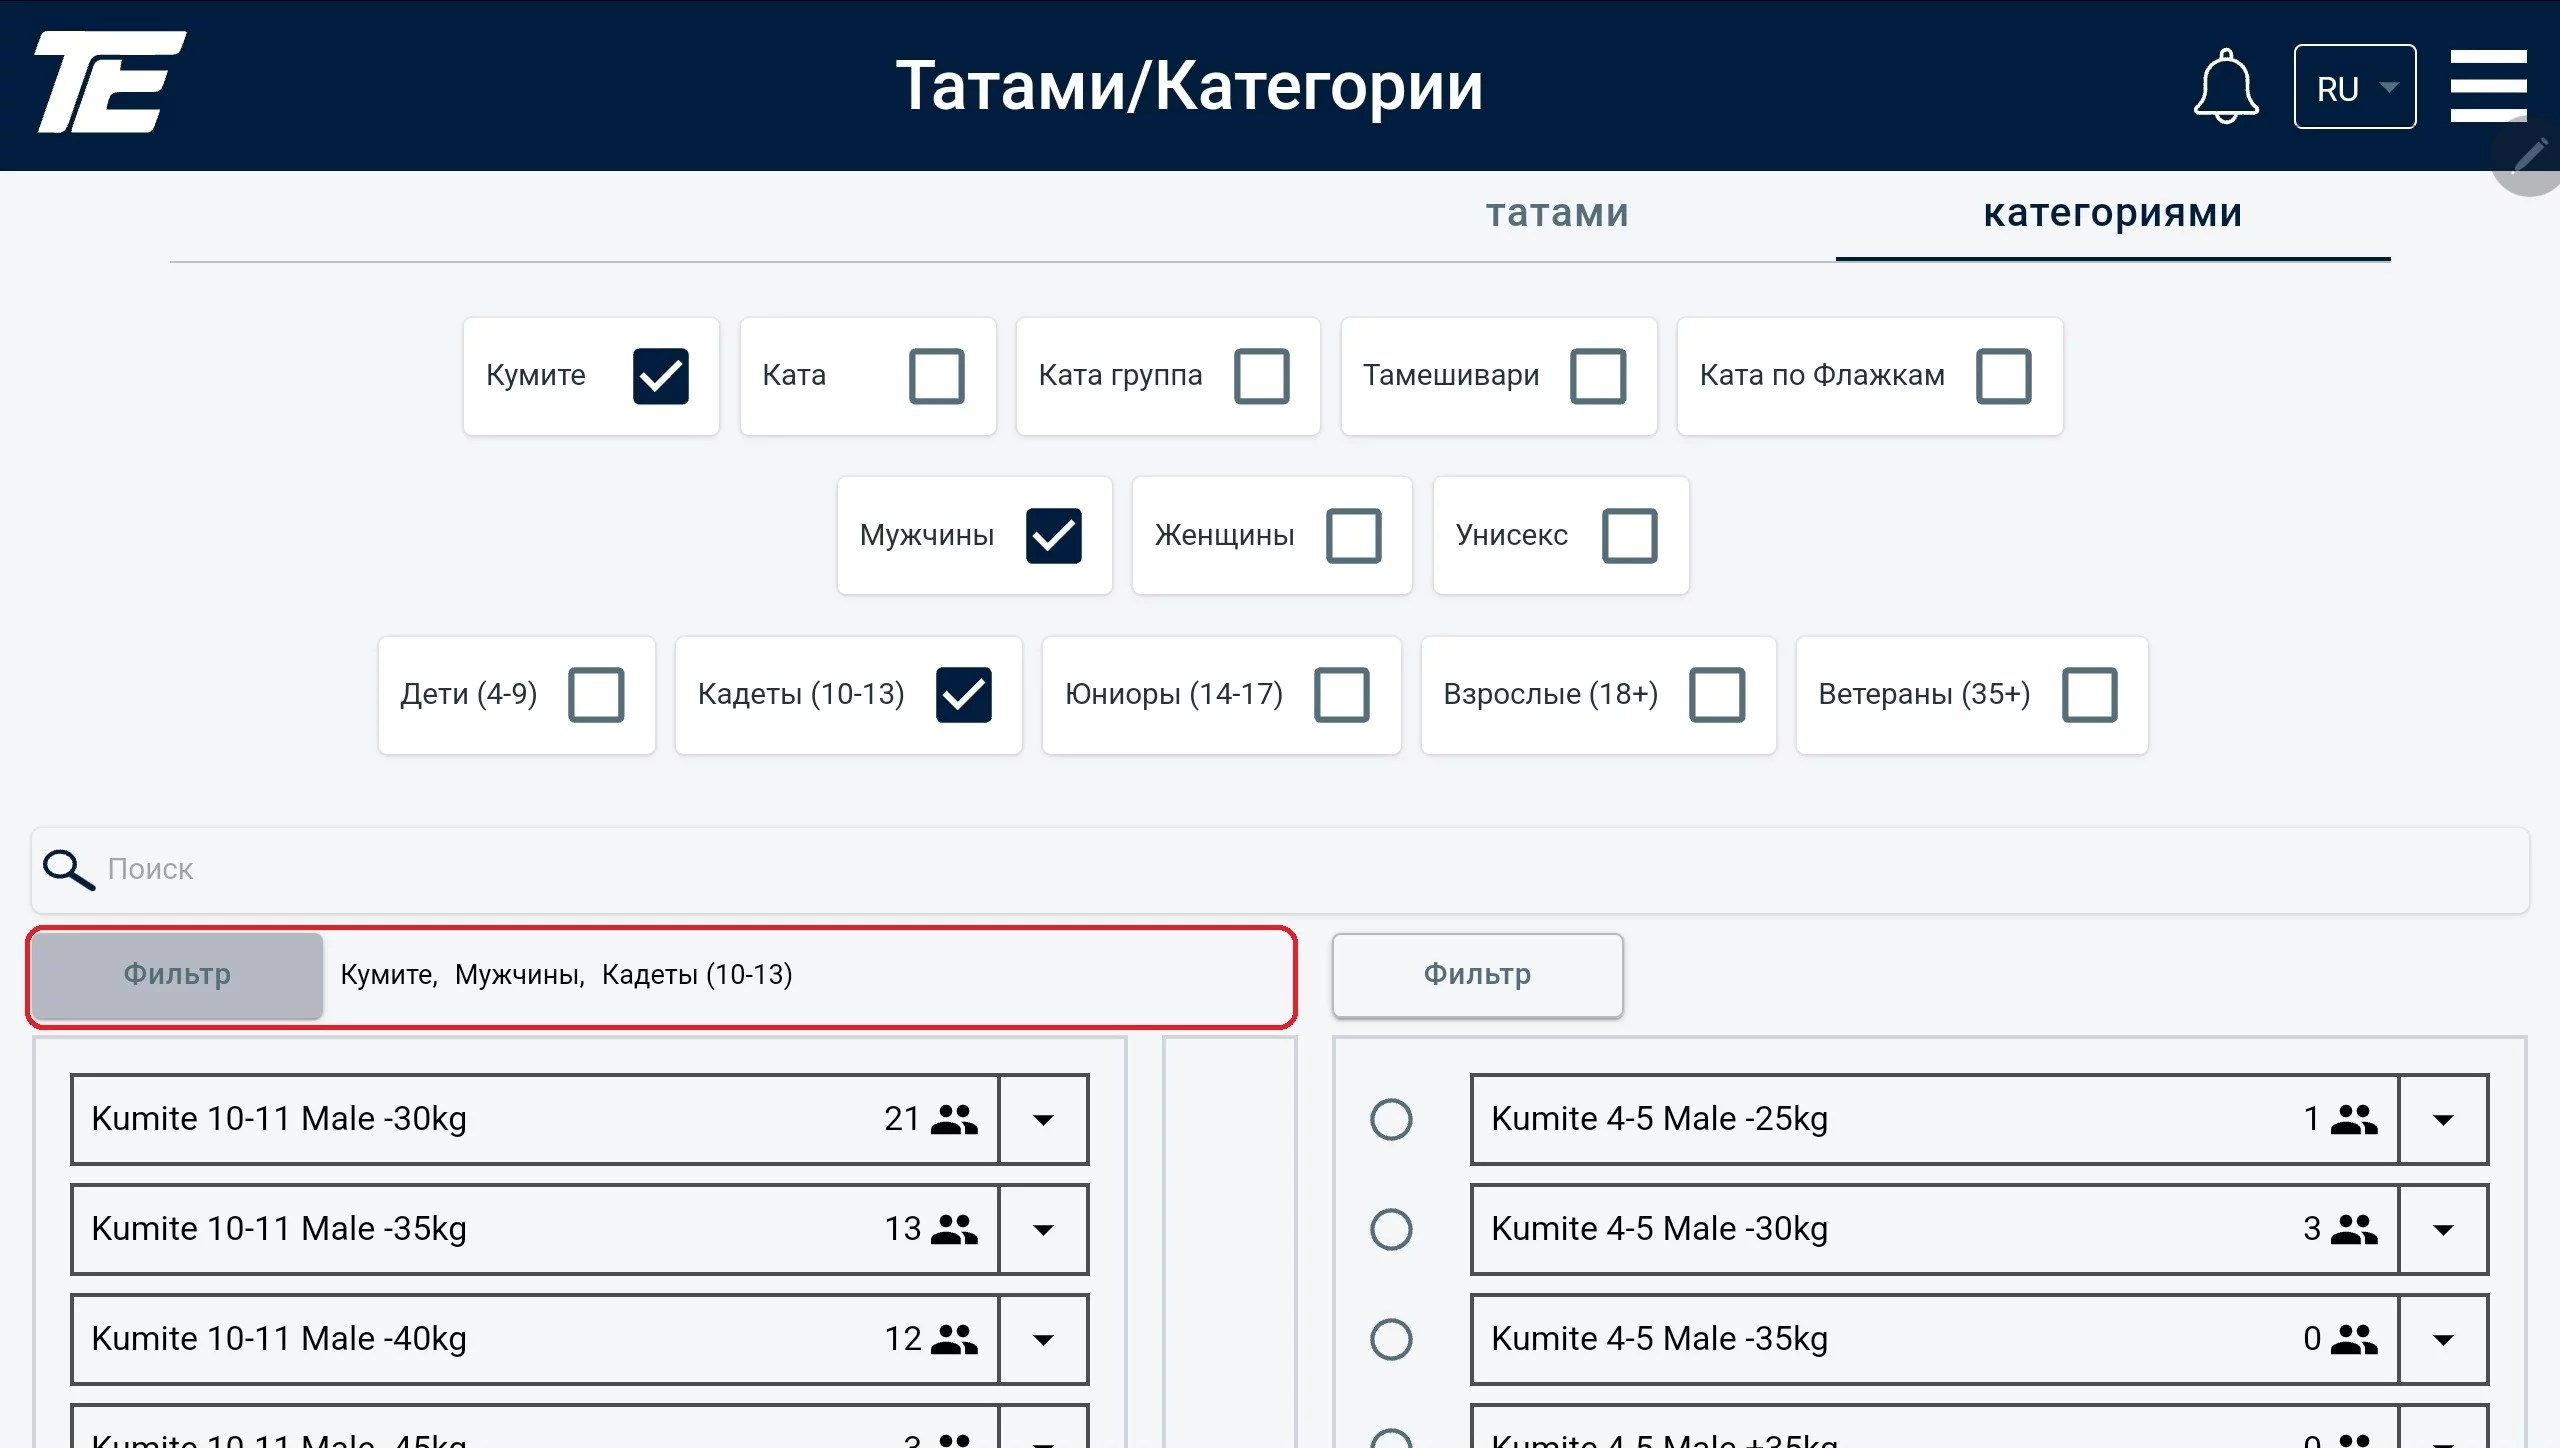
For more convenient use of this feature, we recommend using the filters. First, select the desired filters (tick the boxes).
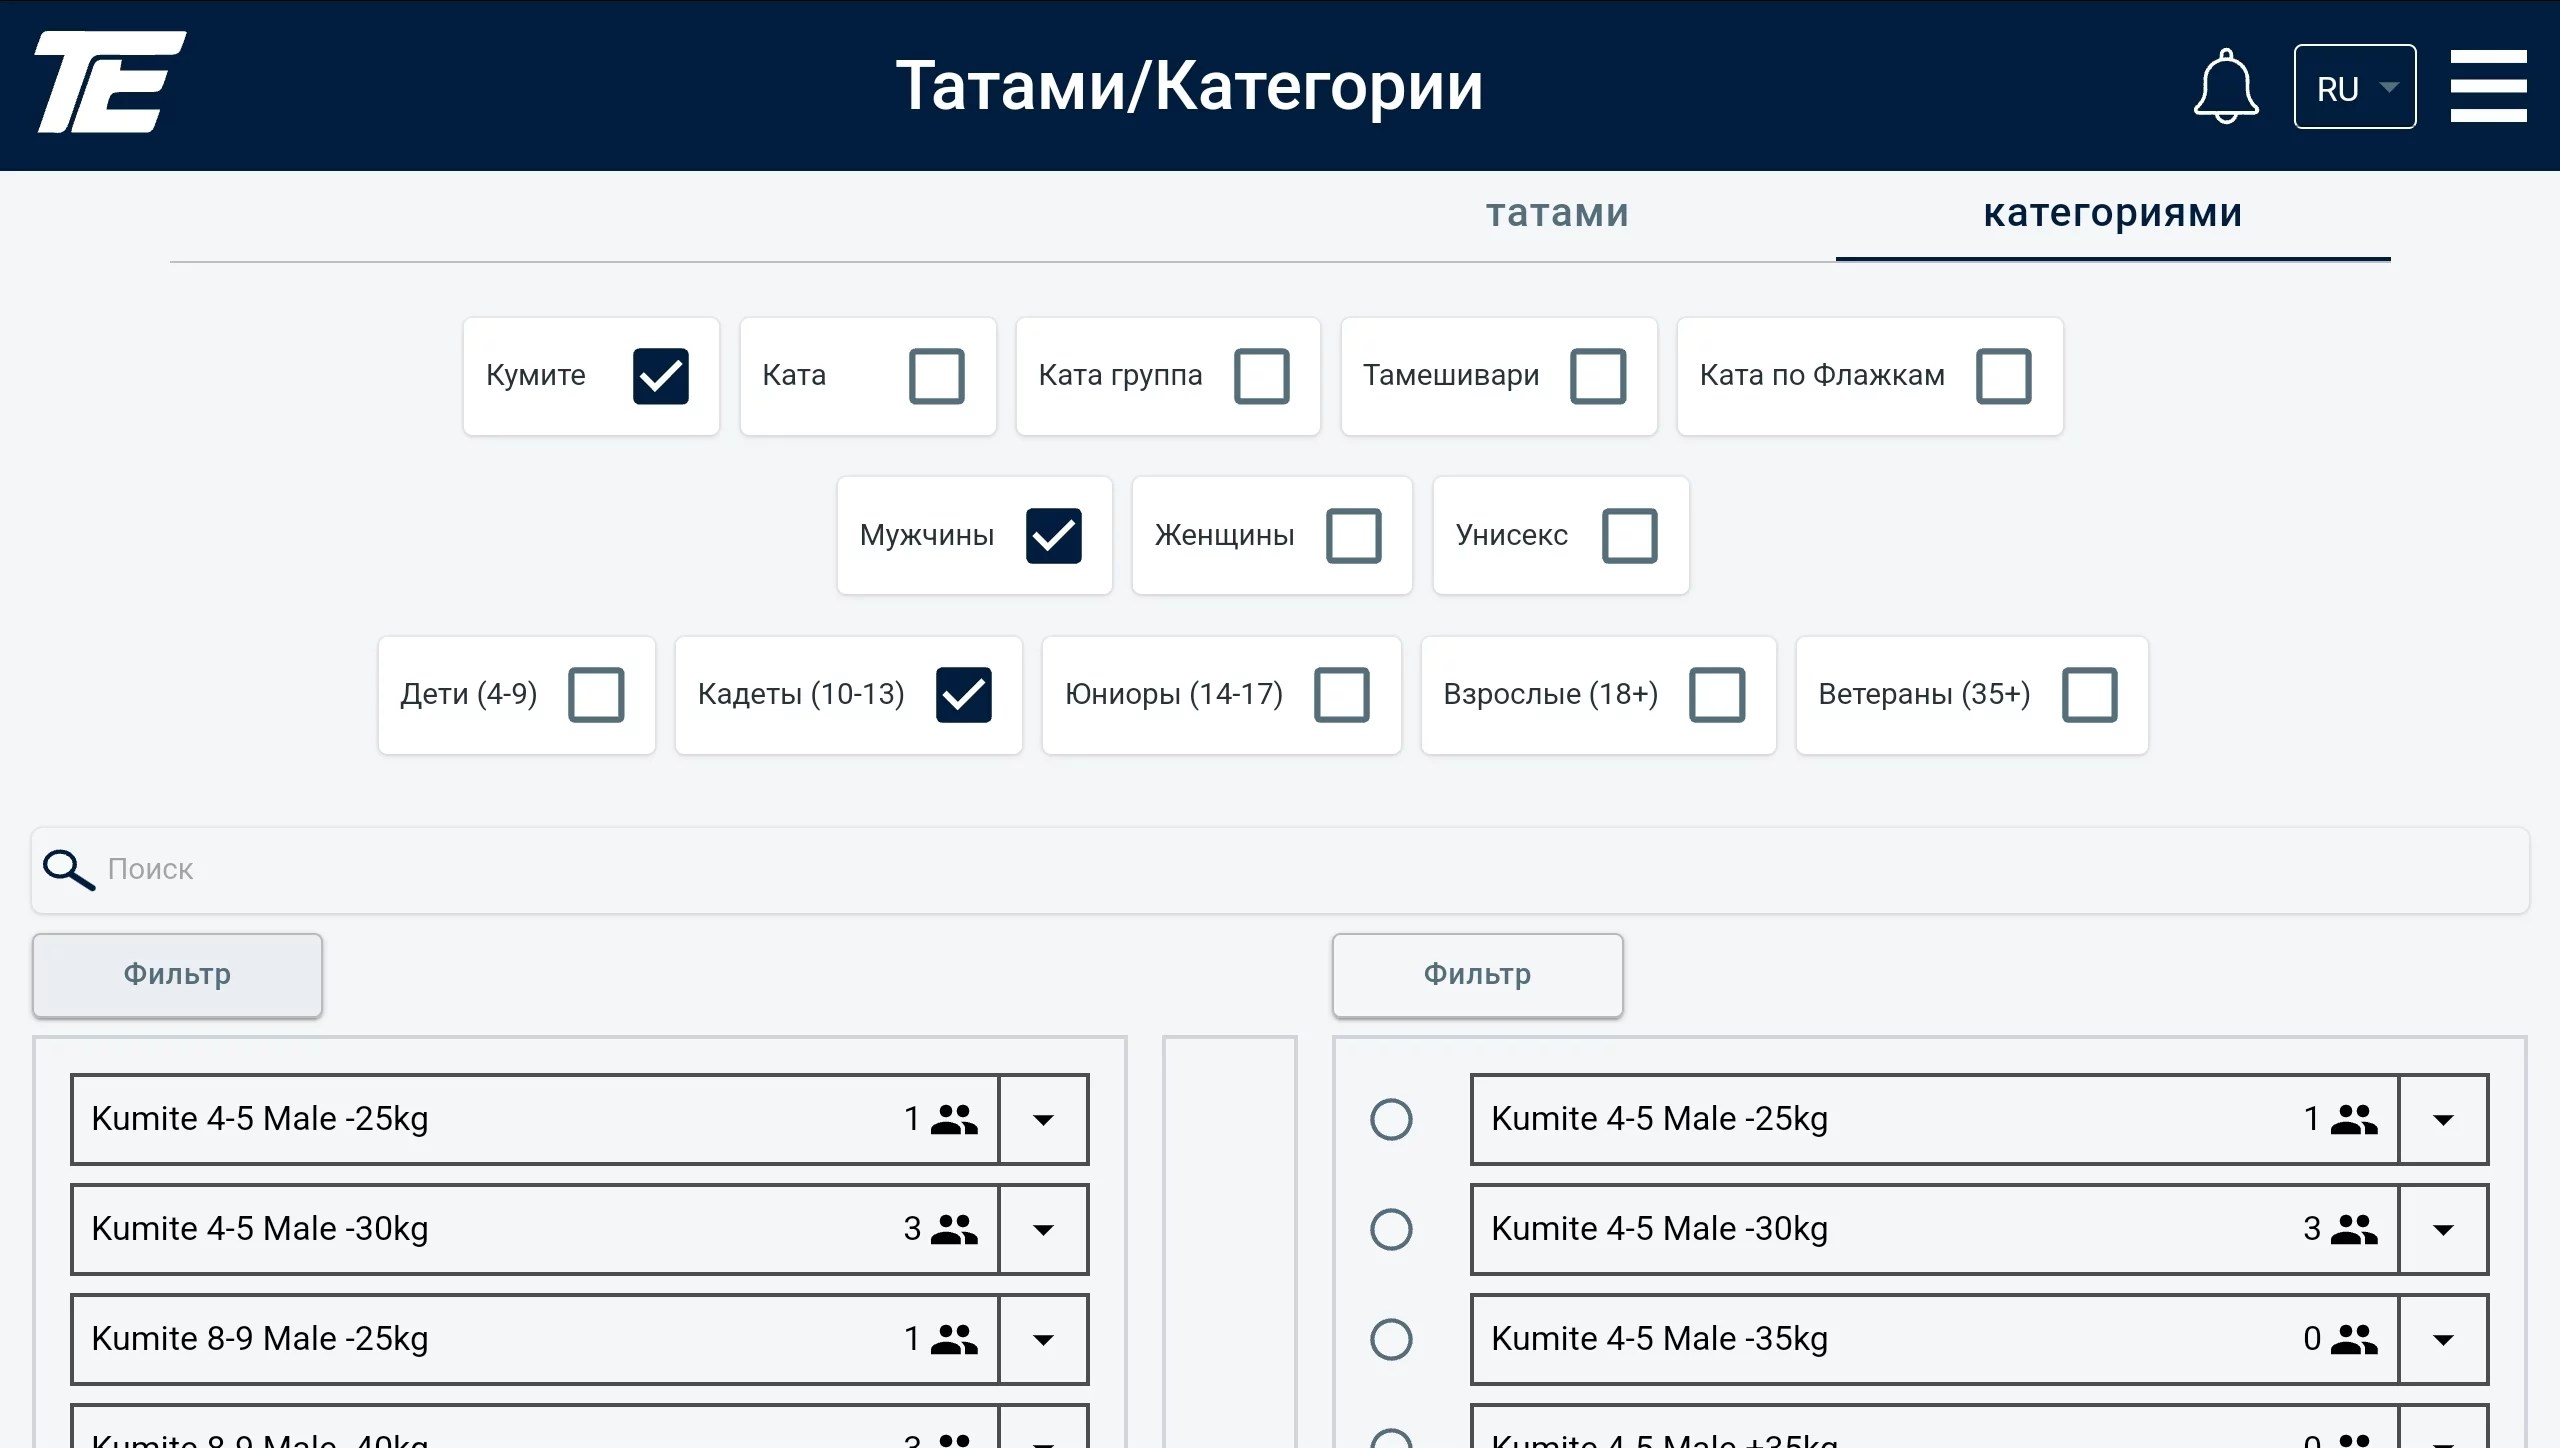
After that, click the “Filter” button in the required column. The button becomes a darker color, and the matching positions are listed next to it.
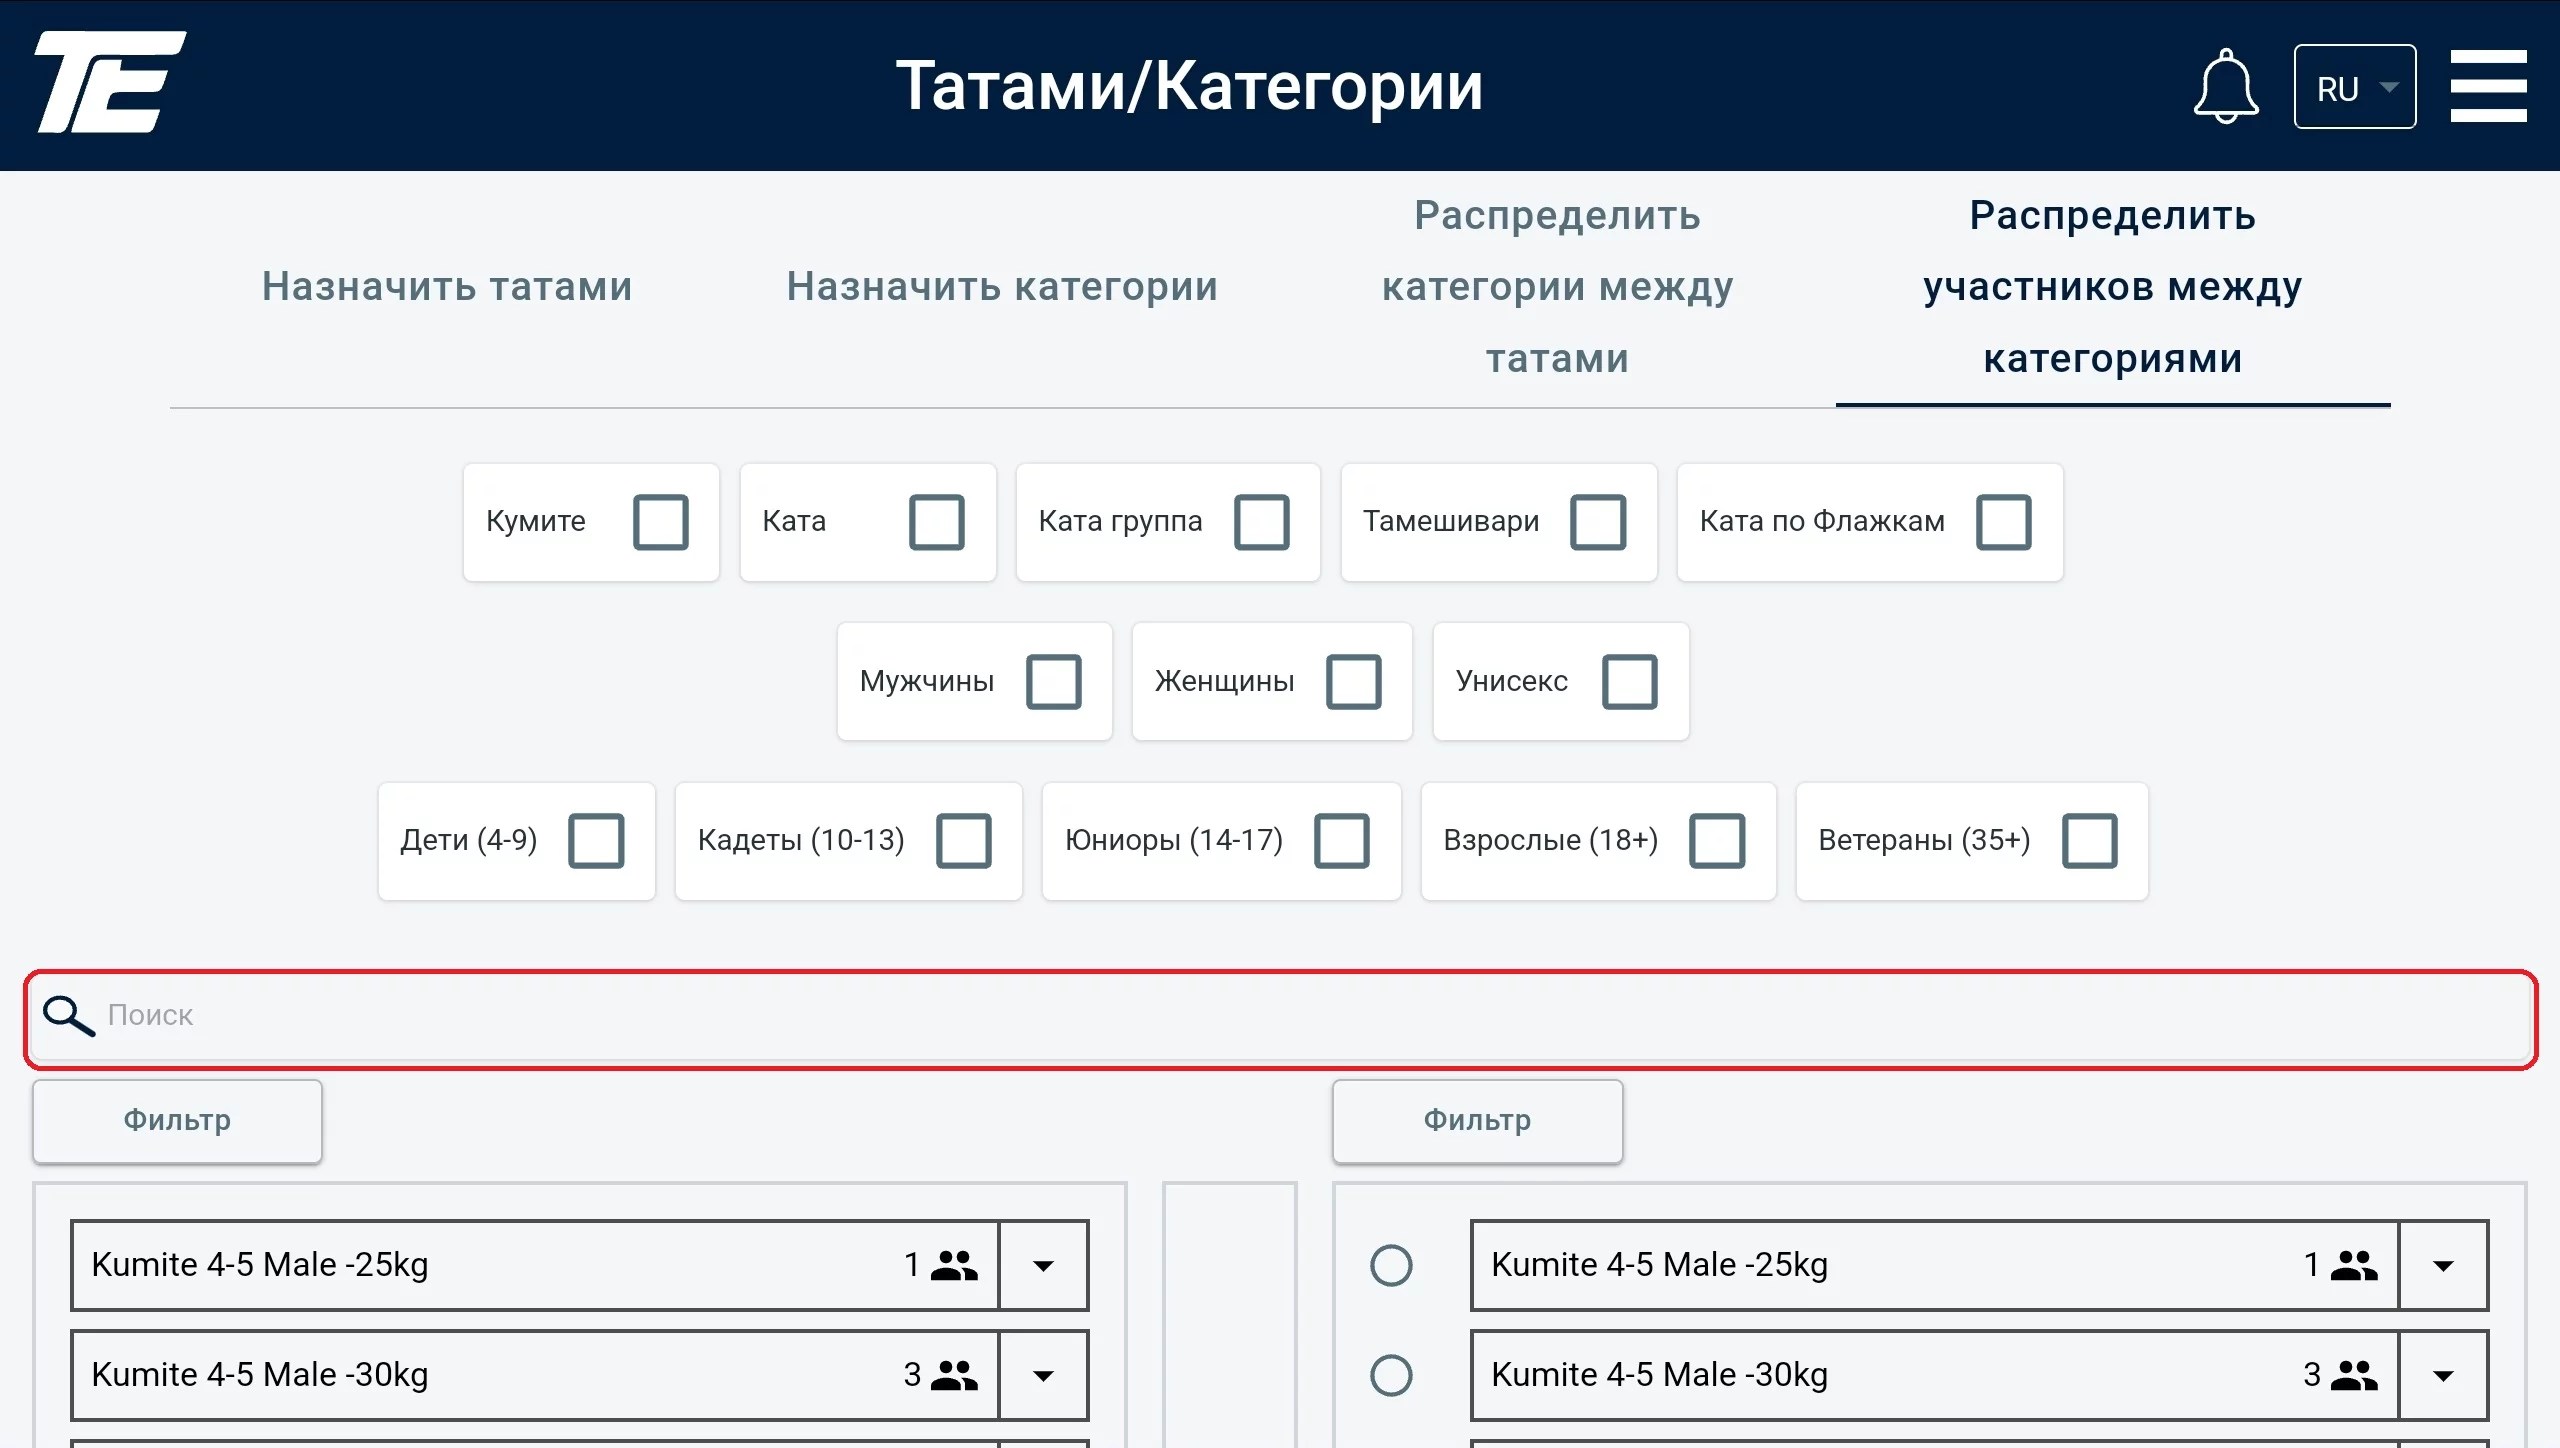
The same applies to the search field. You can use the category name. After entering the category name, click the “Filter” button.
Moving participants between categories is used in the following cases: sometimes you may find that you have a large number of participants in one category, and you want to split them into two categories. For example, «Group A» and «Group B» — placing the beginners in the first group and the athletes who have been training for 2 years or more in the second group.
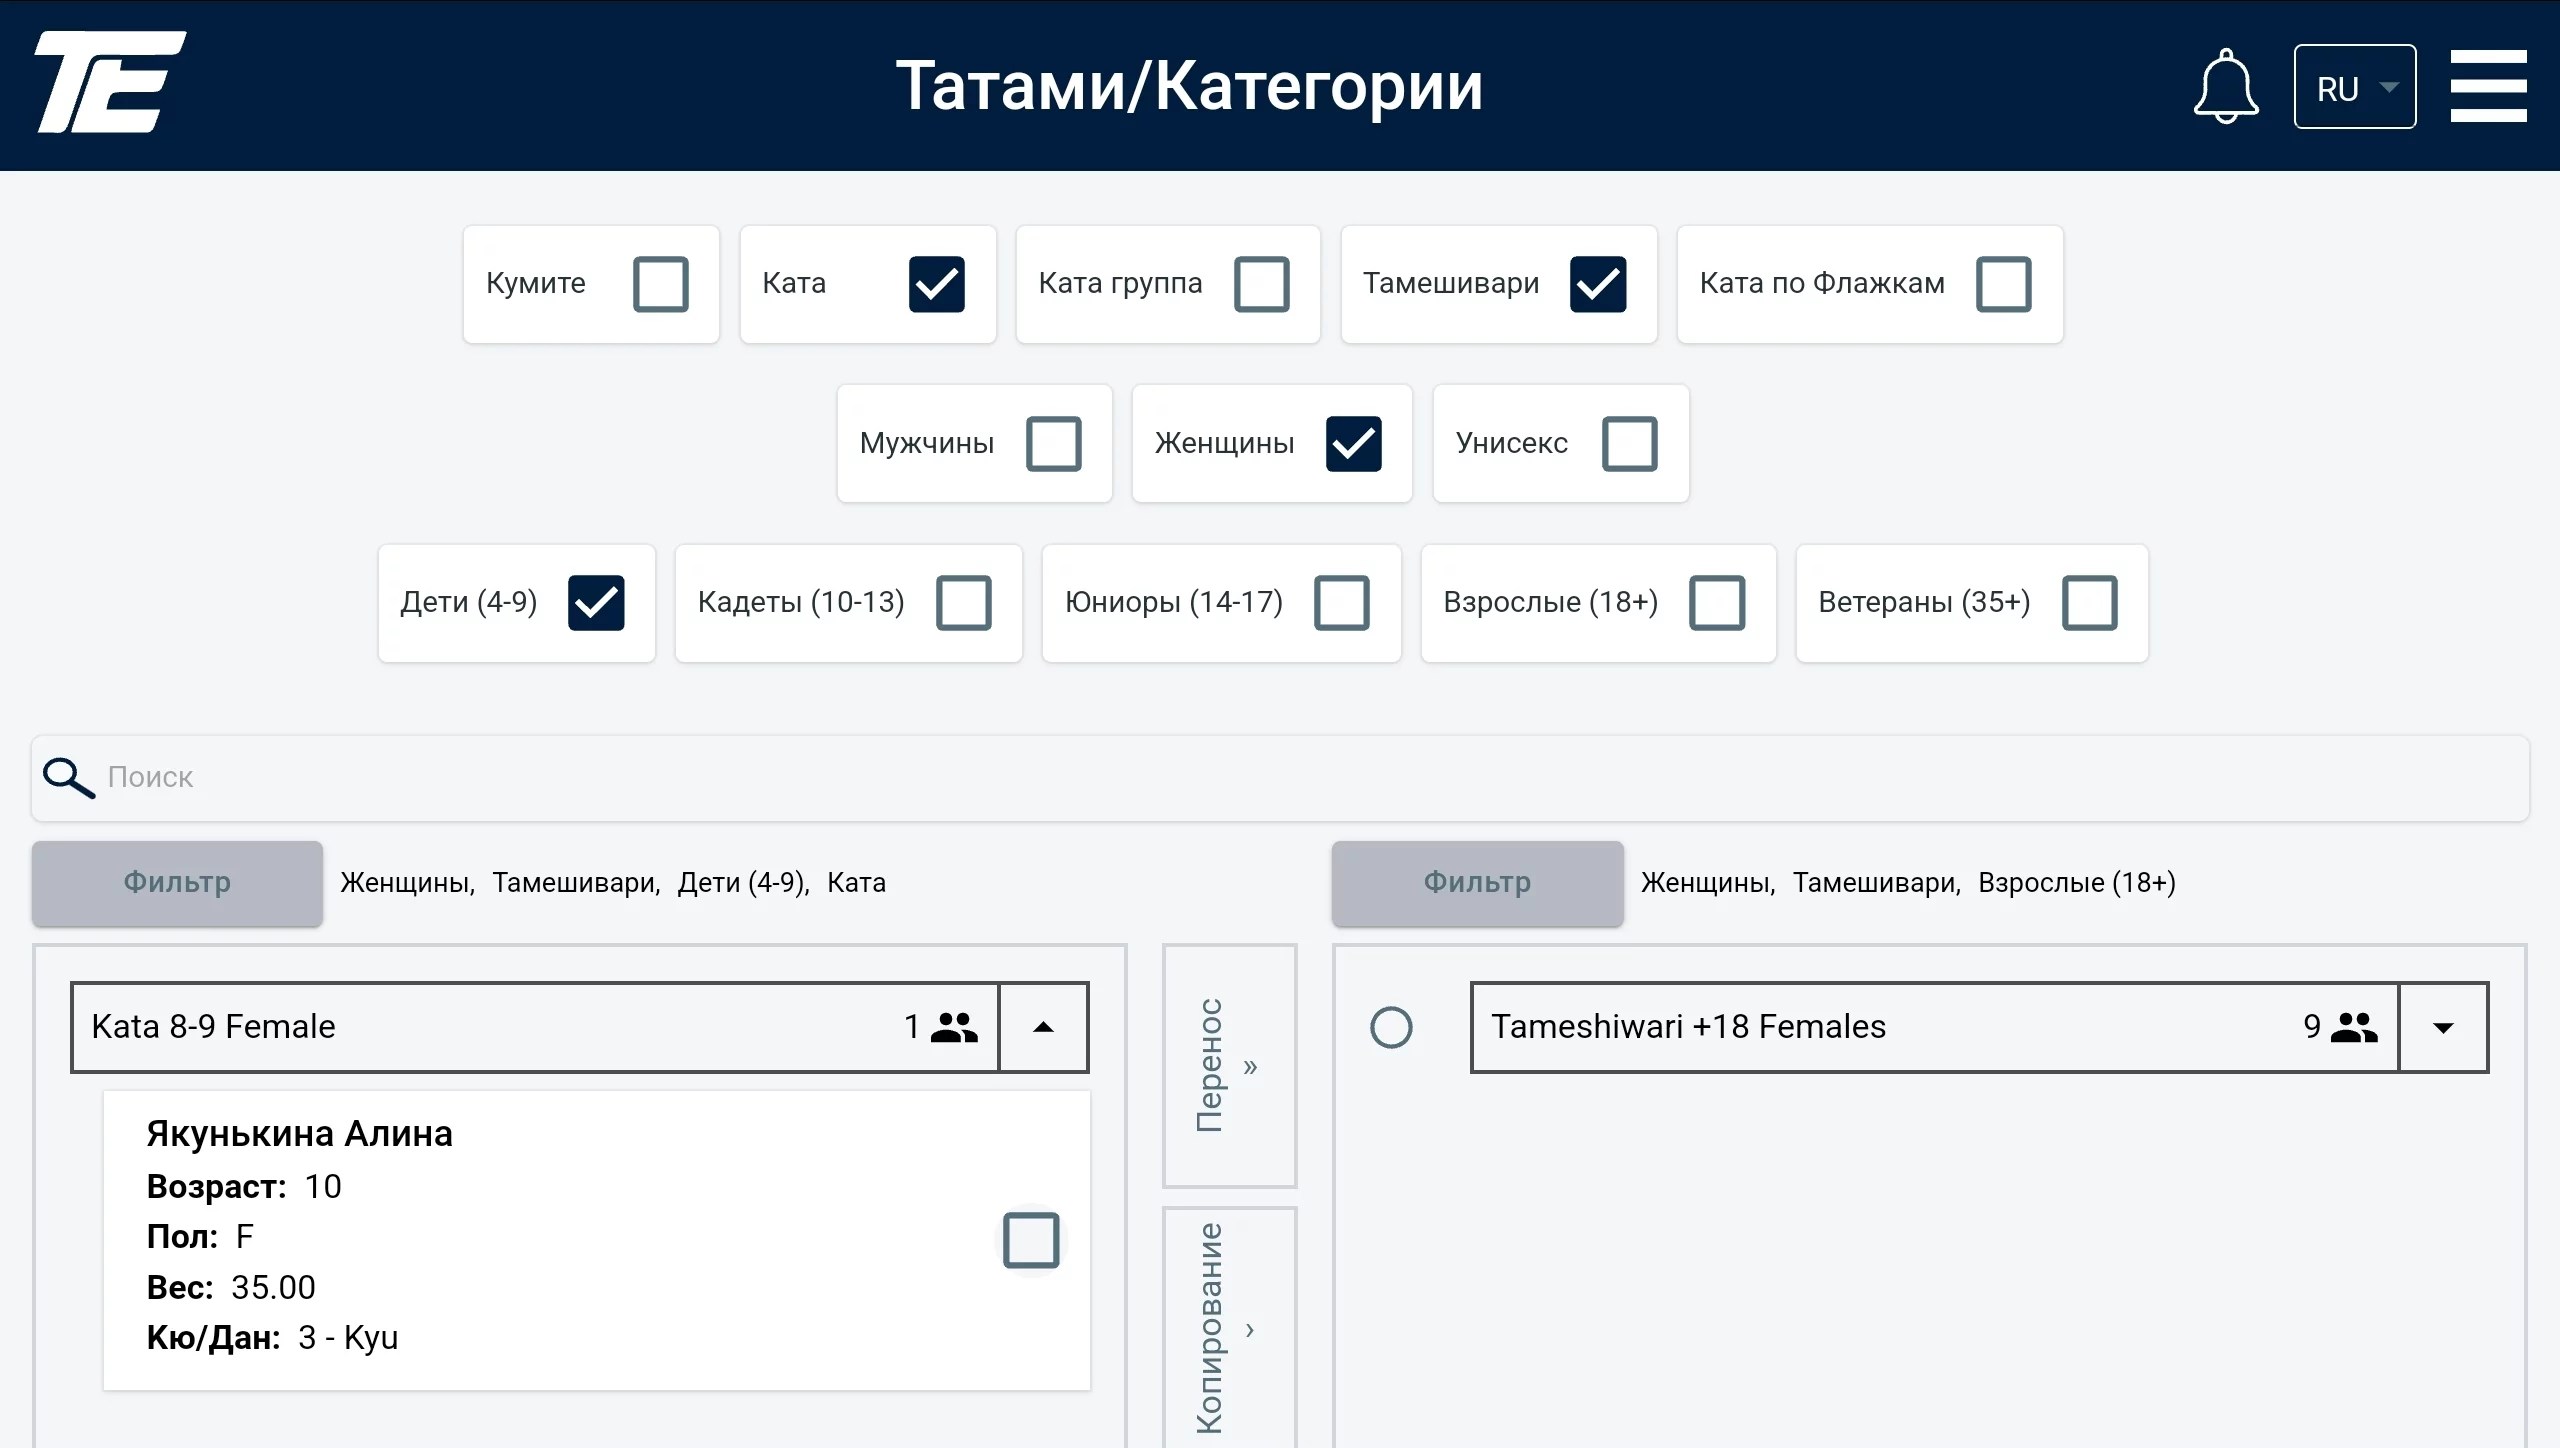
Or you discovered that only one person is registered in your category. By agreement, you can move this participant to another category.
To do this, select in the left column the category you want to move participants from, and in the right column specify the category in which the participants should end up after the move. We strongly recommend using the filters to make the work easier.
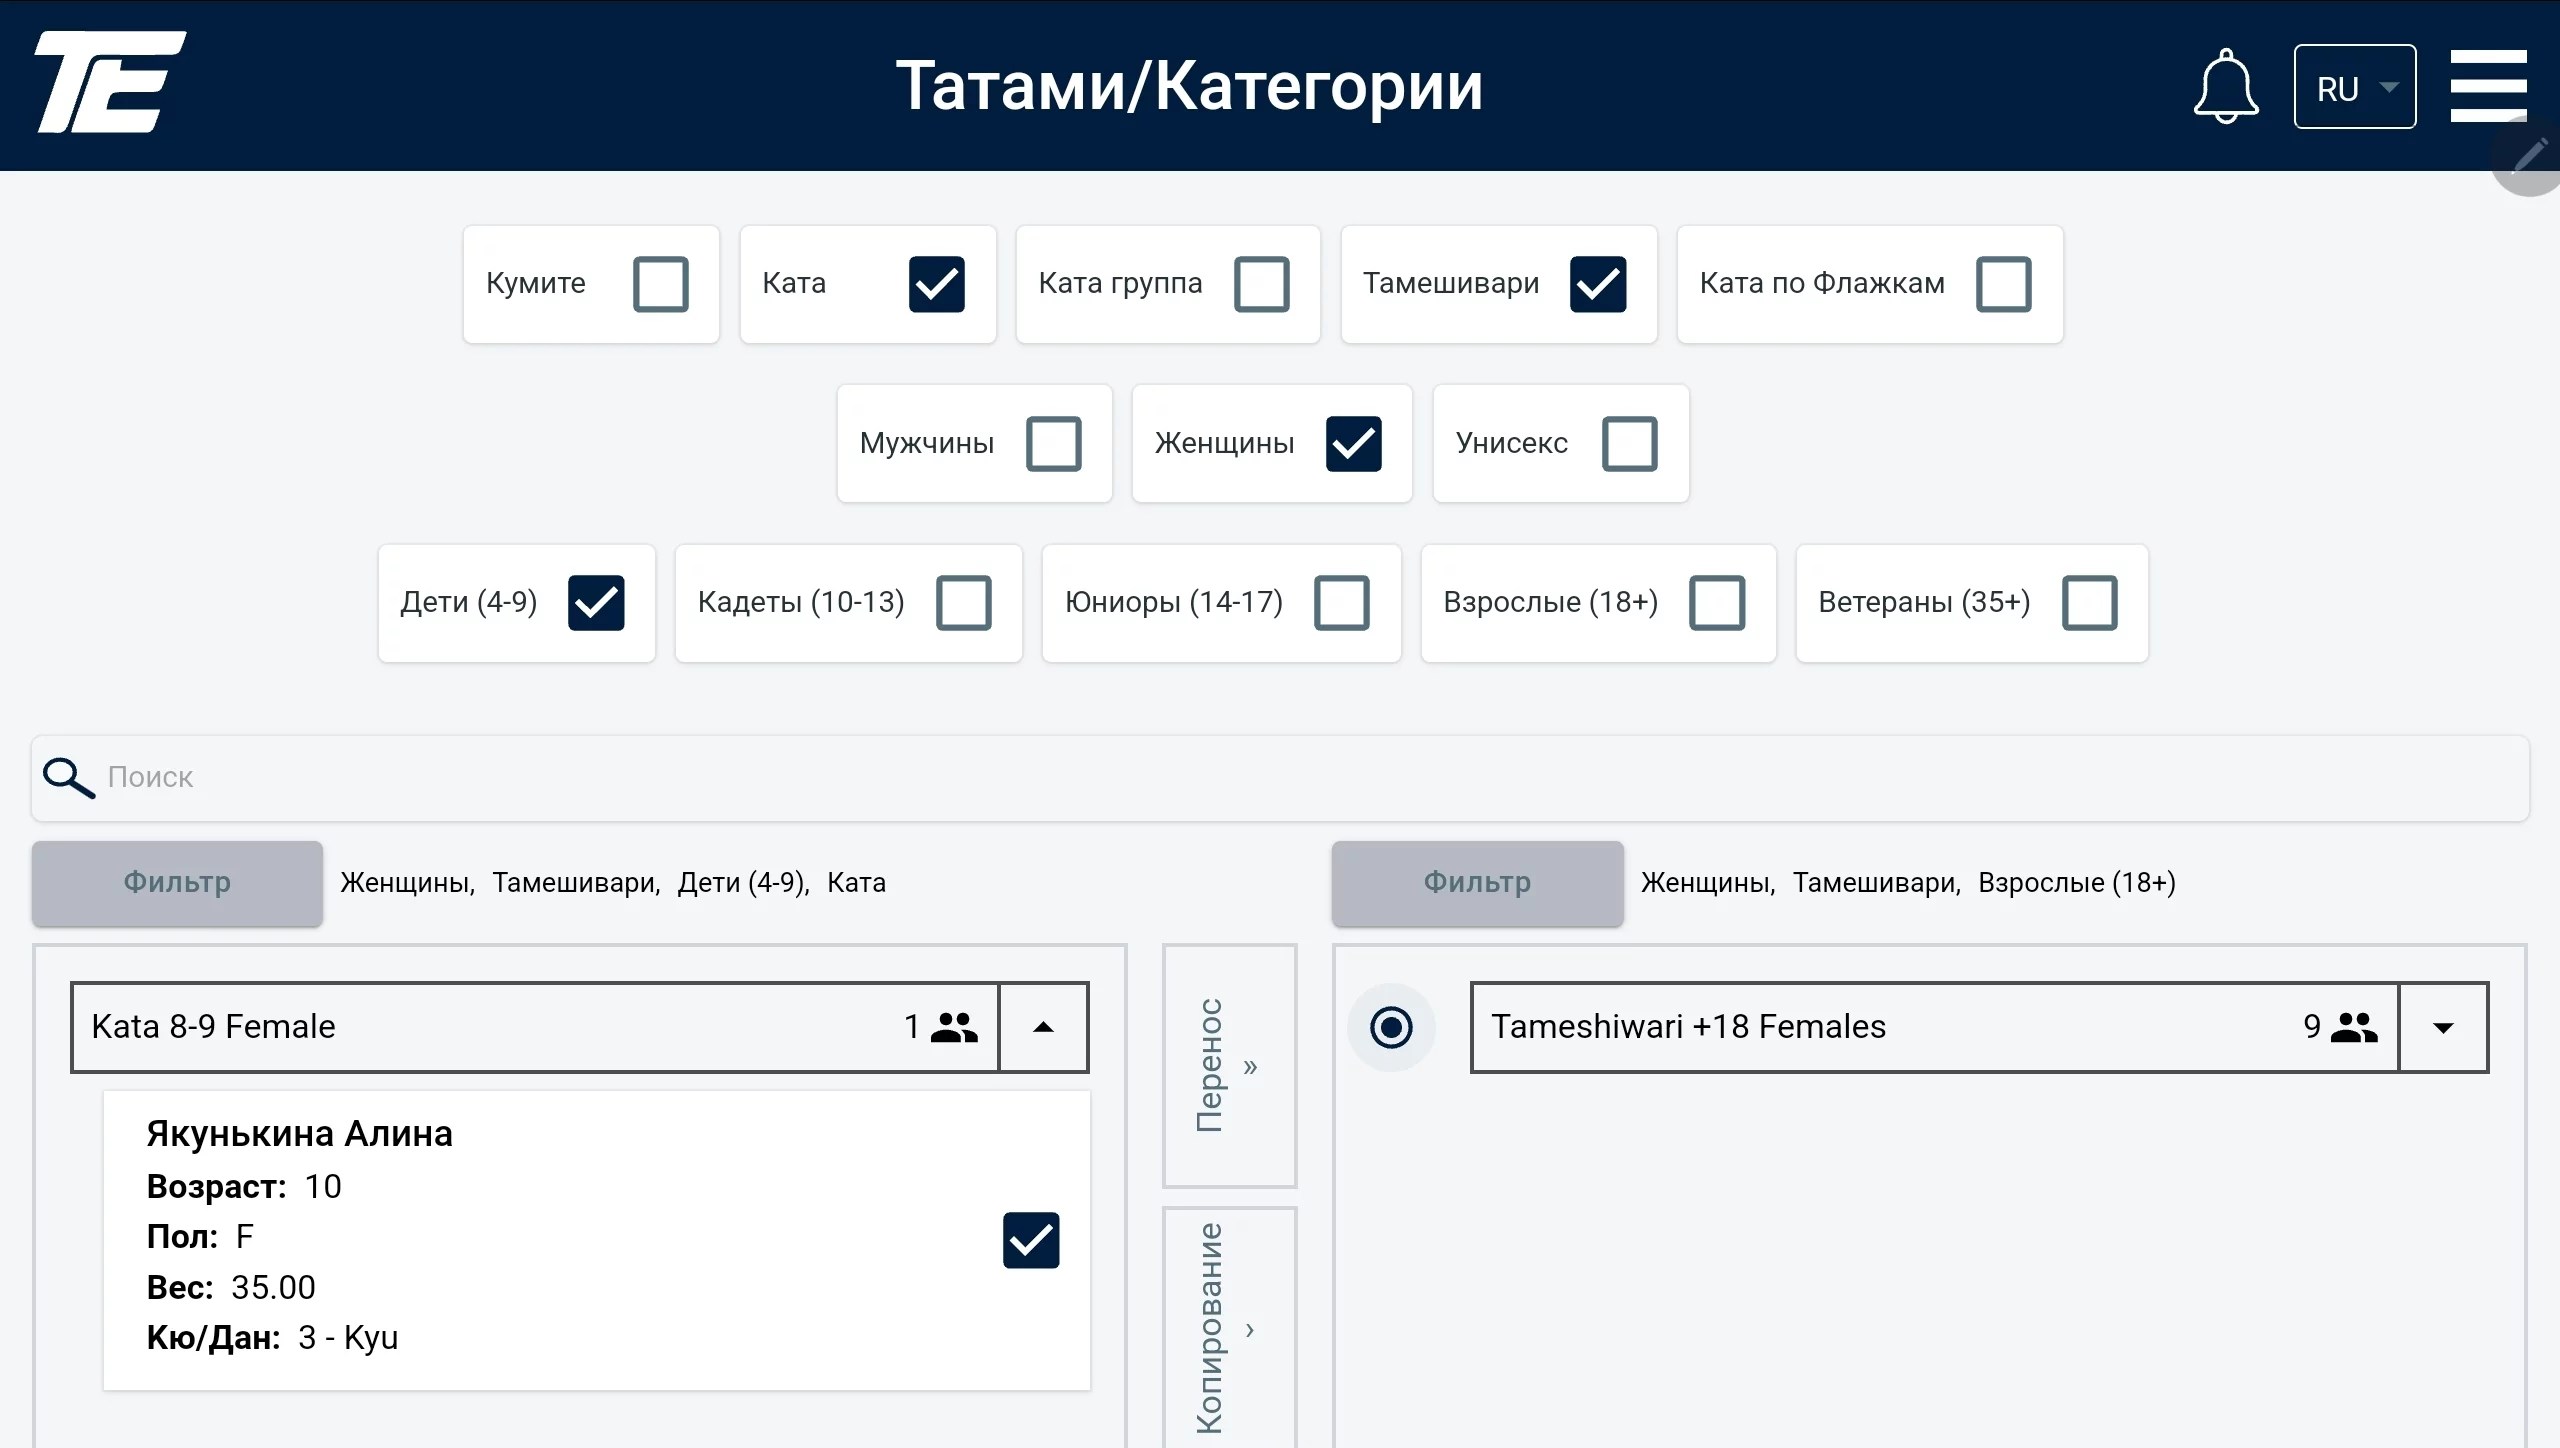
Select the athlete’s name in the right column (tick the box in the allocated field). After that, tick the required category in the left column. Then press the “Move” key.
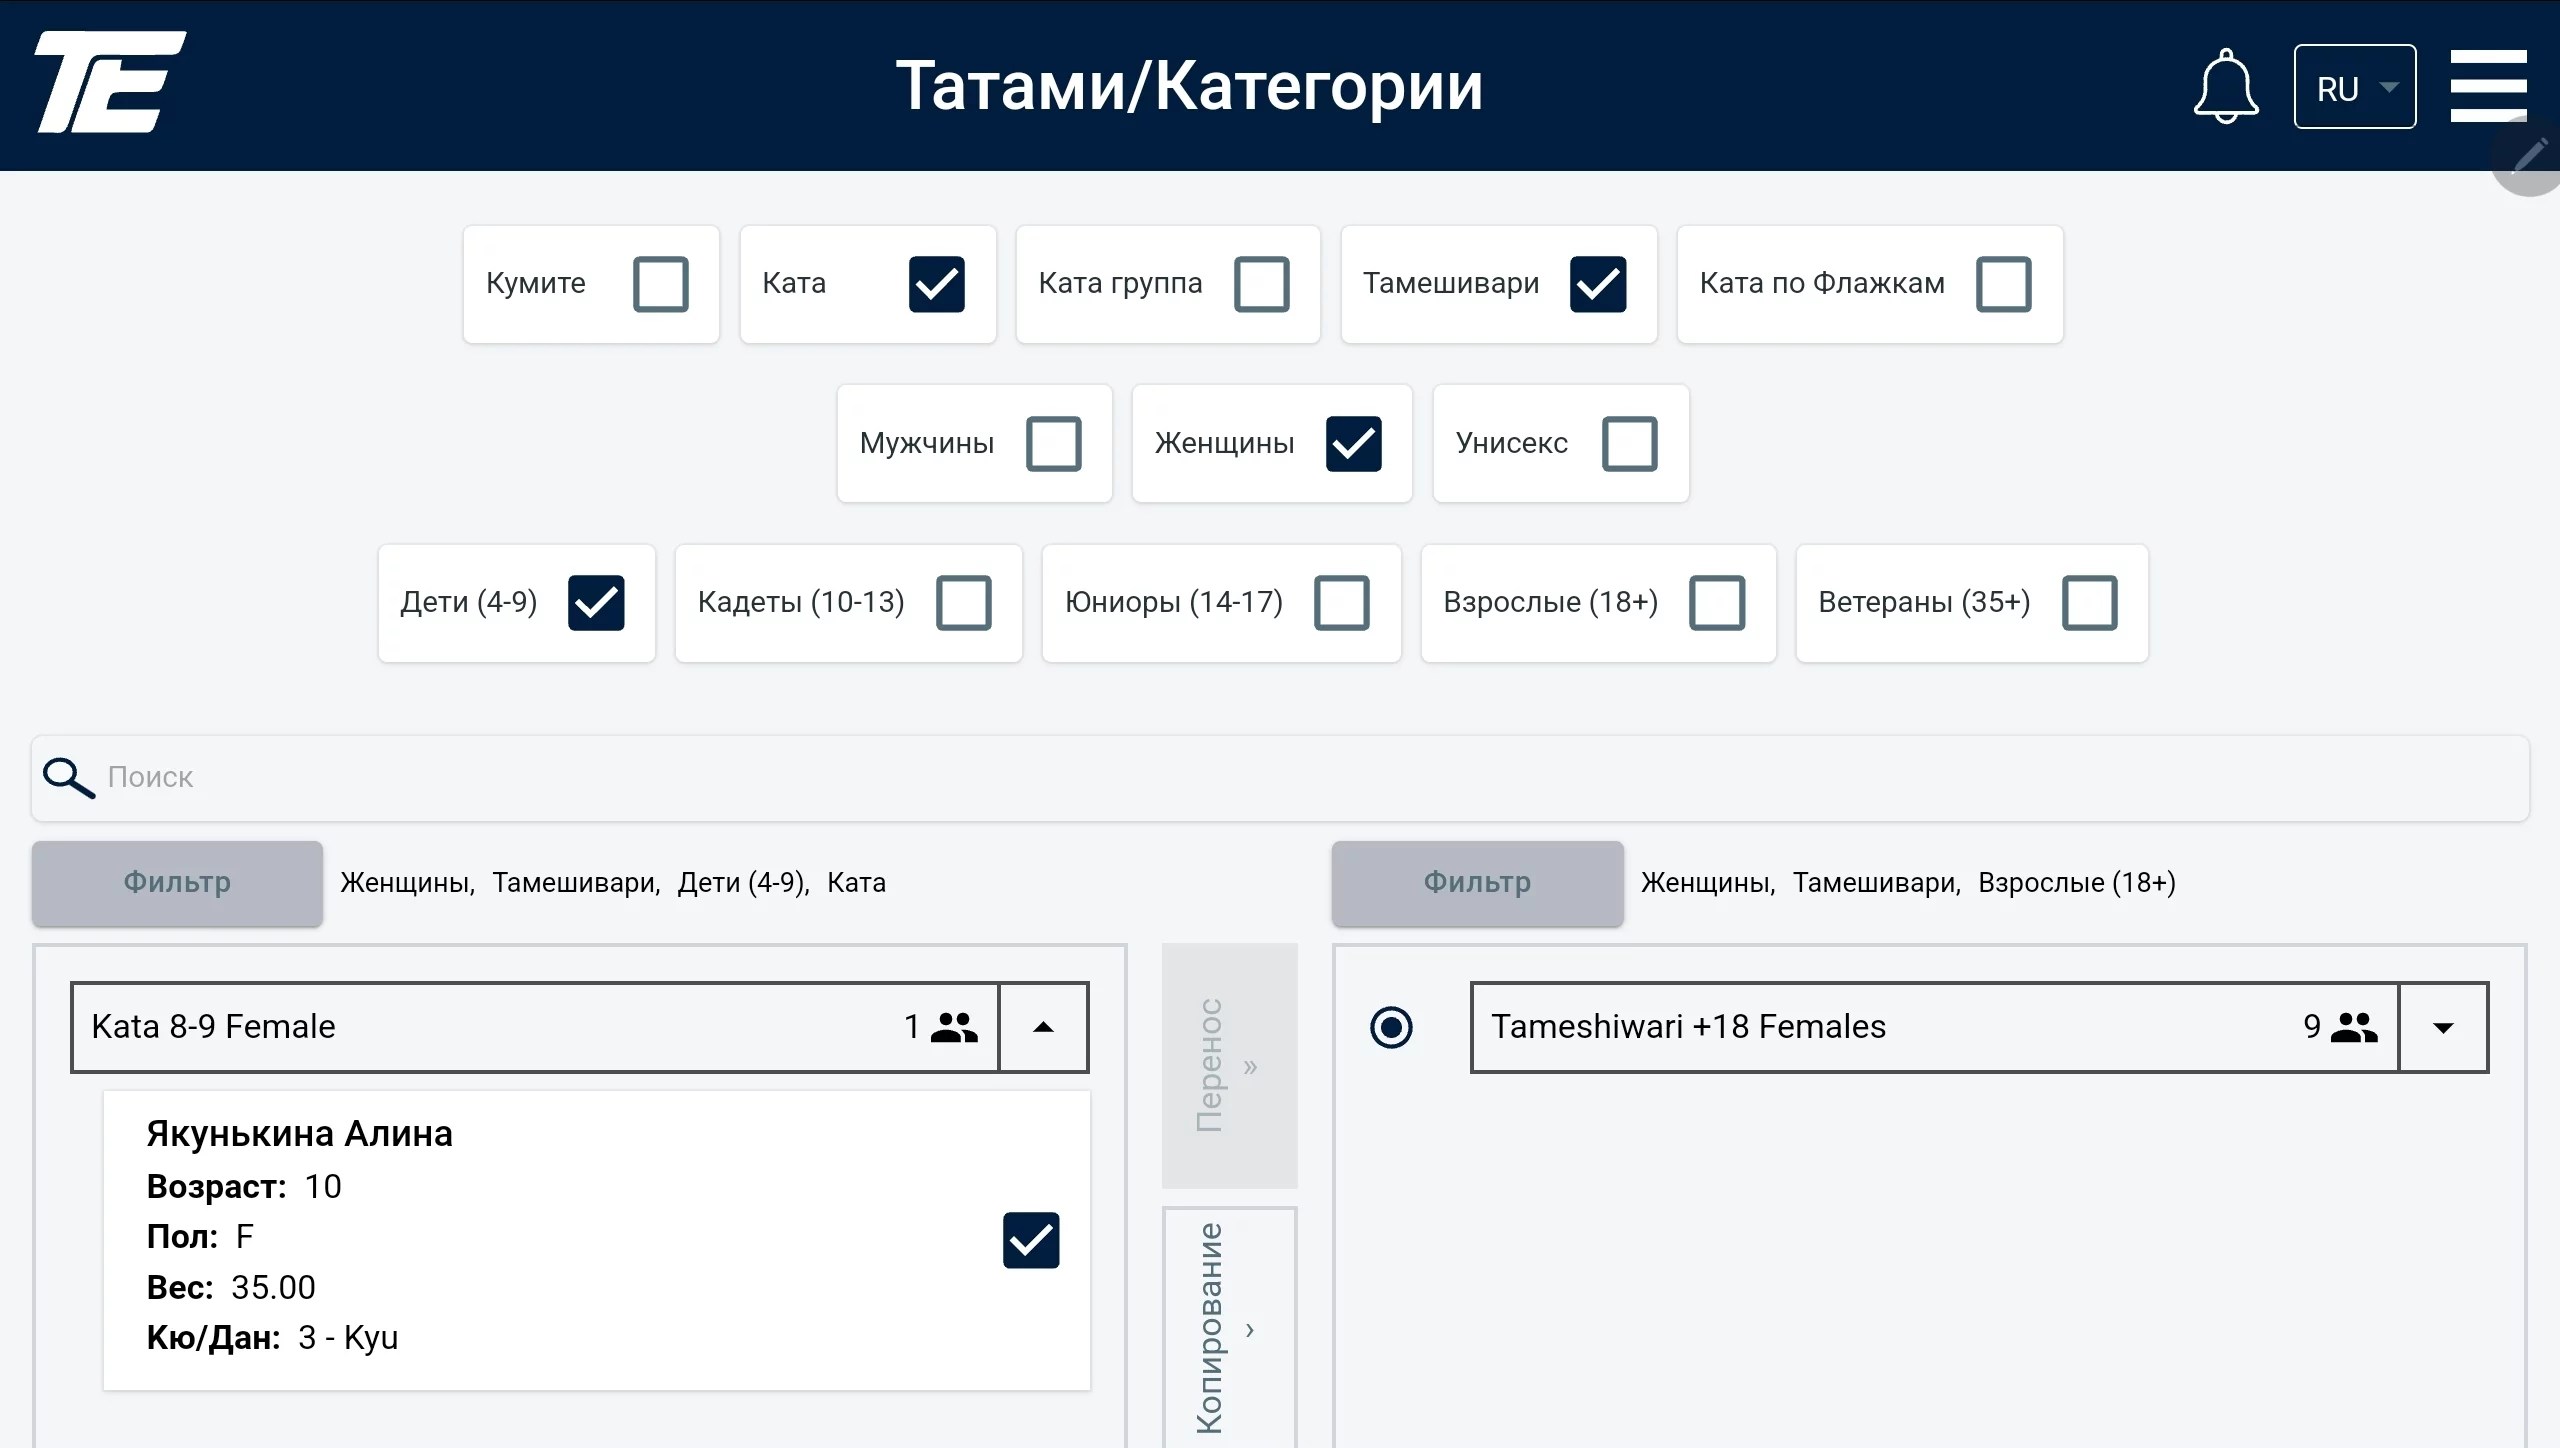
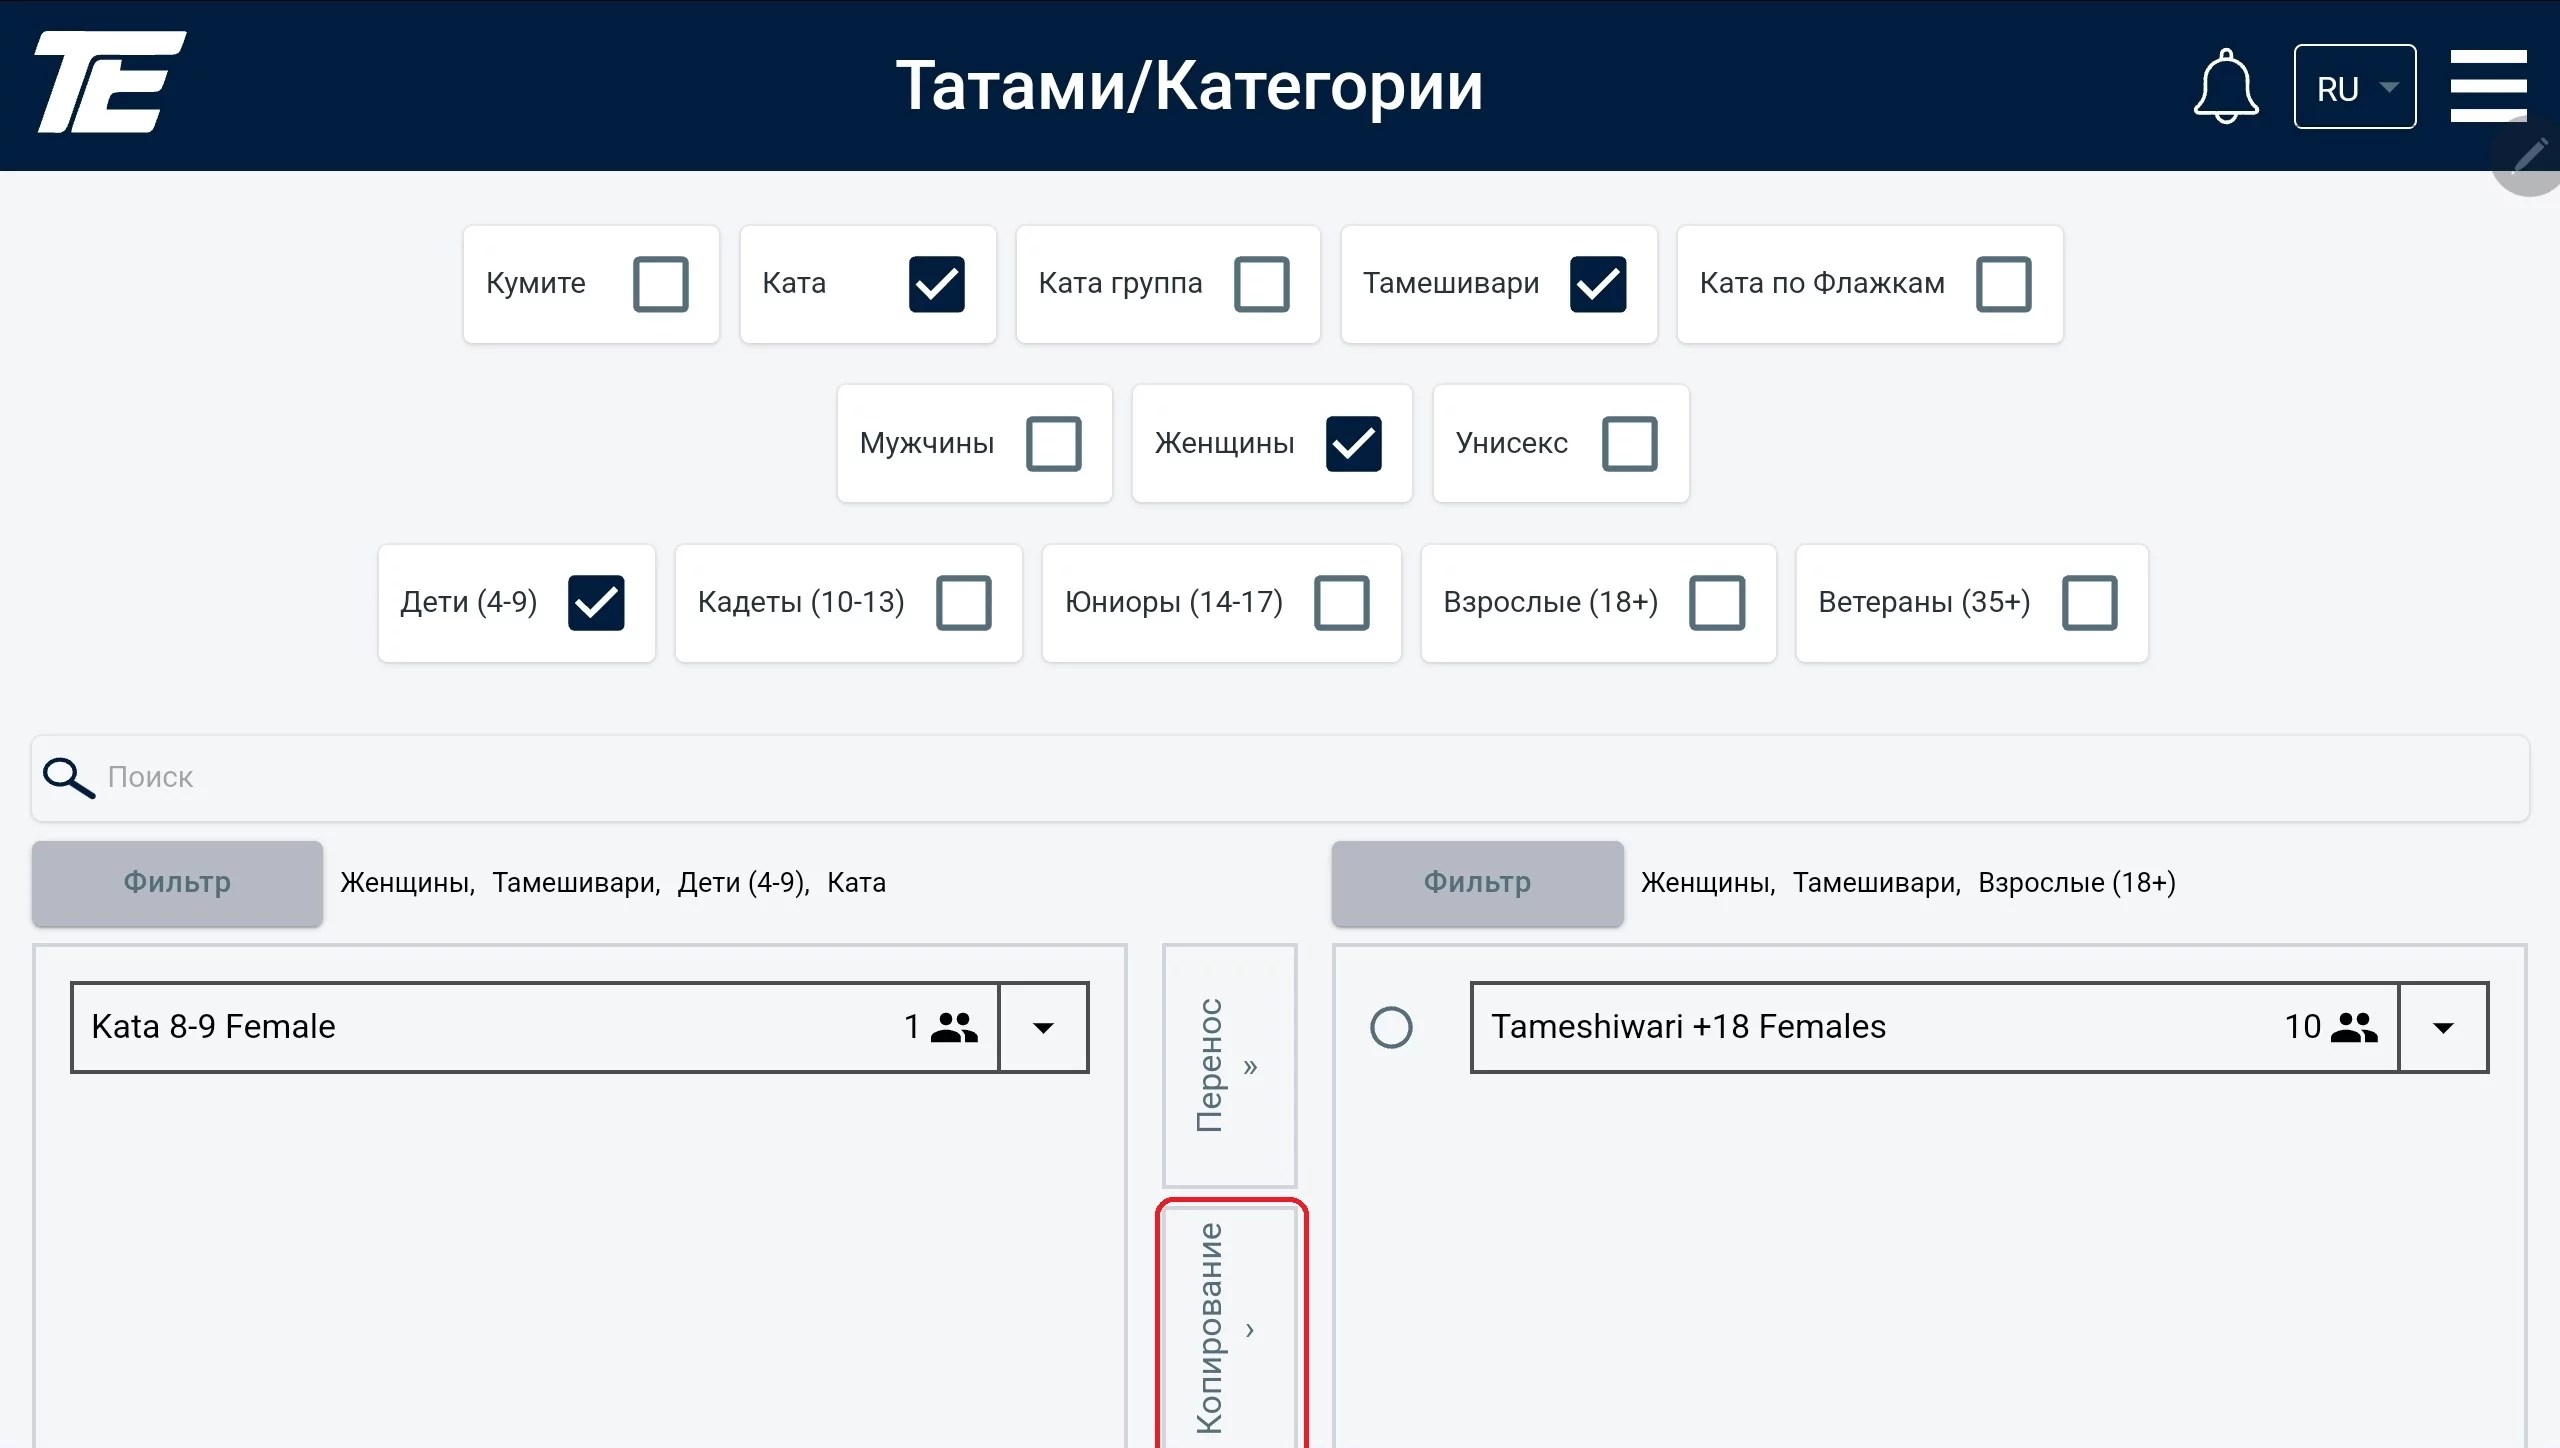
Participants can also be copied between categories. Copying is needed if an athlete or athletes need to take part in two categories, for example Kumite and Kata. The copying process is similar to the moving process, but at the end you need to select the “Copy” key.
A regular computer mouse. A wired one is even better — there is no risk of it running out of battery at the most critical moment.
However, regardless of its color and shape, we strongly recommend using a mouse to run the event. It is much more convenient and calmer than trying to reproduce the required combination of clicks on a touchpad.
However in demand antivirus software is these days, sometimes its quality of operation leaves much to be desired. Sometimes it may block the transfer of important data between the different parts of the functionality in the name of supposed security. It is better to disable any information blocks for the duration of the tournament.
An operating system update can also affect the operation of the application. It is better to install all updates in advance. Or schedule the update installation for later. The recommended version of Windows for operation is 7 and above.
This must be done without fail. In case of any problems, contact us
Such settings are usually present on all computers. In themselves they are not a bad thing. However, they can seriously get in the way when running an event. Just consider how inconvenient it is to jiggle the mouse every 5-10 minutes to wake the laptop from sleep mode (and not to show a black screen instead of the sporting board).
Prepare in advance the AnyDesk installation (the old version without a license) for remote support
After installation, this program allows providing setup consulting in remote format. Also prepare the .net desktop runtime 6.0.12 (x86 and x64) in advance. It is better to install it ahead of time. To do this, download the installer from the Microsoft site — and save it to a USB stick or install it on the laptop right away.
This happens often — the device’s battery ran out at the worst possible moment. Therefore, we advise keeping the laptops connected to a power source throughout the event. It may be worth also worrying in advance about having enough sockets and extension cords.
Not all Wi-Fi networks have a stable signal level. Some laptops may lose the signal and take a very long time to reconnect to the network. To avoid possible problems related to this, it is desirable to use a wired internet connection.
To register athletes for a tournament, you need to register on the online service and enter your participants. You need to use the following internet link that the organizer provided you.
The registration link is provided by the tournament organizer.
For example, how the link looks:
https://app.tournament.expert/
register_to_tournament/XXXXXXXX

For your own convenience you can change the system language by clicking the “language selection” button
After you have entered your participants and registered them for the tournament, your list will be stored, and you will be able to make changes until registration closes.
Save your registration email and password for logging back into the system.
If you are using the registration service for the first time, you need to create your account in the system.
To create an account, click the “SignUp/Registration” button on the first login page.
You need to enter:
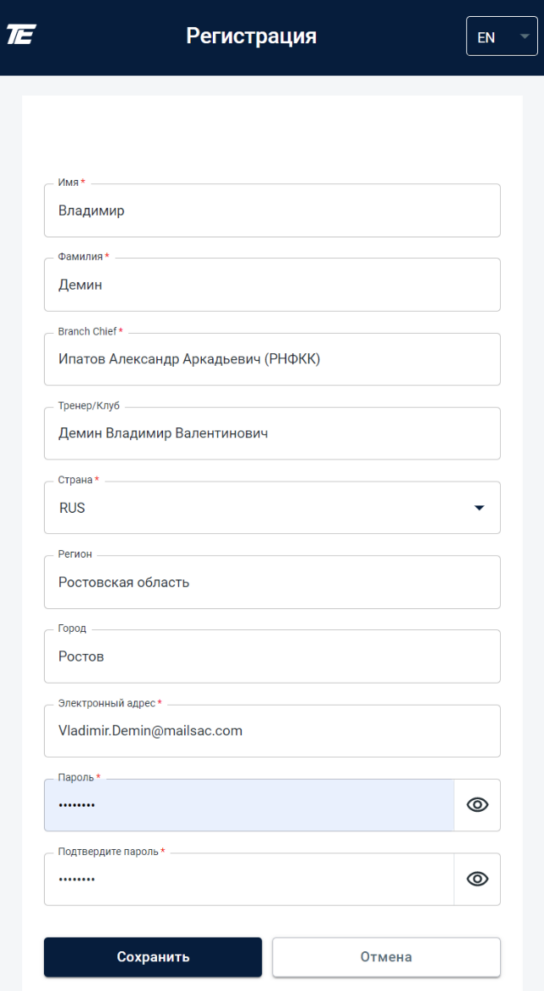
If you have created an account in the system (or you already have one), you should log into the system by providing your data.
After logging in, you can create a list of athletes for the tournament or change it.
To log into the system you need:
If you do not have an account, you need to create one. Click the “Registration” button
If you have forgotten your password, click the “You could not log in” button. Enter the email address you used at registration. Then an email for resetting the password will be sent to you.
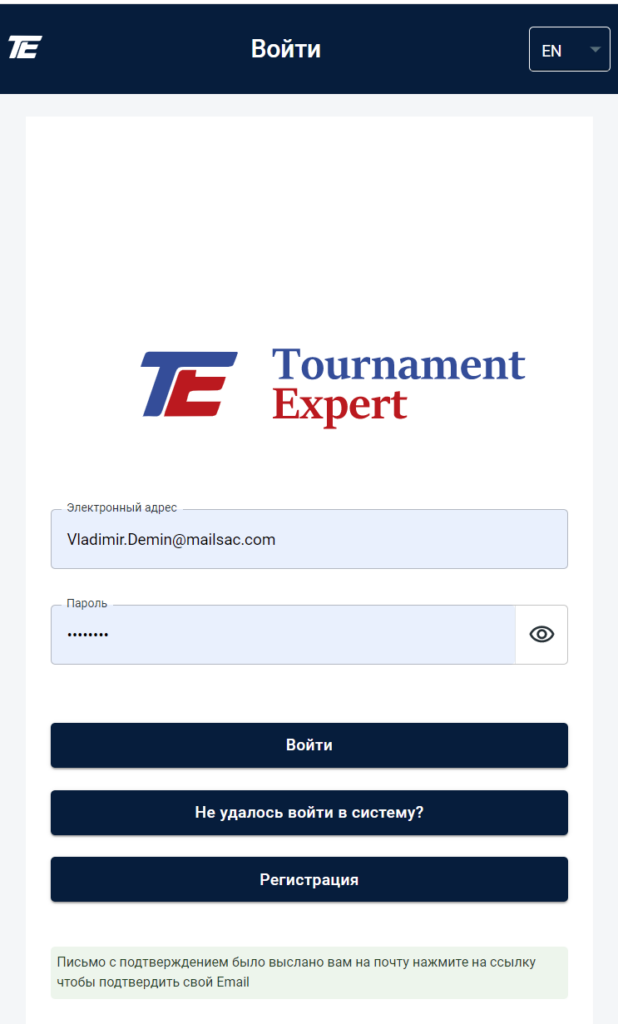
To add a new athlete to the tournament, you need to use the input panel titled “Add Athlete”
You need to enter the following data about the participant:
Click the “Save” button.
Clicking the “cross” button

clears the entered data.

To add an athlete’s photo, click “Logo”.
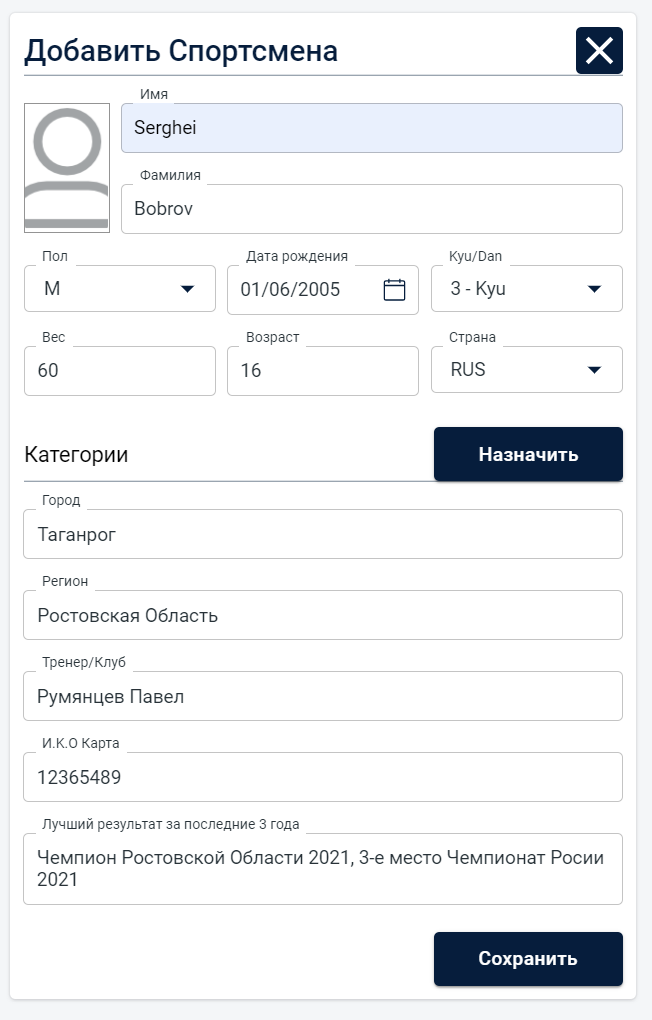
To take part in the tournament, categories must be assigned to the athlete in which he will compete with opponents. You can assign several categories to a single athlete. These categories can be:
The category is assigned in accordance with the participant’s age, gender and weight.
To assign several categories at once, use the “plus” button

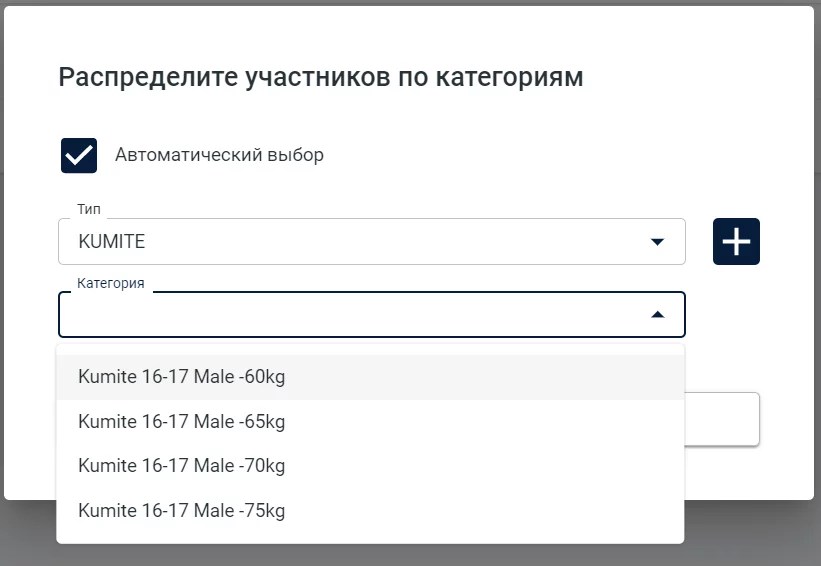
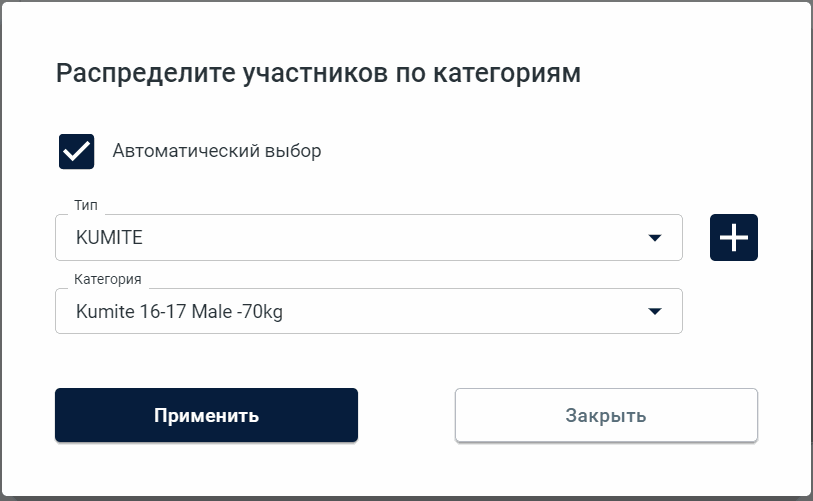
“Automatic selection”

helps you select the appropriate category for the athlete in accordance with his gender, age and weight.
Click the “Apply” button to save the information.
If no categories are assigned to a participant for the tournament, then the participant does not make it into the (“Pulki”) — the tournament table, and no opponents will be assigned to him.
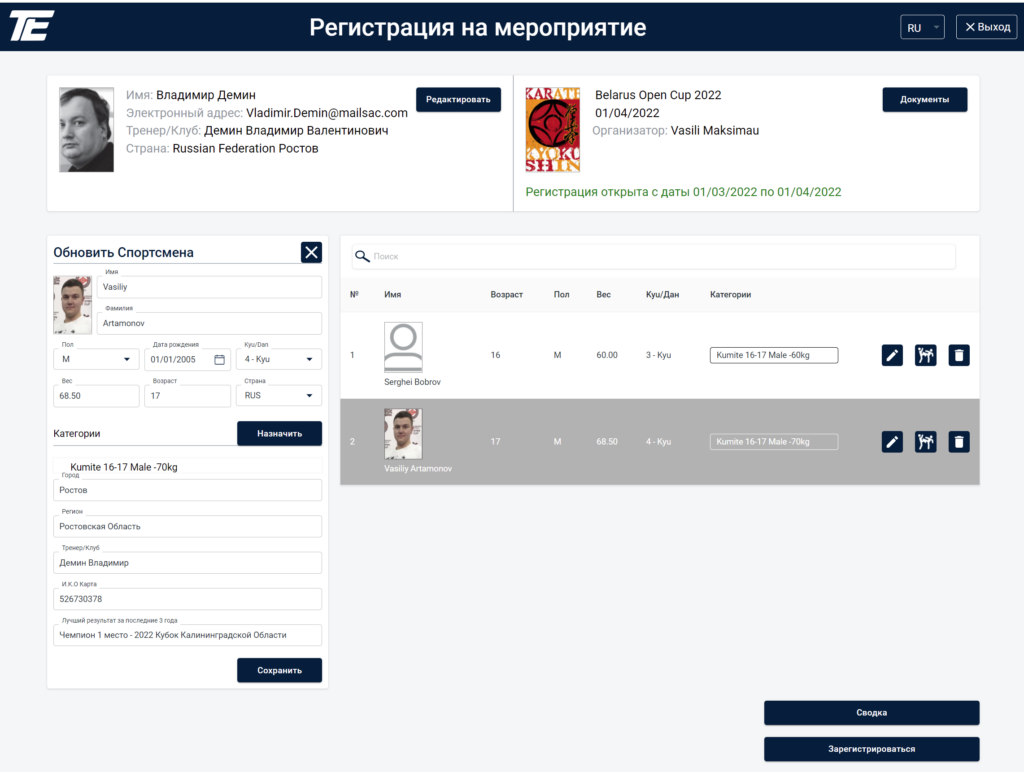
After you have entered the tournament participants into the registration system, your list will be stored, and you will be able to make changes until registration closes.
In the screen header you can see a green notice that registration is open and you can make changes. After the registration deadline passes, a red notice will inform you that registration is closed and changes cannot be made.
Use the following buttons to manage your list of participants:
The “Pencil” button

is used to edit an athlete.
The “Match” button

is used to assign, change or remove categories.
Removing all categories means that the athlete will not take part in the tournament and will not appear in the tournament tables (“Pulki”). The athlete will remain in the list. You can later assign such an athlete to another tournament or category.
The “Trash can” button

is used if you want to remove the athlete from the system entirely. To restore him, you will have to re-enter all the information again.
To add a new athlete to the tournament, you need to use the input panel titled “Add Athlete”
The “Magnifying Glass” button

is used to search for an athlete in the list. Specify the first or last name, and the system will help you find the information you need.
Use the “Summary” button for printing and obtaining reports in “Excel” format
Use the “Register” button to inform the tournament organizer that you have entered the list of athletes for the tournament.
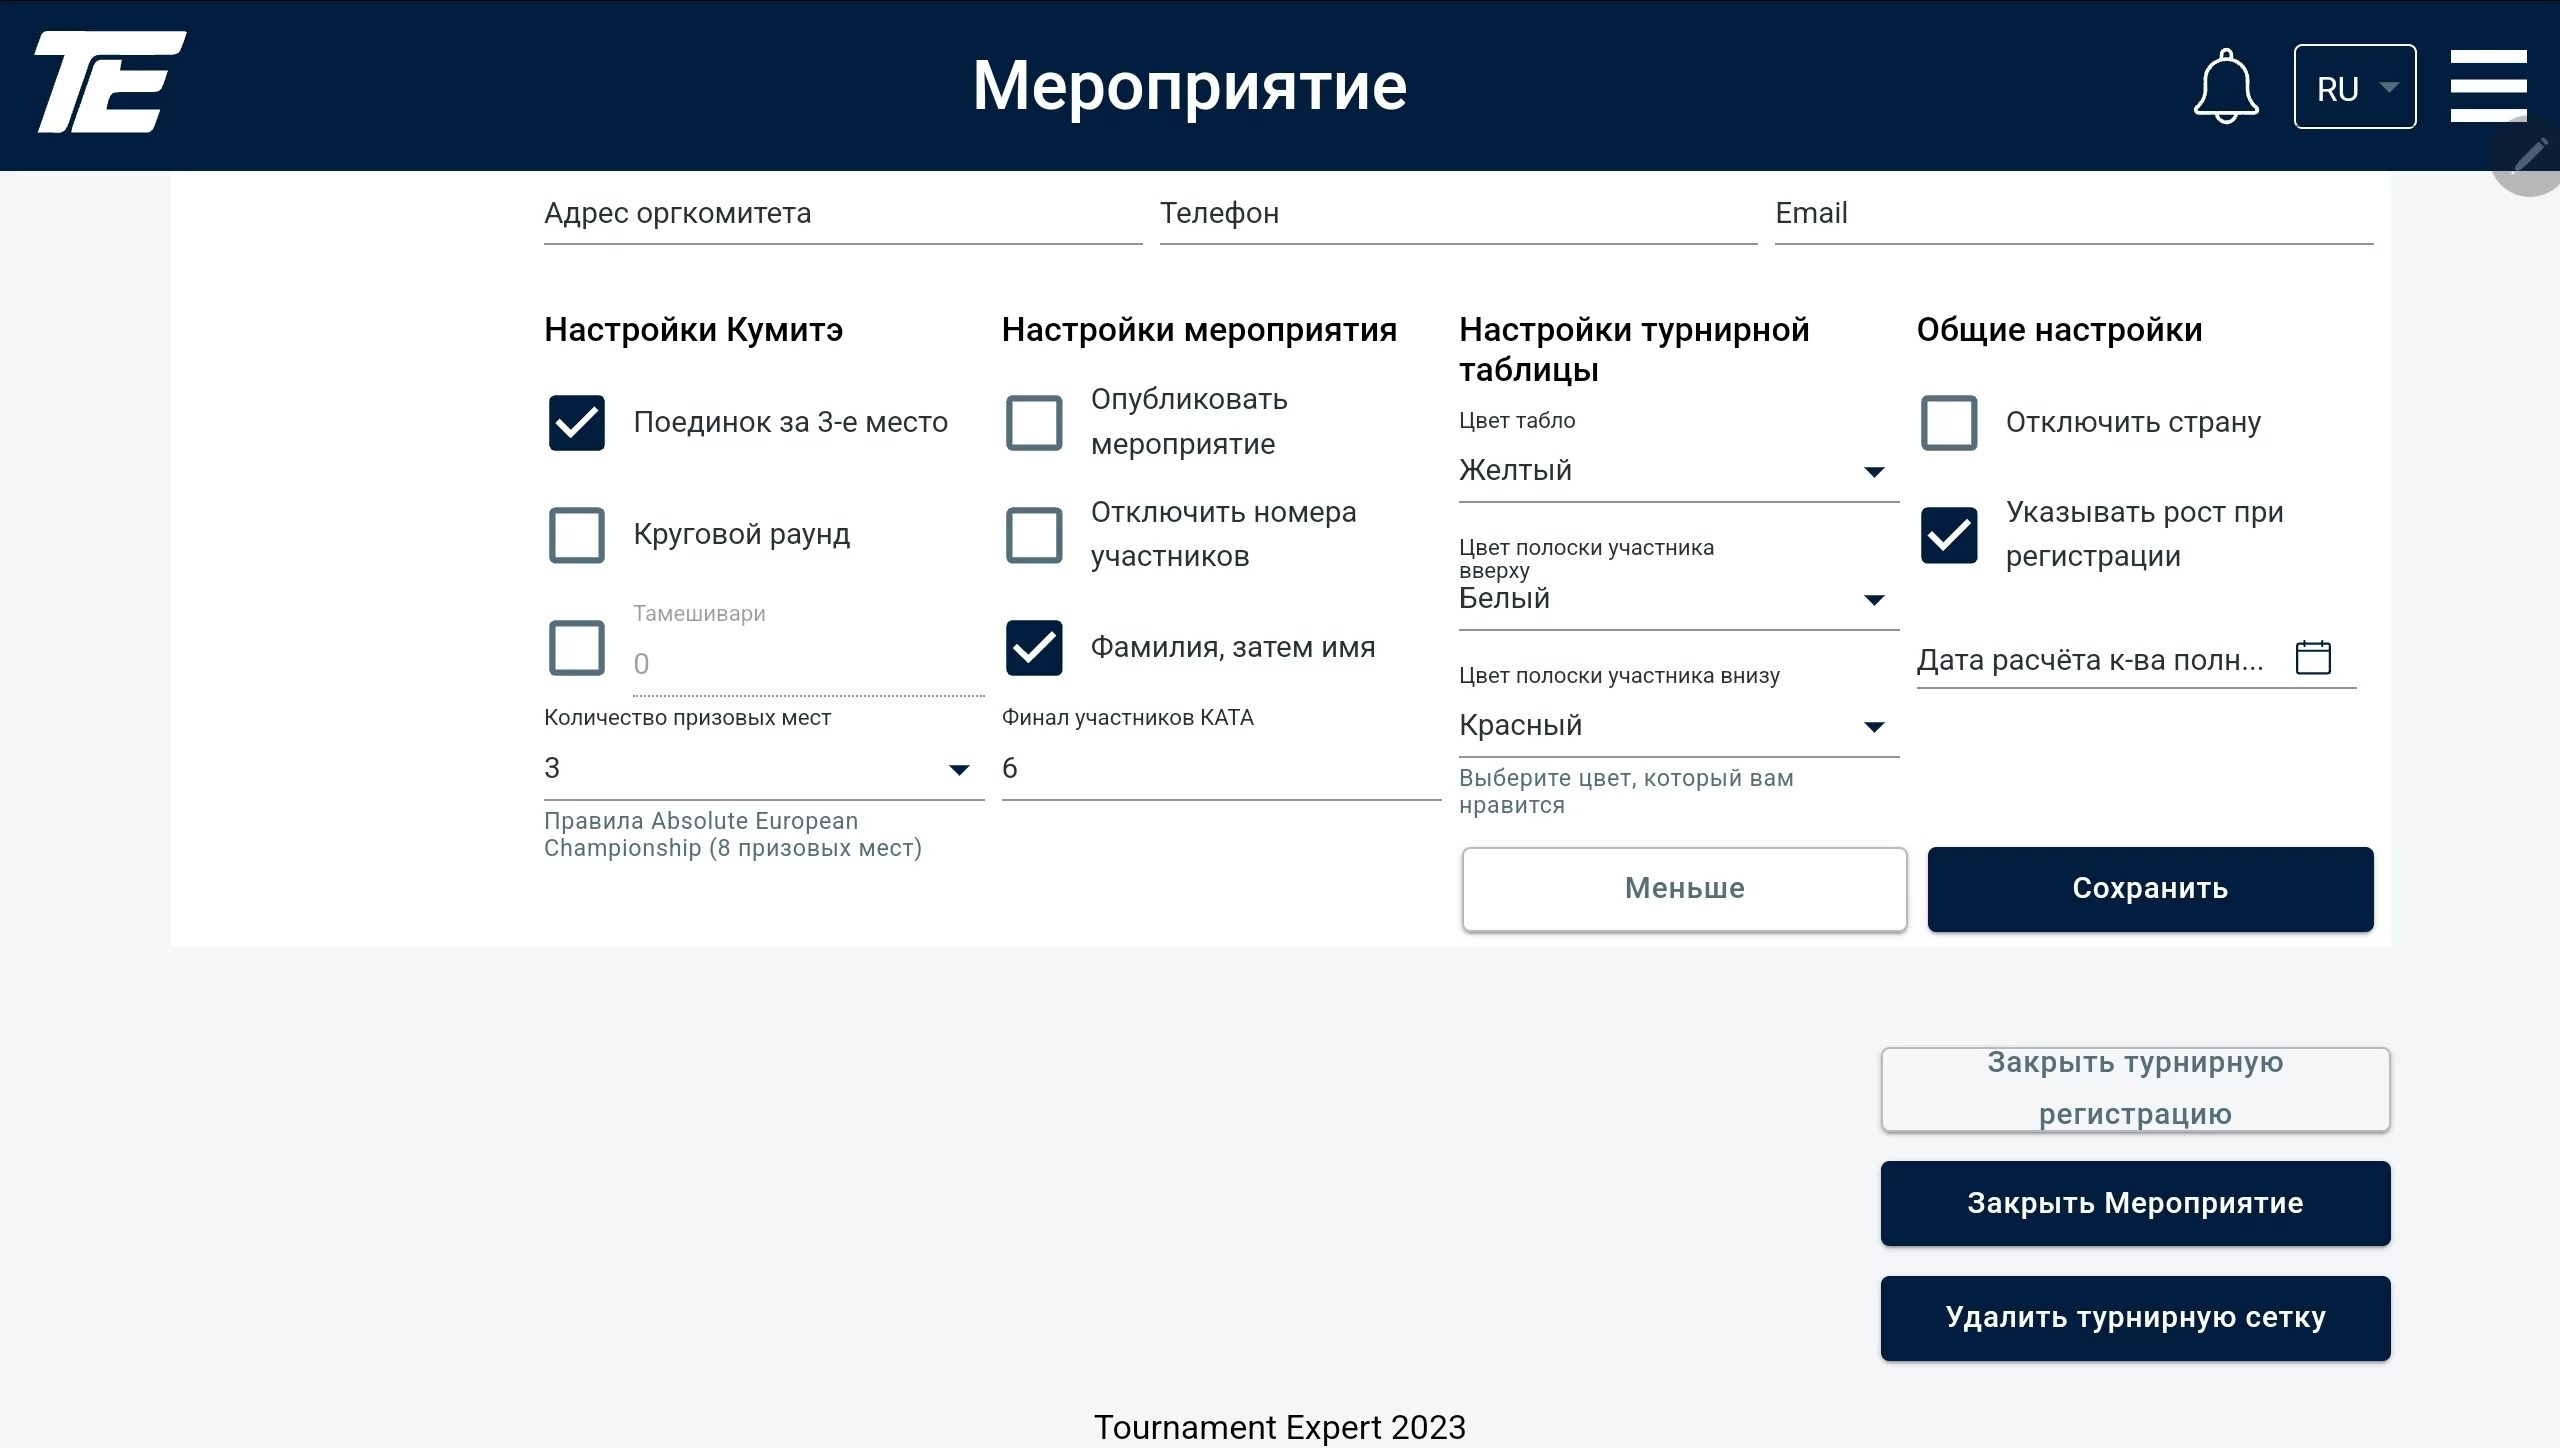
There are additional settings for tournaments, such as whether there is a match for third place in the Kumite category, the order in which the participants’ first and last names are displayed, and so on.
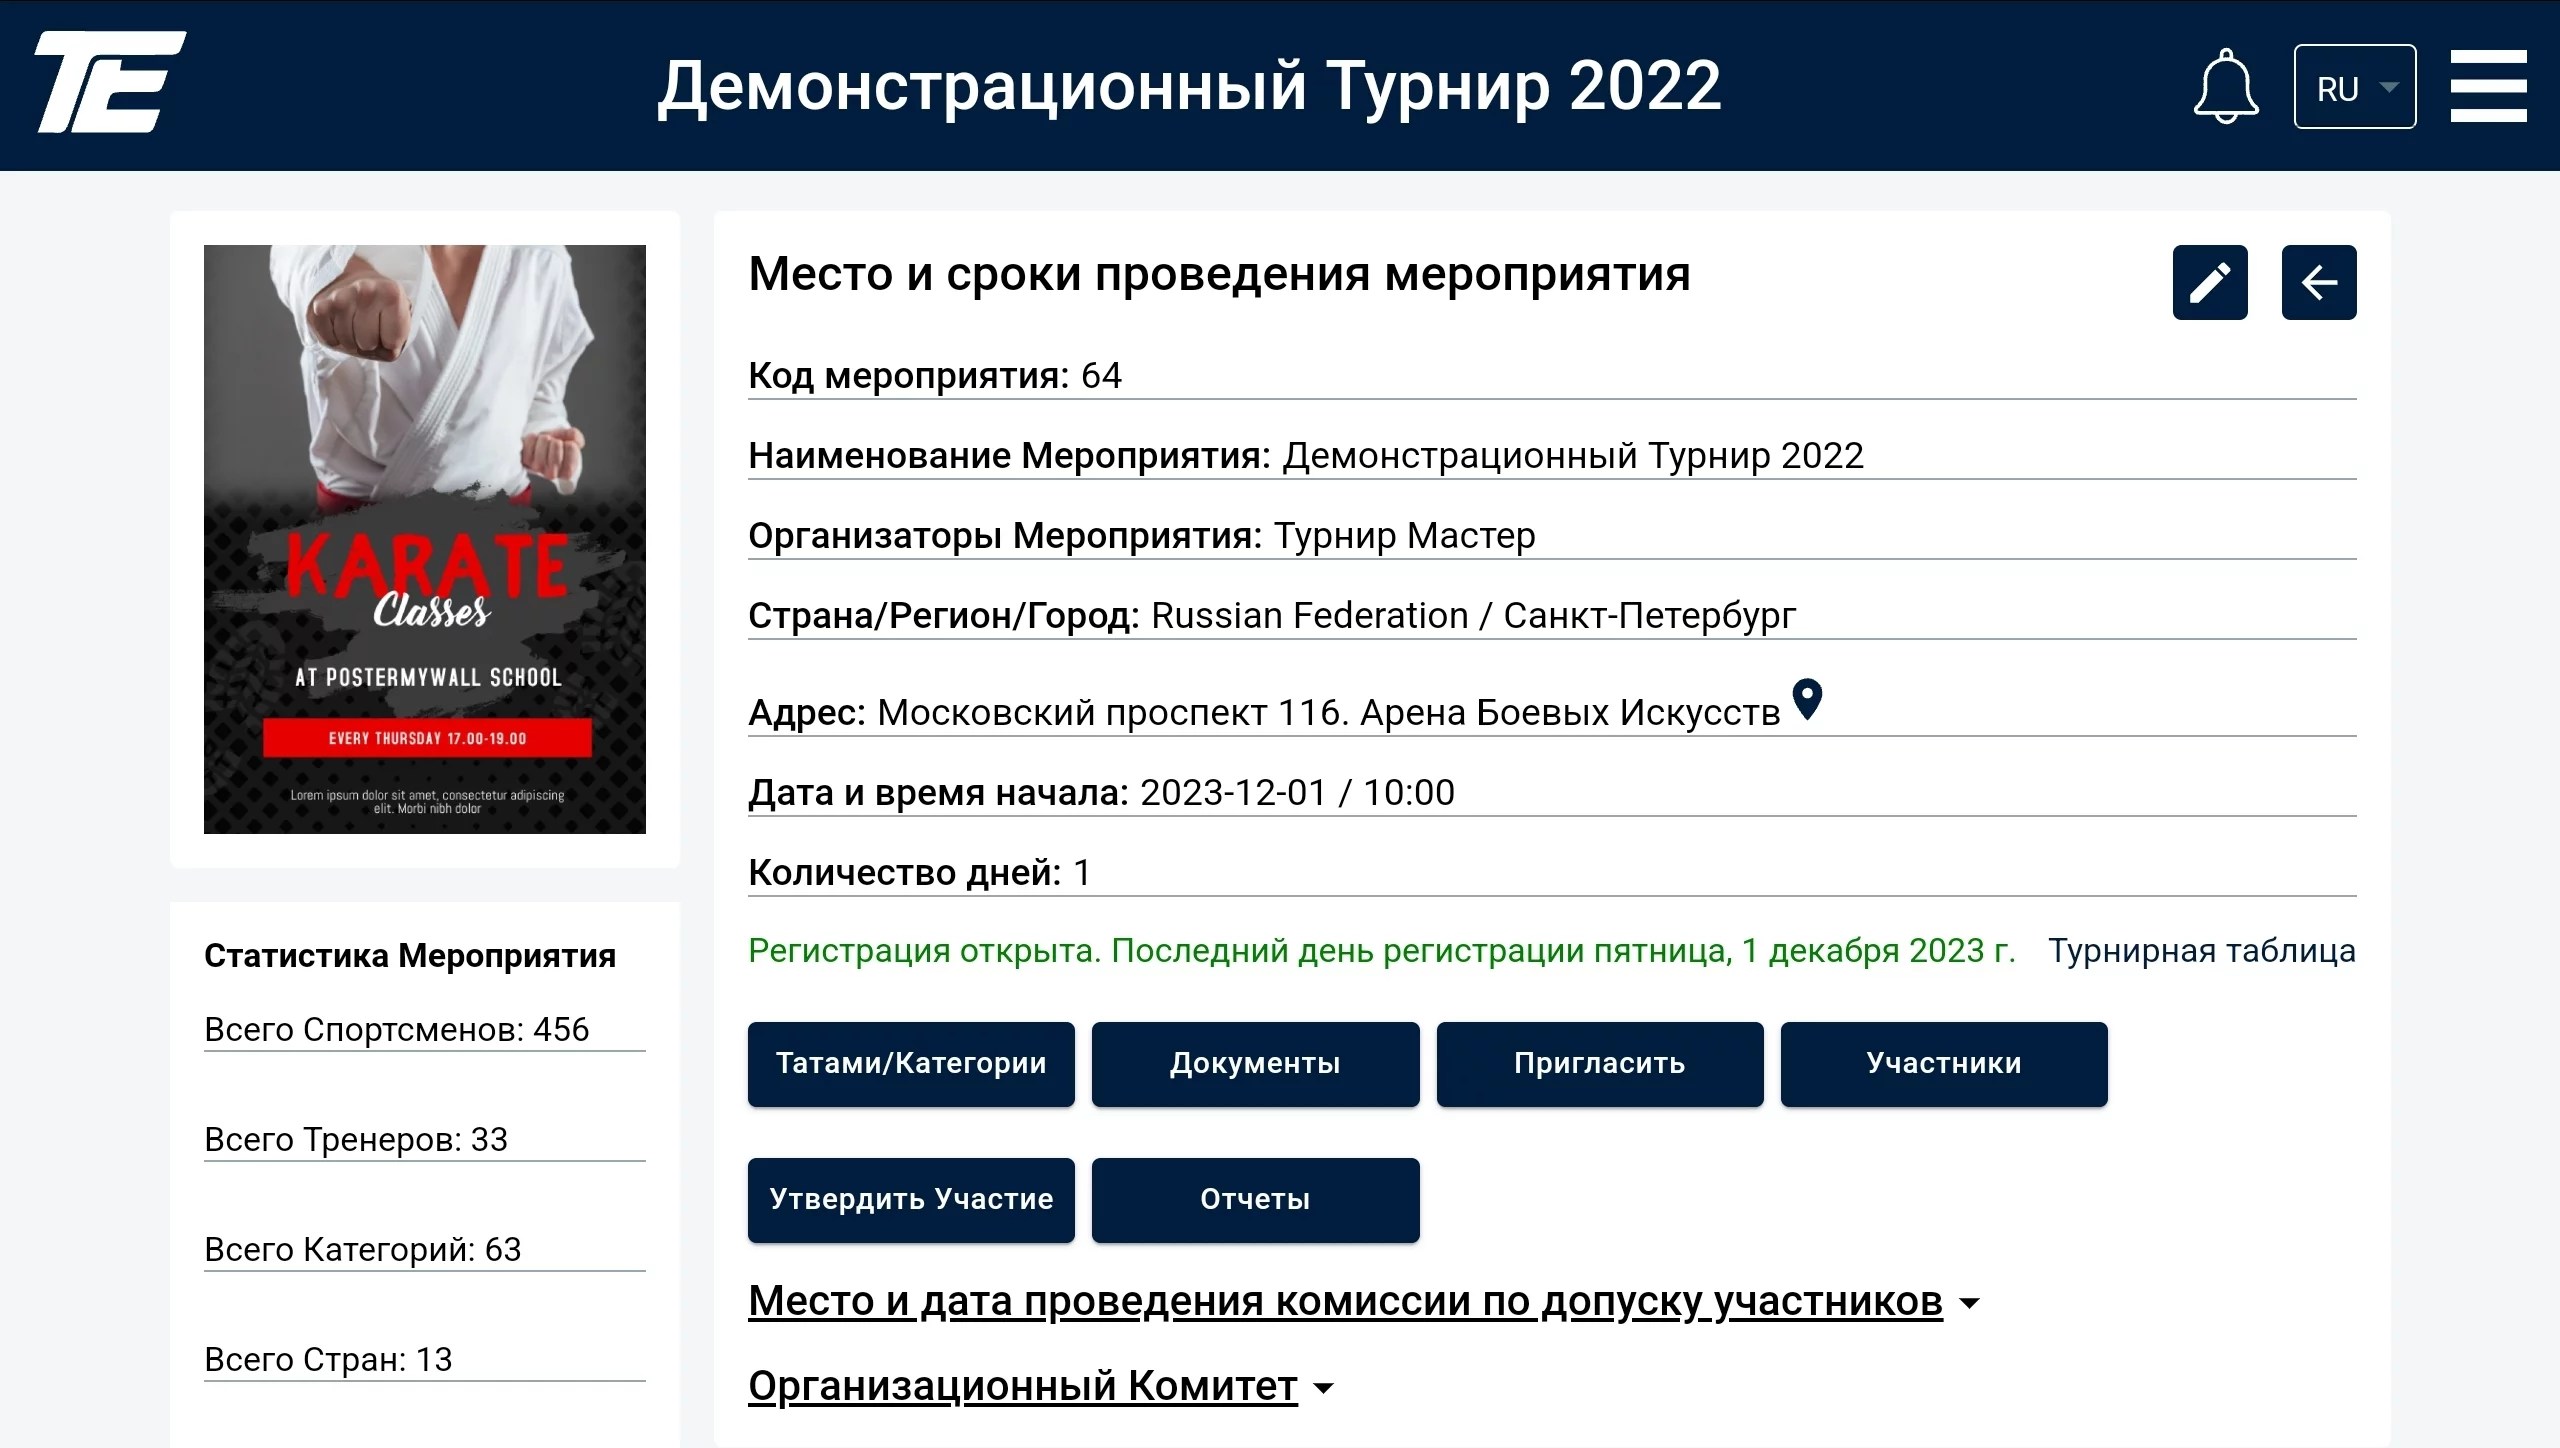
To use this feature, open the tournament and select the “Edit” option (click the pencil).
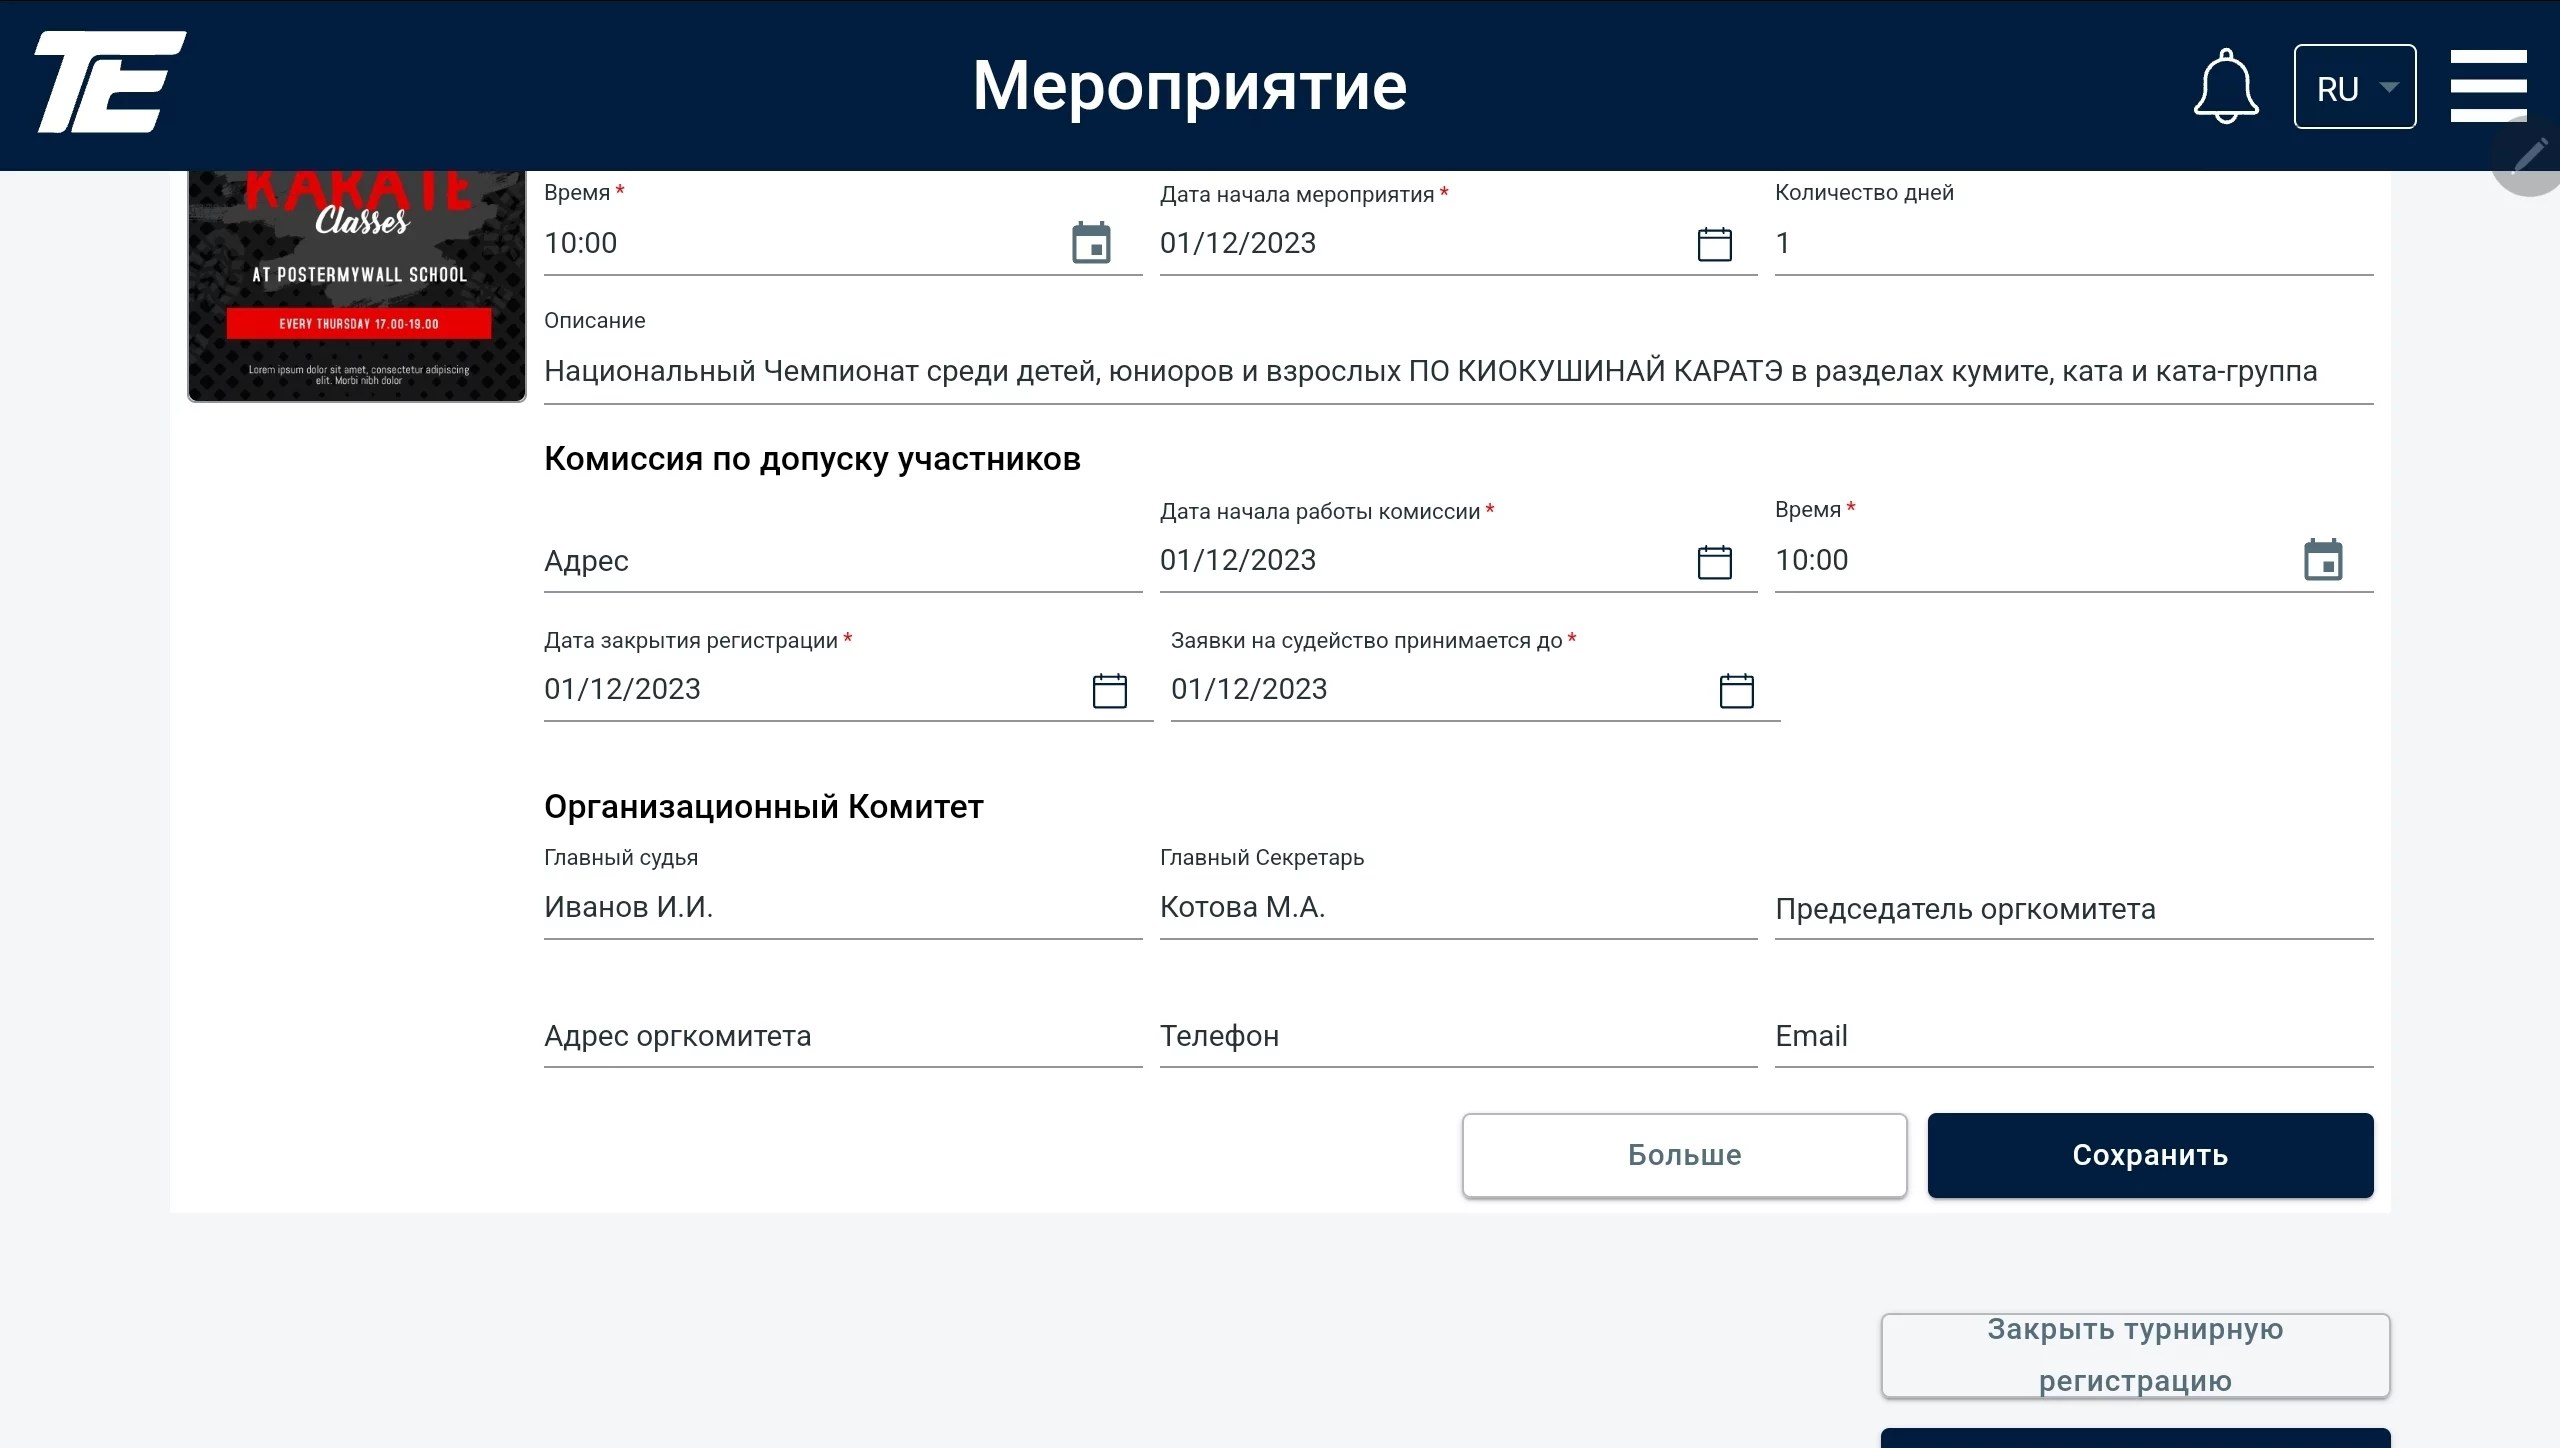
Next, go to the “More” tab.
There are detailed settings for:
The “Information Board” is a software-hardware complex designed for the visualization of sporting information.
At the moment the system supports two types of hardware platforms:
The “Information Board” system outputs information via an HDMI port to a TV or a video wall. In general, to any device that supports an HDMI-type video input.
The “Information Board” displays sporting information for kyokushin karate competitions and supports the following sporting categories:
The “Information Board” system provides sporting data for the visualization of the following information:
Information intended for a live video broadcast as a “plaque” overlaid on the video image on YouTube (RuTube and other video services)
Information with the list of athletes in the order and time of going out onto the tatami/mat (“who is preparing”)
Information about the current match/performance with a description of the competition details (“who is on the tatami now”)
Information about the winners with distribution across the prize places. Can also be used to show information about the winners during the awards ceremony on the podium. (“who is on the podium”)
Information about the leaders based on the performance results. Usually used for the “Kata” and “Team Kata” categories to show how the leaders change in online mode.
To run the information board, you will need a TV (or a computer monitor) with an HDMI input. Or any other video device that supports receiving information via HDMI.
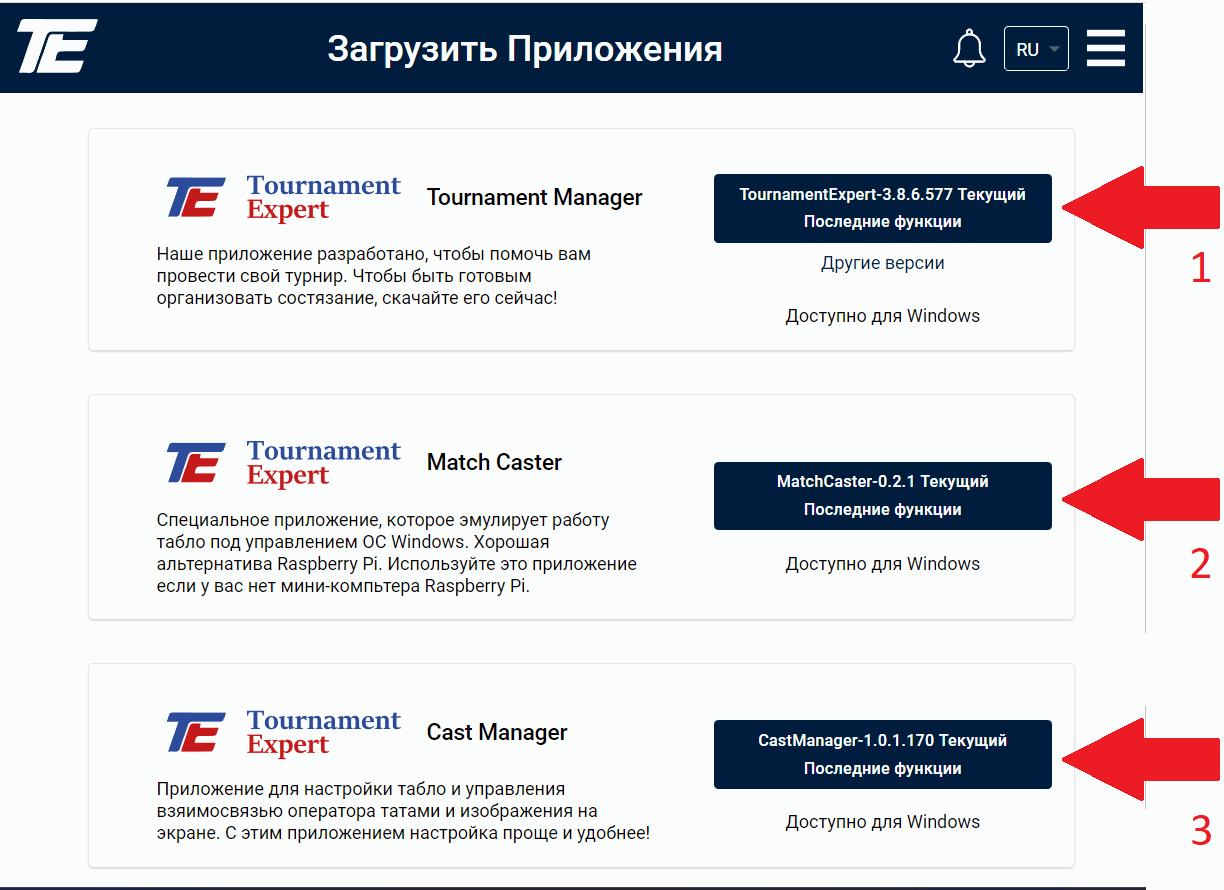
To set up the information board, you will need to download from the website to a computer and install three applications:
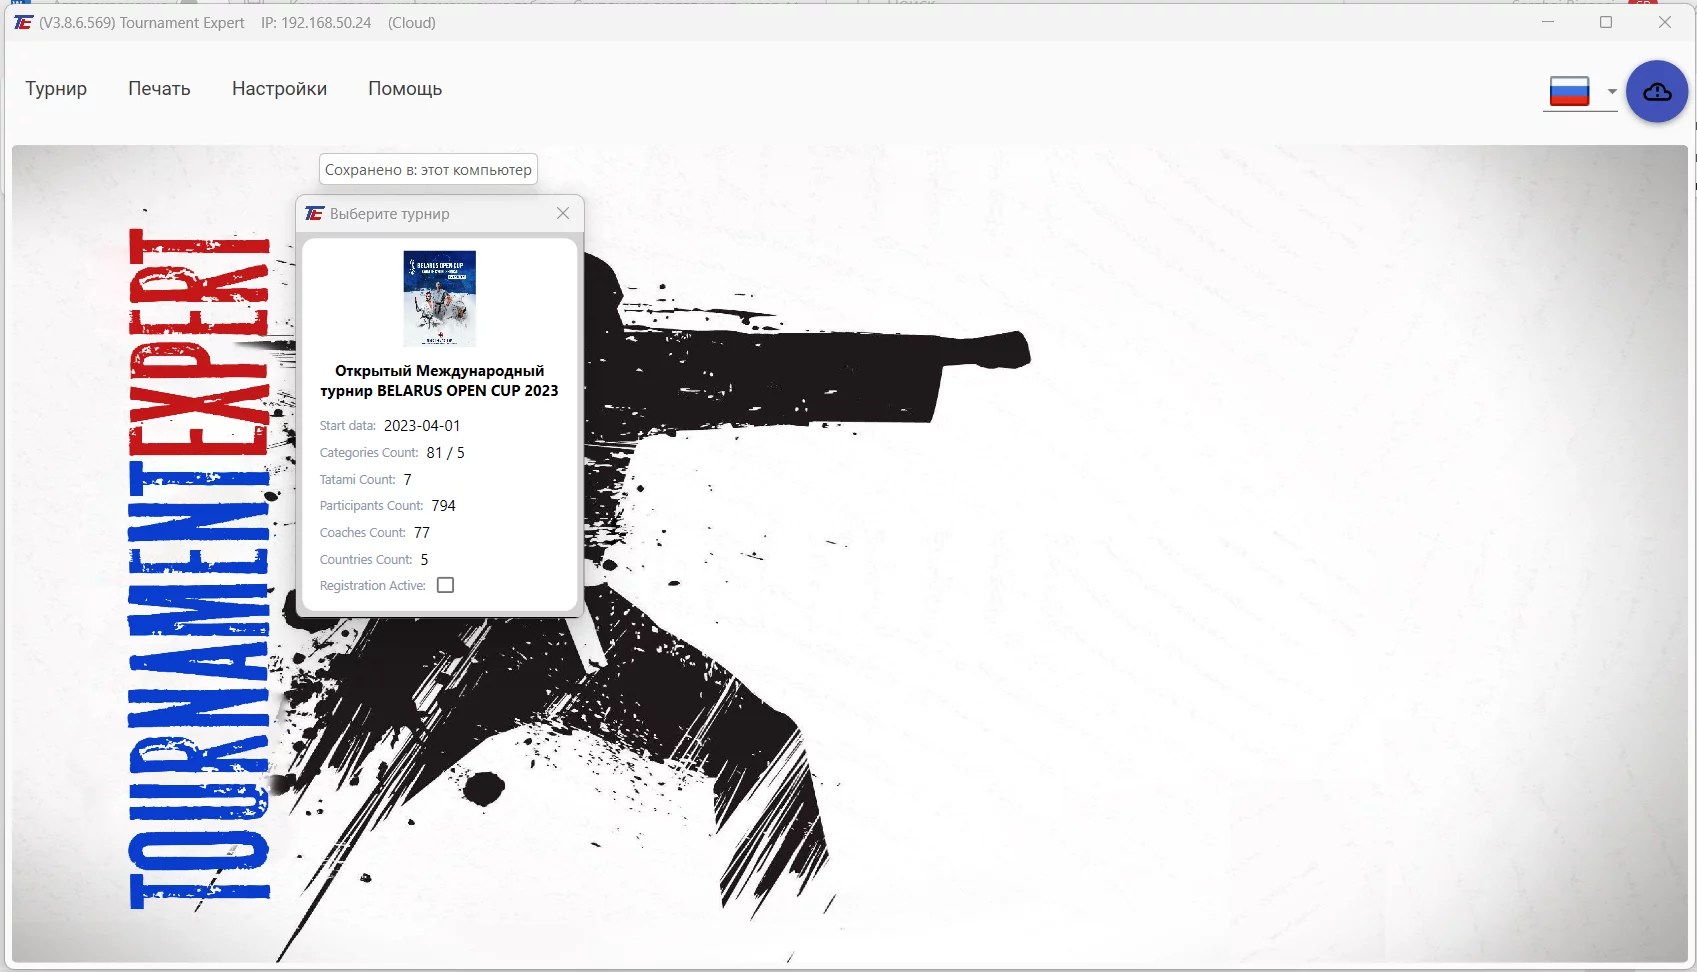
Install the Tournament Expert Studio (Tournament Manager) application on each computer of the Tatami Operator/Secretary. Launch the application, log into the system and select the tournament.
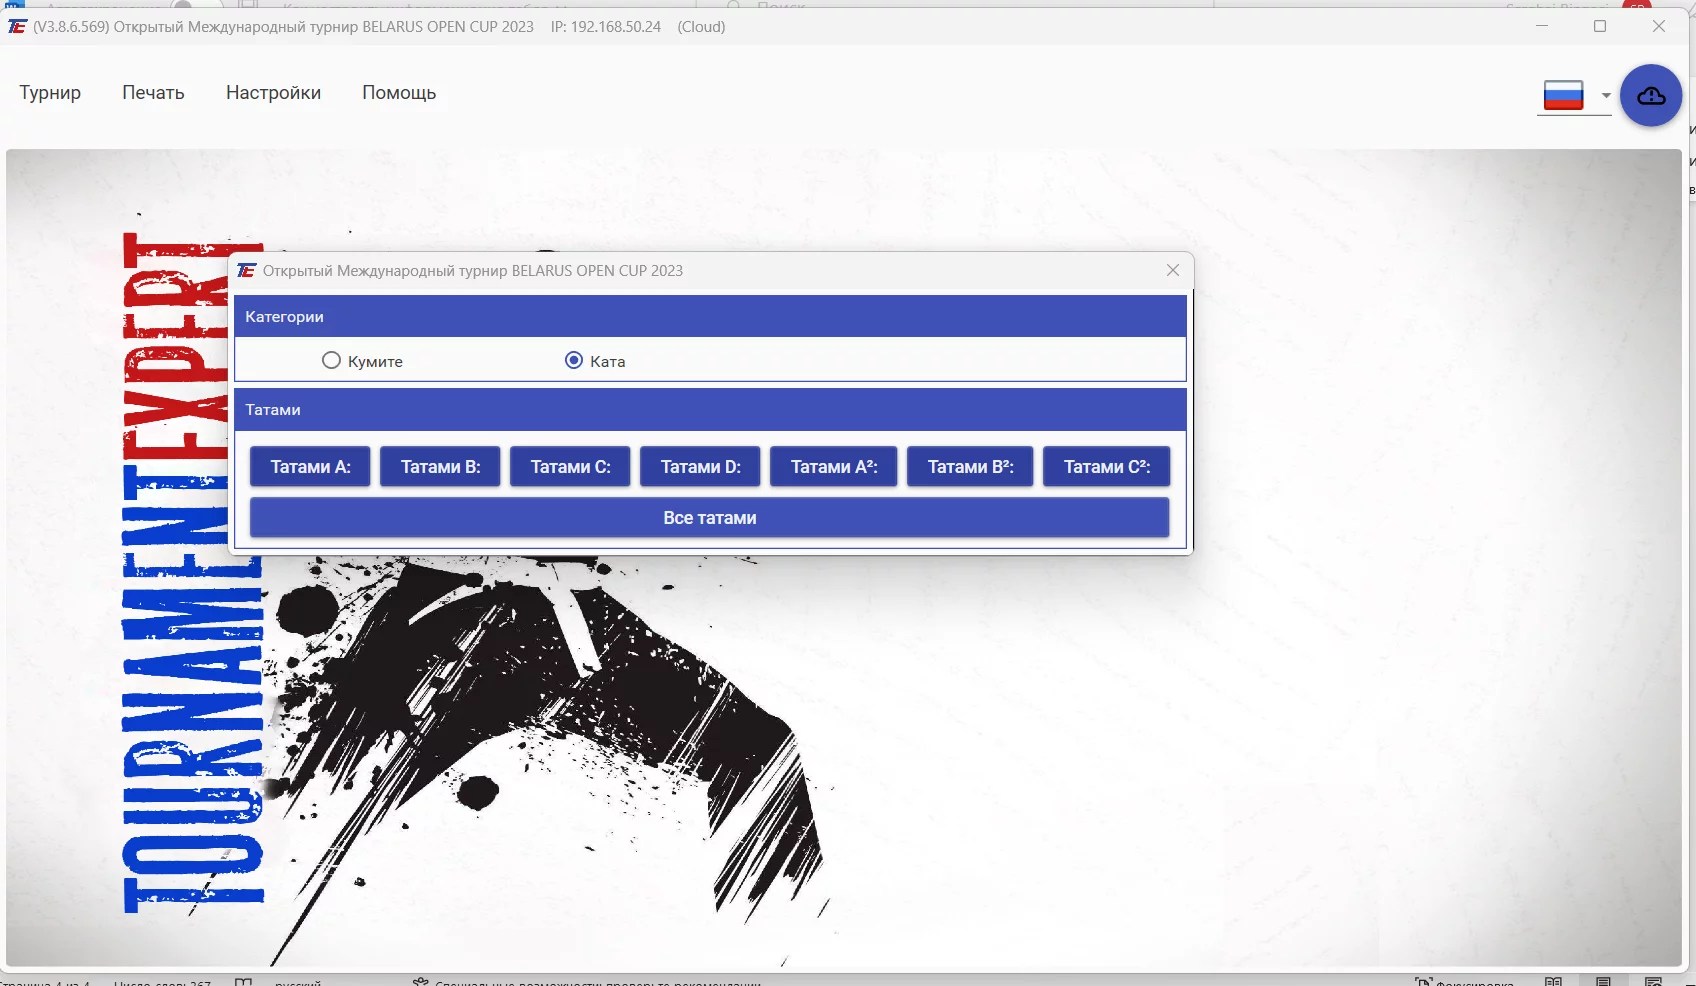
Select one tatami on which the Operator/Secretary will work.
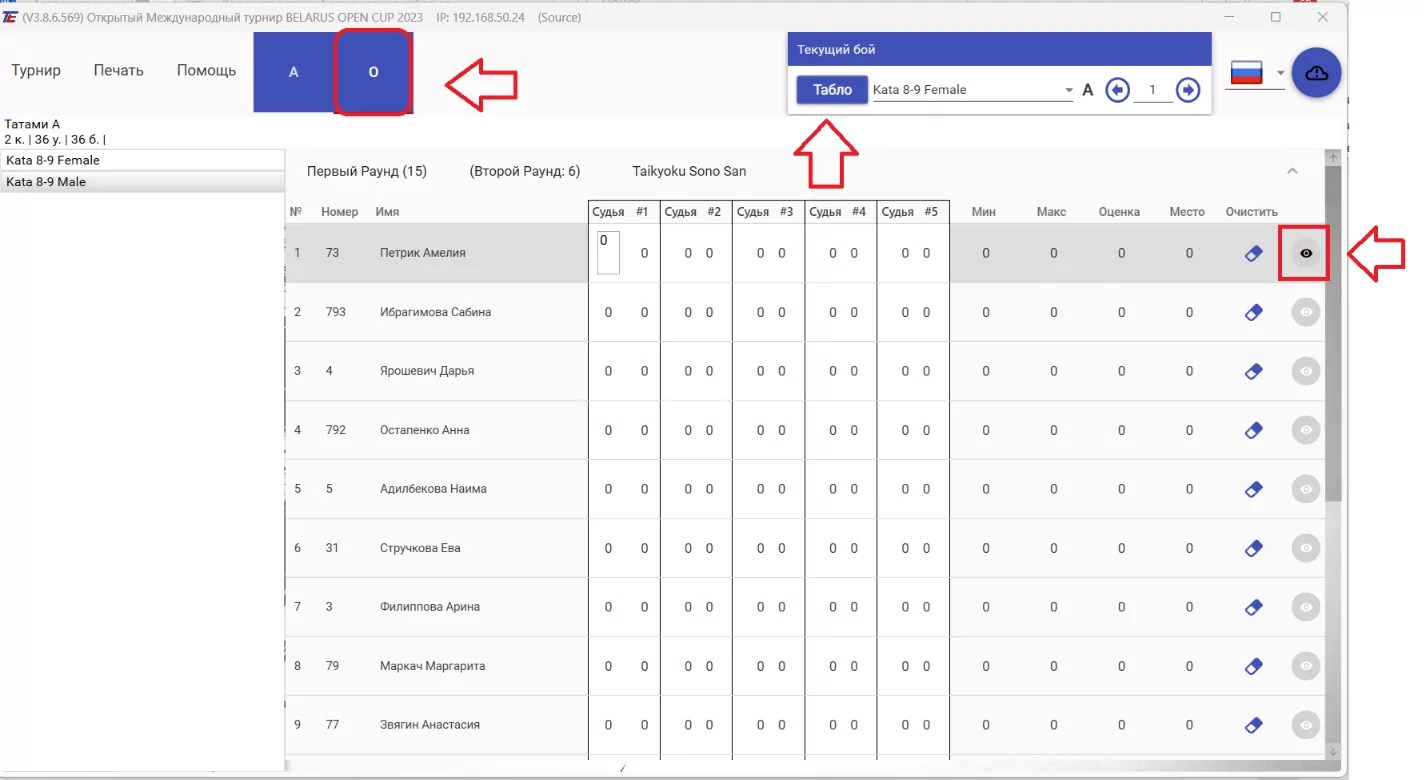
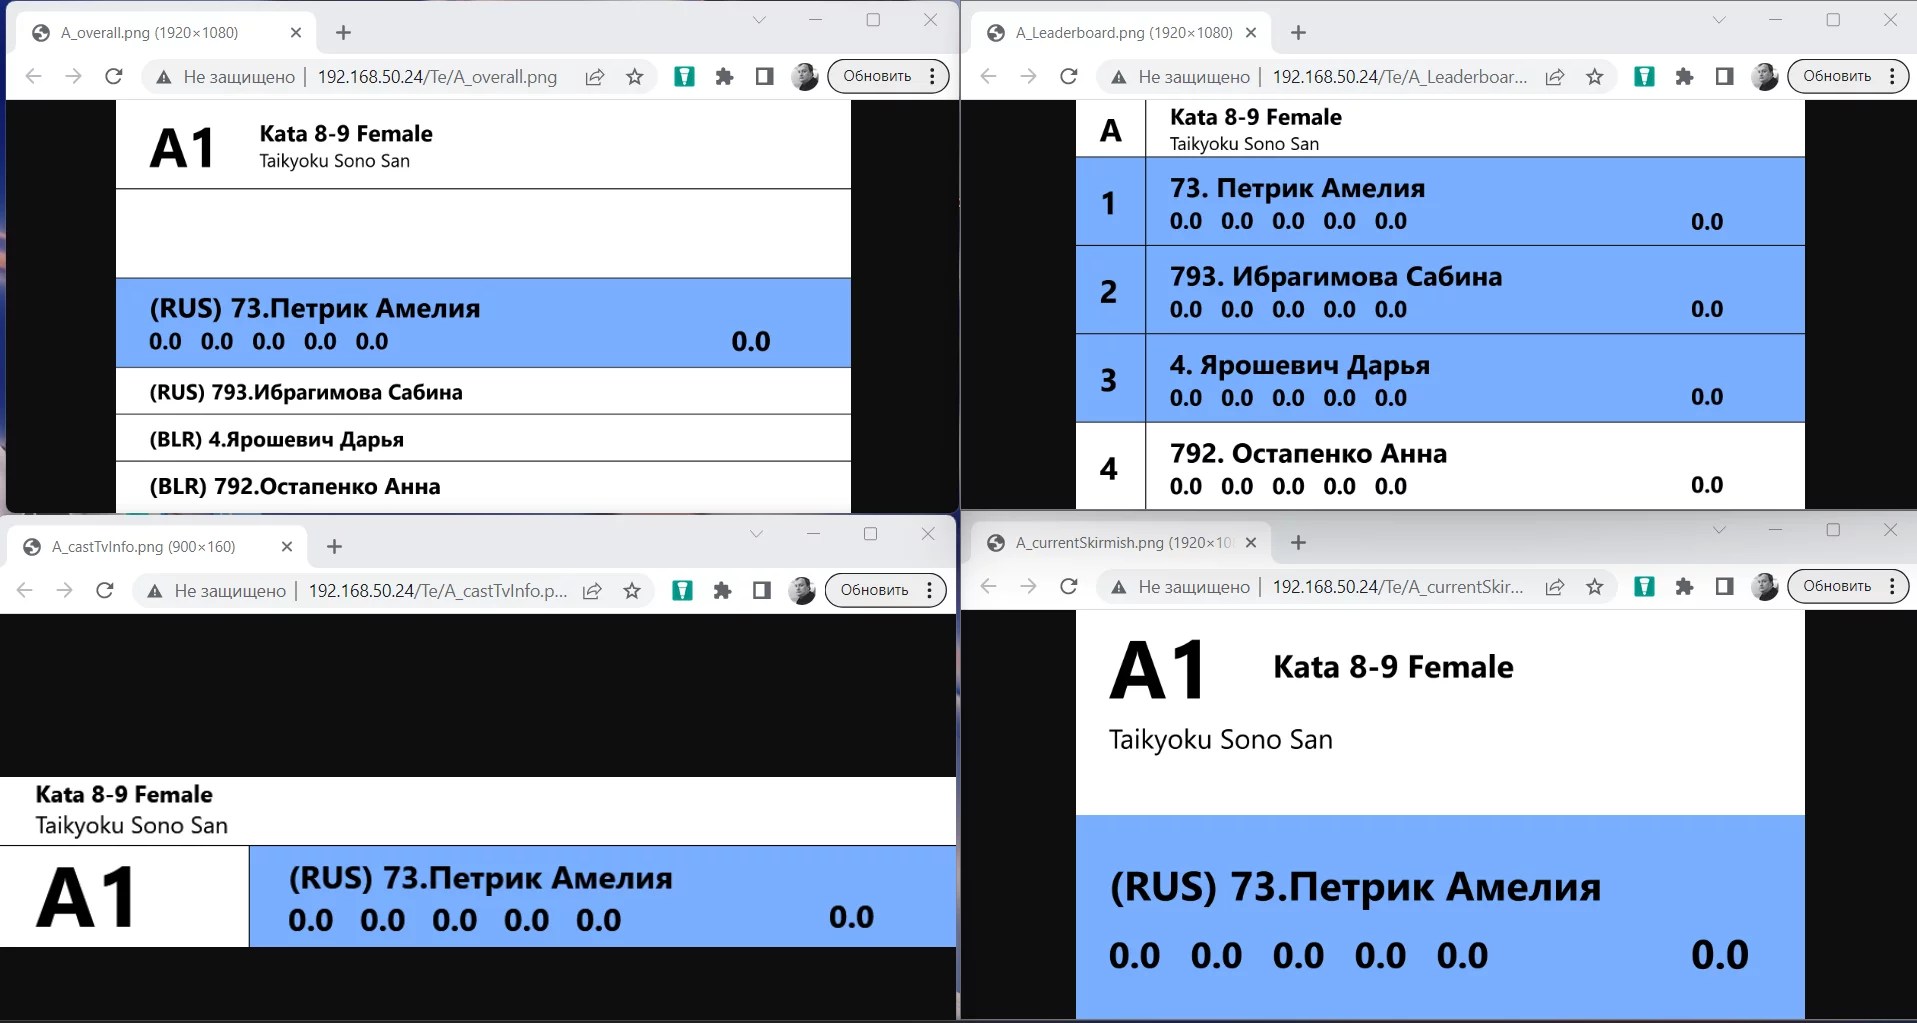
Switch to the Operator mode. Click the “Eye” and the “Board” button. A browser will automatically open with several tabs on which the information from the current tatami will be displayed for subsequent display on the board.
All available board types for the current tatami will be displayed in the browser.
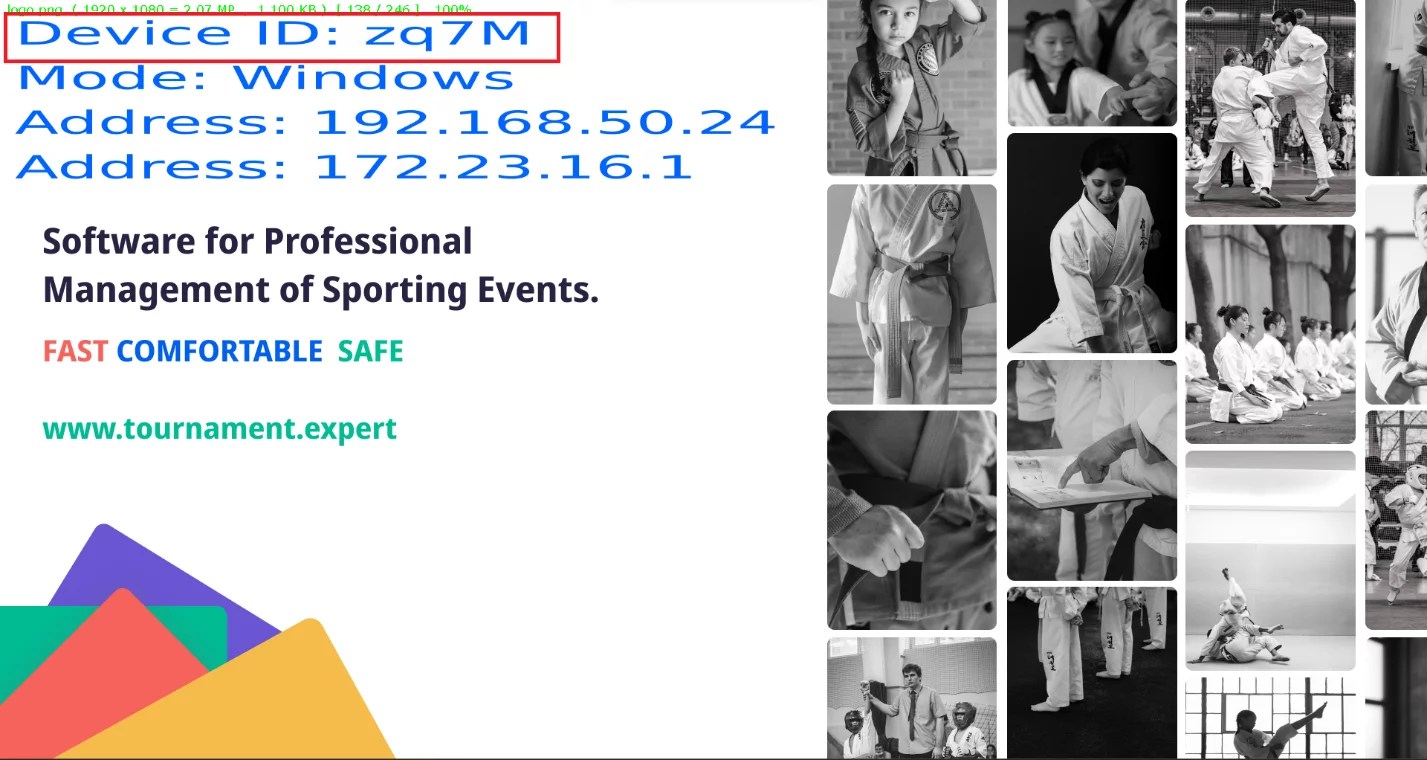
Install the Match Caster application on each computer with which you want to run a board. Connect the computer to the TV or video wall with an HDMI cable. You need to remember (it is better to write it down) the unique board number, consisting of 4 characters. In the example the unique board number is: zq7M
Let us assume that this board is installed in the warm-up hall and its number is zq7M
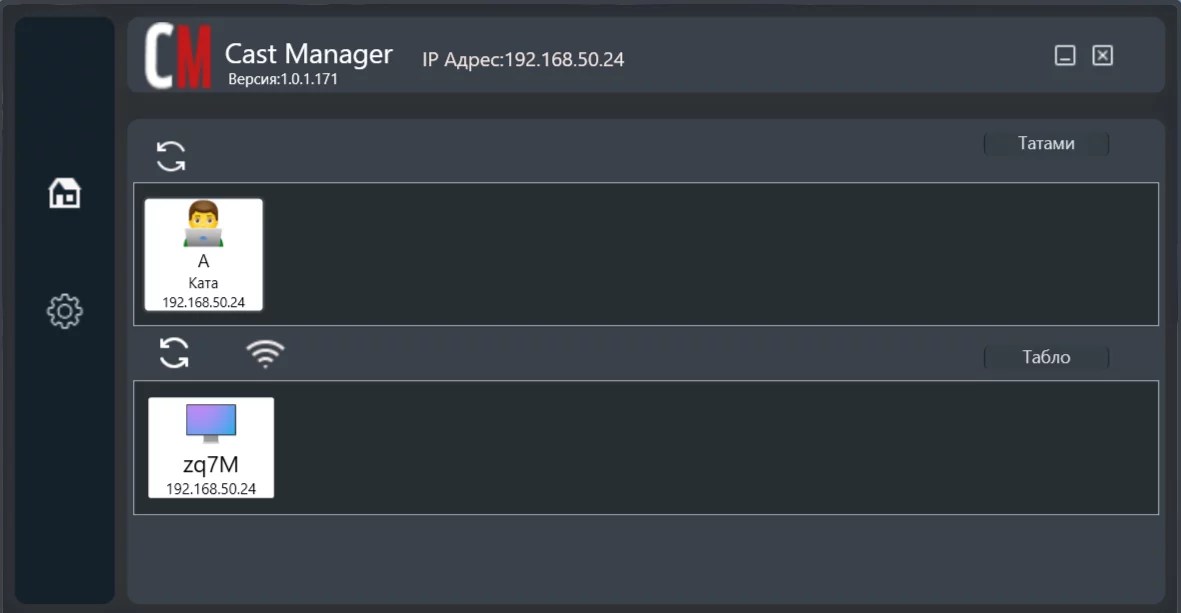
Install the Cast Manager application — for setting up the board — on any computer and launch the application. With this application you need to “link” the tatami and the board together.
The upper part displays all available tatami, and the lower part displays all available boards.
You need to select the TATAMI whose information you want to broadcast to the board. In this case — Tatami A. After selecting the tatami, all available images for broadcasting to the information board will be displayed in the lower part.
Let us assume you want to show the “Queue” (who is preparing) image from tatami A for broadcasting to the board in the warm-up hall. You need to select the “Queue” image from the lower part (click with the mouse on the image)
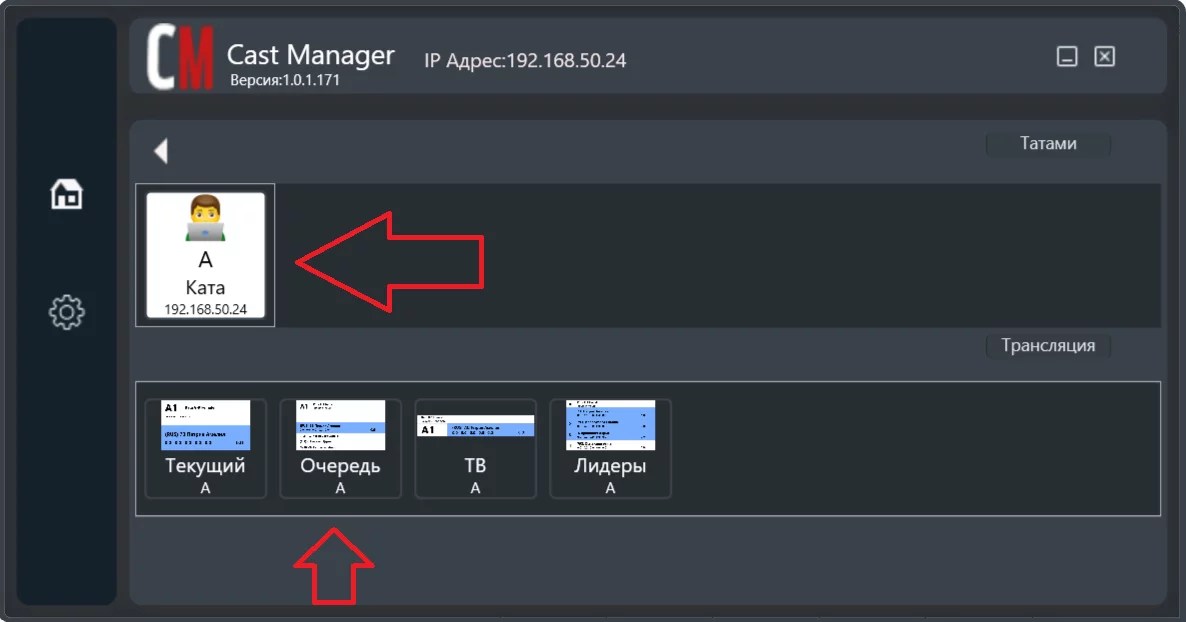
The selected “Tatami A Queue” image in the upper part in the “Broadcasts” section, and in the lower part in the board section all boards available to you will be displayed in order to “link” the image and the board. In the previous step we wrote down the board number in the warm-up hall — zq7M. Select it and press the save button in the bottom right corner of the screen.
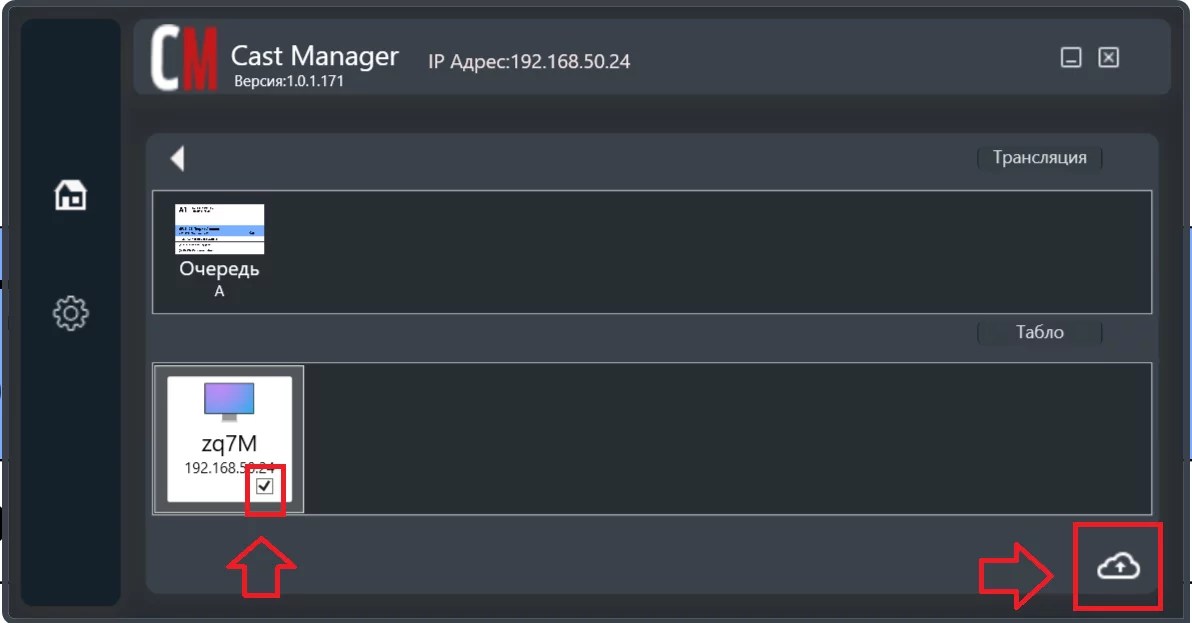
The link between the board and the tatami is established!
.svg)